How to Get Rid of Mice: A Complete Guide with Proven Steps
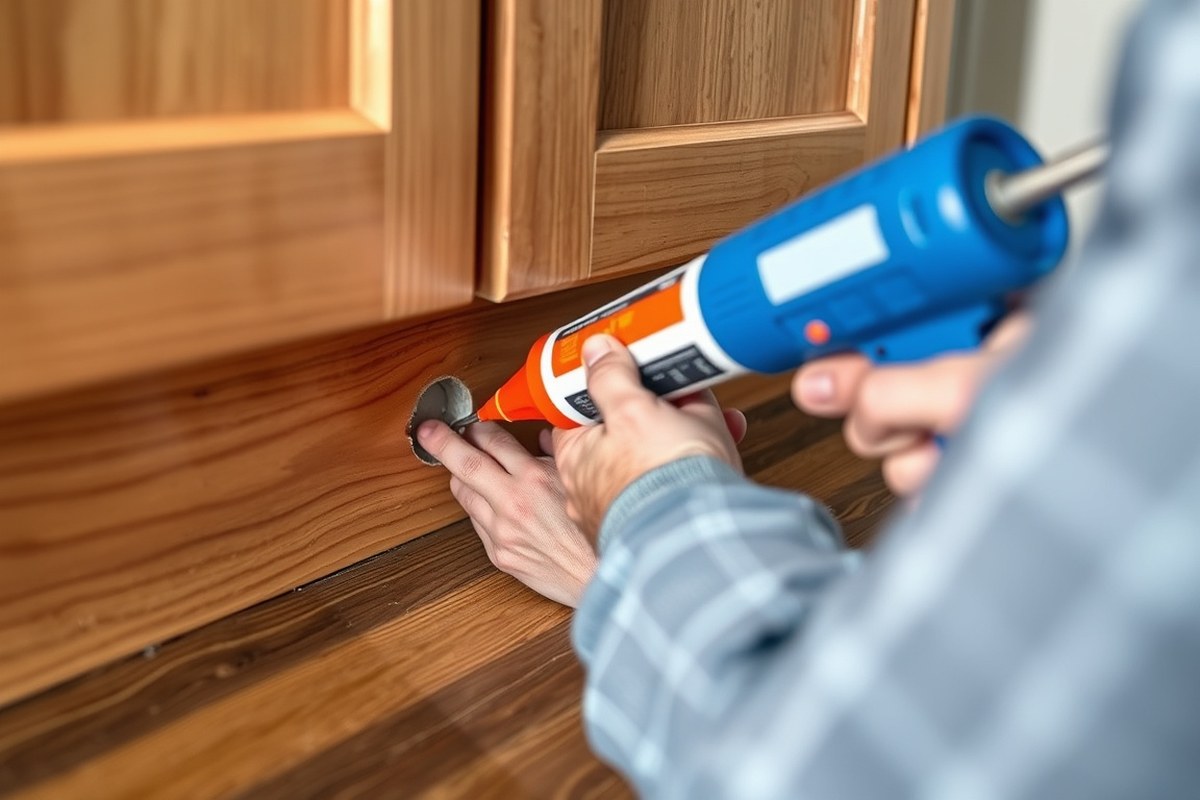
To get rid of mice, start by identifying signs of their presence and sealing all entry points to stop new mice from coming in. Using a combination of traps and natural repellents will quickly reduce the population inside your home. Proper cleaning and habitat changes help keep mice away for good.
This advice is designed for homeowners, renters, and property managers dealing with an unwanted mouse problem. You’ll learn effective methods like trap placement, sanitation, and when to call a professional, ensuring you handle the issue safely and thoroughly.
Key Takeaways
- Seal all entry points larger than ¼ inch, including small holes and gnawed openings about 1.5 inches wide, to block mice access.
- Place traps within 10 to 20 feet of food sources or nesting sites, using at least one trap per suspected mouse activity area.
- Move bait stations 5 feet if mice avoid them, to intercept new mouse territories and increase trapping success.
- Combine sealing, strategic trapping, sanitation, and repellents for a complete and effective mouse removal plan.
- Clean and disinfect areas contaminated by mice carefully, using gloves and safe disposal methods to avoid health risks.
- Keep firewood piles at least 20 feet from the house, and improve outdoor garbage cans 12 inches or more to reduce nesting spots.
How to Identify Mice Presence and Infestation Signs
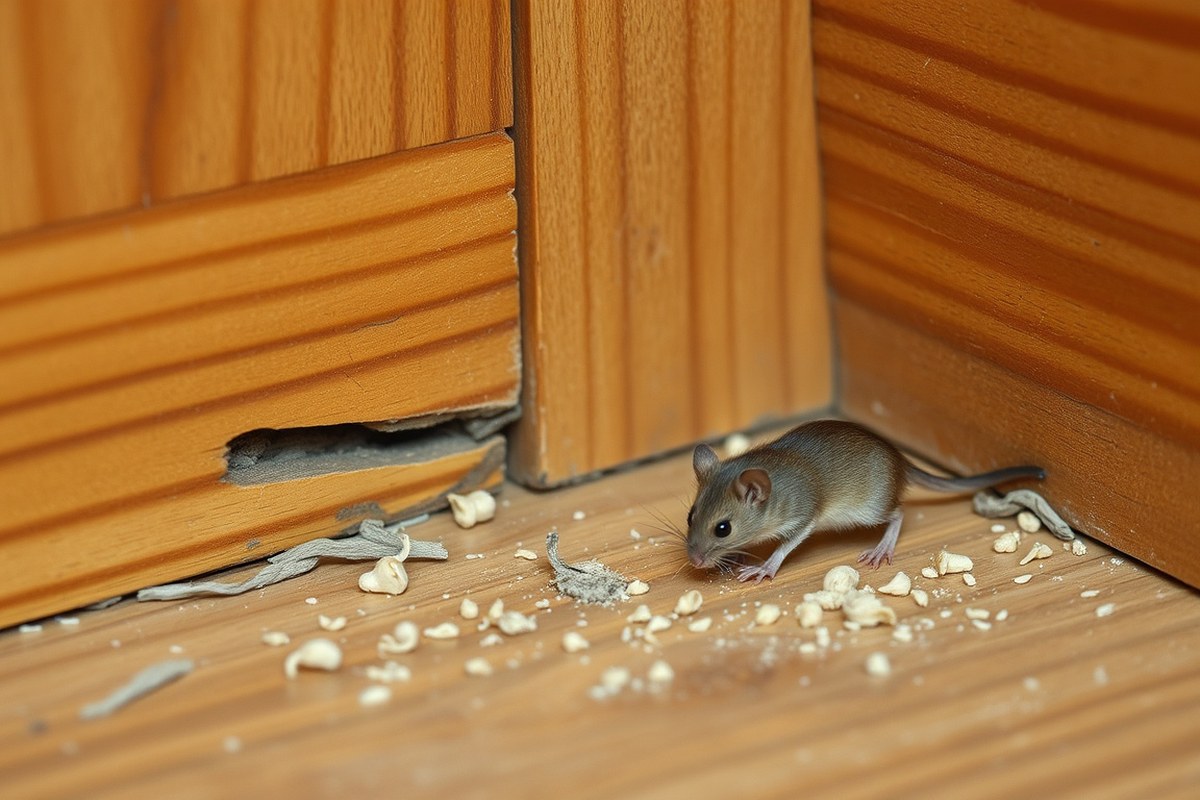
Spotting mice in your home before the problem grows large is important. Look for droppings first, they usually appear near food sources like kitchen cabinets, pantries, or under furniture. These small, dark pellets measure about 1/8 inch and have blunt ends. Fresh droppings are shiny and dark; old ones turn gray and crumble easily. Finding them indicates an active infestation.
Gnaw marks are another strong sign. Mice constantly chew to keep their teeth worn down. Check wooden furniture, baseboards, and cardboard boxes for irregular teeth marks, usually about 1/16 inch wide. You might also notice greasy rub marks along walls or floor edges, where mice leave oil and dirt from their fur. These lines typically appear in their regular travel paths and can guide where to place traps.
Hearing noises inside walls, ceilings, or under floors is common, especially at night when mice are active. Scratching, squeaking, or scampering sounds behind walls or in unused rooms can confirm their presence even if you haven’t seen a mouse directly. You might also detect a musky or ammonia-like odor in areas with heavy activity, particularly in hidden nesting spots.
Mice prefer hiding in quiet, warm places close to food and water. Common daytime nests include cluttered storage areas, behind appliances, inside wall voids, and in attics or basements. They usually stay within 20 to 30 feet of food sources, so confining your search to these zones increases detection chances. Use this checklist to identify likely mouse activity in your home:
- Small, dark droppings near food storage or preparation areas
- Fresh or old gnaw marks on wood, plastic, or cardboard
- Grease or rub marks on walls and along baseboards
- Scratching or scampering noises at night behind walls or ceilings
- Unusual musky odors in confined spaces
- Hidden nests in cluttered or undisturbed areas
Regularly inspecting these signs saves you time and effort. Clean up any droppings with gloves and disinfectant to avoid health risks. If signs increase in number or become more widespread, the infestation is likely growing and needs prompt action. Keeping your home tidy and sealing small openings around your house helps reduce hiding spots and discourage mice from settling inside.
Finding and Sealing All Mouse Entry Points Effectively
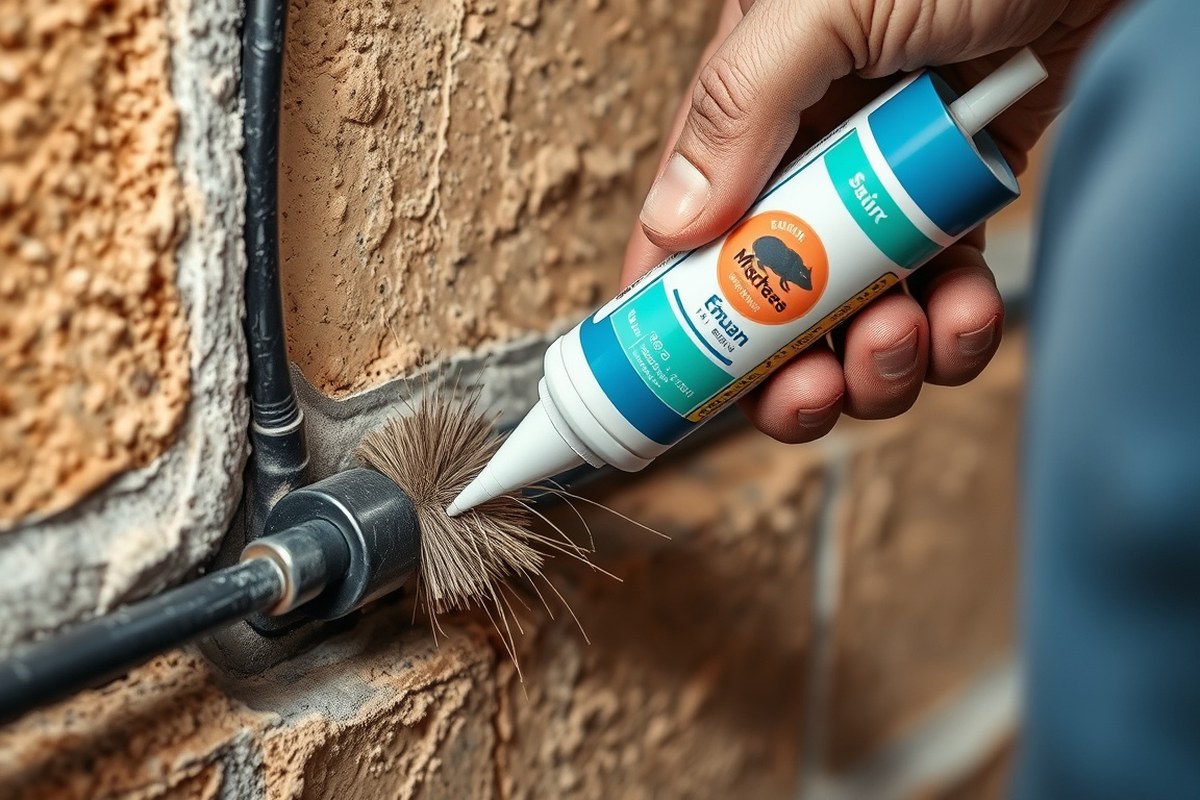
To stop mice from getting inside, start by finding every hole, crack, or gap they could squeeze through, mice can fit into openings as small as a dime, about 0.7 inches across. Seal all these entry points tightly using materials that mice cannot chew through like steel wool combined with caulk or copper wool. Pay special attention around pipes, vents, wires, and doors where gaps often hide.
Common Locations Mice Use to Enter
Mice can enter through the smallest openings near windows, doors, and your foundation. They often use cracks along baseboards, gaps around pipes and cables, and openings around dryer vents and floor drains. Basements, attics, garages, and kitchen cabinets are typical areas where entry points exist. Even if your doors and windows are closed, mice can slip through holes too small for you to notice.
Areas with utility penetrations like pipes and cables are especially vulnerable since small gaps often form there. Look carefully at where exterior walls meet the ground and at joints around vents and drains. Inspect for holes or damage in siding and around crawlspaces, which are common mouse highways into homes.
Assessing Structural Vulnerabilities in Walls
Check exterior and interior walls for cracks and holes at or below 1 inch wide, since mice can squeeze through gaps as small as a quarter-inch. Run your hand along baseboards and window frames to feel for drafts or depressions indicating missing caulk or weather stripping. Look inside attics and crawlspaces for any openings, chew marks, or signs of nesting material near insulation.
Examine areas where pipes and wires penetrate walls or foundations. Even small gaps can serve as entry points if not sealed properly. Check dryer vents and floor drains, which often have poorly fitted coverings that mice can exploit.
Selecting Durable Sealing Materials
Use steel wool or copper wool to plug holes before sealing with a durable, weather-resistant caulk or silicone sealant. Steel wool fibers are difficult for mice to chew through, preventing them from reopening sealed spots. Avoid materials like plastic, rubber, or wood because mice can easily gnaw through them.
For larger gaps around pipes or vents, stuff copper wool deep inside the opening to act as a physical barrier, then cover it with metal flashing or a wire mesh screen where possible. Weather-stripping door seals and foam insulation tape can block gaps under exterior doors and windows effectively.
Step-by-Step Hole Sealing Techniques
Use this checklist to seal mouse entry points systematically. Taking these steps will help close off every crack or hole mice could use and secure your home’s exterior and interior perimeter.
- Inspect all potential entry areas including walls, baseboards, doors, windows, and especially around pipes, vents, and cables.
- Use a flashlight and a thin tool like a wire or screwdriver to probe cracks and feel for gaps larger than a quarter inch.
- Remove any debris, old caulk, or loose materials from cracks or holes to ensure good adhesion of sealing materials.
- Push steel wool or copper wool tightly into larger holes to block the opening physically.
- Apply outdoor-grade caulk or silicone over the plugged holes and seal cracks less than a quarter inch wide completely with caulk.
- Install door sweeps or weather stripping on exterior doors and use foam insulation tape to seal small gaps around frames.
- For vents and dryer ducts, install fine wire mesh screens secured with metal fasteners to prevent mice access while maintaining airflow.
- Allow all sealants to dry fully as per manufacturer instructions before monitoring effectiveness.
Regularly inspect seals and caulking for damage or wear, especially after extreme weather or seasonal temperature changes.
Preventing Future Entry After Repairs
After sealing, keep the perimeter clear of clutter, trim shrubs near the foundation, and store firewood and materials away from walls to reduce hiding spots. Maintaining clean kitchen cabinets and properly storing food in sealed containers will reduce attractants near entry points.
Schedule annual inspections for new cracks or gaps caused by foundation settling or weather. Replace worn weather-stripping and damaged door sweeps promptly to maintain a consistent barrier. Using repellents near potential entry points may discourage mice from testing your seals. Taking these ongoing preventive steps supports your sealing efforts and minimizes the chance of future infestation through repaired or unseen entry points.
Comparing Mouse Control Methods: Traps, Poisons, and Natural Options
When comparing methods to get rid of mice, traps generally offer the quickest and most reliable control, with snap traps standing out for fast kills. Poison baits kill mice but require strict safety precautions to protect children and pets. Ultrasonic devices have limited effectiveness and usually won’t solve infestations alone. Natural repellents like peppermint oil can help repel mice but won’t eliminate an existing problem. Choosing the right method depends on your situation, safety concerns, and goals for humane versus rapid removal.
Types of Mouse Traps and How to Use Them
Snap traps remain one of the most effective options for quickly reducing mouse numbers. These mechanical traps kill instantly if placed in high-traffic mouse areas, such as along walls. Classic wooden or plastic snap traps cost around $1 to $3 each. Position multiple traps spaced 2 to 4 feet apart and bait them with attractive bait like peanut butter or chocolate.
Live traps catch mice without killing them but require you to relocate the mouse far from your home. They are humane but need frequent checking and effort to transport and release the animals, so are best if you prefer non-lethal options. Glue traps capture mice non-toxically but do not kill. They can cause prolonged suffering and may require you to euthanize trapped mice humanely. Glue traps can be useful for small species but may be less effective for larger mice.
Electronic traps kill mice quickly using an electric shock and some models can catch multiple mice before needing a reset, such as those made by Victor. They are more expensive upfront (around $30 to $60), but reusable and clean. Enclosed snap traps provide a less unpleasant solution by hiding the mouse after capture.
| Trap Type | How It Works | Cost | Effectiveness | Considerations |
|---|---|---|---|---|
| Snap Trap | Kills mouse quickly via spring-loaded bar | $1, $3 each | High for quick kills | Visible dead mice, must be placed carefully |
| Live Trap | Catches mouse alive for relocation | $10, $30 each | Moderate; humane but labor-intensive | Requires release, frequent checks |
| Glue Trap | Traps mouse on sticky board, non-toxic | Under $1 each | Variable; better for small mice | Does not kill, may cause suffering |
| Electronic Trap | Zaps mouse with electric shock, some catch multiples | $30, $60 | High; fast and reusable | Higher upfront cost |
Set traps in places where you see mouse activity, such as along walls, behind appliances, and near food sources. Check traps daily and dispose of caught mice promptly and hygienically. Re-bait traps as needed to maintain attraction.
Safety Tips for Using Poison Baits Around Pets and Kids
Rodenticides can effectively reduce mouse populations but pose significant risks. Baits often contain anticoagulants or other toxic substances harmful to children, pets, and wildlife. Using poison baits requires strict safety steps such as placing bait stations in inaccessible areas and using tamper-resistant bait boxes designed to protect non-targets.
Always follow the product label carefully. Avoid placing loose poisons where pets or children can reach them. Keep bait stations out of crawl spaces or basements only accessible to mice. Monitor bait consumption regularly, and clean up any dead mice promptly to prevent secondary poisoning of pets or scavengers.
Poison use may backfire by scattering mice or making them wary of bait, potentially worsening the problem in urban or cluttered environments. Considering these drawbacks, poison baits should be a last resort or part of a professional strategy. Using traps and exclusion methods typically offers safer, more controlled removal.
Effectiveness and Limits of Natural Repellents
Natural repellents appeal as chemical-free ways to deter mice. Peppermint oil, cayenne pepper, and other strong-smelling substances can discourage mice from entering treated areas. You can soak cotton balls with peppermint oil and place them in cupboards, along walls, or near suspected entry points to create an unpleasant environment for mice. Reapply every few days to maintain potency.
Mice may avoid areas regularly treated with natural repellents, but these methods won’t eradicate existing infestations. Repellents work best combined with sealing entry points and sanitation to remove food and shelter. Ultrasonic devices emit high-frequency sounds intended to repel rodents. These units are easy to use by plugging into outlets near problem spots, but evidence of their effectiveness is limited. Most experts agree ultrasonic devices alone won’t solve mouse problems and should not replace traps or exclusion.
Including natural repellents as part of an integrated approach can reduce temptation for mice. However, they require ongoing application and vigilance. Expect repellents to keep mice cautious rather than completely eliminate them by themselves.
Strategic Trap Placement and Quantity for Quick Mouse Removal
Position traps where mice are most active, primarily along walls and near entry points, since mice tend to run close to surfaces. For an average home infestation, start with 3 to 5 traps placed strategically. Using proper bait increases your catch rate and encourages mice to investigate the traps.
Identifying High Activity Mouse Areas
Look for signs like droppings, gnaw marks, or nesting materials along baseboards, inside cabinets, and under sinks. Place traps where you see the most evidence because mice usually travel within 10 feet of their nests. Corners and dark, hidden spots near food sources also tend to be prime areas for trap placement.
Check behind appliances, in pantry corners, and near cluttered storage spaces. Mice rarely cross open spaces, so traps should be set along walls and behind furniture, not in the middle of a room. Trying to trap mice on their natural routes increases the odds they’ll encounter the traps.
Optimal Trap Types for Different Infestations
Snap traps are the most recommended tool for mice because they kill quickly and are inexpensive. For moderate infestations, placing multiple snap traps is more effective than relying on a few. Multiple catch traps are reusable and useful for bigger problems but require manual removal of live mice, which may not suit everyone.
Glue traps can catch mice but do not kill quickly, and they may pose ethical and cleanup concerns. Electronic traps are effective but cost more upfront and might not be necessary for smaller infestations. The right trap depends on your tolerance for disposal and how quickly you want results.
Recommended Trap Quantities by Infestation Size
An average home facing a mouse problem should have at least 3 to 5 traps set at once. For a small infestation, 3 traps placed in the highest activity areas will often catch the problem mice within days. Larger infestations require more traps, possibly 7 to 10, spread throughout multiple rooms to cover more ground.
Always be prepared to add traps if mice persist after a week. Since mice can avoid traps that aren’t placed well, increasing trap density gives you a better chance at catching elusive individuals quickly.
- Small infestation: 3 traps in key areas
- Moderate infestation: 5 traps distributed across rooms
- Heavy infestation: 7 to 10 or more traps evenly spaced
- Place traps every 10 to 15 feet along walls
- Check traps daily and reset if needed
- Adjust trap locations if no mice are caught within a week
- Focus on kitchen, pantry, storage rooms, and near mouse entry points
Spacing traps about 10 to 15 feet apart along walls ensures better coverage without gaps where mice can pass undetected. Inspect and move traps after several days if no activity is recorded to intercept shifting mouse paths.
Effective Bait Choices for Greater Attraction
Peanut butter remains the top bait choice due to its strong scent and sticky texture that keeps mice engaged. Alternatives like chocolate, hot dogs, bacon, or nuts also work well if you want to try different options or avoid allergens. Avoid using cheese, as it tends to dry out and lose appeal quickly.
Apply bait sparingly, just a small pea-sized dab, to avoid overwhelming the trap’s trigger mechanism. Refresh bait every few days to stay attractive and replace it if it gets stale or contaminated. Watch the trap to learn which bait is most effective for your particular mice.
Safety Tips for Trap Setup Indoors
Place traps away from children’s and pets’ reach to prevent accidental triggering and injury. Use enclosed bait stations if needed for extra safety. Wear disposable gloves when handling traps to avoid transferring human scent, which can deter cautious mice.
Set traps perpendicular to walls with the bait side facing the wall, guiding mice directly onto the trigger plate. Check and clear traps daily to avoid odor issues and rebait promptly. Storing extra traps and bait in a secure location helps maintain readiness without hazards.
Complete Mouse Removal Plan: Sealing, Trapping, Sanitation, and Repellents
Eliminating mice requires a focused plan that combines sealing entry points, trapping, sanitation, natural repellents, and ongoing monitoring. Without covering all these steps carefully, mice often return or hide in hard-to-reach areas like inside walls. Complete removal can take anywhere from two to four weeks depending on the infestation size, how quickly mice encounter traps, and your commitment to the process.
Here is a prioritized, step-by-step checklist to follow. This method targets existing mice, prevents new ones from entering, and creates an environment they avoid. For tough infestations inside walls, pest professionals use specialized techniques, but you can reduce numbers significantly with this plan before considering help.
- Seal all entry points: Use steel wool combined with caulk or foam to block holes larger than ¼ inch. Mice can squeeze through tiny gaps. Check foundations, vents, pipes, and around doors and windows. Costs vary, but basic materials might cost $20 to $50.
- Set multiple traps: Place snap or electronic traps where you see droppings or gnaw marks, especially near walls and hidden corners. Use 5 to 10 traps spaced 10 to 20 feet apart for medium infestations. Bait with peanut butter or chocolate. Check traps daily and dispose of caught mice promptly to prevent odors.
- Maintain strict sanitation: Clean all food crumbs, store pantry items in airtight containers, and remove pet food when not in use. While sanitation alone won’t remove mice, poor sanitation attracts more. Use gloves when cleaning mouse droppings and disinfect thoroughly.
- Apply natural repellents: Use essential oils like peppermint or clove oil lightly soaked on cotton balls near entry points and probable nesting spots. Refresh oils every 3 to 5 days. Cats also help deter mice naturally, but remember they require 15 years or more of care.
- Monitor activity continuously: Inspect traps and check for new droppings or gnaw marks every few days. Re-assess entry points after heavy rain or seasonal changes, as mice often seek shelter indoors when weather changes.
- Address mice in walls or inaccessible areas: Since mice inside walls often do not respond well to traps, use bait stations placed near suspected entry holes inside the house. Consider ultrasonic repellers as an additional deterrent, though these work best as part of a larger strategy. Professional pest control is advisable if mice persist in these areas.
- Repeat or adjust as needed: Continue sealing, trapping, and cleaning for at least three weeks after last mouse capture. This ensures you remove newly emerged mice or those that avoided initial traps.
Trap and dispose of mice promptly to avoid hidden carcasses creating bad odors, especially if you use poison, dead mice inside walls are hard to detect and can cause long-term smells.
Cleaning, Disinfecting, and Safely Disposing of Mouse Contamination
Mouse droppings, urine, and nesting materials can carry dangerous diseases, including Hantavirus, so cleaning and disinfecting areas they’ve contaminated requires caution and thoroughness. Proper handling and disposal reduce the risk of spreading bacteria and prevent further infestation. Wearing personal protective equipment (PPE) like gloves, goggles, and long sleeves protects your skin and eyes during cleanup.
Using a commercial disinfectant or a bleach solution made by mixing 1 part bleach with 10 parts water helps kill pathogens effectively. Avoid sweeping or vacuuming dry droppings since this can release airborne particles you could inhale. Instead, saturate contaminated areas first to keep dust down. Dispose of dead mice, droppings, and nesting materials securely in sealed plastic bags to prevent contact with other animals or people. Follow these steps to clean and disinfect mouse-contaminated areas safely and thoroughly:
- Ventilate the area. Open windows and doors for at least 30 minutes before starting cleanup to reduce airborne contaminants.
- Put on PPE. Wear rubber, latex, or nitrile gloves, eye protection, a mask, and long-sleeved clothing to protect against contact and inhalation.
- Spray contaminated surfaces. Saturate droppings, nests, and dead mice with disinfectant or bleach solution; wait 5 to 10 minutes to allow thorough killing of germs.
- Use paper towels to pick up materials. Avoid direct contact by picking up droppings, nesting materials, and dead rodents with disposable towels; place them into a sealable plastic bag.
- Dispose of waste safely. Seal bags tightly and place them in an outdoor trash bin regularly emptied; do not reuse cleanup materials or gloves without disinfecting.
- Clean all affected surfaces. Wipe floors, shelves, and cabinets with fresh disinfectant; mop floors to remove urine stains and odors that attract more mice.
- Wash hands and clothes thoroughly. Remove gloves carefully, wash hands with soap and water for at least 20 seconds, and launder clothing in hot water.
- Monitor for illness. Watch for symptoms such as fever or respiratory issues for several days after cleanup, and seek medical advice if needed.
Extra care is necessary if cleaning a large or enclosed space heavily contaminated with droppings or nesting materials. In those cases, consider professional pest control services trained to handle such cleanup to reduce health risks. Proper sanitation discourages mice from returning by eliminating food and shelter, which is key to long-term mouse control.
Preventing Future Mouse Infestations with Habitat Modification and Maintenance
Preventing mice from returning after removal depends largely on reducing their access to food, shelter, and easy entry points. Start by removing outdoor and indoor habitats that invite rodents. Trim bushes and tree branches that touch your home’s roof or walls. Store firewood, lumber, and other materials at least 18 inches above the ground and 12 inches away from your house. This denies mice convenient nesting areas close to your door. Keep your yard free of fallen fruit, birdseed spills, and compost that can attract rodents.
Inside your home, declutter regularly, especially in basements, attics, and garages where mice often nest. Keep storage boxes sealed and improve them off the floor. Store all food, including pet food, in airtight containers made of glass, metal, or heavy plastic. Empty trash cans frequently and use lids that seal tightly.
Applying repellents such as peppermint oil complements these physical modifications by producing an atmosphere that deters mice. Drench cotton balls with peppermint oil and position them close to doors, vents, cabinets, and likely entry spots. Replace these cotton balls every week, or earlier if the aroma weakens, to keep their potency. Peppermint oil is easy to find and typically costs between $5 and $10 for a small bottle, which can last multiple weeks when used regularly.
- Keep outdoor vegetation trimmed and away from your home
- Store firewood and debris away from building foundations
- Seal food in airtight containers and clean up crumbs immediately
- Empty trash cans regularly; use tightly sealed lids
- Refresh peppermint oil cotton balls weekly near entry points
- Maintain regular home and garage cleaning to reduce clutter
- Check and seal any new structural gaps seasonally
Implement a maintenance checklist every season to inspect and maintain your home’s mouse defenses. In spring and fall, check for new holes, cracks, or damaged weather stripping and seal them with caulk or steel wool. Clean gutters and clear vents to prevent nesting opportunities. During winter months, mice look for warm shelter, so extra vigilance is necessary around storage areas, like garages, campers, and sheds. Use repellents consistently in these periods, especially where mice are most likely to enter or nest.
When to Call a Professional Exterminator and What to Expect
Calling a professional exterminator becomes necessary when your mouse problem exceeds quick fixes or persistent DIY efforts fail. Ongoing signs like noises in your walls during the evening, droppings despite traps, or multiple mice sightings could mean the infestation has grown beyond what you can handle solo. Mouse populations reproduce rapidly, so slow progress or worsening conditions indicate a need for expert help.
Start by assessing your situation with a decision flowchart: Begin with small noticing signs, single trap captures or minor droppings, and continue DIY steps like sealing entry points and trapping. When mice persist after one to two weeks, escalate to increased trap numbers and stronger baits. Should activity remain high or you suspect nesting inside wall voids, this is the point to contact professional pest control.
The cost for professional mouse removal can range widely, typically between $100 to $300 depending on infestation severity and treatment complexity. Basic services, such as inspection and initial trapping, might start at $100. More extensive interventions that include sealing inaccessible areas, repeated visits, and long-term monitoring push costs toward the higher end. Expect a timeframe from one week for mild cases up to three months when infestations are heavy or housed within walls.
Professionals bring advanced tools and techniques that improve outcomes. After a complete inspection to identify entry points and infestation pockets, they place bait stations spaced 8 to 12 feet apart in strategic areas like near appliances, behind walls, and under stoves where mice nest or travel. Pest control experts may use stronger traps and rodenticides not available for consumer use, safely targeting mice inside walls, attics, or crawl spaces. These inaccessible areas often require bait placement within tamper-resistant stations or injection of specialized dusts, ensuring treatment where DIY traps cannot reach. Follow-up visits adjust the approach based on mouse activity and continue until the infestation subsides.
Professional services complement your efforts by tackling parts of the infestation you cannot reach or control effectively. They also provide guidance on sanitation and habitat modification to deny mice food and water, reducing chances of reinfestation. Cost-benefit tradeoffs include the upfront service fee versus potential savings from prevented property damage or health risks associated with uncontrolled mice. Homeowners with chronic or hidden infestations will likely get better results from professional intervention combined with ongoing personal maintenance.
Persistent noises or mouse activity inside walls signals a need for professional help, as these areas often cannot be treated thoroughly with DIY methods alone.
Step-by-Step Action Plan to Get Rid of Mice
Follow these clear steps to remove mice from your home and keep them away for good. Tracking progress at each phase helps ensure success.
- Before You Start: Inspect your home carefully for signs of mice such as droppings, gnaw marks, and nests. Confirm infestation by spotting fresh activity or new droppings within 24-48 hours.
- Day 1, 2: Seal all mouse entry points, including cracks, gaps around doors, windows, and pipes. Test by monitoring for any new mouse signs over the next 48 hours, no fresh droppings means effective sealing.
- Day 3, 7: Set traps strategically where you noticed mouse activity, using enough traps (3 to 5 per room is a good start). Check daily for captures; consistent catches indicate your trap placement is on target.
- Week 2: Clean and disinfect all contaminated areas using gloves and proper cleaners to remove germs and remove odors that attract more mice. Success is clear: no fresh droppings or signs in cleaned zones.
- Week 3: Maintain sanitation and remove food sources by storing food in sealed containers and fixing leaks. Monitor for mouse activity; reduced sightings or droppings signal progress.
- After 3 Weeks: Use mouse repellents or deterrents as an added layer of defense, and continue checking traps weekly. No new captures or signs after a full month usually means the infestation is controlled.
- Ongoing: Perform routine checks every few weeks, reseal any compromised areas, and keep up with habitat modifications like trimming vegetation near your home. Absence of new evidence confirms lasting prevention.
Frequently Asked Questions
Can Leaving Pets Like Cats Help Get Rid of Mice?
Yes, cats can deter mice, but they may not fully eliminate an infestation. Using them alongside other methods increases effectiveness.
Does Peppermint Oil Really Work to Repel Mice?
Peppermint oil can repel mice temporarily, but it needs frequent reapplication. Soaking cotton balls and placing them strategically helps keep mice away.
How Fast Can I Expect Mice to Be Gone After Setting Traps?
Mice can be caught within a few days using multiple traps placed where signs appear. Persistence with trapping is key to success.
Are Ultrasonic Pest Repellents Effective for Mice Control?
Ultrasonic devices have limited effectiveness and often don’t stop mice completely. Combining them with sealing and traps is more reliable.
Can Mice Cause Structural Damage to Homes?
Yes, mice chew on wires, insulation, and wood, which can cause costly damage and safety hazards. Timely removal prevents these problems.
Is It Safe to Handle Trapped Mice Myself?
Handling mice directly can expose you to diseases, so wear gloves and dispose of rodents safely according to local guidelines.
The Bottom Line
Getting rid of mice requires a consistent approach that combines sealing entry points, using traps efficiently, and maintaining a clean environment. Start today by carefully inspecting your home’s exterior for even the smallest holes or gaps and seal them with steel wool or caulk to block mouse access. Taking this simple step can drastically reduce the chance of new mice entering and make other control methods more effective.