How to Get Rid of Warts on Feet: 8 Proven Ways with Clear Guidance
To get rid of warts on feet, start by soaking the affected area in warm water for 10 to 20 minutes to soften the skin. Then, use proven treatments like over-the-counter wart removers or consult a professional for medical options. Managing pain and preventing recurrence during and after treatment makes results more effective.
This information is for adults and parents of children with plantar warts who want clear guidance on identifying, treating, and preventing these stubborn growths. You’ll find practical advice, natural remedies with scientific backing, and when to seek medical care for safe and effective treatment.
Key Takeaways
- Soak your feet in warm water for 10 to 20 minutes before applying treatment to soften skin and improve effectiveness.
- Use salicylic acid products with concentrations of 20% to 40% for the best results against plantar warts on thick skin.
- Home treatments like salicylic acid or cryotherapy achieve about 14% to 70% wart clearance within 12 weeks, varying by method.
- Apply and replace duct tape every 5 to 6 days to help remove warts using the tape occlusion method safely at home.
- Stop home remedies and see a doctor if the wart worsens, spreads, causes significant pain, or lasts beyond several months.
- Medical options like injections can clear 56% to 81% of warts, often stimulating immune response to resolve others naturally.
1. What Are Plantar Warts and How to Identify Them on Your Feet

Plantar warts are tiny, rough patches that form on the bottoms of your feet. They result from an infection in the outermost skin layer, caused by specific strains of the human papillomavirus (HPV), which usually enters through small cuts or breaks in your skin. These warts often appear gray or brown with a rough, spongy texture. Unlike warts on other body areas, plantar warts are typically flat because the pressure from walking pushes them into your skin. They can show up alone or in clusters and sometimes cause pain when you stand or walk.
Identifying a plantar wart can be done by comparing it with other common types of growths on your feet like corns and calluses. Corns generally develop on non-weightbearing areas of your foot, such as the tops or sides of toes, while plantar warts appear on the soles where pressure is applied by walking or standing. Calluses cover larger and more diffuse areas and tend to be less defined in shape than warts, which have clearer edges. One telltale sign of plantar warts is the presence of tiny black dots within the wart, these are small, clotted blood vessels that often distinguish warts from calluses and corns.
To check and identify plantar warts accurately, follow a simple checklist: soak your foot in warm water at about 113 °F (45 °C) for 10 to 20 minutes to soften the area. After soaking, gently scrape the skin with a pumice stone or soft brush to reveal the wart surface. Look for rough, flat, gray or brown lesions with small black specks. Assess the location, make sure they are on the weightbearing sole, unlike corns which tend to avoid these areas. Note if the lesion causes pain when you walk or press on it, as plantar warts often feel like stepping on a pebble.
Spotting plantar warts early saves time and discomfort, as they can slowly grow larger or spread to other parts of your feet or to other people. Cost-effective home identification requires only common household items like warm water, a basin, and a pumice stone or emery board, and it takes about half an hour to complete the soaking and examination process. Be cautious if you have diabetes or a condition affecting circulation before attempting this yourself, and seek professional advice in those cases to avoid complications.
2. What Causes Plantar Warts and How Contagious Are They?
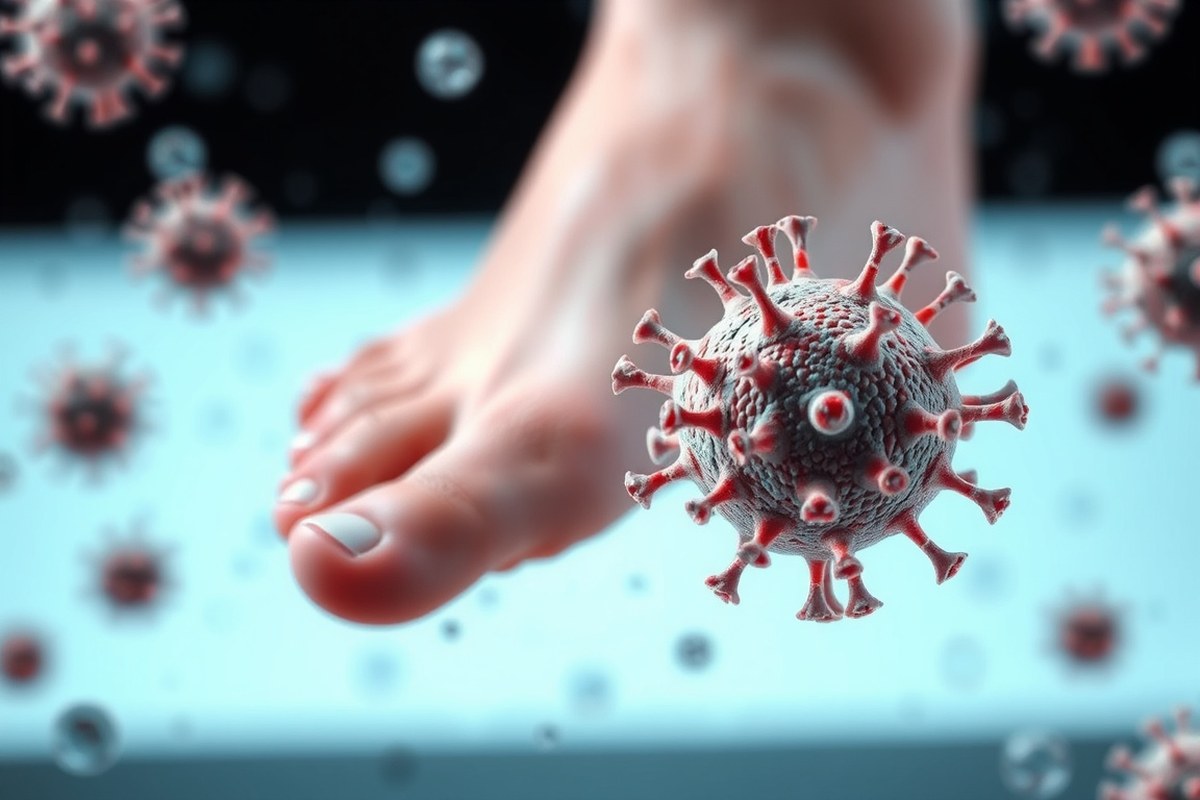
Human papillomavirus (HPV), especially type 1, causes plantar warts by infecting the skin’s surface on your foot’s soles. The virus gains entry through tiny cuts or abrasions that happen often due to barefoot walking or minor foot injuries. When infected, the skin thickens, creating a wart that feels like a hard, callus-like bump. The weight your feet carry presses the wart inward, which may lead to discomfort or pain when you walk.
Plantar warts can be contagious, spreading to other parts of your body or to other people, although not as easily as some viruses. Transmission occurs through direct contact with the wart or by touching contaminated surfaces like wet floors in public showers or swimming pools. You can also spread the virus yourself if you touch a wart and then another skin area, a process called self-inoculation. This explains why plantar warts often appear in groups.
Preventing the spread of HPV requires careful hygiene and behavior. Wash your hands thoroughly with soap and water after touching your feet or any wart. Avoid picking at or scratching warts, as this can cause the virus to spread to nearby skin. When walking in public places like locker rooms or pool areas, wear protective footwear, such as flip-flops or water shoes, to reduce contact with contaminated surfaces. Also, keep any existing warts covered with waterproof bandages when swimming or bathing to limit exposure to others.
People with compromised immune systems or damaged skin have a higher risk of developing plantar warts, so they should be particularly vigilant. Cover any cuts or abrasions on your feet, keep your feet clean and dry, and avoid sharing towels, socks, or shoes, as these can transfer the virus. If you do develop a plantar wart, treating it promptly and following strict hygiene helps prevent spreading.
Always wash your hands after touching a wart to stop the human papillomavirus from spreading to other parts of your body or to others.
3. Step-by-Step Home Treatment Routine for Plantar Warts That Works
The most effective home treatment for plantar warts involves a routine combining skin softening, careful filing, and application of salicylic acid, with optional use of duct tape therapy to improve results. Salicylic acid works by peeling away infected skin, while duct tape may help deprive the wart of oxygen or gradually remove viral particles. Doing these steps consistently and correctly over several weeks increases the chance of wart removal.
Preparing Your Feet for Treatment
Softening the skin around the plantar wart helps the treatment penetrate better and makes filing easier. Soaking your feet in warm water for 10 to 15 minutes before treatment is key. Use plain water without soap or additives to avoid skin irritation. Dry your feet thoroughly before applying any treatment to ensure the salicylic acid adheres well.
Consistency matters, so plan to repeat this routine daily or as recommended on your salicylic acid product’s label. Softening the skin will also reduce discomfort during the filing step.
Applying Salicylic Acid Safely
Salicylic acid is available over the counter in gels, liquids, and medicated patches, usually with concentrations from 17% to 40%. A concentration of around 17% to 30% is common for plantar warts. Choose a product designed specifically for plantar warts to get the correct strength and delivery method.
Before applying, protect the healthy skin around the wart with petroleum jelly or a similar barrier to avoid irritation. Apply the salicylic acid directly on the wart, covering it fully but not spilling onto surrounding skin. Follow the product instructions for drying time and frequency, usually once daily at night.
Watch for signs of irritation like redness or burning. If that happens, reduce frequency or consult a healthcare provider. Avoid applying salicylic acid on broken or infected skin.
Using Duct Tape Therapy Correctly
Duct tape therapy may help by suffocating the wart and removing virus-containing skin with each tape removal. Use silver duct tape or a similar sturdy brand without added adhesives like glue or scents. Cut a piece of tape slightly larger than the wart.
After applying salicylic acid, cover the wart with duct tape and leave it on for six days straight. Replace the tape if it falls off or becomes dirty. After six days, remove the tape, soak your foot in warm water, and gently file the wart before reapplying the salicylic acid and fresh duct tape.
This cycle should continue for up to 6 weeks or until the wart disappears. Some studies report success rates near 70% when using this method properly and consistently.
Filing and Removing Dead Skin
Removing dead skin layers helps expose the wart to treatment and speeds healing. After soaking and tape removal, use a pumice stone or emery board to gently file the wart surface. Avoid aggressive filing, which can cause bleeding or spread the virus.
File only the top layer of dead skin and stop once you see fresh skin. Dispose of or disinfect filing tools after each use to avoid reinfection. Filing combined with salicylic acid and duct tape helps break down the wart’s infected tissue more effectively over time.
Common Home Treatment Mistakes to Avoid
A frequent mistake is applying salicylic acid too aggressively or on healthy skin, which can cause irritation or damage. Use a small applicator for precision and protect surrounding skin with petroleum jelly or tape. Skipping daily soaking and filing also reduces treatment effectiveness.
Do not leave duct tape on for more than six days at a time without a break, as it can trap moisture and cause skin problems. Avoid mixing multiple treatments without guidance, and stop home treatment if the wart worsens, becomes painful, or shows signs of infection.
Patience is essential. Most plantar wart treatments take 6 to 12 weeks for visible results, and premature stopping often leads to recurrence.
- Soak your foot in warm water for 10 to 15 minutes and dry thoroughly.
- Protect the skin around the wart with petroleum jelly or tape.
- Apply salicylic acid directly to the wart using the product applicator.
- Cover the wart with a piece of silver duct tape cut slightly larger than the wart.
- Leave the duct tape in place for 6 days, replacing if lost or dirty.
- Remove the tape after 6 days, soak the foot again, then gently file the wart to remove dead skin.
- Repeat steps 2 through 6 daily for 6 weeks or until the wart disappears.
- Discontinue treatment and consult a healthcare provider if irritation, pain, or infection develops.
4. Evaluating Natural Remedies: What Works and What Doesn’t Scientifically
Several natural remedies for plantar warts have gained popularity, but the evidence supporting their effectiveness varies. Apple cider vinegar is often recommended due to its acetic acid content, which has antibacterial properties, and malic acid, an exfoliant. To try this method, mix two parts apple cider vinegar with one part water and apply it daily to the wart using a cotton ball, covering it with a bandage. Results may take several weeks to months, and skin irritation is common. Apple cider vinegar acts primarily by slowly peeling away the infected skin layers rather than directly killing the wart virus.
Tea tree oil is known for its antimicrobial and anti-inflammatory effects and is commonly used to treat skin conditions like acne and athlete’s foot. To treat warts, mix 1 to 2 drops of tea tree oil with 12 drops of a carrier oil such as almond or castor oil, then gently apply it to the wart twice a day. While many people report positive results, scientific evidence from controlled research is limited. The oil might help reduce the virus but usually needs to be applied consistently over several months and can cause skin irritation in some users.
Vitamin E is another natural option promoted for wart removal due to its antioxidant properties. Applying vitamin E oil directly to the wart and covering it overnight can support skin healing, but scientific support for vitamin E’s direct effect on wart disappearance is weak. Castor oil is sometimes combined with vitamin E for its antimicrobial and anti-inflammatory action. Neither is likely to produce fast results but might improve skin condition during long-term treatment.
The reason some natural remedies show mild success is because many focus on gradually removing wart-affected skin or improving the skin’s resistance to infection rather than eliminating the human papillomavirus (HPV) responsible for warts. Natural acids like those in apple cider vinegar act as gentle chemical exfoliants, while oils with antimicrobial properties might reduce skin irritation and secondary infection. However, none typically provide instant wart removal and often need weeks of dedicated application.
| Factor | Apple Cider Vinegar | Tea Tree Oil | Vitamin E / Castor Oil |
|---|---|---|---|
| How to Apply | Mix 2 parts vinegar + 1 part water; apply daily with cotton ball, cover with bandage | 1-2 drops tea tree oil + 12 drops carrier oil; apply twice daily | Apply oil to wart; cover overnight; repeat daily |
| Time to See Results | Weeks to months | Weeks to months | Weeks to months |
| Effectiveness | Moderate; helps exfoliate wart skin | Possible antiviral and antimicrobial effect; low clinical evidence | Supports skin healing; unproven wart removal |
| Risks / Side Effects | Skin irritation, burning sensation | Skin sensitivity, allergic reactions | Low risk; mild skin irritation possible |
| Cost | Low (under $10 for supply) | Moderate ($10-$20 per bottle) | Low to moderate, depending on product |
Duct tape is another natural remedy often suggested but lacks strong scientific backing despite being affordable and easy to use. It works by occluding the wart and irritating the skin, which may stimulate immune response but requires daily application and frequent tape changes over weeks. Success rates vary widely, and it can cause skin maceration or damage if used improperly.
While some natural remedies may speed up wart resolution, they generally work slowly, and results differ from person to person. The effectiveness often depends on wart size, immune response, and consistency of application. Persistent or painful warts may need medical treatments for quick and reliable removal. You should stop home treatments if you experience severe pain, significant skin changes, or no improvement after two to three months.
5. When to Stop Home Remedies and Seek Professional Medical Treatments
You should stop trying home remedies and consult a healthcare professional if your plantar wart does not improve after 8 to 12 weeks of consistent treatment. Persistence beyond this period without results often indicates a resistant wart that needs advanced medical approaches. Seeking professional advice ensures you get the right treatment before the wart worsens or causes additional complications.
Watch closely for signs of infection around your wart such as redness, swelling, pus, or increasing pain. These symptoms suggest that the area may be infected, which requires prompt medical attention to prevent the infection from spreading. Any notable irritation or sudden changes in the wart’s appearance should also be evaluated by a doctor to rule out other skin conditions or complications.
You can use a simple checklist at home to decide when to stop self-treatment: no reduction in size or discomfort after 8 weeks, presence of increased pain, any discharge or pus, spreading redness, or swollen skin. If one or more of these occur, schedule a visit with a podiatrist or dermatologist for a thorough assessment. Also, persistent warts that cause ongoing pain while walking or standing typically need professional procedures like cryotherapy, laser removal, or injections, options not possible at home.
There’s a cost and time aspect to consider. Home remedies usually involve over-the-counter products costing $10 to $30 and require daily application for up to three months. Medical treatments may cost more, varying from around $100 to several hundred dollars per session, and often need multiple visits spaced every 2 to 3 weeks. While these clinic treatments take time and money, their success rates tend to be higher for stubborn warts, and they help prevent complications.
Lastly, if you have underlying medical conditions such as diabetes, circulation problems, or a weakened immune system, consult your doctor before attempting any treatment. These factors increase the risk of complications from both the wart itself and any treatment applied. Your healthcare provider can guide safer options and monitor your progress closely.
Tip: Avoid waiting longer than three months to see a doctor if your wart isn’t responding to home care or shows signs of infection; early professional treatment can prevent more painful and costly problems later.
6. Overview of Medical Treatments: Options, Success Rates, and Side Effects
Medical treatments for plantar warts include cryotherapy, laser therapy, and injections that stimulate the immune system. These options generally offer faster results than home remedies but vary in success rates, side effects, and costs. Choosing the right treatment depends on wart severity, persistence, pain levels, and your budget.
Cryotherapy: What to Expect
Cryotherapy works by freezing the wart with liquid nitrogen, which destroys the infected tissue. The procedure typically lasts a few minutes and may require multiple sessions spaced two to three weeks apart. This treatment causes a blister to form around the wart that eventually falls off, usually within one to two weeks. Success rates for cryotherapy vary widely, ranging from about 48% to 80% depending on wart location and the number of treatments.
Side effects can include pain during and after the procedure, blistering, swelling, and sometimes scarring or pigmentation changes. Because the freezing temperature is around -320°F (-196°C), you might feel sharp stinging when the nitrogen is applied. This method is often more effective and faster acting than over-the-counter options but may cost $50 to $150 per session depending on your provider and location.
Laser and Other Advanced Therapies
Laser treatment uses focused light energy to burn off wart tissue and stimulate the immune system. This option is typically reserved for stubborn warts that do not respond to cryotherapy or topical treatments. According to case reports, one to four laser sessions can lead to complete clearance in resistant plantar warts. Success rates for laser therapy have been documented between about 60% and 95% but depend on wart size, depth, and patient response.
Side effects may include pain during treatment, redness, swelling, and rarely, scarring. Because laser treatment penetrates deeper than freezing, some patients experience longer post-treatment discomfort. Costs can be higher than cryotherapy, often ranging from $200 to $500 or more per session. This treatment may not be covered by insurance and typically requires a referral to a dermatologist or podiatrist.
Injection Treatments and Immunotherapy
Injection therapies involve delivering substances such as bleomycin or antigens directly into the wart to trigger your immune system to attack the virus causing the wart. Immunotherapy options like Cantharidin or Imiquimod creams may also be prescribed to stimulate immune response over time. These treatments are usually considered after multiple unsuccessful attempts with cryotherapy or topical agents.
The effectiveness of injections or immunotherapy varies but can achieve clearance rates up to about 70% in stubborn cases. Side effects include localized pain, swelling, itching, and occasionally flu-like symptoms, depending on the substance used. Treatments sometimes require several sessions spaced weeks apart, and costs can range from $100 to $400 per injection or prescription course. Careful consultation with a doctor is recommended to select the appropriate agent and monitor side effects.
Cost and Pain Considerations
Over-the-counter wart products often cost less than $20 and cause minor pain or irritation. Professional treatments like cryotherapy, laser therapy, and injections cost more but may clear warts faster or when home remedies fail. For example, cryotherapy may require several $50 to $150 visits, while laser treatments can total $600 to $2000 or more. Injections vary but typically fall between $100 and $400 per treatment.
Pain levels differ by treatment type: cryotherapy causes short, sharp stinging followed by soreness, laser therapy causes deeper burning sensations during and after treatment, and injections may cause localized aching or flu-like symptoms. Discuss all options thoroughly with your healthcare provider to balance cost, expected pain, treatment duration, and likelihood of wart clearance based on your specific situation.
7. Managing Wart Pain and Preventing Recurrence During and After Treatment
Plantar warts often cause pain and discomfort, especially when they form on weight-bearing areas of your feet. This happens because pressure from walking or standing pushes the wart inward, irritating surrounding tissues. To relieve pain during treatment, start by padding the wart with felt or a moleskin patch, which cushions the area and reduces pressure. Over-the-counter nonsteroidal anti-inflammatory drugs (NSAIDs), such as ibuprofen, can also help reduce inflammation and relieve pain. Use these medications as directed on the package to manage discomfort safely.
The immune system plays a key role in clearing plantar warts. Treatments work by signaling your immune system to attack the wart virus, which means your body’s natural defenses ultimately clear the infection. Maintaining a strong immune system can improve treatment success and reduce the chance of the wart coming back. You can support your immune health by getting enough sleep, managing stress, eating a balanced diet rich in fruits and vegetables, and staying physically active.
Plantar warts can recur after treatment because the virus remains in the skin or environment. Continuing the treatment for one to two weeks after the wart appears gone may help prevent its return. You should also avoid picking or scratching the wart, as this can spread the virus to other areas of your feet or to others. Wearing shoes or sandals in public showers and pools reduces your risk of reinfection or spreading warts to others.
Children, whose immune systems are still developing, may experience longer healing times and more frequent recurrences compared with healthy adults. People with compromised immune systems, including those with certain medical conditions or on immunosuppressive medications, may find warts harder to clear. If you fall into these groups, follow your healthcare provider’s recommendations closely and report any persistent pain or changes in the wart.
For managing emotional discomfort related to visible warts on your feet, consider covering the wart during social situations with discreet, breathable patches. This can help reduce self-consciousness while allowing your treatment to work. Remember that plantar warts are common and usually not serious, so focusing on a consistent treatment plan and immune health support is your best strategy for relief and prevention.
8. Special Considerations for Children, Diabetics, and When Safe Home Treatment Isn’t Enough
Special care is needed when treating plantar warts in children, people with diabetes, and those with circulation problems. These groups face higher risks of infection, delayed healing, or complications, so treatment choices and home care require careful adaptation. Consulting a healthcare provider remains the safest option to tailor treatment appropriately.
Treating Warts in Children Safely
Children’s skin is more sensitive and delicate, so milder treatments tend to work best. Over-the-counter salicylic acid products are usually safe for kids but should be used according to directions, avoiding excessive application to prevent irritation. Treatments like cryotherapy may be recommended by a doctor but typically should not be attempted at home for children. Patience is important since warts can take months to resolve naturally in children.
Keep the wart covered with a bandage during treatment to minimize spread at school or daycare. Also, never attempt to shave or pick at a wart in a child, as this increases the risk of pain and infection. A healthcare provider can show you how to safely apply topical treatments and monitor progress to avoid side effects.
Diabetes and Circulation Considerations
People with diabetes or poor circulation should avoid self-treating warts with methods that risk breaking the skin. Damaged skin can lead to serious infections or ulcers, especially on the feet. Salicylic acid and other topical treatments might irritate the skin or cause sores that will not heal well. Before trying any treatment, a visit to a podiatrist or doctor is highly recommended.
Maintain good foot hygiene by washing feet daily, keeping skin moisturized (but not overhydrated), and inspecting feet regularly for any cuts or signs of infection. Treating plantar warts in these individuals often implies careful medical supervision, potentially involving less invasive methods or prescription medications designed with safety in mind.
Risks of Physical Wart Removal at Home
Physically cutting, shaving, or picking at plantar warts at home is strongly discouraged. These methods can lead to bleeding, pain, infections, and scarring. Any skin break can also increase the chance of spreading the wart virus to nearby areas or other people. It’s particularly risky for children, diabetics, and those with circulation issues where healing is slower and complications more common.
Professional treatments for physical removal, such as cryotherapy or laser therapy, involve controlled precision and sterile conditions that reduce risk. Home attempts lack this control and often cause more harm than good. Instead, trust medical guidance to choose safe removal options.
Never cut or shave a wart at home, especially on your feet, to avoid infections and spreading the virus to others.
When to Refer to Specialists
Seeking professional care is advisable when warts persist beyond a few months, worsen, or cause pain and discomfort. Children with warts that interfere with walking or wearing shoes need medical evaluation to choose gentler, age-appropriate treatments. For people with diabetes or circulation problems, seeing a podiatrist is important before starting any treatment to avoid complications.
A specialist can recommend treatments like immunotherapy, prescription creams, injections such as bleomycin, or precise removal techniques that are safer for at-risk groups. Early referral is important if home treatments cause discomfort, infections, or do not improve the wart within 6 to 8 weeks.
Step-by-Step Action Plan to Get Rid of Plantar Warts
Follow these clear steps to identify, treat, and manage plantar warts safely at home, and know when to consult a healthcare provider.
- Day 1: Confirm the Wart, Check for small, rough growths on the soles of your feet, often with black dots inside. When the spot hurts when you press it and disrupts your skin lines, you likely have a plantar wart.
- Day 1: Start Home Treatment, Apply an over-the-counter salicylic acid product according to package instructions. Cover the wart with a waterproof bandage. Improvement means softening and shrinking over 2-4 weeks.
- Week 1-2: Monitor Progress, Gently file away softened skin with a pumice stone or emery board once a day before applying treatment. Wart should gradually reduce in size and discomfort.
- Week 3-4: Evaluate Effectiveness, When the wart is smaller and less painful, continue treatment. Should it show no change or worsen, avoid squeezing or cutting it and prepare to see a professional.
- After 4 Weeks: Seek Medical Advice, Visit a dermatologist or podiatrist if warts persist, spread, or cause pain. A professional can offer treatments like cryotherapy, laser therapy, or stronger topical medications.
- Throughout Treatment: Manage Pain and Prevent Spread, Use cushioning pads or insoles for pain, wash feet daily, and avoid walking barefoot in communal areas. This reduces discomfort and limits contagion.
- If You Have Special Conditions: Consult Early, Children, diabetics, or those with weakened immune systems should see a healthcare provider before home treatment starts for safe options.
- Post-Treatment: Prevent Recurrence, Keep feet clean and dry, change socks daily, and avoid direct contact with warts on others or shared surfaces to reduce the chance of new warts forming.
Frequently Asked Questions
Can I Use Duct Tape to Remove Plantar Warts on My Feet?
Duct tape may help remove plantar warts, but results vary. Some studies support its use, but it can take weeks and isn’t guaranteed, so consider it a low-cost, low-risk option before stronger treatments.
Are Warts on My Feet Likely to Spread to Other Parts of My Body?
Warts can spread to nearby areas with skin contact or breaks. Avoid picking or shaving warts to reduce spreading risk, and keep feet clean and dry.
Do Plantar Warts Go Away on Their Own Without Treatment?
Plantar warts can clear up naturally but may take months or years. Treatment speeds healing and reduces pain and spread, especially if warts persist or increase in size.
Can I Walk Barefoot If I Have Warts on My Feet?
It’s best to avoid walking barefoot in public places to prevent spreading warts. Use shoes or sandals in communal areas like pools and gyms to protect yourself and others.
Do Plantar Warts Itch, and How Should I Manage It?
Plantar warts can itch, though pain is more common. Avoid scratching to prevent irritation and spreading. Keep the wart clean and consider mild moisturizers to soothe itching.
Is It Safe to Treat Plantar Warts at Home If I Have Diabetes?
Diabetes can impair foot circulation, raising risk of infection; consult your healthcare provider before home treatment. Professional care is usually recommended to avoid complications.
Key Points to Remember
Getting rid of warts on your feet takes time and the right approach. Start by committing to a consistent home treatment routine for at least a few weeks, monitoring the wart for changes. If you notice no improvement or if pain worsens, schedule an appointment with a healthcare provider to explore professional options safely. Taking action today can help you avoid complications and move closer to clear skin.