

How to Get Rid of a Wart on Your Finger: 8 Proven Home and Professional Methods
To get rid of a wart on your finger, start with over-the-counter treatments like salicylic acid and the duct tape method, applying medicine or tape regularly until the wart fades. If home methods don’t work within a few weeks, seeing a dermatologist for professional removal is often necessary. Protect the area during treatment to prevent spreading and monitor progress closely.
This information is for anyone struggling with stubborn finger warts looking for effective home remedies and professional options. You’ll learn how to identify finger warts, prevent spreading, handle tricky locations near nails, and decide when to seek medical care. Clear and practical steps help you remove warts safely and efficiently.
Key Takeaways
- Confirm a wart on your finger by its rough texture, small black dots, and persistence beyond a few weeks without healing.
- Finger warts are contagious through direct skin contact or shared items; avoid biting or picking to prevent spreading.
- Use over-the-counter salicylic acid treatments daily, soaking the wart in warm water for 10-15 minutes before application.
- Apply duct tape over the wart, replace every 5-6 days, and soak and gently file the wart before reapplying to improve removal.
- See a doctor for warts near or under nails, large or painful warts, or if over-the-counter methods fail after 12 weeks.
- Prevent spreading warts by keeping the area clean, avoiding nail-biting, and not sharing personal items during treatment.
How to Identify and Confirm a Wart on Your Finger

Warts on your fingers are small, rough growths caused by the human papillomavirus (HPV). This virus makes the skin cells multiply faster than normal, forming the bump you see. You can often tell a wart by its appearance: it may be raised or flat, rough or smooth, and sometimes have tiny black dots inside, which are small clotted blood vessels. Recognizing the type of wart helps confirm it’s caused by HPV and not something else like a callus or skin tag.
The most common types of warts on fingers include common warts, flat warts, and periungual warts. Common warts usually have a rough surface and appear as gray-brown or skin-colored bumps. Flat warts look smoother, flatter, and often appear in clusters. Periungual warts grow around the nails and can cause thickened or fissured skin. These types arise mainly from HPV strains 1, 2, 4, and 7.
To confirm that a growth on your finger is really a wart caused by HPV, follow a few straightforward steps. This self-check will help you identify typical wart characteristics and differentiate them from other skin issues. Although a doctor’s exam or biopsy can definitively diagnose a wart, this method works well to guide you:
- Examine the surface: Look closely at the bump under good light. Warts often have a rough texture and may show black dots or tiny spots.
- Check the edges: Warts typically have well-defined edges but can blend into the surrounding skin. A bump that is very smooth or irregularly shaped might be different.
- Press gently: Warts are usually firm when pressed but can be tender if located near sensitive skin or under the nails.
- Note the size and grouping: Single bumps suggest common warts; multiple flat, smooth ones often mean flat warts. Clusters around nails are periungual warts.
- Recall recent skin injury or touching warts: HPV enters through small cuts or breaks. Regular nail biting or handling warts often leads to new growths appearing.
- Compare to other skin issues: Unlike corns or calluses, warts do not have a central core and cause skin thickening differently.
- Seek professional advice if unsure: If the growth changes quickly, bleeds, or is painful, visit a healthcare provider to rule out other conditions.
Following these steps helps confirm a wart diagnosis at home. Recognizing warts and understanding that HPV causes them can guide you on when to treat yourself or consult a doctor.
Are Finger Warts Contagious and How Do They Spread?
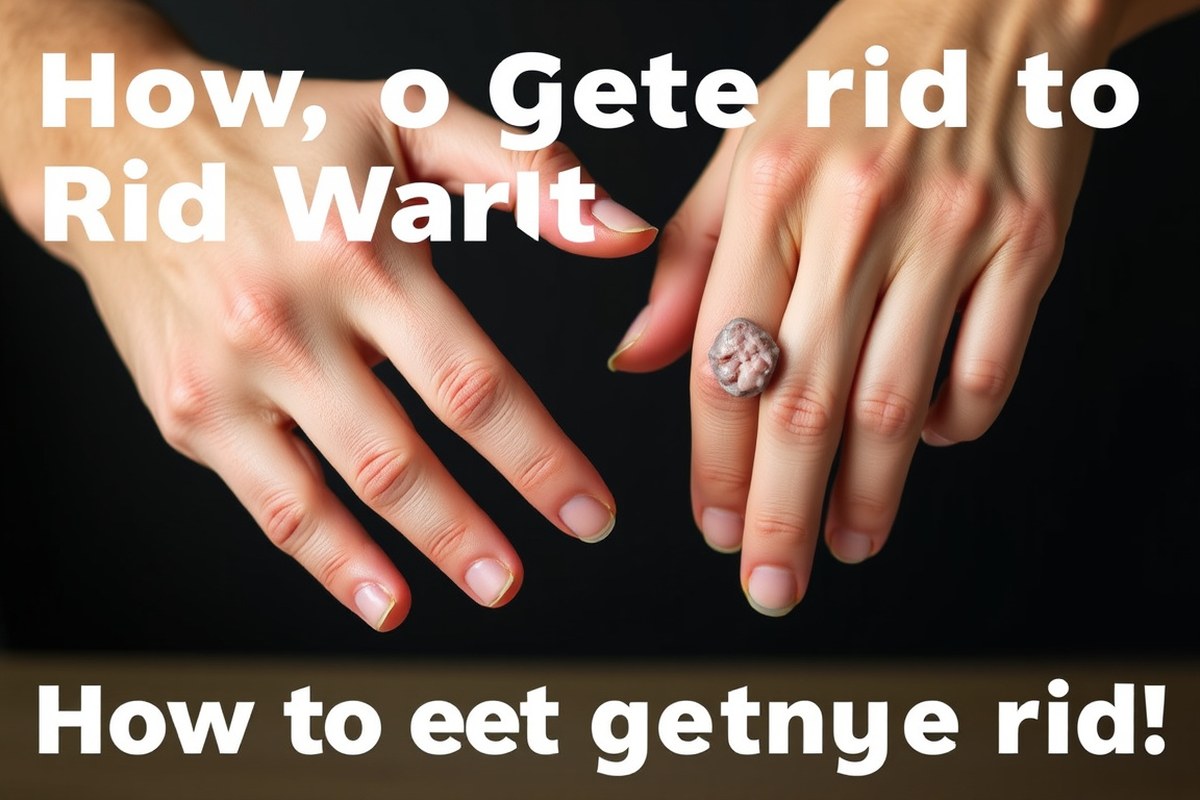
Finger warts are infectious because they result from certain types of human papillomavirus (HPV). You can catch or spread the virus by touching a wart on your finger or handling items that have been exposed to a wart, like towels, bathmats, or gym gear. According to the Centers for Disease Control and Prevention (CDC), close skin contact is a frequent method for the virus to move between people or different areas of your skin.
The strains of HPV responsible for common warts on fingers differ from the strains that cause genital warts or cervical cancer. There are more than 240 HPV strains, but the ones that typically cause warts on your fingers and hands are distinct from the types linked to sexually transmitted infections. While finger warts are generally harmless, they can easily spread to other fingers or family members if the virus transfers through breaks in the skin or frequent contact.
To minimize the chance of spreading finger warts, avoid scratching, picking, or biting the wart. Such actions can cause small skin injuries where the virus can enter and infect new areas. Cover the wart with a bandage or duct tape to reduce direct contact and limit the virus’s spread. Wash your hands thoroughly after touching the wart or changing the covering. Avoid sharing personal items like towels or nail clippers that might contact the wart.
Do not pick or scratch at your wart, as this can transfer the virus to nearby skin and other people.
One important step in controlling transmission is consistent cleaning of items you frequently touch. Disinfect surfaces like gym equipment or bathroom fixtures regularly. When treating a wart, use separate tools such as nail files or pumice stones only for the affected finger to reduce cross-contamination. Treatment itself can help remove the wart and lower the risk of spreading, but improper technique, such as using the same tool on healthy skin, could worsen the situation.
Warts around or under your nails require extra care because breaking the skin there increases the chance of spreading. In households where finger warts are present, everyone should take precautions like not sharing personal items and keeping their skin moisturized to prevent small cracks where HPV can enter.
Following this checklist can reduce the spread of finger warts: do not scratch or pick at the wart; cover it with a bandage or duct tape; thoroughly wash your hands after contact; avoid sharing towels or grooming tools; clean frequently touched surfaces; use separate treatment tools for the wart; and monitor any new spots carefully to start treatment early. These steps help contain the infection and protect others around you while the wart heals.
Effective Over-the-Counter Treatments for Finger Warts
Over-the-counter treatments for finger warts usually focus on products containing salicylic acid, available as liquids, gels, or pads. Salicylic acid works by softening the thickened skin layers that make up the wart, allowing you to gradually remove it with consistent use. Using products with about 17% salicylic acid concentration is common for sensitive areas like fingers, while higher concentrations (up to 40%) are typically for foot warts but can be used carefully on fingers. The process requires daily application for several weeks, and success depends on following steps precisely to avoid skin irritation or damage.
Applying salicylic acid safely involves a few key steps: first, soak the finger with the wart in warm water for 5 minutes to soften the skin; next, gently rub the wart with a disposable emery board or nail file to remove dead skin; then, apply the salicylic acid product directly on the wart; if desired, covering the wart with duct tape can increase effectiveness by keeping the medication in contact and protecting the area. Repeat these steps every day. Expect treatment time to last from 4 to 12 weeks, depending on the size and persistence of the wart.
| Step | Action | Details |
|---|---|---|
| 1 | Soak the wart | Soak in warm water for 5 minutes to soften skin |
| 2 | Pare dead skin | Use emery board or nail file gently before applying medicine |
| 3 | Apply salicylic acid | Use a 17% liquid, gel, or patch product; avoid getting it on healthy skin |
| 4 | Cover (optional) | Apply duct tape for better absorption and protection |
| 5 | Repeat daily | Continue steps 1, 4 every day for up to 12 weeks |
| 6 | Discontinue if irritation | Stop if severe redness, pain, or itching occurs |
This routine gradually removes the wart. Patience is important because visible improvement may take a few weeks. Watch for skin irritation; salicylic acid can damage healthy skin if applied excessively or to the wrong areas. This is why it should never be used on the face or broken skin. Over-the-counter salicylic acid kits generally cost between $10 and $20, making them an affordable first option.
Besides salicylic acid, some OTC wart products contain freezing agents that frost the wart surface, mimicking dermatologist cryotherapy. These are less strong than professional treatment with liquid nitrogen, and their cure rates tend to be lower or similar to salicylic acid alone. Combining salicylic acid and cryotherapy in a clinical setting can slightly increase wart clearance, but OTC freezing kits should be used cautiously to avoid skin damage, especially on fingers where the skin is thinner.
Expect the complete treatment timeline to range from 4 to 12 weeks or even longer for stubborn warts. If the wart doesn’t shrink or falls out, or if it worsens, consult a healthcare provider for professional removal options. Staying consistent with the treatment and protecting the area from irritation improves chances of a successful outcome without scarring or infection.
Step-by-Step Guide to the Duct Tape Method for Wart Removal
The duct tape method is a simple, low-cost home treatment that involves covering a wart on your finger with duct tape to encourage its removal over time. This approach may help by suffocating the wart or gradually peeling away infected skin, but results vary and the process often takes several weeks. Success increases when you properly prepare the wart and follow the daily care routine closely.
Preparing the Wart: Soaking and Filing
Before applying duct tape, soften and reduce the wart’s surface. Soaking the finger in warm water for 10 to 15 minutes helps loosen layers. Gently filing the wart with a nail file or pumice stone afterward removes some dead skin, improving tape adhesion and exposure of the wart’s deeper layers.
Repeat this soaking and filing each time you remove the tape to maximize treatment effectiveness. Avoid aggressive filing or cutting, which can cause injury or spread the wart virus.
Applying and Changing Duct Tape Daily
For best results on a finger wart, cut a small piece of duct tape just large enough to fully cover the wart with a slight margin. Press the tape firmly onto the finger to seal the edges completely and prevent moisture or dirt from getting under.
Keep the tape on continuously and replace it every day. Daily changes avoid skin irritation and allow you to check the wart’s progress. Optionally, before applying fresh tape, you can apply an over-the-counter salicylic acid treatment and let it dry completely to boost results.
- Soak your finger in warm water for 10 to 15 minutes to soften the wart.
- Use a nail file or pumice stone to gently file down the wart’s surface, removing dead skin.
- Dry the finger thoroughly before tape application.
- Cut a piece of duct tape slightly bigger than the wart and press it firmly on your finger, sealing the edges well.
- Leave the tape on for 24 hours, then carefully remove it.
- Repeat the soaking and filing steps after tape removal.
- Optionally apply salicylic acid wart treatment and allow it to dry before reapplying fresh duct tape.
- Continue this cycle daily for up to 6 weeks or until the wart disappears.
Troubleshooting Common Errors and When to Stop
Common mistakes include leaving the tape on too long without changing, which can cause skin irritation, or failing to properly seal the tape edges, reducing effectiveness. Not preparing the wart by soaking and filing can also slow progress. Should you experience redness, pain, or signs of infection, stop the treatment and consult a healthcare provider.
Stop using the duct tape method once the wart visibly shrinks significantly, appears gone, or if the wart worsens or changes color. This method may not work for everyone. When no improvement occurs after 6 weeks or the wart grows, seek advice from a dermatologist for alternative treatments.
Professional Wart Removal Options and When to See a Doctor
Professional treatments for warts on your finger include cryotherapy, electrosurgery, curettage, and laser therapy. You should see a doctor when your wart is painful, spreading, persistent after home treatments, or appears near or under the nail. Medical care offers targeted removal options with varying pain levels and risks of scarring depending on the method and wart location.
Cryotherapy (Liquid Nitrogen) Explained
Cryotherapy is the most common professional treatment for finger warts. A healthcare provider applies liquid nitrogen to freeze the wart and surrounding skin until it forms a 2-mm white halo. This freezing occurs at about −321°F (−196°C), which is much colder than over-the-counter freezing products that reach only −94°F (−70°C). The extreme cold destroys wart tissue by causing cell damage and stimulating an immune response.
One treatment session usually takes only a few minutes. Multiple treatments spaced a few weeks apart may be necessary, especially for larger or stubborn warts. You might experience stinging or burning during the procedure, followed by blistering and peeling for up to two weeks. Cryotherapy is generally safe but can cause temporary skin pigment changes or, rarely, scarring if the freezing is too deep or frequent.
Compared with home freezing kits, cryotherapy by a professional is more effective due to the lower temperatures achieved and the precision of application. Should pain or blistering become severe, contact your provider.
Electrosurgery, Curettage, and Laser Therapy Overview
Other professional treatments include electrosurgery, which uses electric current to burn the wart, often combined with curettage, where the doctor scrapes the wart off after numbing the area. These methods provide immediate wart removal but may cause more discomfort during recovery and carry a higher risk of scarring or infection. Recovery typically involves keeping the area clean and protected over one to two weeks.
Laser therapy targets blood vessels feeding the wart using intense light energy, effectively destroying the wart tissue. Laser treatments are less common due to cost and availability but may be recommended for warts that do not respond to cryotherapy or for those in difficult locations like near the nail. These approaches require local anesthesia to reduce pain during treatment. Electrosurgery and laser options are usually reserved for persistent or resistant warts, especially when faster removal is desired or when other treatments have failed.
When Professional Care Is Necessary for Periungual Warts
Warts near or under your fingernail, known as periungual warts, often need medical attention because of their delicate location and tendency to cause nail damage or infection. Painful, spreading, bleeding warts or those affecting your nail’s growth warrant a dermatologist’s evaluation for specialized care. At-home treatments can be ineffective and risk worsening the condition when used around the nail.
Persistent, multiple, or clustered warts also benefit from professional evaluation to avoid spread and find the best removal method. Your doctor may combine treatments like cryotherapy with topical prescription medications to improve outcomes in these more complicated cases. Routine check-ups are advisable if you notice your wart returning after removal, changing in appearance, or causing increasing discomfort.
Tip: Follow your provider’s instructions carefully after professional wart removal to reduce infection risk and minimize scarring, especially for treatments involving skin scraping or laser.
Special Considerations for Warts Near or Under the Nail
Treating a wart near or under your fingernail requires extra care to avoid damaging the nail or surrounding skin. Professional treatment is often safer and more effective for these periungual warts, especially when the wart is painful, growing, or affecting your nail. You can try gentle, targeted at-home care in some cases, but avoid harsh treatments that risk permanent nail damage.
Risks of Treating Periungual Warts at Home
Warts that develop around or beneath the nail bed can grow deep under the nail, making them difficult to treat without harming the nail. Aggressive use of over-the-counter acids or freezing products near the nail can cause onychodystrophy, which means permanent changes or damage to the nail’s shape and texture. Pain, blistering, and discoloration to the skin and nail bed are also common side effects with home removal methods if not applied carefully.
Trying to scrape or cut these warts at home increases the chance of infection and further spreading the virus to nearby skin or nails. Periungual warts can also lead to fungal infections when left untreated or if the nail is damaged during treatment. The risk of these complications is higher without proper guidance, making professional evaluation important when warts are close to the nail.
Safe At-Home Care Steps for Nail-Adjacent Warts
When you notice a small wart near your nail and want to start treatment at home, choose products designed specifically for sensitive skin or nail areas. Apply a wart treatment only on the wart itself and avoid contact with the nail or cuticles. Use the product sparingly and follow instructions carefully, generally applying once a day. Soaking your finger in warm water for five to ten minutes before treatment can soften the skin and improve effectiveness.
Keep the area clean and dry between treatments, and do not attempt to peel, cut, or force off the wart. Protect the nail and skin around the wart by applying a barrier, such as petroleum jelly, to avoid accidental damage when applying wart medication. Should you experience significant pain, swelling, or nail color changes, stop treatment immediately and seek professional care.
When to Consult a Dermatologist for Nail-Area Warts
You should contact a dermatologist when the wart grows, causes pain, or affects how your nail looks or feels. Professional care is advised for warts under the nail since they often require specialized removal techniques that minimize damage, such as cryotherapy performed carefully or other in-office procedures. Dermatologists can also diagnose any underlying issues from nail dystrophy or infections and provide treatments that home remedies can’t safely offer.
Waiting too long to get expert help may lead to permanent nail deformities or spreading of the wart virus to other fingers. After trying at-home treatments for four to six weeks without improvement, or if the wart returns after removal, a board-certified dermatologist can evaluate and recommend a tailored treatment plan. Costs for in-office removal usually range from $100 to $300, depending on the procedure and insurance coverage.
Preventing Wart Spread and New Wart Formation During Treatment
Human papillomavirus (HPV) causes warts and can easily pass through direct contact or by touching objects that harbor the virus. To prevent new warts from forming and existing ones from spreading, you need to maintain good hygiene and follow treatment regularly. The virus can spread from one wart to other fingers or family members, especially if your skin has cuts or stays wet.
Start by keeping the wart covered with a clean bandage each day. This reduces the risk of the virus spreading through contact. Always wash your hands thoroughly with soap and water after touching the wart or after changing the bandage to avoid transferring the virus elsewhere. Avoid picking or scratching the wart, as this can create open wounds that make it easier for the HPV to spread both on your skin and to others.
- Cover the wart daily with a waterproof adhesive bandage or tape.
- Wash your hands well after any contact with the wart or its covering.
- Do not share towels, nail clippers, or other personal items with family members.
- Keep your skin dry around the wart to reduce virus transmission.
- Avoid biting nails or cuticles near the wart to prevent breaks in skin.
- Disinfect surfaces like sinks or counters regularly if you have an active wart.
- Keep treating the area for one to two weeks after the wart looks completely gone to reduce the chance of it coming back.
These steps don’t require much time or money but can significantly reduce new wart formation and spread. Bandages range from a few cents to a couple of dollars each, and handwashing simply needs soap and clean water. Surface disinfectants cost under $10 and last a long time. Following these practices consistently will improve results. Stopping the treatment too soon or ignoring hygiene can cause the wart to return or appear on other fingers. Persistent or spreading warts should be evaluated by a dermatologist for advanced care options. Prioritizing prevention minimizes discomfort and reduces the chance of passing the infection to people you live with or others you come in contact with.
How to Monitor Progress and Adjust Treatment If Needed
Recognizing whether your wart treatment is effective involves observing gradual changes over several weeks. A good sign is the wart shrinking in size, becoming less rough, and showing fewer black dots, these are clotted blood vessels typical in common warts. You might also notice the wart peeling or scabbing, which suggests the treatment is targeting the tissue. However, you won’t see results overnight; most wart removals take multiple sessions over a few weeks to months. Rapid disappearance within 24 hours is unlikely with standard home treatments, so be patient and consistent.
Pain or changes in the wart’s appearance during treatment can indicate complications or that the chosen method might not be suitable. When the wart becomes very painful, swollen, or shows unusual colors like purple, stop the treatment and consult a healthcare professional. Such symptoms might be signs of infection or a reaction to immunotherapy injections, which have reported cases of pain and discoloration within 24 hours. Monitoring these signs helps prevent worsening conditions and guides the next steps in care.
Maintaining a checklist can streamline progress monitoring. Track size reduction, texture changes, pain levels, and any spread of warts to nearby skin. After 6 to 8 weeks of consistent treatment, no improvement or worsening of the wart calls for considering a switch to a different method, such as cryotherapy or professional removal. Persistent warts might resist over-the-counter treatments due to the virus’s resistance or an immune system that’s not responding well.
Your immune system’s strength heavily influences wart clearance speed. Treatments like immunotherapy work by stimulating your body’s immune response, so overall health, nutrition, and managing stress might help the process. When your immune system is weakened or slow to react, wart removal can take longer. This is why some people see warts disappear without treatment over years, while others require multiple interventions.
Common mistakes when treating finger warts at home include inconsistent application of treatments, not following product instructions, or picking at the wart excessively. These errors can cause skin irritation, pain, or even spread the virus to other areas. Avoid removing the wart’s protective skin too aggressively or interrupting the treatment cycle prematurely. Leaving the wart exposed approximately 10 to 12 hours after applying treatments like salicylic acid or duct tape can improve effectiveness. Always wash your hands before and after treatment to reduce the risk of spreading.
Keep a written log of treatment dates, observations, and any side effects to help decide when to continue or seek help from a professional.
Step-by-Step Action Plan to Remove Finger Warts
Follow this practical plan to identify, treat, and monitor finger warts safely at home or with professional help.
- Day 1: Identify and Confirm the Wart, Examine the spot on your finger for small, rough growths with tiny black dots. When unsure, consult a healthcare provider to confirm it is a wart and not another skin condition.
- Day 2: Start Preventive Measures, Keep the wart and surrounding area clean and dry. Avoid picking or biting the wart and wash your hands regularly to prevent spreading.
- Days 3 to 10: Begin Over-the-Counter Treatment or Duct Tape Method, Choose a wart remover containing salicylic acid or apply the duct tape method: cover the wart with duct tape for six days, then soak and gently file the area. Look for signs of the wart shrinking or softening.
- Week 2: Monitor Progress and Continue Treatment, Assess changes in wart size and texture. When there is no improvement, repeat the treatment cycle for up to 8 weeks. Stop if you notice irritation or worsening symptoms.
- Week 4: Reassess and Consider Professional Help, If the wart persists, especially if it is under or near the nail, schedule an appointment with a dermatologist. Professional options include cryotherapy or laser removal, which offer higher success rates.
- After Professional Treatment: Follow Care Instructions, Follow your provider’s guidelines for wound care and avoid moisture or trauma to the treated area. Watch for signs of infection or recurrence.
- Ongoing: Prevent Future Warts and Spread, Maintain good hygiene and avoid sharing towels or tools. Keep your skin moisturized and promptly treat any new skin lesions to prevent new warts.
Frequently Asked Questions
What Causes Warts on Fingers?
Warts on fingers are caused by the human papilloma virus (HPV), which infects the top layer of skin. This virus enters through tiny cuts or breaks and triggers rapid skin cell growth that forms the wart.
Do Finger Warts Ever Go Away?
Yes, finger warts can go away on their own as the immune system fights the HPV infection. This process may take several months to years and varies by individual.
What Kills Warts Quickly?
Treatments like cryotherapy and salicylic acid remove warts fastest by killing wart tissue. Cryotherapy, especially, freezes the wart causing it to fall off, often in a few sessions.
Is Hand Wart HPV the Same as STD?
No, hand wart HPV strains differ from those causing sexually transmitted infections. Hand warts come from types like HPV 1-5, which are not linked to genital HPV strains.
Can Finger Warts Leave Scars After Removal?
Some treatments may cause mild scarring, especially if the wart is deep or under the nail. Proper aftercare reduces this risk.
Are Finger Warts Painful to Touch?
Finger warts often do not hurt but can be tender if irritated or located near nerves. Pain varies depending on wart size and location.
Wrapping Up
Getting rid of a wart on your finger is possible with patience and the right approach. You can start today by applying an over-the-counter treatment carefully, following the instructions to avoid skin irritation and help the wart clear up. Keep an eye on the wart’s progress each week, and if it doesn’t improve or worsens, schedule a visit with a healthcare professional for more targeted removal options.



One Comment