

How to Get Rid of Weeds in Grass: Complete Guide for Healthy Lawns
Removing weeds from your lawn without harming your grass is possible using several effective methods. You can pull weeds by hand, apply carefully chosen herbicides, or use natural solutions and proper lawn care habits to prevent weeds from taking hold. Timing and technique matter, especially with pre-emergent and post-emergent herbicides, to control weeds safely and efficiently. Learning how to get rid of weeds in grass means balancing active treatment with prevention and maintenance for a healthy lawn.
This guide is for homeowners and lawn care enthusiasts who want practical ways to eliminate common broadleaf, grassy, and sedge weeds. You’ll get advice on natural and chemical controls, lawn maintenance tips that stop weed growth, strategies for stubborn weeds, and when to consider professional help versus DIY methods for safety and cost-effectiveness.
Key Takeaways
- Remove weeds manually if you want to avoid any risk of damaging your grass with herbicides.
- Water your lawn briefly but frequently to target weeds rather than the turf’s root zone and reduce weed growth.
- Mow grass at about 3 inches high to create dense turf that naturally chokes out many common weeds like crabgrass.
- Apply pre-emergent herbicides on dry days before weeds sprout to prevent seed germination without harming grass.
- Use post-emergent herbicides only on actively growing weeds and follow label instructions for safe, effective application.
- Try natural weed control options like vinegar with salt and dish soap or mulching to suppress weeds without chemicals.
Effective Methods to Remove Weeds Without Damaging Grass
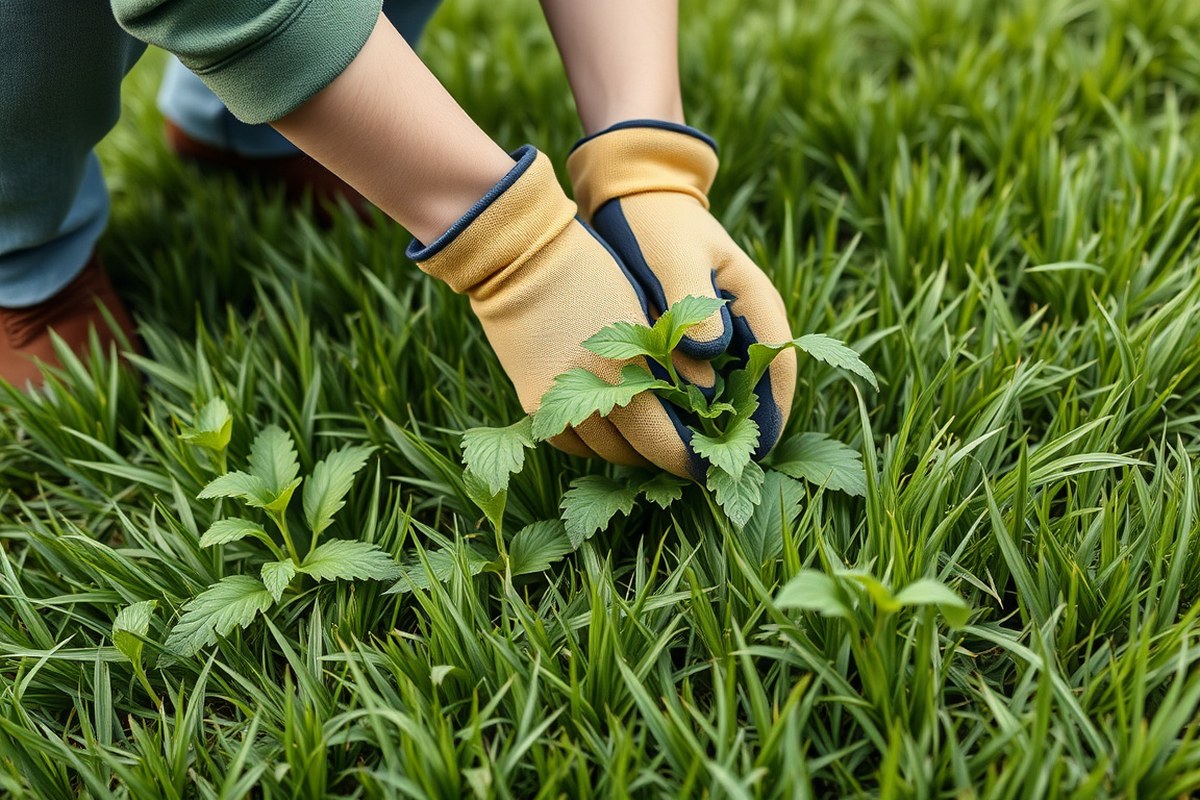
Removing weeds without harming your grass requires careful selection of methods and tools tailored to your lawn’s size and weed type. The safest and most effective approach is manual removal, especially for small lawns or scattered patches. Using a hand trowel or gardening claw helps loosen compacted soil around the weed roots, making extraction easier without disrupting your grass’s root system. Loosen the soil by inserting the tool a few inches deep and gently rocking it back and forth to free the weed before pulling it out by hand. This method ensures the weed is removed entirely, including roots, reducing the chance of regrowth. A specialized weed puller can help make this task less strenuous by gripping the root firmly and allowing you to pull with less effort.
Manual removal is practical and chemical-free, but it requires persistence. Regularly inspect your lawn and remove new weeds promptly to prevent them from seeding. This method is especially suited to homeowners who prefer to avoid herbicides due to concerns about pets, children, or environmental impact. Expect to spend about 10 to 20 minutes a week maintaining a small lawn this way. Larger areas might require more time and could be tiring, but breaking the task into manageable sections helps.
For more extensive weed invasions, selective herbicides formulated for your grass type provide a targeted option that kills weeds without affecting the lawn. It’s important to identify your grass species first and then select a herbicide labeled safe for that species while effective against your specific weeds. Apply the product during optimal weather, ideally on calm, dry days with temperatures between 60 and 85 degrees Fahrenheit, to ensure absorption and minimize drift onto grass blades. Avoid use if pets or children will play on the lawn immediately afterward, and follow the label instructions strictly to prevent grass injury.
Another non-chemical option is using heat methods like weed torches, which kill weeds by applying direct flame. This technique demands caution because flames can damage the nearby grass if not applied precisely. Operate the torch by quickly passing the flame over the weed’s foliage without prolonged exposure to the same spot. This method is more practical for isolated weed spots rather than large infestations and requires protective equipment and adherence to local burn regulations. Heating weeds can be effective but works best alongside good lawn care practices, such as aeration, to strengthen grass competition against weeds naturally.
Healthy soil and thick grass reduce weed problems markedly. Aerating your lawn breaks up compacted soil where weeds thrive, improves root growth, and strengthens grass’s ability to crowd out weeds. Core aerators, which remove small plugs of soil, are widely available for rental and can be used annually in spring or fall. After aeration, overseed any bare patches to promote dense coverage. A dense, well-maintained lawn becomes your first line of defense against weeds, reducing the need for herbicides or repeated manual removal.
Identifying Common Lawn Weeds: Broadleaf, Grassy, and Sedge Types
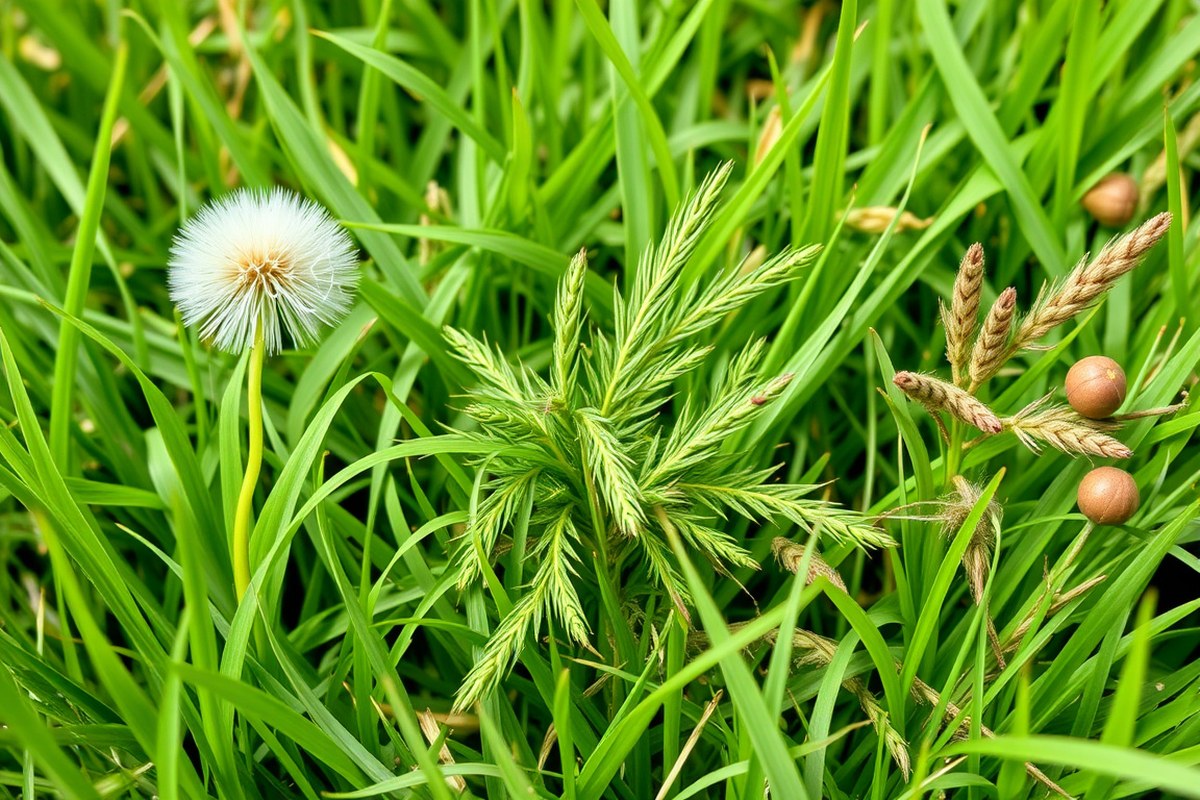
Identifying the type of weeds growing in your lawn is key to choosing the right removal method that won’t harm your grass. Broadleaf, grassy, and sedge weeds each have distinct traits that make them easier to detect once you know what to look for. A clear identification checklist helps you target each weed effectively and avoid costly mistakes.
Broadleaf Weeds Characteristics
Broadleaf weeds have wide, flat leaves with noticeable veins branching from a central stem. They often have flowers, which can be white, yellow, purple, or pink, and grow low to the ground or spike up. Common examples include dandelions, clover, and chickweed. Their spreading growth pattern often crowds out healthy grass by competing for nutrients and sunlight. You can spot broadleaf weeds easily by looking for these features:
- Leaves wider than grass blades, usually with a lobed or oval shape
- Distinct flower heads in varied colors
- Leaves arranged opposite each other on the stem
- Visible veins forming a network on leaves
- Often have a taproot that penetrates deeply into the soil
These weeds respond best to selective broadleaf herbicides, which kill them without damaging grass. Hand-pulling is effective for small infestations but requires removing the entire root to prevent regrowth.
Grassy Weeds Features
Grassy weeds resemble grass but differ in growth habits and texture. They usually have narrower leaves than broadleaf weeds and grow in clumps or spreading runners. Crabgrass and foxtail are typical grassy weeds known to invade lawns, especially in thin or patchy areas. Use this checklist to identify grassy weeds:
- Leaves that are thin and blade-like similar to lawn grass
- Growth in clusters or spreading horizontally via stolons
- Lighter or duller green compared to healthy lawn grass
- Coarser texture and often rough edges on the leaves
- Seed heads appear as spikes or fluffy clusters in summer
Grassy weeds can be tougher to spot but thriving thick grass limits their establishment. Applying selective herbicides designed for grassy weeds or physically removing patches before they spread helps protect your lawn.
Recognizing Sedge Weeds
Sedges look like grasses but belong to a different plant family, making them harder to eliminate using standard grass weed killers. They have triangular stems, a key identifying trait, and leaves arranged in threes rather than two. Nutsedge is a common sedge that grows rapidly in moist areas like poorly drained spots. Check these signs for sedge identification:
- Triangular, solid stems easily felt by rolling them between fingers
- Leaves growing in groups of three from the base
- Often grows in clumps with a lighter green color than typical grass
- Produces small seed heads that resemble tiny spikes
- Prefers wet or soggy spots in the lawn
Non-selective herbicides usually damage grass as well, so target sedge weeds with specific sedge herbicides and monitor treated areas carefully for regrowth.
Knowing how to recognize sedge weeds is important since treatments differ from grassy and broadleaf types. Removing the right weed with appropriate care saves time and helps your lawn recover faster.
Using Pre-Emergent Herbicides: Timing and Application for Prevention
Apply pre-emergent herbicides before weed seeds begin to sprout, usually in early spring when soil temperatures reach 50 to 55 degrees Fahrenheit. The right timing and thorough application create a barrier that stops weed seeds from germinating, helping keep your lawn weed-free all season.
Best Seasonal Timing for Application
Pre-emergent herbicides must be applied before the weed seeds sprout to be effective. This timing often aligns with early spring, as soil temperatures at the surface reach about 50 to 55 degrees Fahrenheit, which is when seeds like crabgrass start germination. Applying too early or too late reduces effectiveness.
Some regions may require a second application in late summer or early fall to prevent fall-germinating weeds, depending on the local climate and weed types common in your area. Monitor your soil temperature and local extension service recommendations to fine-tune the timing.
Choosing the Right Pre-Emergent Product
Many pre-emergent herbicides differ by active ingredients, target weed species, and safety for specific grasses. Corn gluten meal is a natural option that prevents weed seeds from taking root but may be less predictable than chemical herbicides. Synthetic products offer stronger, broader control but check that they are safe for your grass type and labeled for lawn use.
Pre-emergent herbicides also prevent grass seed from germinating. Avoid using these products where you plan to overseed or lay new sod until the herbicide has broken down, usually several months later. Choose products labeled for your turf species to prevent lawn damage.
Correct Application Techniques and Safety
Applying a pre-emergent herbicide requires evenly covering the lawn before weed seeds germinate. Uneven application leaves gaps where weeds can sprout, reducing effectiveness. Use a spreader for granular products or a sprayer for liquid formulas, following label instructions exactly for mix rates and water requirements.
Keep pets and children off the treated lawn until it dries completely to avoid accidental contact, even though many pre-emergent products are low in toxicity. Wear gloves and protective eyewear when handling chemicals. Here is a simple step-by-step process for applying a pre-emergent herbicide:
- Check the soil temperature with a soil thermometer to confirm it is between 50 and 55 degrees Fahrenheit.
- Remove debris like leaves and sticks to ensure even coverage and prevent herbicide from being blocked.
- Choose a product suited for your grass and target weeds, reading the label carefully.
- Calibrate your spreader or sprayer according to the product instructions for even distribution.
- Apply the herbicide uniformly over the entire lawn, avoiding missed spots.
- Water the lawn lightly if the product labeling requires activation by irrigation.
- Keep pets and children off the lawn until it is dry and safe as directed.
Post-Emergent Herbicides: Choosing and Applying for Active Weed Control
You should choose a post-emergent herbicide that specifically targets the type of weeds in your lawn without harming your grass. Products containing 2,4-D amine are effective against common broadleaf weeds and can be safely used on warm- and cool-season grasses. Apply these herbicides when weeds are actively growing and temperatures are moderate, usually between 50°F and 85°F. This ensures the herbicide is absorbed effectively and reduces stress on your lawn.
Before application, read the label carefully to understand the mixing ratios, conditions, and safety precautions. Apply the herbicide using a sprayer or spreader for even coverage. It’s best to avoid application during very hot or windy days to prevent damage to grass and nearby plants. After spraying, keep foot traffic to a minimum for at least 24 hours to allow the herbicide to work.
Results typically appear within 7 to 14 days after application, with weeds showing yellowing and dying off. Reapplication may be necessary if weeds persist, usually after 2 to 4 weeks, but follow the label recommendations for timing to avoid overuse. Post-emergent herbicides won’t affect dormant weeds or prevent new ones from sprouting, so ongoing lawn maintenance is important. The table below compares common post-emergent herbicides for lawn weeds, focusing on target weeds, application timing, and safety considerations:
| Herbicide | Weed Type Targeted | Best Application Temperature | Reapplication Interval | Safe for Most Grasses? | Notes |
|---|---|---|---|---|---|
| 2,4-D Amine | Broadleaf weeds (dandelions, clover) | 50°F to 85°F | 2-4 weeks | Yes | Avoid on newly seeded lawns |
| Dicamba | Broadleaf weeds | 55°F to 80°F | 3-4 weeks | Yes | Can harm sensitive plants if drift occurs |
| Quinclorac | Crabgrass and broadleaf weeds | 60°F to 85°F | 2-3 weeks | Yes | Effective on grassy and broadleaf weeds |
| Natural Herbicides (Vinegar-based) | Young, actively growing weeds | Above 60°F | As needed | No, can harm grass | Use carefully to avoid grass damage |
Using these herbicides at the proper time and temperature maximizes their effectiveness. Apply them on calm days with temperatures within the recommended range to avoid volatility and reduce drift risk, which could damage desirable plants.
Monitoring your lawn after treatment helps you decide if a second application is necessary. During the waiting period, maintain good lawn health through watering and mowing, as stressed grass is more susceptible to damage and weed invasion. Cost varies by product but expect to pay between $15 and $40 per quart, depending on brand and concentration, with most homeowners requiring less than a quart per lawn.
Natural Weed Control: Homemade Solutions and Mulching Strategies
Natural weed control methods like vinegar sprays, boiling water, and mulching offer you effective options to manage weeds without harming your grass. These approaches work by targeting weeds directly or reducing their ability to grow, all while minimizing chemical exposure. Each method requires careful application to protect your lawn and surrounding plants.
Preparing and Using Vinegar-Based Sprays
Vinegar can be an effective natural weed killer when used correctly. Household white vinegar with 5% acetic acid works well on young or small weeds. For tougher growth, a stronger homemade mixture combining vinegar, salt, and dish soap offers increased strength but must be used cautiously to avoid damaging your grass.
To prepare a potent vinegar-based spray, mix one gallon of white vinegar with one cup of salt and one tablespoon of dish soap. The dish soap helps the solution adhere to the weed leaves, improving effectiveness. Apply the spray directly onto the weeds during dry weather and avoid spraying on windy days to prevent drift onto your lawn or desired plants.
- Mix one gallon of white vinegar, one cup of salt, and one tablespoon of liquid dish soap in a large bucket.
- Stir the mixture thoroughly until the salt dissolves.
- Pour the solution into a spray bottle for targeted application.
- Choose a dry, calm day with no rain expected for the next 24 hours.
- Spray the mixture directly onto the leaves of weeds, avoiding contact with your lawn grass as much as possible.
- Wait 24 to 48 hours and reapply if needed on persistent weeds.
- Water your lawn normally after two days to avoid salt buildup harming the grass roots.
Be especially careful when spraying vinegar solutions near your grass; the salt can harm desirable plants if overused or applied to wet foliage.
Safe Application of Boiling Water and Flame Weeding
Boiling water offers a simple, chemical-free way to kill weeds by cooking their tissues. It works best on small, isolated weeds in cracks, walkways, or law edges where grass is not present to avoid damage. The heat quickly wilts weed foliage, usually within minutes, but repeated applications may be necessary.
Flame weeding uses a controlled propane torch to briefly expose weeds to intense heat, rupturing their cell walls. This method requires careful handling to protect your lawn grass and prevent fire risks. Limit flame weeding to young weeds or bare spots without grass, and keep a water source nearby for safety.
- Boil a kettle or pot of water on the stove.
- Carefully pour the boiling water directly onto the weed leaves and stems.
- Avoid pouring boiling water on or near lawn grass to prevent damage.
- Repeat applications after two to three days if weeds reappear.
- For flame weeding, wear protective gloves and eye protection.
- Hold the flame torch 2 to 3 inches away from weed foliage and move quickly over the weeds until leaves wilt.
- Keep a hose or bucket of water nearby in case of accidental fire.
Never pour boiling water or use flame weeding on a hot, dry day to reduce the risk of igniting nearby vegetation or damaging your lawn.
Using Mulch to Suppress Weed Growth
Mulching effectively prevents weeds by blocking sunlight needed for seed germination. Applying a 1-2 inch layer of organic mulch like shredded bark, wood chips, or straw around garden beds, trees, and lawn edges limits weed establishment. Mulch also helps retain soil moisture and improves soil health over time.
Keep in mind that mulching is not suitable for active turfgrass areas since it can suffocate grass if applied there. Instead, use mulch strategically in planting beds and bare spots where grass does not grow well. Combine mulch with manual weeding or spot treatments to maintain a neat lawn and garden.
- Clear the area of existing weeds and debris, hand-pulling if necessary.
- Avoid disturbing the soil to prevent bringing new weed seeds to the surface.
- Spread 1 to 2 inches of organic mulch uniformly over the weed-prone areas.
- Replenish mulch annually or as needed to maintain coverage.
- Plant cover crops or ground covers in off-season to further compete with weeds.
- Inspect mulch regularly for weed growth and remove any visible sprouts promptly.
Do not pile mulch too thickly; excess mulch can prevent water and air from reaching plant roots and encourage pests such as slugs.
Lawn Maintenance Habits That Prevent Weeds: Mowing, Watering, and Soil Health
Mowing height and frequency have a direct impact on weed prevention by promoting stronger grass and reducing the open spaces where weeds can take root. Keep your mower blade set to a higher cut, around 3 to 4 inches, especially during warm months, to avoid stressing the grass. Cutting too short weakens grass by exposing crowns and roots, resulting in bare patches that invite weeds. Mow frequently enough to never remove more than one-third of the leaf blade at a time, usually once a week in active growing seasons.
Watering strategy also influences lawn health and weed control. Water deeply but infrequently, delivering about 1 inch of water once or twice a week. This encourages deep root growth in grass while discouraging shallow-rooted weeds. Overwatering or frequent shallow watering creates conditions favorable for weeds and lawn diseases. Adjust watering based on soil type, weather, and grass species, consistently aiming for moist but not saturated soil.
Soil aeration and feeding support long-term weed prevention by improving the soil environment for grass roots. Aerate once a year, ideally in early fall or spring, using a core aerator to remove small plugs of soil. This reduces compaction, improve oxygen availability, and improves water infiltration. Following aeration, apply fertilizer with a balanced nitrogen-phosphorus-potassium ratio suited to your grass type. Avoid overfeeding, as excess nutrients can also feed weeds.
- Set mower blade height to 3-4 inches during summer
- Mow weekly, removing no more than one-third of grass height
- Water deeply (~1 inch) 1-2 times per week rather than daily light watering
- Aerate lawn annually with a core aerator in early fall or spring
- Apply fertilizer according to your grass species’ needs without overfeeding
- Overseed thin or bare spots after aeration to build density
- Avoid mulching clippings when weeds are seeding to prevent spreading
Using these techniques helps establish a thick, competitive lawn that limits space and resources available for weeds. A healthy grass root system from proper mowing, watering, and soil care competes effectively with weed seeds, slowing their growth and spread. Problems arise if mowing is too low, watering is excessive or shallow, or soil becomes compacted and nutrient imbalanced, creating favorable conditions for weeds instead of grass growth. These habits require some effort and investment, but over time can reduce the need for herbicides and manual weed removal, producing a more resilient lawn.
Dealing with Stubborn and Recurring Weeds: Protocols and Troubleshooting
Persistent perennial weeds often require repeated attention and specific treatment strategies to control without damaging your lawn. Stubborn weeds can regrow after initial treatment because their roots or seeds remain viable. Avoid common mistakes like mowing too soon after herbicide application or using the wrong product for your grass type and weed species. Proper timing and method help ensure your weed control efforts succeed.
Indicators your approach is working include yellowing and wilting of weed leaves within days, slowed growth, or no new weeds appearing. On the other hand, rapid recovery, green healthy leaves on treated weeds, or spreading patches suggest the method is failing, likely due to resistance, insufficient application, or environmental stressors. Monitoring closely after treatment is key. Use this checklist of steps to manage stubborn and recurring weeds effectively:
- Identify the weed and grass types. Knowing exactly what weed you’re dealing with and your lawn species helps select the right herbicide and treatment schedule.
- Do not mow your lawn within three to five days prior to or following the use of herbicides. Mowing too early may lower the herbicide’s effectiveness and cause untreated weed residues to spread. This pause helps ensure the herbicide is fully absorbed and effective against the weeds.
- Apply the recommended herbicide at the correct time and rate. Check the label carefully for application instructions. For example, post-emergent herbicides often need calm weather and temperatures between 60°F and 85°F to work best. Using too little or too much herbicide can cause poor results or lawn damage.
- Water sparingly for 24 to 48 hours after treatment. Avoid watering as it can wash away chemicals, reducing effectiveness. Check product labels as some herbicides have specific watering instructions.
- Repeat treatment if necessary after the product’s waiting period. Some stubborn weeds require multiple applications, spaced two to four weeks apart, to fully kill roots and prevent regrowth.
- Consider manual removal for small patches. Hand-pulling weeds can complement chemical control, especially for broadleaf weeds or when treating sensitive lawn areas.
- Use biocontrol agents for targeted, natural weed control. Certain insects can control specific perennial weeds without herbicides but require patience and correct species matching.
- Maintain strong lawn health to prevent future weed problems. Aerate soil before fertilizing and consider combined fertilizer/weed killer products to give your grass an advantage over weeds.
When to Hire Professionals vs DIY Weed Control: Costs, Safety, and Effectiveness
Deciding between handling weed control yourself or hiring a professional often comes down to the extent of the problem and how much you are willing to invest in time and money. Doing it yourself is typically much cheaper and gives you full control over the products and methods used. Professional services, while pricier, may save you effort and yield better results, especially when the weed infestation is severe.
Professional weed control costs usually range from $65 to $165 for every 1/4 acre treated. This variation depends on the size of your lawn, the severity of weed growth, and the specific treatments used. DIY weed control mainly costs you upfront for buying herbicides or natural remedies, ranging from $10 to $50, depending on the products chosen.
| Type of Weed Control | Average Cost | Effectiveness | Safety Considerations |
|---|---|---|---|
| DIY Weed Control | $10 – $50 | Good for light to moderate infestations, requires time and proper application | Risk depends on product use; needs careful handling to avoid harm to kids and pets |
| Professional Services | $65 – $165 per 1/4 acre | High effectiveness for heavy infestations and recurring weeds | Trained applicators reduce improper use; some chemical treatments may still require safety precautions |
Proper chemical usage poses environmental and safety risks, especially around children and pets. Professionals are usually better trained to apply herbicides safely and in amounts that limit exposure. If you decide on DIY options, read labels thoroughly and follow all safety instructions, such as keeping children and pets off the treated lawn for the recommended time, usually 24 to 48 hours.
Choose professional services if your lawn’s condition feels overwhelming or persistent weed growth resists home treatments. These experts bring the right equipment and expertise to tackle widespread, tough weeds more efficiently. For smaller yards or minor weed problems, a DIY approach can work well if you are consistent and careful.
Always follow product labels exactly and keep children and pets off treated lawns until it’s safe to return, typically after 24 to 48 hours.
Step-by-Step Action Plan to Remove and Prevent Weeds in Your Lawn
Follow this plan to eliminate weeds safely, protect your grass, and keep your lawn healthy year-round.
- Before You Start: Identify the types of weeds in your lawn, broadleaf, grassy, or sedge, using visual guides or apps. Accurate identification helps you choose the right treatment.
- Week 1: Apply a pre-emergent herbicide in early spring or fall to prevent weed seeds from sprouting. Track success by fewer new weed seedlings appearing after a few weeks.
- Week 3: Treat active weeds with a selective post-emergent herbicide suited to your weed type. Spray on calm, dry days and check after 7, 14 days for browning or wilting of targeted weeds.
- Week 4: Use natural weed control methods like homemade vinegar sprays or mulching around lawn edges to suppress weed growth. Success shows as fewer weeds in mulched areas and slow regrowth after sprays.
- Ongoing Lawn Care: Mow regularly at the recommended height for your grass type, water deeply but infrequently, and aerate or fertilize your soil to strengthen grass competition against weeds. Healthy grass crowds out weeds effectively.
- Monthly Check: Inspect your lawn for recurring or stubborn weeds. Hand-pull small or isolated patches promptly and treat larger infestations with spot applications of herbicides. Track progress by decreasing weed patches over time.
- If Problems Persist: Consult a lawn care professional for assessment, especially if weeds resist treatment or cover large areas. Professionals can recommend stronger, safe options and save your lawn from damage.
Frequently Asked Questions
What Is the Safest Manual Method to Remove Weeds from Grass?
The safest manual method is pulling weeds out by hand. This prevents damage to grass and avoids chemicals that can harm pets or children.
Can I Use Vinegar on My Lawn to Kill Weeds Without Hurting the Grass?
Vinegar can kill weeds but may also damage grass, so use it carefully on spot treatments only.
How Often Should I Water My Lawn to Discourage Weed Growth?
Water your lawn a few times a week for about 10 minutes. This targets grass roots more than weeds.
Are There Affordable Tools That Help Remove Lawn Weeds Effectively?
Yes, weed-pulling tools under $20 can remove dandelions and other weeds efficiently without chemicals.
Is It Possible to Get Rid of Weeds Without Using Chemical Herbicides?
Yes, manual removal and natural methods like mulching help control weeds without risking grass damage.
Why Might Using Non-Selective Herbicides on Lawns Be Risky?
Non-selective herbicides kill all plants, including grass, so they should be a last resort.
The Bottom Line
Getting rid of weeds in your grass takes a mix of identifying the problem and carefully choosing the right treatment so your lawn stays healthy. Start today by inspecting your lawn closely to identify the most common weeds growing there. That sets you up to pick the best control method and maintain a greener, weed-free lawn.






One Comment