
What Does a Pest Inspection Look for? A Complete Guide for Confident Homeowners
A pest inspection looks for signs of insect, rodent, and other pest infestations that could damage your property or affect health. Inspectors check key areas like wood structures for termites, crawl spaces for moisture issues, and kitchens or basements for rodent activity. They identify visible damage, droppings, nests, and use specialized tools or moisture meters to find hidden infestations.
This information helps you understand what to expect and how inspectors work. You’ll learn which pests are common targets, typical inspection costs and durations, how to interpret reports, and what steps to take if pests or damage are found. This knowledge supports informed decisions whether you’re buying, selling, or maintaining a home, improving your ability to protect your investment.
Key Takeaways
- Pest inspections focus on wood damage, moisture areas, entry points, and signs like droppings or nests to assess infestation risks.
- Inspectors commonly check for termites, rodents, ants, cockroaches, and other pests prevalent in the home’s region and season.
- Tools like moisture meters, flashlights, and sometimes infrared cameras help detect hidden or dormant pests behind walls or under floors.
- Typical inspections last 1, 2 hours, with costs ranging from $75 to $200 depending on property size and location.
- Reports detail pest presence, damage extent, and treatment recommendations, and buyers should review these carefully before proceeding.
- If pests or damage are found, immediate pest control and possible structural repairs are advised to prevent further harm.
What Does a Pest Inspection Entail: Key Areas and Signs Checked

A pest inspection involves a thorough examination of a home and its surrounding property to identify the presence or risk of pest infestations. Inspectors focus on areas where pests commonly hide, breed, or damage structures, looking for visible signs and conditions conducive to pests. The goal is to detect current issues and potential vulnerabilities that could lead to infestations.
Inspection Zones Inside a Home
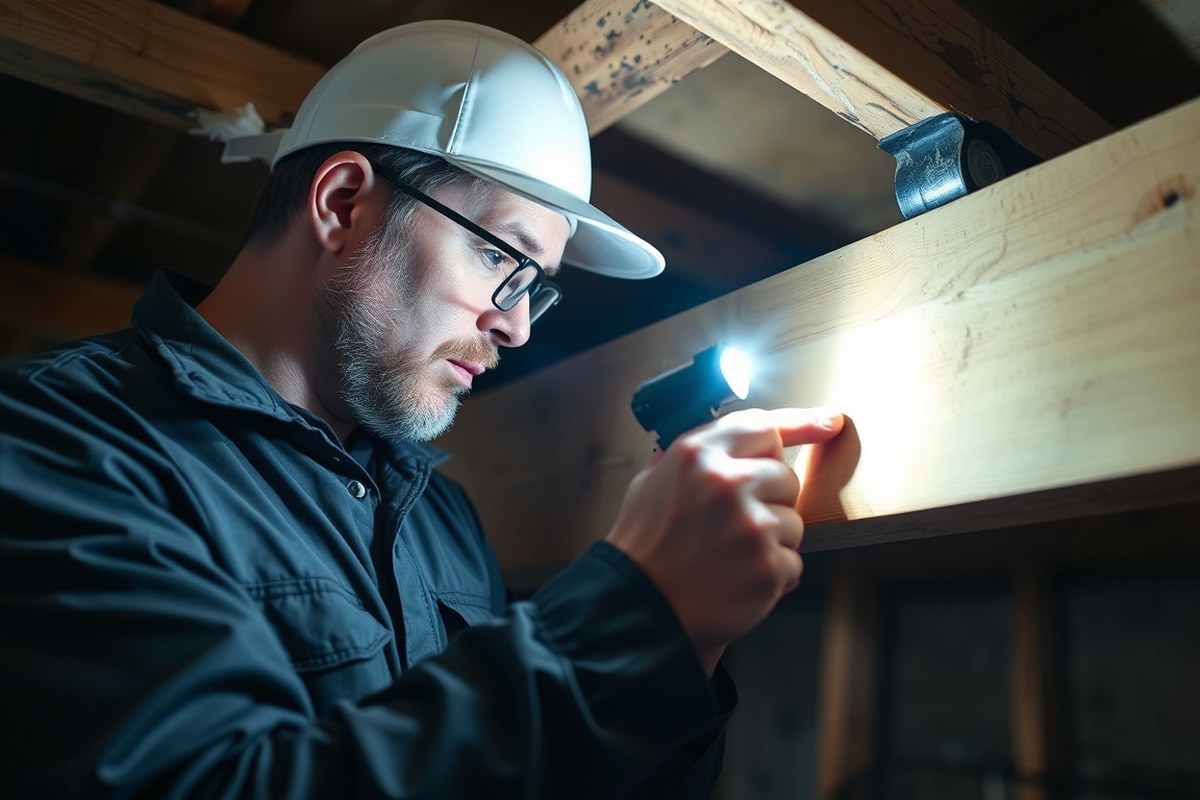
Inspectors start indoors by examining entry points, living spaces, and areas with water access such as kitchens, bathrooms, and laundry rooms. They check baseboards, cabinets, and behind appliances for insect droppings, shed skins, or live insects. Crawl spaces and attics receive close attention since dark, undisturbed places are favored by termites, rodents, and other pests. Inspectors look for damaged wood, especially near floor framing and wall studs, as this can indicate termite activity.
Electrical outlets, plumbing penetrations, and wall voids also get inspected since these offer routes for pests to travel unseen. Inspectors often use tools like flashlights and moisture meters to spot hidden dampness that attracts termites and carpenter ants. Checking stored items and cluttered corners helps find cockroach harborage or rodent nests. Doors and window frames are examined for cracks or gaps that could allow insect or rodent access.
Exterior and Property Areas Checked
The outside of the home and surrounding property provide multiple inspection zones. Inspectors check the foundation for cracks and look for wood that contacts soil, a common spot for termites. Soil grading is inspected to ensure water drains away from the house, preventing moisture buildup that invites pests. Inspectors examine decks, porches, fences, and sheds for wood damage or evidence of carpenter bees, termites, or rodents.
Landscaping plays a role as well. Mulch piled against the foundation, dense vegetation close to walls, and wood piles are common hiding places for pests. Inspectors evaluate gutter function to avoid standing water, a breeding ground for mosquitoes. Outdoor faucets, irrigation systems, and septic areas are checked for leaks or dampness. Perimeter walls and windows screens are examined for holes or tears that could provide pest entry.
Common Physical Signs of Infestation
Pest inspectors look for various telltale signs to confirm infestations. For termites, mud tubes on foundation walls or damaged, hollow-sounding wood are key indicators. Wood debris or sawdust near wooden structures often points to wood-boring insects. Rodent activity shows up as droppings, gnaw marks, grease stains along walls, or shredded nesting material.
Insect infestations may reveal themselves through visible live insects, insect casings, or droppings resembling tiny black specks. Dead bugs near windows or light fixtures can hint at a larger population inside walls or attics. Some pests leave odor clues; for example, a musky smell might indicate rodents or bats. Inspectors also watch for moisture stains or mold, secondary indicators that attract insects such as silverfish and cockroaches.
They often note structural conditions that increase risk, like wood in contact with soil, poorly sealed entry points, and plumbing leaks. Documentation of these signs helps homeowners or buyers understand the extent and urgency of any pest problems and decide on treatment or repairs.
Common Pests Targeted During a Home Pest Inspection

Pest inspections focus on a specific group of insects and rodents that commonly cause structural damage or create health concerns in homes. The main pests that inspectors look for include termites, rodents, ants, carpenter bees, and wood borers because these species can lead to costly repairs and affect a property’s safety. Each pest shows different signs and causes distinct types of damage, which inspectors know how to identify.
Termites are a primary target because they consume wood from the inside, often leaving beams and framing weakened but visually intact. Inspectors check for mud tubes on foundations and walls, cracked or hollow-sounding wood, and discarded wings near windows or doors. Termite damage can compromise a home’s structural integrity, requiring expensive treatment and repair.
Rodents such as rats and mice are searched for due to their ability to chew through wiring, insulation, and even pipes. This creates fire hazards and potential water leaks. Common signs include droppings, urine stains, gnaw marks on wood or plastic, nesting materials, and noise behind walls. Rodents also carry diseases that affect household health.
- Termites: mud tubes, hollow wood, discarded wings, wood damage
- Rodents: droppings, gnaw marks, nests, shredded insulation, noise
- Ants (Carpenter ants): rustling noises inside walls, sawdust piles, damaged wood
- Carpenter bees: perfectly round holes on wooden trim, powdery deposits below holes
- Wood borers: tiny exit holes, fine sawdust, weakened wood and beams
Carpenter ants do not eat wood but hollow it out to build nests, which can weaken structural parts over time. Inspectors listen for faint rustling in walls and look for small sawdust piles near wooden surfaces. Carpenter bees bore circular holes in wood for nesting, often targeting eaves, soffits, and decks; their holes might leak sap or create wood powder below.
Wood borers are often larvae of beetles; their presence is revealed by tiny pinholes and fine sawdust that piles near wood or floors. Their feeding tunnels weaken furniture, flooring, and framing members. Spotting these signs helps inspectors assess infestation extent and which treatment methods will be necessary.
Always get a professional inspection if you spot small exit holes or unusual sawdust around your home; these can hint at hidden wood damage that grows over time.
How Inspectors Detect Hidden or Dormant Pest Infestations
Inspectors find hidden or dormant pest infestations by combining a detailed visual examination with specialized tools that reveal evidence not visible to the naked eye. The process involves checking for physical signs, temperature differences, moisture levels, and sounds inside walls, attics, and crawl spaces. Each step targets a specific way pests leave traces or create conditions that are detectable despite being out of direct view.
Visual Inspection and Probing
Inspectors start by closely examining accessible areas for visible clues like tiny holes, frass (insect droppings), mud tubes, or wood damage that indicate pest presence. They look in corners, baseboards, and around plumbing penetrations because pests often enter near moisture sources. Probing involves gently pressing on wood or drywall with a tool like an awl or screwdriver to check for soft spots that suggest decay or internal damage.
Inspectors open access panels or remove insulation carefully to look behind walls and inside crawl spaces. This hands-on step reveals structural areas weakened by pests like termites or carpenter ants. This part of inspection requires patience and attention to small details, since many signs are subtle or easy to miss without experience.
Thermal Imaging for Heat Signatures
Thermal imaging cameras help inspectors detect unusual heat patterns caused by pest activity, such as heat from insect colonies or animal nests. For example, termites generate heat while consuming wood, which creates a temperature difference compared to the surrounding structure. The camera captures infrared radiation and turns it into visual images showing these warm spots behind walls or under floors.
This tool is especially useful in attics and crawl spaces that are difficult to access or where visual signs are not clear. A thermal image costs around $50 to $100 per inspection if the inspector doesn’t own the device. Good results show consistent heat clusters, whereas scattered or absent heat may mean no infestation or a dormant colony. Thermal cameras can produce false positives from sunlight or electrical wiring, so inspectors use these images alongside other methods for confirmation.
Moisture Meters to Detect Damp Wood
Moisture meters measure the water content in wood and building materials, which is important because many pests thrive in damp environments. For instance, termites and wood-boring beetles prefer softened wood caused by moisture damage. The meter either uses pins to conduct electricity through the material or scans without contact to estimate moisture levels.
Inspectors test wood in structural beams, subfloors, and wall studs, looking for improve moisture that signals conditions suitable for infestation. High moisture readings above 16% often warrant closer inspection or remediation. These tools typically cost between $50 and $200 for inspectors and provide quick, objective data. Low moisture usually means pest activity is less likely, but dry wood doesn’t rule out dormant infestations hidden deeper inside.
Other Tools Like Borescopes and Sound Detectors
Borescopes are small cameras mounted on flexible cables that inspectors insert into narrow openings like drilled holes or wall cavities. This allows visual inspection inside spaces too small or unsafe to enter physically. The camera transmits live images to a screen, revealing nest materials, frass, or live pests inside walls or ceilings without destructive measures.
Sound detectors pick up noises such as termites chewing or rodents moving in inaccessible areas. These devices amplify low-level sounds that indicate pest presence even when no visible signs exist. These tools require expertise to interpret, as environmental noises can confuse the results. Combined with visual and thermal data, borescopes and sound detectors help create a more complete picture of hidden infestations.
Typical Duration and Cost of a Pest Inspection
A standard residential pest inspection typically takes between 30 minutes and 2 hours, depending mostly on the property’s size and complexity. A smaller condominium may take around half an hour, while a large, multi-level home with extensive grounds can require up to two hours for a thorough check. The time allows the inspector to look over common entry points, basements, attics, crawl spaces, and exterior wood, which are frequent places pests target.
Costs for pest inspections vary widely but generally fall between $100 and $300 for a typical home. The main factors influencing cost include the property’s square footage, age, and the complexity of the inspection type requested. For example, a basic termite inspection might run closer to $100 to $150, while a complete inspection checking for multiple pests, including rodents and bed bugs, might push the price closer to $250 or more. Commercial property inspections usually cost more due to larger areas and higher complexity.
Inspection types also affect both time and cost. A termite-only inspection usually takes less time and costs less than a general pest inspection covering multiple species. Some inspectors offer bundled packages for termite and pest inspections that can be more cost-effective if you need both. A follow-up or re-inspection after treatment normally costs less and takes less time than an initial inspection.
| Inspection Type | Approximate Duration | Typical Cost Range |
|---|---|---|
| Termite-Only Inspection | 30 to 60 minutes | $100 to $150 |
| General Pest Inspection (Includes rodents, insects, termites) | 1 to 2 hours | $150 to $300 |
| Commercial Property Inspection | 2 hours or more | $300 and up |
| Follow-up/Re-Inspection | 15 to 30 minutes | $50 to $100 |
Several factors can change these estimates. Homes with large yards, multiple outbuildings, or difficult access points require extra time. Older homes often cost more to inspect because inspectors need to check vulnerable areas like original wooden framing more thoroughly. Geographic location plays a role as well, since rates vary by region and the prevalence of specific pests can change the focus and length of the visit.
Choosing an inspector with clear pricing upfront helps avoid surprises. Some companies charge extra for written reports or certification letters, so ask about those fees before scheduling. Scheduling the inspection during regular business hours usually costs less, while emergency or weekend appointments may add fees. Being present during the inspection to answer questions or point out specific concerns can improve inspection efficiency and results.
What a Pest Inspection Report Includes and How to Interpret It
A pest inspection report provides a detailed account of pest presence and damage, offering clear findings and actionable recommendations. Understanding each section helps you decide on treatment options and further inspections. The report typically organizes information by infestation evidence, visual aids, and professional advice to guide repairs or pest control.
Summary of Infestation and Damage
The report starts with a concise summary of all pest activity found during the inspection. This section identifies the type of pests detected, such as termites, rodents, or carpenter ants, and describes the extent of damage. Details include affected areas, the severity of infestation, and any structural concerns caused by pest activity.
Inspectors often specify whether damage is active (ongoing infestation) or old (previous pest activity). This distinction matters because active infestations require urgent treatment, while old damage might need repair but not immediate pest control. The summary might also note signs of potential future risk, like moisture problems that attract pests.
Understanding this part means focusing on exact pest types and affected locations. For example, when the report states “termite damage in basement support beams with active galleries,” action to treat termites and assess beam integrity is warranted. When no visible damage is found but evidence like droppings appears in attic spaces, treatment recommendation might be different or preventive.
Photos and Illustrations Included
Reports include photos or diagrams showing infestation signs and damage locations. These images provide concrete evidence backing the written summary, helping you visualize problem areas without needing technical knowledge. Photos typically highlight wood damage patterns, pest droppings, nesting sites, or entry points that the inspector found.
Visual aids are essential for comparing pre-treatment conditions with post-treatment results or repair work. Some reports include measurements or scale markers to illustrate damage size, making it easier to understand urgency and cost implications. For instance, a photo showing a two-foot strip of damaged wood indicates more significant repair needs than just surface scratches.
When reviewing photos, note date stamps and labels. These help confirm the report’s relevance if you revisit the issue later or bring in another professional. Should images be unclear or too few, request clarification or additional documentation from the inspector before proceeding.
Recommendations for Treatment or Repairs
The final critical section offers tailored advice based on inspection results. Recommendations detail specific treatments like chemical termite barriers, baiting stations for rodents, or wood replacement where damage compromises structure. Inspectors usually suggest licensed pest control services for professional treatment and sometimes offer timelines for when repair work should start.
This section also might propose preventive measures such as sealing cracks, fixing leaks, or improving ventilation to reduce pest attraction. You should understand these suggestions as part of a broader strategy rather than quick fixes. For example, treating termites without repairing moisture issues can lead to repeat infestations.
Costs and timing may vary widely depending on pest type, damage extent, and local market rates. Pest control treatments often cost several hundred to a few thousand dollars, especially if structural repair is needed. When reading recommendations, ask your inspector or treatment company for written estimates and timelines based on the report’s findings.
Always verify the dates and exact locations mentioned in photos and summaries to avoid confusion about whether a reported infestation is current or historic.
Recommended Next Steps If Pests or Damage Are Found
Pest inspections often lead to recommended follow-up actions when pests or structural damage are detected. The first step is to prioritize addressing any active infestations since pests like termites or carpenter ants can worsen damage quickly. Treatment options vary based on the pest type, infestation size, and location but typically include chemical treatments, baiting systems, or physical removal.
You should select a licensed pest control professional who specializes in the pest found during the inspection. For termite infestations, for example, professionals usually offer liquid barrier treatments or baiting systems that monitor and eliminate colonies. Treatment costs depend on the infestation extent and treatment type, ranging from a few hundred dollars for spot treatments to several thousand for full perimeter barriers in larger homes.
Once the infestation is addressed, repairing structural damage becomes critical to prevent future problems. This often requires hiring a licensed contractor experienced with pest-related repairs. Damage may include weakened wood framing, damaged drywall, or compromised foundations. Obtain a detailed repair estimate and timeline. You might need permits for significant structural work, so check local building codes before proceeding.
Deciding on treatments and repairs can depend on your future plans for the property. For instance, when planning to sell soon, focus on treatments needed to pass local real estate inspection requirements and delay cosmetic repairs until after sale. For long-term residence, more extensive damage repairs and ongoing pest prevention measures are advisable. Document all treatment and repair work carefully, especially if you expect future inspections or want to maintain resale value.
Treatment success is best judged by follow-up inspections. Good pest control companies typically offer warranty periods ranging from six months to several years depending on the pest. A return of pests within the warranty period requires retreatment at no extra charge. Watch for signs like fresh damage, visible pests, or new frass piles. Repairs that show signs of new damage or appear shoddy should prompt a request for revisions promptly to avoid costlier problems later.
Some homeowners opt for do-it-yourself treatments after an inspection, but this approach carries risks. Over-the-counter products might not fully eradicate infestations, especially subterranean termites or wood-boring beetles hidden deep inside structures. Misapplication can cause health risks or damage finishes. Attempting DIY treatments requires following label instructions strictly and considering a professional inspection before and after treatment.
How Pest Inspections Differ from and Complement Home Inspections
Pest inspections focus specifically on identifying signs of pest activity and structural damage caused by pests, while general home inspections cover the broader condition of the home including its structure, systems, and safety aspects. Pest inspections pay close attention to areas where insects, rodents, or wood-destroying organisms could be present, such as crawl spaces, roof eaves, and wood framing. Home inspections, on the other hand, evaluate plumbing, electrical, HVAC, roofing, and foundation conditions among other elements.
The two inspections complement each other during real estate transactions by providing a full picture of the property’s condition. A pest inspection typically follows or happens alongside a general home inspection, offering a detailed pest-related risk assessment that the home inspection does not include. This integration matters because home inspectors often look for visible signs of damage but are not experts in identifying hidden pest infestations or subtle pest-related structural issues.
For residential properties, pest inspections usually involve a thorough search for termites, carpenter ants, rodents, and sometimes mold or moisture issues linked to pest activity. Commercial properties require a similar approach but often need a more extensive evaluation due to larger building size, different pest pressures, and sometimes specialized use areas like warehouses or kitchens. Commercial pest inspections may also have to comply with additional regulatory standards, making it important to hire inspectors with experience in commercial settings.
| Aspect | Pest Inspection | Home Inspection |
|---|---|---|
| Focus | Signs of active or past pest infestation, structural damage from pests, conducive conditions for pests | Overall home condition including structure, systems, safety, and maintenance issues |
| Areas Inspected | Wood framing, crawl spaces, attics, exterior wood elements, areas prone to moisture and pest entry | Roof, foundation, electrical, plumbing, HVAC, walls, ceilings, floors, exterior elements |
| Tools Used | Moisture meters, probing tools, magnifying glasses, sometimes infrared cameras | General inspection tools, moisture meters, voltage testers, binoculars for roof |
| Inspection Time | Typically 1 to 2 hours depending on property size and complexity | 2 to 4 hours or more depending on property size and systems |
| Cost Range (Residential) | $75 to $200, varies by region and property size | $300 to $500 on average, higher for large or complex homes |
| Report Content | Pest evidence, damage areas, recommendations for treatment or repair | Condition summary for home systems, defects, safety concerns, repair suggestions |
You can decide the order by starting with a home inspection to catch major structural or safety defects, then schedule a pest inspection if your offer depends on pest-free condition or if the home is older or in a pest-prone region. Some states or lenders require pest inspections separately, so knowing when to order one is practical.
Combining both inspections reduces surprises after purchase and helps you negotiate repairs or treatments. Skipping pest inspections to save money might expose you to costly damage later, especially with termites or carpenter ants. Commercial pest inspections often cost more and take longer due to building complexity, so plan for extra time and budget accordingly.
Seasonal and Regional Pest Variations Affecting Inspection Focus
Pest inspections vary significantly depending on the season and the region, as these factors influence which pests are active and where they are most likely to appear. For instance, termite activity spikes in spring and summer in warmer climates because they swarm and establish new colonies during these months. Inspections scheduled in late spring through early summer generally provide more accurate detection of active infestations in these regions.
In cooler climates, rodents like mice and rats seek indoor shelter more often in fall and winter, so inspections during these seasons focus more on entry points, nesting sites, and signs of rodent activity. Scheduling your pest inspection just before or during this time can help catch problems right as pests move indoors to escape colder weather.
The types of pests prioritized during an inspection depend largely on regional conditions. In the southern United States, inspectors pay closer attention to subterranean and drywood termites because the warm, humid environment supports their presence year-round. Along the West Coast, inspections might focus more on carpenter ants and occasional drywood termite activity that can be more seasonal. In northern states, the focus often shifts toward rodents, occasional ant species, and spiders that invade heated spaces during colder months.
Your best approach is to align the inspection timing with the pest activity cycles typical for your area and the pest type you are most concerned about. For example, if you live in the Southeast and worry about termites, late spring to early summer is your window. If you live in the Midwest and have had rodent troubles before, schedule your inspection in fall. This targeted timing increases the chances of detecting active pests rather than only signs of past activity, which can affect treatment plans and accuracy.
Schedule your inspection during the season when your key regional pests are most active; inspecting outside this window often misses current infestations and may lead to unnecessary follow-ups or treatments.
Costs and inspection duration do not change drastically based on season, but the thoroughness of detection can vary. Inspectors might use different techniques depending on the pest’s life cycle stage. For example, termite inspections may include moisture meter readings during warm months when termites are actively feeding on wood, but in colder months, they rely more on visual checks for damage and dark tunnels.
Regional variations require inspectors to be familiar with local pest prevalence and seasonal patterns. A home inspector in Arizona reports searching primarily for scorpions and desert termites in spring and summer, while an inspector in Pennsylvania focuses on rodents and carpenter ants in fall and winter. Knowing these patterns lets you plan your inspection schedule and tailor it to the risks your home faces in its specific location and climate.
Common Mistakes Homeowners Make Before and During Inspections
Homeowners often underestimate the importance of preparation and communication when scheduling a pest inspection. Common errors include inadequate access to key areas, neglecting to select a qualified inspector, and missing the opportunity to engage during the inspection. Avoiding these mistakes helps ensure a thorough evaluation and a clear understanding of any pest issues.
Preparing Access and Cleaning Clutter
Providing clear access to all parts of your home guides the inspector and speeds up the process. Move furniture at least a foot away from walls, clear boxes or storage from basements and crawl spaces, and trim back shrubbery that touches the house exterior. Inspectors need to check foundation walls, vents, and subfloor areas where pests commonly hide or enter. Clutter that blocks these areas limits visibility and raises the chance that infestations go unnoticed.
Cleaning up spills, food crumbs, and standing water before the inspection also helps identify signs of pests more easily. For instance, insect droppings on bare floors are easier to spot than on carpet or piled debris. Cleaning does not mean deep sanitizing but removing obvious materials that could obstruct inspection or confuse identification of pest evidence. A well-prepared home also demonstrates your seriousness and helps maintain a good working relationship with the inspector.
Choosing Certified and Experienced Inspectors
Many homeowners pick the cheapest or most convenient pest inspector without checking qualifications, which risks incomplete or inaccurate results. Look for inspectors licensed by your state’s pesticide control board or a recognized certifying body. Experienced inspectors have better skills in spotting subtle signs and understanding local pest patterns. Asking for references or reviews adds a layer of assurance.
Interview inspectors before hiring them. Ask about their detection methods and experience with the particular pests common to your area. Clarify if they offer guarantees or follow-up inspections. Remember that the lowest price may mean a quick surface check rather than a thorough exam. Paying slightly more for a certified inspector can save money by catching damage early and avoiding unnecessary treatments.
Participating and Asking Questions During Inspection
Staying present during the inspection adds value you cannot get from the report alone. You can point out areas of concern, such as recent pest sightings, moisture problems, or structural changes. Showing the inspector these spots can guide their focus and reveal hidden risks. Many inspectors welcome questions as they work; this interaction improves your understanding of the findings and recommended next steps.
When attendance is not possible, request the inspector to call or text you during the inspection to highlight critical issues. After the inspection, review the report together and request clarifications on technical language or treatment options. Being an active participant equips you better for decisions about repairs or pest control measures. Skip being passive or absent, as important details may be missed or misunderstood.
How to Verify Thoroughness and Understand Limitations of Pest Inspections
Confirming the thoroughness of a pest inspection depends on carefully reviewing the written report and observing the inspector’s process during the visit. The report should include detailed notes on the inspected areas, including commonly missed spots like crawl spaces, attics, and behind appliances. It should list any signs of infestation or damage found, what pests were targeted, and recommendations for treatment or repairs. To check if the inspection covered all necessary ground, ask the inspector if they examined areas prone to pests in your region and if they checked for less obvious signs like structural damage or droppings.
The limits of pest inspections come from their nature as visual and non-invasive examinations. Inspectors cannot open walls or floors, so hidden infestations within wall cavities or under flooring may go undetected. Some pests like drywood termites or carpenter ants may only show intermittent activity, making a one-time inspection insufficient to confirm absence. Inspections also depend on the inspector’s experience and training; a less trained inspector might miss subtle but important clues. Knowing these limits helps set reasonable expectations, you should see an inspection as a snapshot in time rather than a guarantee against future problems.
DIY pest inspections rarely match professional ones in depth or accuracy. A homeowner may miss subtle structural damage or signs of pests hidden in less accessible spaces. Professionals use specialized equipment such as moisture meters, flashlights, and sometimes infrared cameras to detect hidden infestations. Time spent learning how to spot pests and damage can be substantial, and without this expertise, many signs will be overlooked. While a homeowner’s inspection can help identify obvious issues, a licensed inspector’s report carries more weight with lenders and insurers and reduces the risk of costly surprises after purchase.
To verify the thoroughness of a professional pest inspection, use this simple rule: the report should detail at least twelve key areas commonly checked during pest inspections, including the foundation, basement, attic, roof overhangs, and indoor areas like kitchens or laundry rooms. It should explain what was found in each area or confirm that no issues were detected. You can ask for the inspector’s credentials and experience, which correlates with quality of work. A thorough inspection usually takes one to two hours depending on property size, so very short inspections should raise questions about thoroughness.
If your report raises concerns or does not fully address certain problem areas, consider requesting a follow-up or hiring a specialist pest control service for more targeted evaluation. In cases of suspected termite damage, a wood-destroying organism inspection might be needed. Also, if your property has had previous pest problems or sits in a high-risk area, regular inspections every 6 to 12 months are advisable rather than relying on a single check. Checking your local pest control company’s credentials and their inspection procedures can provide additional assurance of quality service and detailed reporting.
Step-by-Step Action Plan for Your Pest Inspection
Start by understanding what a pest inspection covers so you can schedule one confidently, know what the inspector will do, and interpret the report effectively. This plan guides you through deciding if and when to get an inspection, what to expect, and how to act on the findings.
- Before scheduling: Review your property’s location, age, and known pest issues common in your region and season. This helps you assess the urgency and focus areas for the inspection. For example, a home in the Southeast is more likely to face termite and mosquito problems during warm months.
- Schedule the inspection: Book with a licensed pest inspector and ask what pests they target, how they check for hidden infestations, and the expected duration and cost. A thorough inspection often takes 60, 90 minutes and should include checking crawl spaces, attics, and around plumbing. Confirming this upfront avoids surprises and ensures full coverage.
- Prepare your property a day before: Clear access to common inspection points like basements, attics, and exterior walls. Removing clutter lets the inspector identify signs like wood damage, droppings, or entry points clearly. A well-prepared home allows the inspector to complete the job efficiently and reduces the chance of missed issues.
- During the inspection: Observe the process or ask questions to understand what the inspector is checking. Verify that they look for live pests, droppings, damage to wood or insulation, moisture issues, and evidence of nests or trails. This engagement ensures they cover key areas and you learn how to spot early signs yourself.
- Receive and review the report within 24 to 48 hours: Expect a detailed list of findings with photos, severity of damage, and pest species identified. Check if the report explains limitations, such as inaccessible areas or seasonal variations affecting detection. Understanding these details helps you decide on necessary treatments or repairs without overreacting.
- Plan your next steps if pests or damage are found: Follow the inspector’s recommendations, which may include hiring a pest control professional, repairing structural damage, or improving moisture control. Acting within one to two weeks prevents infestations from worsening and limits costly repairs.
- Verify treatment effectiveness after 1 to 3 months: Schedule a follow-up inspection or self-inspect the treated areas for new signs of pests or damage. This confirms if control measures worked or if further action is needed. Pest problems can recur if conditions remain favorable, so ongoing vigilance is important.
Frequently Asked Questions
What Types of Wood Damage Do Pest Inspectors Look For?
Pest inspectors check for signs of wood decay, termite galleries, and carpenter ant galleries because these indicate active or past infestation. They also look for softened wood and hollow sounds when tapped, which can reveal hidden damage that’s often expensive to repair.
Do Pest Inspections Cover Structural Pests Only?
Pest inspections primarily focus on structural pests that damage buildings like termites, carpenter ants, and wood-boring beetles, but they may also note evidence of rodents or nuisance insects depending on the inspector’s scope. This helps you understand what pest risks affect your home’s integrity.
How Do Inspectors Check for Pests in Hard-To-Access Places?
Inspectors use tools like moisture meters, flashlights, and sometimes borescopes to inspect inside walls or tight crawl spaces. These tools help detect hidden infestations without invasive openings, although complete certainty often requires ongoing monitoring or specialist follow-up.
Are Exterior Inspections Part of a Standard Pest Inspection?
Yes, exterior inspections focus on foundation cracks, wood-to-soil contact, and moisture sources that attract pests. Inspectors look for mud tubes and nests around the perimeter to assess risk before pests invade the interior.
Do Pest Inspectors Test Pesticide Residues During Inspections?
Pest inspections don’t typically test for pesticide residues; they focus on pest presence and damage signs. Concerns about chemicals require a separate environmental or chemical testing service.
How Often Should Pest Inspections Be Done for Prevention?
Annually is a common recommendation to catch new infestations early, especially for homes in termite-prone or humid regions. More frequent inspections may be needed if you’ve had recent pest issues or renovations.
The Bottom Line
A pest inspection focuses on identifying current infestations, potential entry points, and damage risks to protect your property’s value and health. Scheduling a professional inspection before buying or selling a home is a practical step, as it uncovers issues that could affect negotiations or require timely treatment. Ask the inspector for a detailed report and clarification on cost estimates for recommended repairs or treatments, so you have clear information to make informed decisions. Staying proactive with pest inspections can prevent costly damage and keep your home safe for years.


