
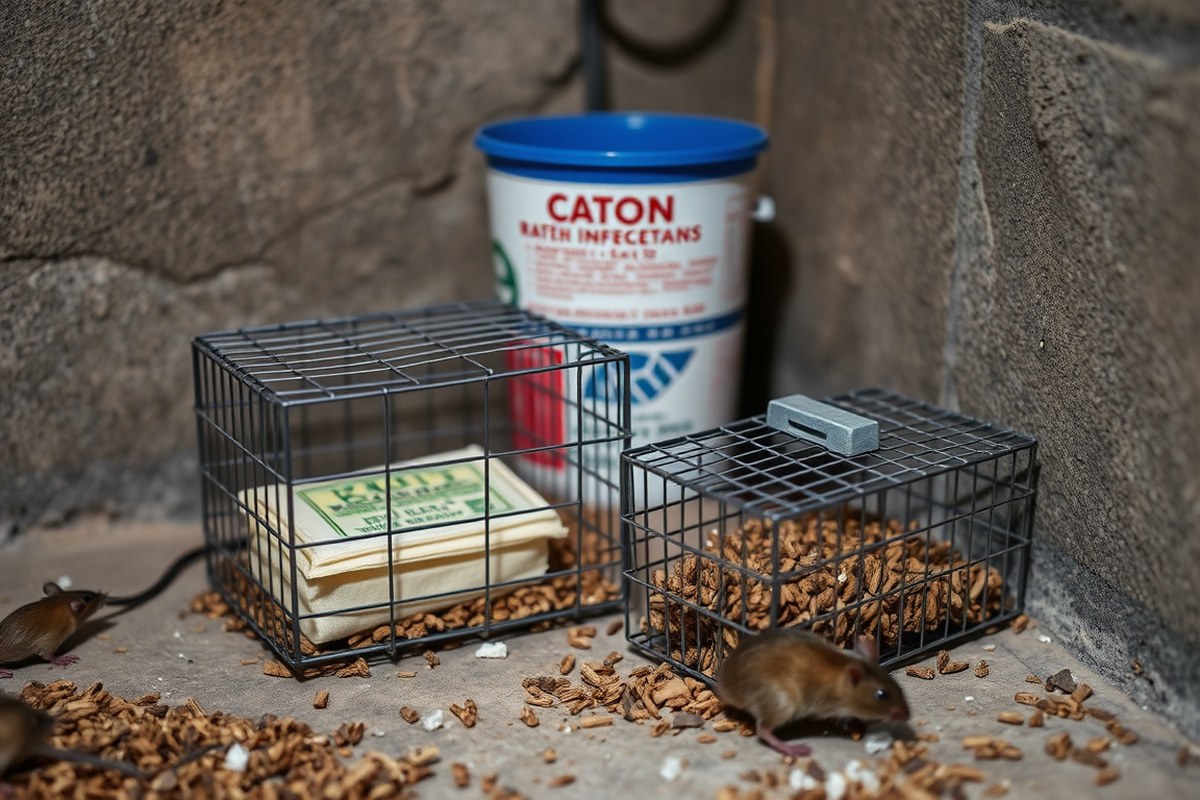
How to Get Rid of Rats: 8 Proven Steps for Lasting Control
Getting rid of rats requires a clear strategy that includes identifying signs of infestation, removing food and water sources, sealing entry points, setting traps, and considering safe rodenticide use. You can support your efforts with natural repellents, thorough cleaning, and knowing when to call a professional. Following these steps helps ensure rats don’t return and keeps your home safe and clean.
This information is essential for homeowners, renters, and property managers dealing with rats indoors or around the property. You’ll learn practical actions such as decluttering to reduce shelter, safely trapping rats, and deciding when professional help is necessary for lasting control.
Key Takeaways
- Look for rat droppings, gnaw marks, burrows, and greasy trails to identify an active rat infestation early.
- Store food in sealed containers and remove water sources to make your home less attractive to rats.
- Seal all openings larger than half an inch using metal or concrete to block rats from entering your home.
- Set snap traps every 6 to 10 feet along walls where rats travel, placing bait like peanut butter to increase catch rates.
- Use rodenticides cautiously indoors and follow label instructions to avoid risks to children, pets, and non-target wildlife.
- Declutter regularly and clean to remove shelter and nesting areas, which helps prevent future rat infestations.
1. Identifying a Rat Infestation: Signs and Symptoms
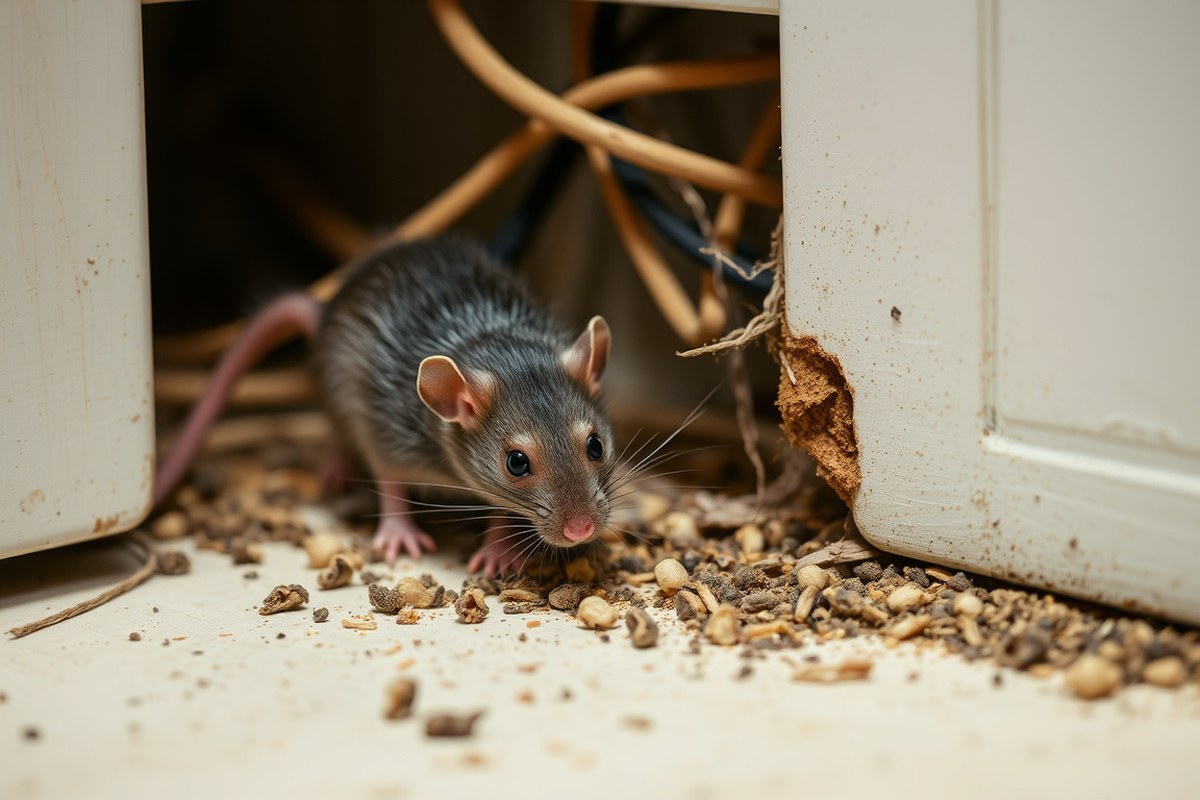
Rats are fast breeders and can quickly turn a small problem into a severe infestation. One female rat can give birth to 6 to 12 pups every three weeks. This means, in just a few months, a handful of rats can multiply into dozens, making early detection essential. Rats can invade your home or yard looking for food, warmth, and shelter, so it’s important to check for signs regularly.
Common signs of a rat infestation include rat droppings, which look like dark, pellet-shaped pieces about ½ inch long. You might also notice gnaw marks on wood, plastic, or wires, as rats have strong teeth they use to chew through many materials. Another indicator is greasy or dirty rub marks along walls and baseboards where rats frequently travel. Hearing scratching or scurrying noises at night, often in walls or attics, also points to their presence. Rats have a strong, musty odor that might be noticeable if the infestation is large.
- Fresh rat droppings in hidden places like cupboards or under sinks
- Gnaw marks on food packaging, furniture, or wiring
- Grease stains or rub marks along walls and baseboards
- Scratching noises, especially at night
- A strong, musky smell near nesting areas
- Nests made of shredded paper, fabric, or plant material
- Burrows or holes in the yard near foundations
Health risks from rats are significant. Rats can carry diseases such as Hantavirus, leptospirosis, and salmonella, which spread through their droppings, urine, or bites. They also bring parasites like fleas and ticks into your home. In addition to health concerns, rats can cause structural damage by chewing electrical wiring, which increases the risk of fire. Because of these dangers, inspecting your home and yard frequently for signs is important.
Check your property weekly for fresh droppings or new damage. Pay close attention to areas near food sources, water, and warm spots like near water heaters or inside attics. If you spot multiple signs or see rats directly, the infestation is probably growing fast and needs immediate attention. Early detection paired with prompt action helps prevent large infestations and reduces health and repair costs.
2. Removing and Securing Food and Water to Deter Rats

Rats are attracted to properties that provide easy access to food and water. Common food sources include pet food left out overnight, fallen fruits, unsealed garbage, compost piles, and birdseed. Water sources such as leaking outdoor faucets, pet water bowls, and standing water in puddles or containers also draw rats in. Removing or securing these attractants is key to discouraging rats from settling in your home or yard.
Limiting food and water availability denies rats the resources they need to survive and reproduce. This approach reduces their motivation to explore your property and return repeatedly. To effectively remove or secure potential food and water sources, it helps to follow a set of clear, practical steps tailored to common home situations.
- Store pet and human food in sealed containers. Use airtight plastic or metal bins to keep food fresh and inaccessible to rats. Avoid leaving pet food outside overnight, as this creates an easy meal. Always clean up any spilled crumbs promptly.
- Secure garbage and compost bins. Use containers with tight-fitting lids and place them away from your home’s foundation. Empty trash regularly, ideally once or twice a week, to prevent buildup that attracts rats.
- Remove fallen fruits and vegetables. Clear your yard of fallen or rotting plant matter daily during growing seasons. Rats prefer grains, fruits, and vegetables, so keeping your garden or yard clean reduces food availability greatly.
- Fix leaks and eliminate standing water. Repair dripping outdoor faucets promptly and ensure gutters and drains direct water away from your foundation. Remove or empty containers that collect water to discourage rats and mosquitoes alike.
- Bring pet water bowls inside at night. This limits rats’ easy access to water during their most active hours. Refill bowls only in the morning and clean them regularly.
- Declutter indoor and outdoor spaces. Remove paper scraps, cardboard boxes, and debris that could serve as shelter near food and water sources. Rats prefer hiding in cluttered areas close to resources.
- Clean food preparation areas thoroughly. Wipe down counters, sweep floors, and wash dishes promptly. Avoid leaving food out on counters or tables, especially overnight.
Failing to secure food and water sources inside and outside your home allows rats to return even after trapping or other control methods.
3. Sealing Entry Points: How to Block Rats from Coming In
Rats can squeeze through openings as small as ½ inch wide, roughly the size of a dime. Even holes as small as a cable entry can let them inside. To keep rats from entering your home, inspect your property carefully for cracks, holes, damaged vents, and any gaps around the foundation, garage doors, windows, drains, and sewer lines. Sealing these openings is key to blocking rat access before an infestation worsens.
Sealing points larger than ½ inch prevents rats from slipping indoors. Pay special attention to sewer lines and drains, as these offer hidden entry routes. Ensure all drain covers fit tightly and repair any broken or loose screens. Rats may try to enter through gaps around pipes leading to sewer lines, so use sturdy materials to close these off. Sealing cracks around the foundation and garage also removes their common access points. Here are the exact steps to identify and seal rat entry points effectively:
- Inspect the perimeter. Walk around your house during daylight to note cracks, holes, and gaps near the foundation, garage doors, vents, windows, and any openings around sewer lines or drains.
- Measure openings. Check for any gaps larger than ½ inch. Even small holes slightly bigger than a dime can allow rats inside.
- Clear the area. Remove debris, leaves, or clutter near entry points that rats could use for nesting or hiding during repairs.
- Use appropriate materials. Seal small cracks and holes with high-quality silicone or acrylic-latex caulk. For larger gaps, fill with steel wool first, then cover with cement, metal flashing, or wire mesh. Avoid using only foam insulation, as rats can chew through it.
- Secure drains and sewer access. Replace broken drain covers with heavy-duty grates. Add wire mesh screens inside sewer pipe openings where pipes enter the home. Make sure no gaps remain around plumbing pipes penetrating walls or floors.
- Install door sweeps and weather stripping. Fit these on exterior doors and garage doors to block rat entry under doors and around frames.
- Monitor sealed areas. Check repairs regularly for new damage or gaps, especially after heavy rain or freezes, which can cause materials to crack or shift.
- Maintain yard drainage. Eliminate standing water near your home since moist conditions attract rats and can cause decay that creates new feeding burrows by foundations and drains.
Proper sealing requires materials that resist chewing and weathering. Steel wool combined with cement or metal flashing is effective because rats cannot gnaw through it. Caulking fills small cracks and should be reapplied if it cracks with temperature changes. Costs vary but sealing a typical house exterior entry point can range from $20 to $100 in materials depending on size, with DIY efforts saving labor costs.
Failing to seal all points larger than ½ inch leaves weak spots rats exploit. Seal carefully around pipes and vents where gaps are often missed. Properly done, you should see fewer rat signs like droppings and nesting near the sealed spots within a week or two.
4. Choosing and Setting Rat Traps for Best Results
Snap traps are the most effective type of trap for rats, killing them quickly and reliably. Setting these traps properly and placing them where rats travel increases your chances of success. There are also humane alternatives such as electronic traps and live traps that kill or capture rats without prolonged suffering.
Common Types of Rat Traps
Snap traps remain the top choice for quickly killing rats and giving immediate results. These traps come in larger sizes than mousetraps and are designed specifically to catch rats. Electronic traps kill rats instantly using a high-voltage shock, which many consider the most humane option. Live traps capture rats alive, allowing for relocation, but require you to release rats at least a mile from your home to prevent return. Glue traps are also an option but tend to be inhumane as they cause prolonged suffering.
| Trap Type | How It Works | Result | Humane Rating |
|---|---|---|---|
| Snap Trap | Spring-loaded bar kills instantly | Immediate kill | Moderate |
| Electronic Trap | Voltage shock delivers instant death | Instant kill | High |
| Live Trap | Catches rat alive for removal | Capture alive | High |
| Glue Trap | Sticky surface traps rat | Death by starvation or suffocation | Low |
Choosing the right trap depends on your priorities and situation. Snap and electronic traps kill quickly and reduce the risk of rats suffering. Live traps avoid killing but require careful handling and relocation. Glide traps are generally discouraged due to cruelty concerns.
Setting Snap Traps Safely and Effectively
Use rat-sized snap traps made of wood or plastic, which are larger and stronger than mousetraps. Handle traps carefully to avoid snapping your fingers when setting the bait. Set the bait, peanut butter, dried fruit, or nuts, on the trigger area. Avoid oily or smelly baits that can deter cautious rats.
After baiting, arm the trap by pulling back the kill bar and locking it in place. Position the trap so the bait is near a wall or rat travel path. Check traps daily to remove any caught rats and reset or replace as needed. Frequent checking helps prevent odors or attracting other pests.
Strategic Trap Placement for Success
Rats prefer to travel along walls and hidden areas. Place traps about every 6 to 10 feet along these routes, especially near signs like droppings and grease marks. Position traps behind appliances, in attics, basements, and near food sources but out of sight of pets or children.
Conceal traps where possible, because rats are cautious and avoid open spaces. Combining snap traps with tamper-resistant bait stations along known travel lines improves control. Inspect the area regularly and move traps if you see no activity after several days.
Humane Trap Alternatives Explored
Electronic traps provide an instant-kill method that many consider humane since they avoid prolonged suffering. These devices kill rats with a quick voltage shock and usually come with compartments that conceal the dead rat, allowing you to dispose of it hygienically. Prices vary, generally ranging from $30 to $70 depending on model and features.
Live traps are another humane option, designed to capture rats alive. Use bait inside the trap, check frequently, and release rats far from your property to prevent their return. This method avoids killing but may require repeated trapping sessions. Both methods require diligent monitoring and safety precautions when handling captured or dead rats.
5. Using Rodenticides: Risks and Safe Practices
Using rodenticides can be an effective way to control rat infestations, but they come with risks to pets, children, and even wildlife. Setting up poison baits correctly and safely is essential to avoid accidental poisoning and odor problems from dead rats in hard-to-reach places.
Advantages and Disadvantages of Poison Baits
Poison baits offer a less labor-intensive option to reduce rat populations by killing rats quickly, which can help stop breeding cycles that last about 28 days. They are often used in bait stations that hold the toxic bait in block or paste form, making it easier to manage and apply in targeted areas outdoors or indoors.
However, poison baits come with several downsides. Rats may consume the bait and retreat to hidden spaces, where they die and create strong odors that can persist for days or weeks. This can lead to secondary issues if rats die inside walls or under floors, making removal difficult. Also, poisons pose a serious risk of accidental poisoning to children, pets, and non-target wildlife if not used carefully.
| Aspect | Pros | Cons |
|---|---|---|
| Effectiveness | Can rapidly reduce rat populations | Rats may die in hidden spots causing odors |
| Labor | Requires less frequent checking than traps | Needs careful placement and monitoring |
| Safety | Available in tamper-resistant bait stations | Risk of accidental poisoning for children/pets |
| Environmental Impact | Targets rats specifically when used correctly | Can harm wildlife if bait is accessed |
Poison bait is usually more suitable for outdoor use in areas that are not accessible to pets and children. It works best alongside other control methods like trapping and habitat reduction to improve long-term results.
Safe Rodenticide Use Around Pets and Kids
Always place rodenticides in tamper-resistant bait stations that keep the bait secure and out of reach of pets, children, and non-target animals. These bait stations are often required by law to prevent accidental ingestion. Positioning bait stations where rats commonly travel can improve bait uptake and reduce risk.
Avoid placing poison bait near pet feeding areas or places children frequently play. Clean up any spilled bait immediately and remove pet food bowls promptly after feeding to minimize attraction. Monitoring bait stations regularly ensures that poison is fresh and reduces chances of locked-on bait being accessed by unintended animals.
Consider alternative rat control methods if children or pets cannot be kept away from the infestation site safely. For example, dry ice or trapping may offer lower-risk options in sensitive areas.
Never place rodenticide bait where pets can reach it, and always supervise children closely during pest control efforts.
Proper Placement and Monitoring of Bait Stations
Place bait stations along walls and near entry points where rats travel, such as fence lines, sheds, or basements. Use multiple stations spaced strategically to increase the likelihood rats will find and consume the bait. Keep bait stations in areas inaccessible to kids and pets, such as behind locked gates or improve surfaces.
Check bait stations at least once a week to replenish bait and remove any dead rats. This regular monitoring reduces the chance that rats will die in inaccessible locations, preventing odor and secondary pest problems. Proper sealing of cracks, pipes, or vents complements bait station use by limiting rat movement and making bait placement more effective.
6. Natural Rat Repellents: What Works and What Doesn’t
Natural rat repellents like ultrasonic devices, essential oils, and certain plants offer options that avoid chemicals. Ultrasonic repellents have mixed results but can at least be a low-effort attempt. Essential oils and spices usually don’t provide lasting protection, while some plants may help keep rats at bay outdoors. Understanding each method’s limits helps you apply them effectively alongside other control measures.
Ultrasonic Devices Evaluated
Ultrasonic rat repellents emit high-frequency sounds that are mostly silent to humans but unpleasant to rats. These devices cost between $20 and $50 each and plug into a standard outlet. They claim to drive rats away by disrupting their comfort and communication.
Effectiveness varies depending on device quality, room layout, and obstacles like furniture or walls. Rats can become accustomed to the noise over time, reducing the device’s deterrent effect. Ultrasonic devices may work better in small enclosed spaces with minimal sound barriers.
Essential Oils and Spices with Repellent Properties
Essential oils such as peppermint and spices like cayenne pepper are believed to repel rats due to their strong smells. However, evidence does not support these scents as reliable repellents. Peppermint oil, for example, dissipates quickly requiring frequent reapplication, which can be time-consuming and costly.
Using cotton balls soaked in essential oil placed around entry points or rat-prone areas can provide temporary discomfort to rats. This approach might help discourage rats on the move but is unlikely to solve an infestation alone. Mothballs, often mistaken for natural repellents, pose health risks and are not recommended.
Rat-Repelling Plants and Their Use
Certain plants with strong smells, such as mint and lavender, can act as mild deterrents when grown around your home’s perimeter. They create a natural barrier that rats may avoid. However, plants alone won’t keep rats away if food, water, and shelter are still accessible.
Planting these herbs in garden beds, along fences, or near entry points could support other rat control efforts. Regular trimming and maintenance increase their effectiveness by keeping scents strong. Remember to clear debris and fallen leaves nearby to reduce hiding spots that attract rats. Here’s a summary table of natural deterrents and their typical attributes:
| Repellent Type | How It Works | Cost | Effectiveness | Maintenance |
|---|---|---|---|---|
| Ultrasonic Device | Emits high-frequency sound rats dislike | $20 – $50 per unit | Moderate; varies with conditions | Low; plug in and leave on |
| Essential Oils (e.g., peppermint) | Strong odor irritates rats | $10 – $30 per bottle | Low; temporary, scent fades quickly | High; reapply every few days |
| Spices (e.g., cayenne pepper) | Spicy scent may deter rats | Under $10 | Low; minimal evidence of long-term effect | High; reapply often, ineffective if wet |
| Repellent Plants (mint, lavender) | Mild scent discourages rats | Varies $5 – $20 per plant | Low to moderate outdoors | Medium; regular watering and trimming |
Choosing a natural repellent depends on the infestation level and location. Ultrasonic devices can be an easy addition indoors but shouldn’t replace traps or sealing entry points. Essential oils and spices might help cover small areas temporarily but require frequent upkeep and won’t fully prevent rat return. Plants work best outside as a complementary barrier rather than a sole solution.
Limitations of Natural Repellents
Rats are adaptable creatures with strong survival instincts, so relying solely on natural repellents rarely produces lasting results. Ultrasonic devices provide a non-toxic approach but do not kill rats or address attractants like food and shelter. Essential oils and spices lose potency rapidly and require constant reapplication, which can become impractical.
Natural plants grow slowly and cannot block rat entry or eliminate existing nests. They are best for supporting long-term prevention in combination with good sanitation and physical barriers. These repellents work as part of an integrated strategy rather than a standalone fix, especially during severe infestations.
7. Cleaning and Disinfecting After Rat Removal Safely
Cleaning and disinfecting areas where rats have been is essential to avoid serious health risks. Rat droppings, urine, and carcasses can carry harmful bacteria and viruses like hantavirus, leptospirosis, and salmonella. Proper cleanup reduces the chance of disease spread and eliminates odors that might attract new rats. Safety precautions during cleanup protect you from airborne particles and direct contact with contaminants.
Use gloves, a mask (preferably an N95 respirator), and disposable cleaning tools to avoid exposure. Keep the area well-ventilated and never sweep or vacuum dry droppings, which can release harmful dust into the air. Instead, dampen the droppings first using a disinfectant spray or a bleach solution. Cleaning up dead rats is equally important and should be handled with similar precautions.
- Ventilate the area. Open windows and doors for at least 30 minutes before cleaning to help clear airborne particles.
- Prepare a disinfectant. Mix a solution of 1 part bleach to 10 parts water or use EPA-registered disinfectants. Avoid mixing bleach with ammonia or other cleaners.
- Wear protective gear. Put on disposable gloves, an N95 mask, and eye protection if possible to prevent contact with infectious agents.
- Spray the contaminated area. Generously soak rat droppings, urine stains, nesting material, and any carcasses with the disinfectant. Let it sit for at least 5 minutes to kill pathogens.
- Remove waste carefully. Use paper towels or disposable rags to pick up droppings and carcasses. Place all waste in a sealed plastic bag and double-bag it to prevent leaks.
- Dispose of waste safely. Follow local regulations for biohazard or hazardous waste disposal. If none exist, dispose of the sealed bags in your regular trash outside the home promptly.
- Clean and disinfect tools and surfaces. After waste removal, scrub surfaces with soap and water, then apply disinfectant again. Dispose of or wash gloves and masks properly after use.
- Wash hands thoroughly. Even if you wore gloves, wash your hands with soap and warm water for at least 20 seconds after cleanup.
Carry out this routine promptly after detecting rats or their droppings, especially in locations like basements or near food storage areas where rats tend to gather. Taking these steps usually requires 30 to 60 minutes, depending on the infestation size, and the cost of supplies ranges from $10 to $30 for gloves, masks, and cleaning agents. Skipping or rushing cleanup risks ongoing contamination and a higher chance of reinfestation, along with potential health issues for you and your family.
8. Deciding When to DIY or Call Professional Exterminators
Call a professional exterminator if you notice rats inside your walls, persistent signs despite your DIY efforts, or if the infestation has lasted more than two months. A large population, or rat activity concentrated indoors, usually requires expert help because professionals can follow signs like burrows and rub marks along common rat pathways to pinpoint hiding spots you might miss. This targeted approach often prevents the rats from simply relocating deeper inside your property.
The cost of professional rat removal generally averages around $550 but can vary based on your home’s size and infestation severity. Exterminators typically provide an initial assessment and then tailor a removal plan that suits your property’s needs. This process usually takes a few visits over several weeks to completely resolve the issue, since rats reproduce rapidly and some may avoid initial traps.
You’ll want to assess the risk rats pose to your health and property when deciding on help. Rats can carry diseases and cause structural damage by gnawing wires or wood, posing fire hazards and costly repairs. Homes with vulnerable residents, young children, elderly, or those with respiratory issues, should seek professional removal sooner rather than later to avoid health risks. Outdoor infestations around gardens, sheds, or yards sometimes can be handled with DIY trapping and exclusion techniques. However, rats nesting within walls or attics demand professional treatment.
Rats behave differently by season, impacting how you manage them. They tend to move indoors during colder months for warmth and food, increasing the urgency for professional intervention. Outdoors, rats appear more active from spring through fall. Professionals adapt control methods seasonally, emphasizing sealing entry points before winter and removing outdoor attractants through the warmer seasons.
Common mistakes include relying solely on repellents or sporadic trapping, which might repel a few rats but rarely remove the entire population. Trying to control rats outdoors with indoor methods often fails because rat species like Norway rats and Roof rats differ in habits; the former burrow near the ground, while the latter prefer improve nesting spots. Professionals understand these differences and use setting strategies matched to the species present.
To decide whether to call a professional, check for these indicators: ongoing rat sightings, rat droppings in multiple locations, gnaw marks on wiring or structures, and sounds of movement inside walls or ceiling spaces. If these signs persist despite your active efforts over four to eight weeks, professional help is the safer and more effective choice.
Pro Tip: Don’t wait until the rats are well-established, calling a professional early can prevent costly damage and health risks later on.
Step-by-Step Action Plan to Get Rid of Rats
Follow these clear steps to identify, eliminate, and prevent rats in your home effectively. Track your progress by checking for fewer signs of rats and no new infestations.
- Day 1: Inspect Your Property, Look for rat droppings, gnaw marks, or greasy rub marks along walls and corners. Confirm the infestation by spotting fresh signs, which means action is needed.
- Day 2: Remove Food and Water Sources, Store all food in sealed containers and fix any leaks or standing water. No accessible food or water should reduce rat activity within 3-5 days.
- Day 3: Seal Entry Points, Use steel wool, metal flashing, or caulk to block holes larger than ¼ inch around doors, vents, and pipes. Return to check if new chew marks appear, indicating failed seals.
- Day 4: Set Traps Strategically, Place snap traps or electronic traps near walls and suspected rat runs, baited with peanut butter or dried fruit. Monitor traps daily; fewer catches over one week show progress.
- Week 2: Consider Rodenticides Carefully, If traps don’t control the rats, use rodenticides according to label instructions and keep them away from children and pets. Observe for reduced rat sightings and trap captures.
- Week 3: Clean and Disinfect, Wear gloves and a mask; clean rat nests, droppings, and urine with disinfectants to avoid disease. Repeat cleaning until no fresh material appears.
- Week 4: Assess Progress and Decide on Calling a Professional, If signs persist after four weeks, or the infestation is large, contact a licensed pest control expert to ensure complete removal and prevention.
Frequently Asked Questions
What’s the Fastest Way to Get Rid of Rats?
The fastest way is using rat traps placed strategically around the home. Traps kill rats quickly and help stop the infestation from growing.
Can Decluttering Help Get Rid of Rats?
Yes, clearing clutter removes places rats can hide, like cardboard and paper. Keeping things tidy reduces their shelter and helps prevent future infestations.
Is It Safe to Use Dry Ice for Rat Control?
Dry ice can kill rats by cutting off oxygen in burrows safely if handled carefully. It avoids poison, but use gloves and follow safety guidelines to prevent accidents.
Can Attracting Predators Reduce Rat Problems?
Yes, encouraging owls or snakes around your property can naturally lower rat populations. However, this method takes time and won’t solve infestations immediately.
Why Do Rats Keep Coming Back After Removal?
Rats return if there’s food, water, or shelter available outside your home. Sealing entry points and removing attracts are critical to prevent reinfestation.
What’s the Best Way to Get Rid of Rats in Walls?
Calling a professional pest control service is your best bet for rats in walls. They have special tools and knowledge to access and remove rats safely.
Before You Go
Effective rat control requires a combination of prevention, removal, and ongoing maintenance to keep your home safe and clean. Start by thoroughly inspecting your property for any entry points and sealing them tightly to block rats today. Taking this step can significantly reduce the chances of a new infestation and make other control methods work better.





One Comment