Which Method Is the Best for Prevention of Pest Infestations: A Complete Guide for Effective Choices
The best method for prevention of pest infestations depends on your specific situation, including the type of pests, environment, and resources. Combining cultural and sanitation practices with targeted chemical or biological controls usually improves effectiveness. Integrated Pest Management (IPM) focuses on using multiple tools and monitoring to prevent infestations before they start, reducing long-term costs and risks.
You’ll find practical strategies tailored for homeowners, gardeners, farmers, and facility managers. The article explains how to identify common pests, recognize early signs, choose prevention methods, and avoid mistakes. It also covers the tools you’ll need, expected costs, timelines for results, and when professional help may be necessary versus DIY approaches. This helps you make informed decisions that suit your needs and budget.
Key Takeaways
- Choose pest prevention methods based on specific pests, infestation points, and your property’s unique environmental factors for best results.
- Maintain cleanliness and eliminate food, water, and shelter sources to effectively reduce pest attraction and breeding opportunities.
- Use biological controls like beneficial insects cautiously as part of integrated approaches, balancing with chemical options if necessary.
- Integrated Pest Management combines monitoring, cultural practices, and targeted treatments to minimize pest issues sustainably.
- Prepare necessary tools like traps, sealants, and proper storage before starting prevention to ensure thorough coverage and maintenance.
- Expect chemical methods to show results within days, while sanitation and cultural changes often require weeks to significantly impact pest levels.
Which Pest Prevention Method Works Best for Your Needs?
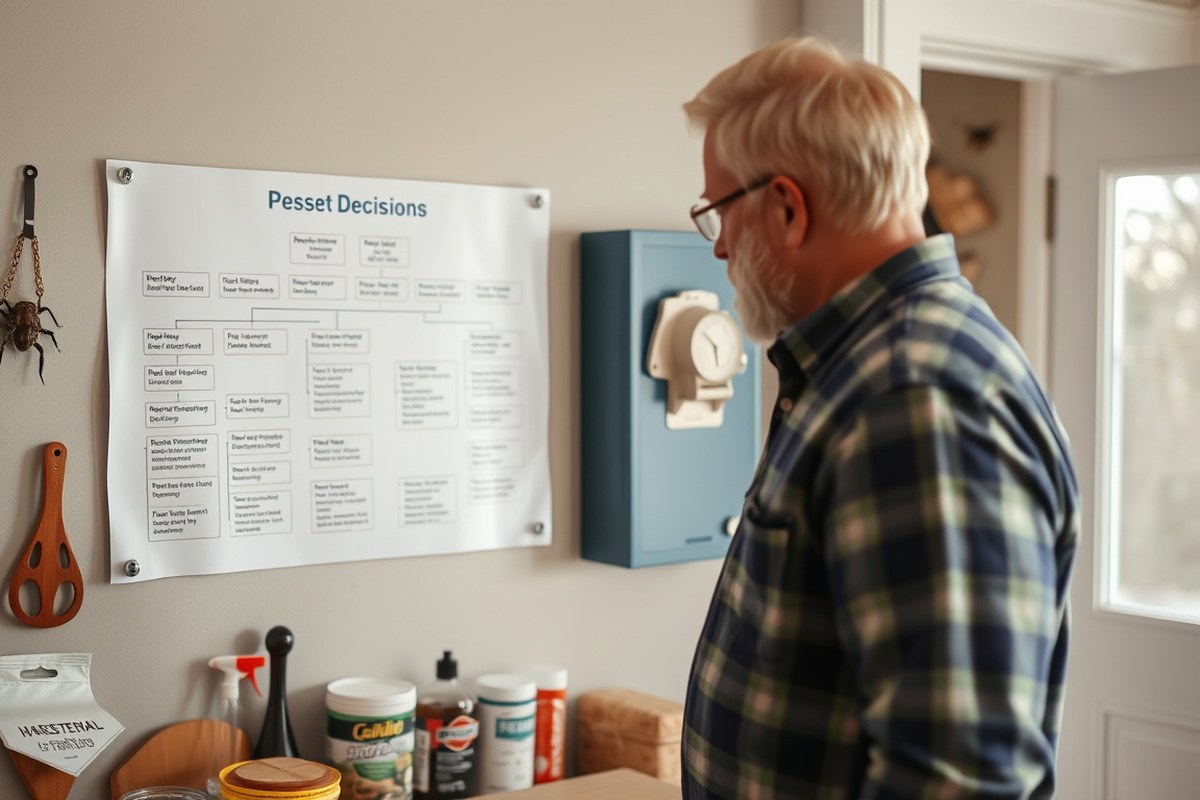
The best pest prevention method depends on the type of pests you face, the environment around your home or property, and your budget along with safety concerns. Focusing on the most appropriate technique for your specific situation saves time and money while reducing risks to people and pets. Making a clear decision starts by identifying the pest, understanding the conditions that allow them to thrive, and then selecting a targeted, appropriate control approach.
Matching Methods to Common Pest Types
Different pests react to different prevention methods, so knowing what you’re dealing with is essential. For instance, ants often respond well to baiting because they carry the poison back to the colony, while rodents require exclusion techniques like sealing entry points since poisons are less effective without addressing their access. Flying insects such as mosquitoes benefit from removing standing water and installing screens or using targeted larvicides.
Choose a method based on the pest’s biology and behavior. Wood-destroying insects like termites need soil treatments or barrier applications because they nest underground and enter through contact with soil. Stored product pests call for removing infested goods and storing food in airtight containers. Examine the pest’s common entry routes and life cycle stages in your area to decide early if sanitation, physical barriers, or chemical deterrents work best for prevention.
Considering Environment and Setting
Outdoor settings such as gardens or farms require different strategies than indoor areas. In outdoor environments, environmental factors like moisture, vegetation, and soil type influence pest presence and how you prevent them. Removing dense plant growth and using mulches that resist pests lower risk, while in indoor settings, keeping humidity low and promptly fixing leaks help prevent cockroaches and mold-related pests.
Your geographic region also matters because pest species vary widely. Coastal areas often face different pests than inland or arid regions. Tailor your prevention methods to local recommendations. For example, in a humid southern US climate, you might prioritize moisture control combined with physical barriers, while northern homes might need more focus on rodent exclusion during winter. Evaluate the specific site conditions and daily activities that affect pests’ ability to thrive.
Balancing Cost, Safety, and Effectiveness
Budget influences your prevention choice by limiting access to some methods or tools. Physical barriers such as door sweeps and screen repairs generally cost under $50 to install and last years, making them cost-efficient compared to ongoing chemical treatments that require repeat applications and can add up to hundreds or thousands of dollars annually in large properties. Chemicals provide quicker results but can pose health risks and require careful handling, especially around children or pets.
Safety concerns might steer you away from chemical use. Organic or non-toxic prevention like sealing cracks or removing attractants are safer but sometimes slower. Consider if your environment includes vulnerable people or animals before using pesticides. Keep in mind the potential cost of ineffective method choices, selecting a cheaper but inappropriate method may result in infestations returning and higher expenses over time.
Use the following decision approach: first, identify the pest and its specific vulnerabilities, second, assess your environment and how you use the space, third, set a budget that includes follow-up costs, and finally, consider if you or others require non-chemical options. This process helps you pick the final method matching your needs, reducing trial and error and costly mistakes.
Common Pests and Their Typical Infestation Pathways
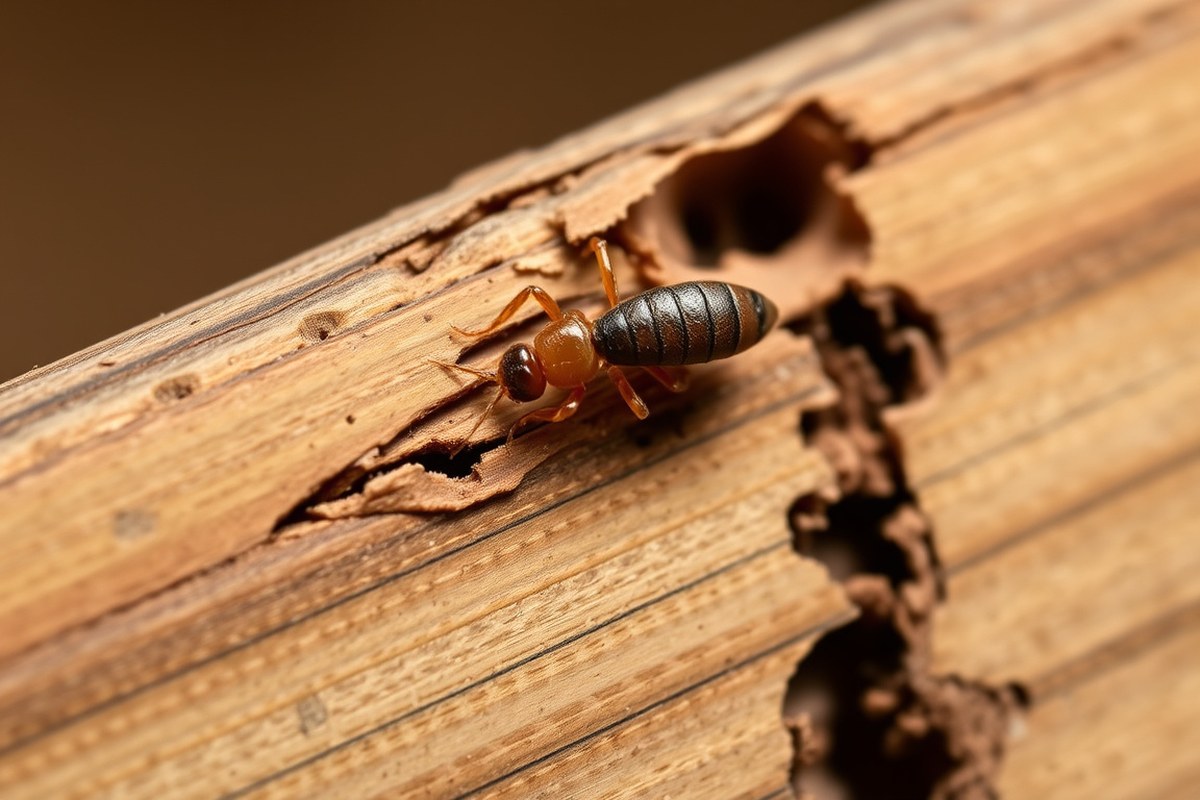
Common pests differ by environment, but they all find ways to enter and establish rapidly. Indoor pests like rodents, cockroaches, and ants exploit small gaps and food sources inside homes. Garden pests such as aphids, caterpillars, and beetles often arrive from nearby plants or windblown eggs. Farm pests including termites, wireworms, and locusts typically migrate through soil or from adjoining infested fields.
Indoor Pests: Rodents, Cockroaches, Ants
Rodents such as mice and rats usually enter through cracks in walls, gaps around doors or windows, and openings around pipes. They seek shelter and food, multiplying quickly once inside. Cockroaches take advantage of warm, moist areas near kitchens and bathrooms. They hide in cracks, behind appliances, and inside cabinets.
Ants often make nests close to food sources, entering through doors, windows, or tiny wall openings. They leave scent trails to guide others, which causes infestations to spread if left unchecked. Key ways pests invade homes include:
- Cracks and gaps around foundation, doors, and windows
- Open vents or utility openings
- Cluttered areas providing shelter
- Food spills, crumbs, or unsecured trash
- Standing water or leaks attracting moisture-dependent pests
Seal gaps larger than 1/4 inch with caulk or steel wool as these can let rodents and cockroaches in.
Early signs of indoor pest presence include droppings, greasy smears, unpleasant odors, and sighting of live insects or rodents, especially at night.
Garden Pests: Aphids, Caterpillars, Beetles
Aphids infest most garden plants by hitching rides on wind currents or visiting insects. They quickly cluster on new growth, sucking sap and often transmitting plant diseases. Caterpillars hatch from eggs laid on leaves and can consume large portions of foliage in a few days. Beetles usually arrive on plants or soil and damage roots, leaves, or fruit depending on the species.
Pests spread within gardens by crawling, flying, or through contaminated soil and plant material. Overwatering and dense planting promote pest problems by creating favorable humid conditions and hiding places. Common points of entry and spread in gardens include:
- Windblown eggs and larvae
- Infested nursery plants or seeds
- Damaged or weakened plants attracting pests
- Excessive mulch or ground cover hiding pests
- Water splashing soil or insects onto plants
Inspect new plants outdoors for pest eggs or larvae before planting to avoid introducing infestations.
Look for wilting, holes in leaves, sticky residue, or clusters of small insects early to catch garden pest problems before they spread widely.
Farm Pests: Termites, Wireworms, Locusts
Termites enter farms mainly through soil contact, wooden structures in contact with soil, or cracks in foundations. They silently feed on cellulose materials, causing structural and crop damage over time. Wireworms infest crops from the soil where larvae hatch after eggs laid on the ground. They attack seedlings and roots underground where detection is hardest.
Locusts migrate in swarms from infested regions, devastating crops quickly across large areas. They often come with changes in weather patterns or seasonal conditions triggering mass hatching and movement. Entry pathways and spread include:
- Moving infested soil or plant material between fields
- Damage or gaps in storage barns and equipment sheds
- Close proximity to untreated fields hosting pests
- Heavy rains or flooding dispersing larvae
- Uncontrolled vegetation corridors linking farms and wild lands
Monitor farm perimeters and stored materials regularly during peak pest seasons to catch termite and locust activity early.
Early infestation signs include wilting crops, hollow-sounding wood, sudden plant death, and visible insect swarms or larvae in soil.
How Cultural and Sanitation Practices Prevent Pest Infestations
Sanitation, habitat modification, and cultural practices lower the chances pests find food, water, and shelter. This reduces their attraction and ability to breed near your home, garden, or farm. Each step focuses on removing what pests need to survive and interrupting their life cycles effectively.
Sanitation Protocols for Home and Garden
Cleaning living spaces and garden areas consistently removes food scraps, standing water, and debris that attract pests. Pests like rodents, cockroaches, and flies are drawn to leftover food and garbage, so sealing trash cans with tight-fitting lids and emptying them at least twice a week limits their food source. Indoors, wipe down counters daily, store dry goods in sealed containers, and fix leaks promptly to eliminate water access.
Outdoor sanitation matters too. Rake fallen leaves and remove piles of wood or yard waste that provide shelter for insects and rodents. Pet food left outside overnight invites pests; feeding pets indoors or picking up uneaten food helps prevent infestations. Consistent removal of clutter reduces hiding spots and breeding grounds around the home and garden.
- Seal trash bins and empty regularly
- Store food in airtight containers
- Fix leaky faucets and remove standing water
- Clear fallen leaves and yard debris frequently
- Minimize outdoor pet food exposure
- Keep clutter away from walls and entry points
A common mistake is neglecting small spills or drips that provide water, especially in humid areas. Effective sanitation requires attention to detail and daily or weekly routines. Doing less often can allow pest populations to grow unnoticed.
Modifying Habitat to Reduce Pest Harborages
Habitat modification changes the environment so it becomes less favorable for pests to live and reproduce. Removing dense vegetation or trimming plants away from building foundations reduces pests’ access routes indoors. For example, rats and mice use shrubs and vines as cover to approach homes, so keeping at least 18 inches of cleared space around walls makes entry more difficult.
Standing water attracts mosquitoes and other insects. Grading soil to prevent water pooling or installing drainage systems helps eliminate breeding sites. Also, sealing cracks and gaps in building exteriors removes entry points for insects and rodents. Habitat modification costs vary but often involve simple physical changes or routine maintenance.
- Trim bushes and tree limbs away from structures
- Remove tall grass and dense ground cover near buildings
- Grade land to avoid water accumulation
- Seal foundation cracks, door frames, and vents
- Store firewood 20 feet from buildings and 5 inches off the ground
If habitat modifications are ignored, pests continue finding shelter close to food and water. Some changes require seasonal upkeep, such as pruning or clearing drainage paths, to remain effective year-round.
Crop Rotation and Planting Schedules in Farms
Changing crop types and planting times disrupts pest life cycles on farms. Many insect pests and soil pathogens specialize in certain crops. Growing different crops each season or alternating fields reduces pest buildup and minimizes damage. For instance, planting corn after a legume crop interferes with pests that rely on corn residues.
Scheduling planting dates outside peak pest emergence can further reduce infestations. Early or late planting avoids periods when specific insects are most active. This method depends on local climate and pest patterns, so consulting regional extension services provides the best timing advice. Crop rotation and adjusted schedules require planning but can reduce chemical treatments over time.
- Plan crop sequences to avoid repeating the same plant family annually
- Rotate with cover crops that suppress weeds and pests, like clover or rye
- Adjust planting dates based on local pest monitoring data
- Use resistant crop varieties when available
- Keep detailed records to evaluate rotation and planting impacts annually
Farmers who skip rotation risk pest populations adapting to repeated crops, increasing infestation levels. Timely field preparation and planting also matter; delays can expose young plants to pests or stress that reduces resistance.
Biological Control Versus Chemical Prevention Methods Compared
Biological control uses living organisms to reduce pests, while chemical prevention applies pesticides or insecticides to kill or repel them. Both methods have specific strengths and drawbacks based on effectiveness, safety, and environmental impact. Choosing between them depends on the type of pest problem, setting, and long-term risk tolerance.
Types of Biological Control Agents
Biological control relies on natural predators, parasites, or pathogens to lower pest populations. Predators like ladybugs consume aphids, and parasitic wasps lay eggs inside pest insects, killing them from within. Microbial agents include bacteria and fungi that infect or poison pests selectively. You typically release these organisms where the pest is common and monitor pest levels regularly for impact.
This method suits large-scale agriculture and gardens where chemical use is limited by regulations or environmental concerns. It takes time for biological agents to grow their populations and habitat balance must support them. You’ll need to research specific agents that target your pest species and provide suitable environments such as plants that support predators.
Overview of Chemical Prevention Options
Chemical methods use insecticides, rodenticides, or repellents applied directly to infestations or as ongoing treatments. These products act rapidly to kill or deter pests and often provide immediate reductions in pest numbers. Application can be through sprays, baits, dusts, or systemic treatments absorbed by plants.
Chemicals work best when pest populations are high or when fast action is essential, such as in food storage or health-sensitive areas. You must follow label directions carefully to avoid overuse or harming non-target species. Rotating between different chemicals helps reduce pest resistance developing over time.
Safety and Environmental Considerations
Biological controls pose fewer risks to humans and non-target wildlife since they use natural pest enemies. They reduce the chance of drinking water contamination and pesticide buildup in soil. However, some introduced species can become invasive or disrupt native ecosystems if not managed carefully.
Chemical pesticides bring risks like toxicity to beneficial insects, pets, or children if misapplied. Persistent chemicals may contaminate groundwater or kill pollinators. Proper storage, selective product choices, and using the lowest effective doses mitigate these dangers. Wearing protective gear and keeping people and pets away during and after application is important.
Comparing biological and chemical options highlights major tradeoffs. Biological agents usually take longer to control pests but are safer long-term environmentally. Chemicals act fast but carry higher risks requiring strict safety measures. Your pest problem, timing, and tolerance for environmental impact should guide your choice.
| Aspect | Biological Control | Chemical Control |
|---|---|---|
| Effectiveness | Gradual pest population reduction, best over months | Rapid knockdown of pests, effective in days |
| Safety | Lower risk to humans and non-target species | Higher toxicity risks, requires protective measures |
| Environmental Impact | Minimal pollution, supports ecosystem balance | Potential groundwater contamination, kills beneficial insects |
| Cost and Availability | May require specialized suppliers, moderate cost | Widely available, cost varies by chemical type |
| Usage Limitations | Needs specific conditions, not effective in emergencies | Restricted by laws in sensitive areas, risk of resistance |
The table helps weigh options based on your setting and priorities. Biological control fits well when you want ongoing suppression with few safety concerns. Chemical control applies best to urgent infestations needing quick results but demands careful handling to protect health and environment.
How Integrated Pest Management Emphasizes Effective Prevention
Integrated Pest Management (IPM) is a systematic approach that focuses on preventing pest infestations by combining various control methods to manage pest populations in a safe, economical, and environmentally sound way. IPM emphasizes early detection and uses a step-by-step prevention cycle to avoid the need for heavy chemical use. This approach reduces damage by tackling pests before they become a problem.
Monitoring and Early Detection
Monitoring pests is the foundation of IPM, as it helps you identify potential infestations before they grow. Regular inspections look for signs like droppings, damage, or pest activity, which guides timely interventions. Using simple tools such as sticky traps, pheromone traps, or visual checks helps you track pest populations accurately without overreacting.
Maintaining detailed records of pest sightings and environmental conditions plays a key role in early detection. You establish patterns over time that reveal which pests are active when and where. This data informs where to focus preventive efforts next. Without good monitoring, pest problems can develop unnoticed until they require more aggressive control measures.
Combining Cultural, Biological, and Physical Controls
IPM integrates multiple non-chemical strategies to prevent pests safely. Cultural controls include changing maintenance routines, such as proper sanitation, waste management, and crop rotation, to make environments less attractive to pests. Biological controls introduce natural pest enemies, like predatory insects or beneficial microbes, to keep pest numbers in check.
Physical controls involve barriers, traps, or environmental adjustments to restrict pest access or survival. For example, sealing entry points around a building, installing screens, or improving drainage to reduce standing water can effectively block pests. Using these methods together lowers pest pressure while limiting chemical use and the risk of resistance.
- Keep food storage areas clean and sealed tightly
- Remove standing water and fix leaks promptly
- Seal cracks and gaps in walls, doors, and windows
- Rotate crops annually to disrupt pest life cycles in gardens
- Introduce ladybugs or parasitic wasps for insect pest control
- Set up pheromone traps to monitor or reduce insect populations
- Use physical traps or barriers to intercept rodents or crawling insects
The balance of these controls depends on your site, pest threats, and resources. Overusing one method can reduce effectiveness or harm non-target species. The goal is to combine controls thoughtfully based on monitoring results.
Consistent record-keeping during monitoring can prevent unnecessary pesticide use by revealing when pest levels remain below action thresholds.
Thresholds and Decision-Making in IPM
IPM relies on action thresholds, specific pest population levels or damage signs that signal the need for control measures. These thresholds prevent wasteful treatments when pest presence is minimal. Setting thresholds varies depending on the pest species, site tolerance, and time of year. For instance, a single cockroach sighting in a restaurant kitchen might trigger action, while a few harmless ants in a garden might not.
Once monitoring detects pest activity near or above the threshold, IPM guides the most appropriate response using the least harmful methods first. Chemical control is reserved only if other strategies are insufficient. This decision-making cycle repeats continually to adjust treatments based on ongoing monitoring.
Following this cycle ensures pest populations stay manageable without excessive interventions. It also extends the effectiveness of control tools by reducing resistance risks and environmental harm. IPM’s preventive focus can lower long-term costs despite upfront time for monitoring and maintenance.
Tools, Materials, and Setup Needed for Pest Prevention Success
Cultural and physical prevention methods rely heavily on simple tools and regular maintenance to keep pests out. You’ll need equipment like hand pruners, shovels, and rakes to manage vegetation and soil health, which discourages pests from settling. Sealants and caulking materials are essential for closing cracks in walls, foundations, and window frames, stopping entry points for insects and rodents. Installing door sweeps and screens requires basic hand tools such as screwdrivers and measuring tape. Preparing these tools means keeping them clean, sharp, and in good condition to ensure efficiency and accuracy when fixing or modifying structures around your property.
Biological control uses living organisms to reduce pest populations and depends on obtaining the right natural predators or beneficial insects. Common materials include lady beetles, parasitic wasps, and nematodes. These should be sourced from reputable suppliers, stored according to instructions (often in cool, shaded conditions), and released in appropriate numbers timed with the pest life cycle. You must prepare by removing broad-spectrum pesticides beforehand to avoid killing beneficial species. Successful outcomes show a gradual decline in pest numbers without chemical intervention, but premature release or improper storage can reduce effectiveness significantly.
Chemical pest prevention requires a different setup, focusing on safety and proper application. Essential safety gear includes gloves made from nitrile or thick rubber, chemical-resistant eyewear, and long sleeves to prevent skin contact. You’ll also need sprayers or dusters designed for controlled pesticide application and proper storage containers labeled correctly. Chemicals range from repellents to insecticides and rodenticides, each with specific handling instructions listed on product labels. Preparing for chemical treatment involves reading these labels carefully, measuring doses precisely, and planning application timing to minimize exposure to people, pets, and the environment.
- Hand pruners, rakes, shovels for vegetation and soil management
- Sealants, caulks, door sweeps, and screens for physical barriers
- Natural predators like lady beetles, parasitic wasps, nematodes for biological control
- Refrigerated storage or cool shaded places for keeping beneficial insects before release
- Nitrile gloves, chemical-resistant eyewear, protective clothing for chemical applications
- Precision sprayers and dusters designed for safe chemical use
- Clearly labeled, secure containers for storing pesticides and rodenticides
Before beginning any prevention work, organizing these tools and materials saves time and ensures proper technique. For cultural and physical methods, it’s common to spend 10 to 15 minutes inspecting and maintaining equipment before each use. Biological controls require monitoring weather and pest cycles to know the right release window, with preparations starting several days in advance. Chemical methods take extra time to set up safely, often requiring 30 minutes to don protective gear and prepare sprayers. Results for cultural methods usually start visible after a few weeks of maintenance, biological controls show effect in 1 to 3 weeks, and chemical prevention can produce faster results but demands careful handling to avoid hazards or resistance buildup.
Costs and Timelines: How Soon You See Results from Each Method
Costs and timelines vary significantly between pest prevention methods, affecting which option fits your situation best. Preventive chemical treatments usually cost between $100 and $300 per application for a typical home, with effects visible within days but requiring reapplication every few months for continued protection. Biological controls, like introducing predatory insects, range from $50 to $200 depending on scale but take weeks to establish effective pest control. Sanitation and cultural methods often involve upfront costs for tools or labor but mostly rely on ongoing effort and can show results in a month or more.
The table below compares common pest prevention methods, highlighting typical costs, initial timelines to see results, and maintenance frequency. This gives a concrete way to assess what fits your budget and timing needs.
| Method | Typical Cost Range | Time to Initial Results | Maintenance Frequency |
|---|---|---|---|
| Chemical Treatments (Pesticides) | $100 to $300 per application | 2 to 5 days | Every 2 to 4 months |
| Biological Controls (Predators, Parasites) | $50 to $200 per application | 2 to 6 weeks | Seasonal or as needed |
| Sanitation and Cultural Practices | Varies; labor and minimal supply costs | 1 to 4 weeks | Continuous |
| Physical Barriers (Screens, Seals) | $20 to $150 depending on extent | Immediate after installation | Inspect annually |
| Integrated Pest Management (Combination) | Varies widely; $200 to $500+ per season | Days to weeks, depends on methods combined | Ongoing seasonal adjustments |
Chemical treatments deliver fast, measurable pest reductions within days, useful if you need immediate relief and have a budget for repeated applications. These methods require strict observance of label directions to ensure safety and effectiveness. Biological controls represent a cost-effective but slower approach that fits well in organic or environmentally sensitive contexts, though pests can persist for a few weeks until natural enemies multiply.
Sanitation and cultural controls require consistent effort, removing food and water sources or changing landscaping habits affect pest populations slowly but sustainably. You’ll start noticing fewer pest signs within weeks if the measures are thorough. Physical barriers block entry paths, yielding immediate benefits without chemicals, but the initial installation cost and effort can be higher if many points of entry exist.
In many pest prevention plans, especially those meant for long-term property care, combining methods under an Integrated Pest Management strategy balances cost, speed, and environmental impact. A typical IPM approach may begin with pest monitoring and physical exclusion, followed by spot chemical treatments or biological releases as needed, with costs and results spread over a few months.
Early Signs of Pest Activity and How to Detect Them Fast
Early detection of pest activity revolves around spotting physical signs and setting up regular monitoring. Visible indicators include droppings, chewed leaves or wood, shed skins, or small holes in food packaging. Bark dust or fine sawdust near wood suggests termites or carpenter ants. Noticing these cues quickly matters because pests multiply fast, making control costlier and more complicated if you wait.
To monitor pests effectively indoors, inspect common hiding spots weekly. Check behind appliances, inside cabinets, and under sinks for signs like droppings or grease marks. Outdoors, examine garden plants, mulch, and foundation cracks. The best practice combines visual checks with strategically placed traps that reveal early activity before damage spreads.
- Create and use a pest monitoring checklist covering daily or weekly inspections of vulnerable areas.
- Set sticky traps for flying insects near windows and light sources; replace every 1-2 weeks.
- Use bait stations indoors to detect ants or cockroaches, checking them twice a week for activity.
- Install pheromone traps outdoors for specific pests like moths or beetles during active seasons.
- Keep a record of observation dates and findings to notice trends or escalating activity.
- Inspect stored foods in sealed plastic or glass containers before long-term storage to avoid attracting pantry pests.
- Review plants regularly for early damage such as leaf discoloration or holes, signaling insect feeding.
Useful tools for early pest detection include magnifying lenses for spotting tiny pests and moisture meters, which reveal damp areas favored by termites or fungus gnats. A flashlight helps examine dark corners thoroughly. Electronic devices like motion sensors or remote cameras provide detailed tracking but cost several hundred dollars and may require expert setup. These investments reduce the chance of missing early signs.
Regularly entering monitoring results in a simple log helps you recognize patterns quickly and decide when to act before infestations worsen.
Consistent timing and thoroughness define effective monitoring. Neglecting this allows pests to build nests or colonies out of view. In different climates, monitoring intensity may change, for example, weekly checks during warm months but monthly inspections in colder seasons. Adjust according to your location and typical pest activity to catch signs early and apply preventive measures efficiently.
Common Mistakes in Pest Prevention and How to Avoid Them
One common mistake in pest prevention is neglecting thorough inspection before starting any control measure. Missing early signs such as small droppings, subtle damage, or entry points allows pests to establish and multiply unnoticed. Another frequent error is applying treatments inconsistently or at the wrong times, which can spread pests instead of reducing them. For example, applying sprays during a pest’s inactive phase may waste chemicals and cause resistance.
Improper sanitation and clutter can undo even the best prevention methods. Leaving food scraps or standing water gives pests easy access to resources, encouraging them to stay or return quickly. Blocking only visible entry points without checking for hidden gaps around pipes, vents, or cracks also invites reinfestation. Failing to rotate or follow label instructions for chemical use risks ineffective control and environmental harm.
To avoid these pitfalls, focus on a detailed checklist before implementing any strategy. Begin by inspecting the entire area thoroughly, include both indoor and outdoor spaces, and identify pest signs and access routes. Maintain cleanliness daily by removing food residues and fixing leaks. Seal entry points with materials suitable for your situation, like caulk for small cracks or metal flashing for larger gaps. Always read product labels carefully, applying treatments during active pest periods and repeating applications as directed.
- Conduct a detailed inspection for signs and entry points every 2, 4 weeks
- Keep food stored in sealed containers and clean up spills immediately
- Fix plumbing leaks and remove standing water sources to reduce pest attraction
- Seal cracks and gaps with durable materials, checking regularly for new openings
- Apply chemical treatments only as specified on labels and during peak pest activity
- Rotate pesticide types annually to limit pest resistance
- Monitor pest activity after treatment to adjust control methods as needed
Following this routine helps ensure long-term pest control success by removing food, water, and shelter options pests rely on. It also avoids the reinforcement of infestations due to partial treatments or overlooked invasion spots. These steps typically require regular time commitment but prevent costly damage and more intensive future treatments.
When to Consult Professionals Versus Using DIY Prevention Methods
Deciding between professional pest control and DIY prevention methods depends on the infestation’s severity, safety concerns, and local regulations. Minor pest signs can often be managed with DIY steps, but widespread or hazardous infestations require a professional’s expertise.
Assessing Infestation Severity
A key factor in choosing the right approach is how intense the pest problem is. Small or early-stage infestations such as a few ants or occasional flies are usually manageable with basic sanitation, sealing entry points, and store-bought traps or sprays. You can monitor these situations closely and increase preventive measures without professional help. However, when pests have spread extensively, like large colonies of termites, rodents, or bed bugs covering multiple rooms, DIY efforts rarely succeed. Professionals have tools and training for thorough inspections and treatments that homeowners generally can’t match.
A useful rule is the “visibility and damage” test: if pests are easily seen in several places or you notice damage to structures, wiring, or stored goods, call an expert. For example, drywall holes chewed by rodents or wood weakened by termites indicate a need for professional assessment. Early inspections cost around $100 to $300 but can save thousands in repairs and repeated DIY attempts.
Evaluating Risks and Chemical Use
Safety concerns around pest control chemicals influence the choice between DIY and professional methods. Over-the-counter products contain lower concentrations to minimize risks, suitable for controlled use on minor issues. Using these products following label instructions reduces hazards and limits environmental impact. Professionals often use stronger or specialized chemicals that require certification and experience to apply safely and effectively. Incorrect handling of these substances can pose health risks to people and pets.
Another safety consideration is the pest species and the treatment approach. For example, fumigation or extensive baiting in food storage or childcare areas demands professional involvement. Personal protective equipment, ventilation, and secure application techniques matter significantly and are part of licensed applicators’ training. If you need to use more potent treatments, it is better to engage a licensed professional to prevent contamination and legal problems.
Regulatory Guidelines and Safety Standards
Pest control activities can be subject to state and local regulations that restrict who may apply certain pesticides and under what conditions. Many states require professional licensing for commercial pesticide use, especially for restricted-use products where exposure risk is higher. These rules protect public health and ensure that correct procedures are followed. Ignoring regulations can lead to penalties or ineffective treatments that allow pests to return.
You should verify local guidelines by contacting your state agricultural department or pest control board, especially for large or chemical-based control measures. For example, agricultural pest management often follows stricter rules than residential settings. Homeowners who want to do DIY pest prevention need to stick to approved products and methods. Professionals keep up with regulatory changes and maintain certifications, so hiring them is advisable for complex or regulated pest problems.
Step-by-Step Action Plan for Preventing Pest Infestations
Choose one primary prevention method based on your site’s pest risks, then follow these clear steps to implement and track its effectiveness. This focused plan helps you limit damage and manage costs while maintaining safety.
- Before you start: Identify common pests in your area and their usual entry points. Use this knowledge to select a prevention method that targets those pests specifically, which reduces wasted effort and cost.
- Day 1: Inspect your property thoroughly for early signs of pest activity such as droppings, gnaw marks, or trails. Early detection lets you act before infestations grow and become costly.
- Week 1: Implement cultural and sanitation controls by removing food sources, storing waste properly, sealing gaps, and fixing leaks. This basic clean-up reduces pest attraction effectively without chemicals.
- Week 2: Set up physical barriers or traps tailored to your chosen pest and site conditions. Confirm barriers cover all typical pathways and traps are placed in known pest hotspots; this blocks pest entry and monitors presence.
- Week 3: For persistent pests, consider adding biological controls suited to your location or targeted pesticides if safe and legal. Use chemical methods sparingly to reduce resistance risks and monitor their effects carefully.
- Month 1 and ongoing: Track pest activity weekly through inspections and trap checks. When signs of pests decline or disappear, your method is working; if not, adjust sanitation or barrier efforts before considering professional help.
- After 2 months: Review your costs versus results. When prevention reduced pest sightings and damage noticeably and fits your budget, continue; otherwise, consult a licensed professional to assess for integrated pest management options.
Frequently Asked Questions
What Is the Most Effective Prevention Method for Termite Infestations?
The most effective method is professional soil treatment with termiticides. This creates a chemical barrier that stops termites from reaching wood structures and is backed by extensive research on termite behavior. Regular inspections improve early detection, improving long-term prevention.
Can Using Physical Barriers Prevent Rodents from Entering Buildings?
Yes, sealing all entry points with materials like steel wool and metal flashing is key. Rodents chew through softer substances, so durable barriers are necessary to block their access effectively. Inspect these seals regularly to maintain protection.
How Does Removing Standing Water Help Prevent Mosquito Infestations?
Eliminating standing water removes mosquito breeding sites because females lay eggs in still water. Even small amounts like flower pot saucers or clogged gutters can support larvae, so clear these areas weekly to reduce mosquito populations.
Is Planting Certain Types of Vegetation Useful in Pest Prevention?
Certain plants like marigolds and lavender can repel insects naturally. Their oils produce scents that pests avoid, helping reduce infestations around gardens or homes. However, these plants work best combined with other control methods; don’t rely on them alone.
Does Regular Trash Removal Influence Pest Control Success?
Yes, promptly removing trash eliminates food sources that attract pests like rodents and flies. Keeping outdoor bins sealed and cleaning kitchen waste daily cuts pest attraction significantly, making sanitation a cornerstone of prevention.
Can Pheromone Traps Assist in Early Pest Detection?
Pheromone traps can monitor and reduce pest populations by attracting specific insects, providing early warning signs of infestations. Place traps near entry points to detect insects like moths or beetles early and apply controls before they spread extensively.
Final Thoughts
Prevention works best when you tailor your approach to the pests you face and the environment around your home or farm. Start today by inspecting potential entry points like cracks and gaps, sealing them with durable caulk or weatherstripping to block common access routes for ants, rodents, and other pests. This step alone reduces infestation risks because many pests enter through small, overlooked openings. Regularly maintaining clean, dry conditions and promptly removing food waste adds layers of defense that make other prevention methods more effective over time.