Which Is a Sign of Pest in an Operation: 10 Key Indicators with Expert Tips
Signs of pest activity in a food service operation include droppings, gnaw marks, unusual sounds, and unpleasant odors. These indicators show where pests have compromised cleanliness or safety, requiring quick identification to prevent contamination or regulatory issues. Knowing which is a sign of pest in an operation helps you act before problems escalate and ensures compliance with health standards.
This is essential for restaurant managers, food service operators, and health safety officers who need to maintain a pest-free environment. You’ll learn to distinguish pest signs from normal wear, understand inspection routines, and apply clear criteria to decide when to call pest control professionals. Seasonal factors and operational weaknesses also affect pest presence, so targeted observation and timely action reduce risks effectively.
Key Takeaways
- Check for droppings in dark corners and near food sources, distinguishing rodent droppings (capsule-shaped) from insect feces (grainy or powdery).
- Use routine visual and auditory inspections, listening for scratching sounds and watching for unusual grease marks or gnawing on packaging.
- Smell sharp, musky odors or decaying scents around storage or prep areas as indicators of hidden infestations requiring immediate attention.
- Compare damage patterns on food packaging and facility structures to differentiate pest activity from regular wear based on irregular holes or chew marks.
- Schedule pest inspections weekly and use a detailed checklist emphasizing droppings, tracks, nesting materials, and entry point integrity.
- Escalate to professional pest control when consistent signs appear in multiple zones or when DIY measures fail to reduce visible evidence.
Common Signs of Pest Infestation in Food Service Operations
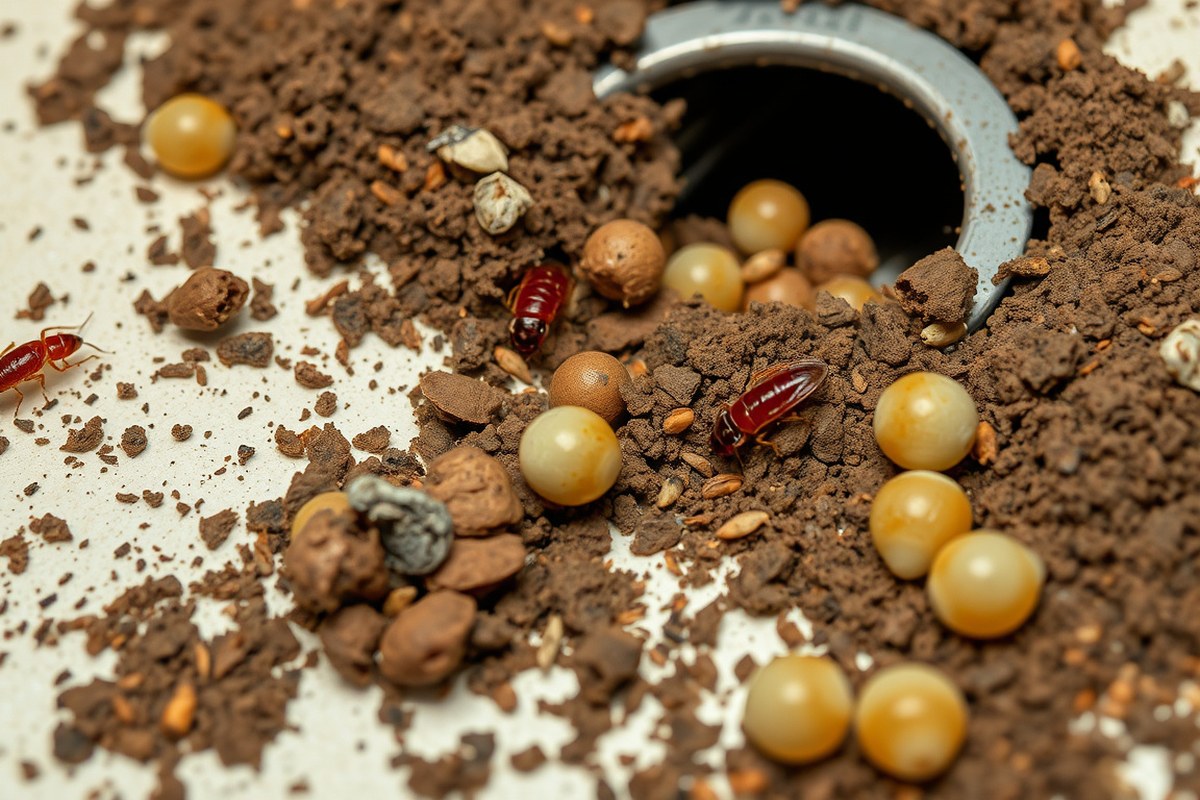
Common pests in foodservice operations include rodents, cockroaches, flies, ants, termites, and occasionally birds. Each pest leaves specific signs that reveal their presence even if you don’t spot them directly. Knowing what to look for helps catch infestations early, speeding up effective control and reducing contamination risks.
Rodent Indicators: Droppings, Tracks, and Gnaw Marks
Rodents such as rats and mice leave several physical signs that you can spot during routine inspections. Their droppings are the most obvious clue. Look for dark, pellet-shaped droppings about ¼ inch long in storage areas, under sinks, and along walls. Fresh droppings look shiny and moist, while older ones appear dry and crumbly.
Rodents also leave tracks and greasy rub marks along walls and baseboards where they travel frequently. You can detect tracks by sprinkling a fine layer of flour or talcum powder in suspected areas overnight and then checking for footprints. Gnaw marks on wood, plastic, or packaging reveal rodent activity. These marks are clean-cut and often about ½ inch long or smaller. Rodents chew to file down their constantly growing incisors and access food or shelter.
- Fresh vs. Old rodent droppings to assess recent activity
- Grease rub marks along walls or baseboards from rodent fur oils
- Gnaw marks on packaging, shelving, or food containers
- Footprints captured by powder dusting in low-light areas
- Burrows or nesting material near walls or under equipment
Checking these signs twice a week is practical in busy kitchens. Early detection helps prevent contamination and damage, especially since rodents reproduce rapidly. Missing fresh droppings or tracks can delay control, making infestations harder and costlier to manage.
Cockroach Signs: Egg Cases, Smears, and Shed Skins
Cockroaches avoid open areas and active hours, so direct sightings can be rare despite heavy infestations. Inspect dark, damp locations around sinks, behind equipment, and inside cabinetry for key signs. Egg cases, called oothecae, look like small, brownish capsules roughly ½ inch long. These attach to hidden spots and indicate breeding.
Smear marks occur when cockroaches travel over surfaces and leave brownish streaks from oily body parts mixed with dirt. Look along edges of cabinets and under sinks. Shed skins of cockroach nymphs also accumulate in undisturbed corners. This molted skin is transparent and papery.
- Sticky brown smear marks on walls and counters in dark, moist areas
- Egg cases (oothecae) attached near warm, moist hiding spots
- Shed cockroach skins in corners or inside equipment
- Strong musty odor during severe infestations
- Checking behind appliances during off-hours when roaches are active
Using a flashlight and a mirror helps inspect tight or hidden spaces. Inspections after closing hours increase the chance of finding active cockroach signs since they are nocturnal. Early cleaning and sealing entry points prevent egg-laying and population growth. Overlooking small egg cases or smears lets roaches multiply quickly before control begins.
Other Pests: Flies, Ants, Termites, and Birds
Flies commonly indicate poor sanitation or food residue. Look for adult flies near trash areas, drains, and food prep zones during the day. Fly larvae or maggots appear as small white grubs in decomposing organic matter. Managing fly sources involves regular trash removal, drain maintenance, and screen repairs.
Ant trails often appear in straight lines across floors or along walls, marking their path between nests and food. Check for tiny ant bodies clustering near spilled sugars or grease. Depending on the species, ants can contaminate food or damage structural wood.
Termite signs usually show up as mud tubes along foundations or damaged wood surfaces inside wall cavities. Detecting termites early requires looking underneath wooden structures for blistering or hollow sounds when tapped. Birds pose risks when nesting near vents or open doors, leaving feathers and droppings that compromise food safety.
- Visible flies and maggots near waste and drains
- Ant trails and clusters near sugary or greasy spills
- Mud tubes or hollow wood indicating termites
- Bird droppings, feathers, and nesting materials near openings
- Regular monitoring of entrances and exterior walls for pest access
Regular sanitation removes fly and ant attractants, limiting infestations. Structural repairs and pest-proofing prevent termite and bird entry. Missing early signs lets these pests spread contamination or cause expensive building damage.
How to Identify Droppings and Fecal Evidence Correctly
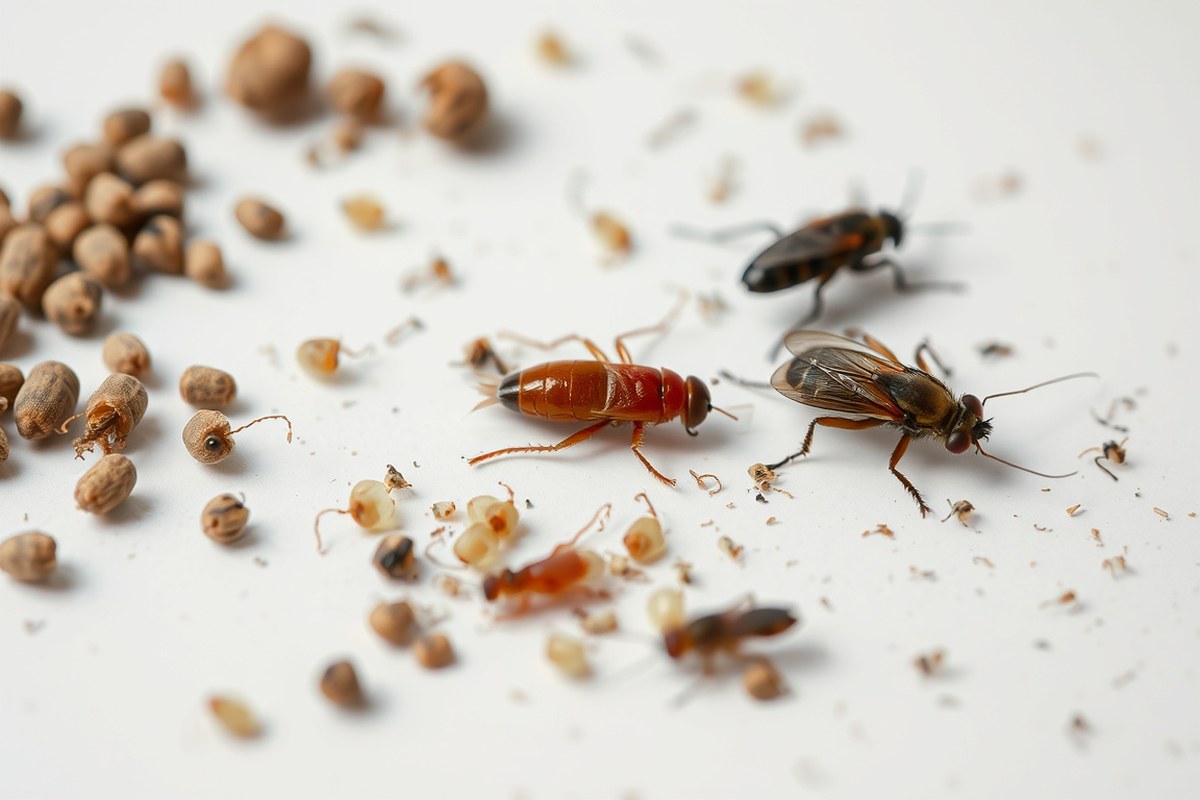
Identifying pest droppings correctly involves noting size, shape, color, and location, which helps distinguish them from ordinary debris or food particles. Recognizing these characteristics lets you respond swiftly to pest issues before they become widespread. You need focused observation and some reference points to do this accurately.
Rodent Droppings: Size, Shape, and Placement
Rodent droppings are typically elongated, cylindrical, and dark-colored, ranging from about 1/8 to 1/2 inch long depending on the species. Mice droppings are smaller, about 1/4 inch, with pointed ends, while rat droppings are larger, up to 1/2 inch, and blunt at the tips. These droppings often cluster near food sources, walls, or dark corners, as rodents prefer to travel along these protected pathways.
Fresh droppings are shiny and soft, becoming dull and hard as they dry. You can identify recent activity by spotting the shiny texture and moist feel using a gloved finger. Droppings found near gnawed materials or rub marks on walls and floors strengthen the suspicion of rodent presence.
Cockroach and Insect Droppings: Appearance and Context
Cockroach droppings look like small black or brown specks, often described as resembling ground pepper or coffee grounds. They can range from about 1/16 to 1/8 inch long and might appear in clusters or streaks along walls, in cabinets, or under appliances. Their appearance varies slightly between species, such as German cockroaches leaving droppings with tapered ends.
Other insect droppings, like those from flies, may be lighter and irregular in shape but usually occur near windows or food prep areas. Identifying insect droppings becomes easier when paired with observing live insects or molted skins nearby, as these signs often go hand in hand.
Distinguishing Pest Droppings from Food or Dirt
Confusing pest droppings with food crumbs or dirt is common, especially when particles are small or scattered. A practical step is to gently scoop the suspected material with a gloved finger and examine its texture and shape. Food particles tend to be irregularly shaped and may crumble, while droppings hold a consistent form and usually have a glossy or dry surface depending on freshness.
A small hand lens can help magnify these details. For example, rodent droppings usually have a hard surface and a defined shape, whereas spilled grains or pepper flakes are flat or fragmented. Dirt and dust often appear matte, loosely packed, and can be shifted easily by air or brushing.
| Pest Droppings Type | Size Range | Color | Shape | Common Locations |
|---|---|---|---|---|
| Mouse | 1/8 to 1/4 inch | Dark brown to black | Small, pointed ends | Along walls, food storage, corners |
| Rat | 1/4 to 1/2 inch | Dark brown to black | Larger, blunt ends | Basements, behind appliances, attics |
| Cockroach | 1/16 to 1/8 inch | Black or dark brown | Speck-like, ground-pepper appearance | Under sinks, cabinets, cracks |
| Other Insects | Varies, usually <1/8 inch | Light brown to black | Irregular, sometimes powdery | Near windows, food prep areas |
This table provides a quick visual guide to separate droppings by type using size, color, and typical locations. Using this information during routine inspections helps catch pest issues early.
Always wear gloves and avoid sweeping or vacuuming fresh droppings to prevent airborne particles; instead, use a damp cloth to collect samples safely.
Visual, Auditory, and Olfactory Pest Indicators to Monitor
Signs of pests often appear through sounds, smells, or visible evidence. Detecting these sensory cues early helps control infestations before they affect food safety or operations. Recognizing specific noises, odors, and visual damage guides you in identifying the exact pest and deciding your next steps.
Sounds of Pest Activity: Scratching and Scurrying
Unusual noises inside walls, ceilings, or storage areas can signal rodents or birds. Rodents, such as rats and mice, produce scratching or gnawing sounds often heard at night when they are most active. Birds trapped inside vents or attics may create flapping or chirping noises, which are distinct and usually constant during daylight hours.
To listen effectively, conduct inspections during quiet times, such as early morning or late night, to detect subtle sounds. Use a stethoscope or simple handheld listening device pressed against walls near suspected areas to isolate the noise source. Record or note the time and frequency of the sounds to help track pest activity patterns.
- Scratching behind walls or ceilings, especially at night, suggests rodents.
- Flapping or chirping near vents or attics points to birds.
- Rustling in stored goods can indicate insects like beetles or cockroaches.
- Consistent tapping may signal woodboring insects.
- Loud gnawing often appears in the early hours before dawn.
- High-pitched squeaking can come from rat pups or baby mice.
Failing to note these sounds early can delay treatment. If noises persist after initial control efforts, reassess the building structure for reentry points or hidden nests.
Common Pest Odors and What They Indicate
Distinct odors often reveal pest presence before visual confirmation. Rodents emit a strong, musky smell from urine and gland secretions, especially in enclosed or poorly ventilated spaces. This odor can accumulate near nests, food storage, or along travel routes. Cockroaches produce oily or musty smells, which intensify with larger populations and long-term infestations.
Termites and carpenter ants usually do not produce noticeable odors, but mold growth from moisture in infested wood might emit a damp, earthy smell. Dead pests trapped inside structures can generate a foul or decaying scent.
Regularly inspect less visible spots such as behind appliances, under sinks, or inside wall cavities for unusual smells. Portable odor detectors are available but not necessary if you systematically check suspected areas on a weekly basis. Ventilating these spaces may reduce odor buildup but does not solve the pest problem.
- Strong musky or ammonia-like smell near walls suggests rodents.
- Oily or musty odor points toward cockroach activity.
- Damp, moldy smells may indicate termite or carpenter ant damage.
- Decaying scent signals dead pests inside the building.
- Strong urine odor in storage or behind equipment flags rodent nests.
Ignoring pest odors risks contamination and customer complaints. Use smell as one diagnostic tool, combined with visual checks for full assessment.
Visible Signs: Damage, Nests, and Movement
Visual inspection reveals direct evidence like gnaw marks, nesting materials, or live pests. Rodents leave teeth marks on wood, plastic pipes, or food packaging. They also build nests from shredded paper, cloth, or insulation, usually in hidden cavities. Birds create nests in rafters or ventilation shafts made from twigs, feathers, and debris.
Termite infestation shows through swollen or blistered wood, small holes, and mud tubes on foundations or wall joints. Carpenter ants hollow out damp or soft wood, leaving smooth channels inside. Spotting live insects or seeing ants or termites on walls signals active infestation.
Use a flashlight to examine dark corners and behind appliances. Run a wire or probe into holes to detect hollow sounds from termite damage. Look for small piles of sawdust (frass) near wood damage, a common sign of carpenter ants and termites.
- Teeth or gnaw marks on packaging or infrastructure indicate rodents.
- Nests made from shredded paper or twigs reveal rodent or bird activity.
- Swollen, cracked, or blistered wood points to termite damage.
- Frass or tiny sawdust piles suggests carpenter ant presence.
- Live or dead insects on surfaces confirm an active infestation.
- Mud tubes on walls or foundations are termite signs.
- Droppings near food preparation validate pest presence.
Sometimes damage may seem minor but indicates a larger underground problem. Schedule detailed inspections after spotting these visual signs to prevent costly repairs or food contamination.
Distinguishing Pest Damage from Normal Wear and Tear
Distinguishing pest damage from normal wear and tear requires close observation of the damage characteristics and context. Pest damage tends to follow certain patterns, such as irregular holes, gnaw marks, or tunnels in wood, packaging, or food products. Wear and tear usually shows as uniform abrasion, fading, or gradual material breakdown. Understanding these differences helps you address pest issues early and avoid unnecessary repairs or replacements.
Start your assessment by examining the material damaged. For example, gnawing on wooden beams might have clean, sharp edges with splintered fibers, while wear from regular use will look more like smooth erosion or simple scratching. Look for grouping or clustering of damage spots, which often indicates pest activity, as individual signs like rodent teeth marks or insect boreholes rarely appear randomly. Conversely, worn-out surfaces from operational stress or cleaning tend to be more evenly spread.
Create a simple checklist for daily or weekly walk-throughs that covers common sites where pest damage differs from wear. Include corners of storage areas, under equipment, along baseboards, and inside dry good packaging. Check for shredded materials, droppings nearby, or grease marks that accompany pest damage. Note if damage appears suddenly between inspections; normal wear is generally gradual and predictable over time. Keep photos with date stamps to document changes.
Consider the type of operation because different environments influence how damage presents. In a high-traffic kitchen, signs like scratches or faded paint on walls may stem from routine handling rather than pests. Weight your observations alongside odors, sounds, or fecal evidence before concluding pest damage. In dry storage rooms, find any tiny exit holes on grain bags or cartons and trace them to insect infestation. Write down your findings daily to track trends.
Good results come from keeping records of inspections and damage characteristics. Review patterns monthly to decide if professional pest control is necessary. Avoid assumptions based solely on visual wear without considering location, damage patterns, or additional pest clues, since misinterpreting wear as a pest problem can lead to unnecessary chemical treatments or maintenance costs. In contrast, missing real pest damage delays remediation and increases contamination risk.
Costs mainly involve time spent training staff on the checklist and the frequency of detailed inspections, which can be 10 to 15 minutes per key area every few days. Investing in a handheld magnifier helps identify fine gnaw marks or insect holes clearly. Over time, this approach reduces reactive expenses from structural repairs or health code violations due to unnoticed pest damage. A practical script for a spot check could be: “Inspect the baseboard for irregular chew marks; check if holes appear in stored packaging; observe if damage is localized or widespread; look under equipment for droppings or grease smears; photograph and date any suspect damage; report patterns to maintenance or pest control.” Following these steps puts you in control of differentiating pest damage from everyday wear, especially in busy operations where damage signs overlap.
Inspection Protocols: Frequency and Practical Checklist for Pest Signs
Inspections for pest signs should occur daily in critical areas and weekly across the entire operation to catch infestations early. Frequent checks allow you to act swiftly and prevent costly contamination or damage. A clear, step-by-step checklist ensures thorough and consistent monitoring.
Daily Inspection Points: High-Risk Areas
Daily inspections need to focus on areas prone to pest activity due to food availability, moisture, and access points. Checking these zones every day helps spot early indications like droppings, gnaw marks, or nesting materials before they become serious. The inspection should take 10 to 20 minutes depending on the size of the operation.
Key daily targets include: storage rooms, waste disposal locations, kitchen floors under equipment, and entry points such as doors and vents. Look carefully in hidden spaces behind appliances and in cracks along walls where pests often hide.
- Look for fresh droppings or urine stains near food prep and storage
- Check traps or glue boards for any captured pests
- Inspect floor drains for signs of crawling insects
- Examine food packages for tears, holes, or gnawing
- Confirm that exterior doors close tightly and screens have no holes
- Remove and inspect trash bins for waste spills or pest access
- Scan ceilings and light fixtures for evidence of nesting or webbing
Daily inspections are only effective if documented consistently; use a checklist form to track findings and actions taken.
Weekly Complete Inspection Tasks
A weekly inspection goes beyond the high-risk spots and covers the entire facility systematically. It takes 30 to 60 minutes, depending on your operation’s size and layout, and should include less obvious areas. This thorough review will uncover hidden issues such as pest breeding sites and indirect entry points.
Systematic weekly checks require a structured route through all rooms, including storage, dining, bathrooms, maintenance areas, and even outside service entrances. Use a flashlight to inspect behind equipment and inside wall voids if safe and accessible.
- Survey the infrastructure for cracks, gaps, and damage that pests can use
- Evaluate sanitation levels in less trafficked areas like HVAC units and ceiling tiles
- Inspect stored equipment and supplies for pest intrusion
- Test the effectiveness of current pest control measures like bait stations and traps
- Check outdoor perimeters for signs of rodent burrows or insect nests
Document each weekly inspection carefully, including pest sightings, sanitation issues, and structural concerns. Share findings promptly with your pest control provider or maintenance team.
Using Tools: Infrared Cameras, Glue Boards, and Sensors
Many pests hide in inaccessible areas or only visit at night, so relying solely on visual inspection can miss early signs. Using detection tools can improve accuracy and speed in identifying pest presence.
Infrared cameras detect heat signatures of rodents or large insects behind walls or inside ceiling spaces. Glue boards trap insects or rodents and reveal their activity level, especially when placed along walls or near entry points. Motion-activated sensors and ultrasonic devices can alert staff to pest movement during off-hours.
- Deploy infrared cameras monthly or when infestation is suspected to locate hidden nests
- Replace glue boards every week after inspection to maintain effectiveness and prevent decay that deters pests
- Install sensors in quiet, low-traffic zones for ongoing monitoring
- Train staff to interpret tool results and report unusual findings immediately
While these tools add upfront costs, typically ranging from $50 for simple glue boards to several hundred dollars for infrared devices, they reduce long-term damage and contamination risks. Use them as part of an integrated inspection strategy.
When to Escalate: Decision Flowchart for Pest Control Intervention
You should escalate to professional pest control when signs indicate more than a minor, localized issue. Small, isolated sightings or droppings found during routine inspections can often be managed internally with proper sanitation, targeted cleaning, and exclusion techniques. However, if you observe multiple pests over several days, evidence of breeding like nests or larvae, or if pests appear in food prep or storage areas, it signals a deeper infestation that requires expert intervention.
Decide on intervention by following a simple decision rule: assess the severity, location, and frequency of pest signs. Start by quantifying pest activity, one or two sightings of a single pest type can be monitored and controlled in-house through inspections, cleaning, and sealing entry points. When sightings increase to three or more in a week, or you find multiple species, escalate to a professional. Also, sighting flying insects or rodents in food handling zones constitutes an immediate risk and should prompt urgent action.
A practical flowchart to guide your decision begins with categorizing pest signs into minor, moderate, or severe. Minor signs include a single droppings cluster or one-off sighting in non-critical areas. Moderate signs occur when pests are repeatedly seen over a week or droppings appear near food prep zones. Severe signs mean seeing reproduction, pest animals daily, or pests inside packaged food products. Minor signs prompt internal cleaning and monitoring protocols. Moderate signs lead to a call for pest control inspection and treatment. Severe signs require emergency pest control services within 24 to 48 hours.
Internal control efforts involve scheduling deep cleaning, removing harborage points, and applying over-the-counter baits or traps. These typically cost under $200 and require ongoing monitoring. Hiring professionals can cost $300 to $1,000 per treatment, depending on infestation type and facility size. The good result of professional intervention is a visible reduction in pest activity within a week and elimination of breeding evidence. Failure to escalate properly often results in pest population growth, structural damage, and health code violations.
Emergencies are mostly defined by rodent sightings in food handling areas or flying insect infestations that risk contamination, such as fruit flies or wasps. Since these pests spread disease quickly, wait times for professional response should be no longer than 24 hours. Delays increase cross-contamination risks and potential shutdowns by health inspectors.
Managers can use digital inspection logs or software tools to track pest sightings by date and location. This data helps justify when professional services are needed or confirms that internal controls are working. Consistent documentation combined with a clear decision flowcard prevents overlooked infestations and unnecessary costs from premature professional calls.
Common Mistakes and How to Correctly Identify Pest Signs
Managers often misinterpret pest signs by assuming all evidence indicates active infestation or by overlooking critical details that distinguish new activity from old. Mistakes like confusing dirt marks for droppings or misidentifying species can lead to inappropriate or delayed responses. Correct identification requires careful examination, contextual understanding, and consistent documentation.
Mistaking Old for New Activity
One common error involves treating old pest signs as fresh, which wastes time and resources chasing problems that have already been resolved. For instance, dried rodent droppings or faded gnaw marks may look similar to recent damage but do not indicate ongoing infestation. You can avoid this by checking the texture and moisture content of droppings; fresh droppings tend to be moist and shiny.
Accurate assessment of activity timing involves inspecting droppings or damage early in the day before cleaning routines. Take photos or measure droppings for size comparisons over time. Record the location and note environmental factors like recent weather changes or cleaning schedules. When signs remain unchanged for a week, chances increase that they are older and not an active threat. This step costs little but requires consistency in documentation and frequent inspections to detect trends.
Confusing Non-Pest Signs with Infestation
Managers often mistake non-pest materials for signs of infestation, such as mistaking dirt smudges, food crumbs, or rust marks for feces or pest trails. This can prompt unnecessary pest control treatments that increase expenses and disrupt operations. Avoid these errors by learning to differentiate based on appearance and context. For example, rodent droppings are usually black, capsule-shaped, and measure about ¼ inch long, while dirt smudges lack this shape and often fall off when rubbed.
A practical tip is to collect suspected droppings using a piece of clear tape applied gently to the surface. When the material sticks properly and retains its form, it is more likely to be actual fecal matter. Alternatively, if it brushes away easily or smears, it is likely non-pest residue. Training staff to recognize these distinctions during routine cleaning shifts helps reduce confusion and improves the accuracy of reporting pest sightings.
Misidentifying Pest Species Based on Incomplete Evidence
Relying on partial evidence, such as a single dropping or an ambiguous chew mark, can lead to misidentifying the pest involved and applying the wrong control strategies. For example, mouse and rat droppings differ in size, with mouse droppings smaller and more pointed, while rat droppings are larger and more blunt. Using a magnifying glass and measuring droppings against a ruler during inspections clarifies species identification. This affects trap selection and bait choice, which vary between pest types.
In some operations, pest signs can overlap, such as cockroach droppings resembling mouse droppings to an untrained eye. Confirming by observing live pests or using monitoring devices like glue boards provides more definitive species identification. This approach may delay immediate action but saves the cost and troubles of repeated failed treatments. Accurate species ID matters because it guides targeted responses that reduce pesticide use and improve long-term pest management outcomes.
How Seasonality and Climate Influence Pest Signs and Risks
Seasonality and regional climate shape when and how pest signs show up in your operation. Specific pests become active at certain times of the year or under particular weather conditions, so understanding these patterns helps plan inspections and control efforts more effectively.
Seasonal Pest Activity Patterns
Pest activity fluctuates across the year, and these shifts influence when signs appear. In temperate regions, rodents and cockroaches often seek indoor shelter as temperatures drop in fall and winter, raising the risk of infestations and visible droppings during those months. During warmer months, insects like flies and ants increase in number, leaving fresh trails and nests around food storage or preparation areas. Recognizing these trends allows you to schedule more thorough inspections ahead of high-risk seasons, such as late summer for ant control or early fall for rodent prevention.
Season-specific baiting or trapping tactics should align with peak pest activity times. For example, intensify cockroach monitoring from late spring to early fall when their breeding accelerates. Failing to align pest control tactics with seasonal patterns wastes resources and allows pests to establish.
Climate Impacts on Breeding and Nesting
Local climate influences how quickly pests reproduce and where they nest. Humid environments promote cockroach and fly breeding by providing moisture, while dry climates might concentrate pest activity around water sources. In tropical or subtropical zones, pests reproduce year-round, so signs can be constant rather than seasonal. Indoor humidity control and sealing water leaks become critical in these locations to reduce pest-friendly conditions.
Cold climates delay breeding cycles, which reduces pest signs during winter but can concentrate signs around heating sources or entry points as pests attempt to stay warm. In these areas, monitoring heat vents, steam pipes, and cracks near doors provides clues about hidden nests and rodent trails.
Adjusting Inspection Frequency by Region
Adjust inspection schedules based on your regional climate and seasonal pest cycles. In cooler northern states, inspect pest-prone areas monthly during colder months, increasing to biweekly inspections in early spring when pests become active again. In southern or coastal regions with mild winters, maintain biweekly inspections year-round because pest activity typically persists.
Weather events like heavy rains or droughts also affect inspection timing. After storms, check for displaced termite mud tubes and rodent burrows near foundations. Droughts can push pests indoors in search of water, making indoor inspections more urgent. Plan pest control budgets and staffing based on these inspection rhythms to avoid surprise infestations that appear between scheduled visits.
Adjust your monitoring schedule immediately after unusually wet or dry weather, as pest behavior can change rapidly with shifting environmental conditions.
Linking Pest Signs to Operational Practices and Structural Issues
Pest presence in a food service operation often traces back to specific operational habits and building conditions. Identifying these links helps target the source of infestation and correct underlying issues that allow pests to thrive. You can use checklists and focused inspections to match observed pest signs to particular housekeeping, storage, or structural faults.
Food and Waste Handling Mistakes
Pests rely heavily on accessible food and waste. Improper housekeeping, such as leaving food scraps or spilled liquids on floors and counters, makes your operation a ready target. Food stored in open containers or without proper sealing attracts rodents, cockroaches, and ants, increasing the risk of signs like droppings or muscle damage near storage areas.
Ensure to seal all food items tightly and clean spills immediately. Empty trash bins frequently, at least once daily, and use covered containers that close securely. Frequent breakdowns in food waste protocols can correlate strongly with pests seen in or around dumpsters and kitchens.
- Store dry and bulk foods in rodent-proof, sealed containers
- Clean food prep areas after each use and at shift end
- Remove garbage and recycling daily, and clean bins weekly
- Inspect and seal cracks or holes near food storage
- Train staff on proper food handling and waste disposal routines
With consistent adherence, you’ll reduce pest entry points related to food and often see a sharp decline in droppings or gnaw marks. Poor implementation results in persistent infestation despite treatment efforts.
Building Entry Points and Structural Flaws
Pests enter through gaps in doors, windows, walls, and floors. Even small holes near utility lines or under doors can let in rodents or insects. Structural issues like damaged window screens or missing door sweeps provide constant opportunities for pests, linking physical defects with visible signs like live pests or nests.
Regularly inspect all points where the building meets external areas, including vents and pipes. Use appropriate materials such as steel wool or caulking to seal gaps. Doors should have automatic or well-fitted sweeps, and screens should be intact without tears. This inspection should happen at least quarterly and after any building work.
Focus on these areas if pest signs cluster near entrances and exits. Costs typically involve minimal materials and labor but prevent larger infestations. Ignoring entry points often means treatments provide only temporary relief.
Water Sources and Moisture Issues
Moisture attracts many pests, including cockroaches and silverfish, because they need water to survive. Leaks under sinks, condensation on pipes, or poor drainage create damp environments that invite infestation. You can link pest sightings or droppings to these wet areas by checking where moisture accumulates regularly.
Regularly inspect plumbing, fix leaks within 24 to 48 hours, and ensure proper ventilation in food prep and storage rooms. Use dehumidifiers in areas prone to dampness, especially in basements or walk-in coolers. Tracking humidity levels below 60% helps reduce pest suitability.
- Monitor and repair dripping faucets and pipes promptly
- Clear clogged drains and verify proper drainage outside
- Use waterproof sealants where moisture intrusion is common
- Keep floor drains covered with pest-proof grates
- Schedule periodic moisture inspections alongside pest checks
Failing to control moisture not only encourages pests but also harms materials and building integrity. Proper moisture control significantly reduces pest pressure and complements other operational controls.
Prioritizing Actions and Follow-Up After Detecting Pest Signs
Prioritizing your actions after detecting pest signs depends on the severity and type of pests found. Taking immediate containment steps minimizes further contamination or damage, while setting up monitoring and documentation ensures you track progress and compliance. Scheduled follow-up inspections confirm if treatments worked or if additional action is necessary.
Immediate Containment and Cleaning Measures
Start by identifying the exact location and extent of the pest signs. For evidence of active pests like rodents or cockroaches, place targeted traps or bait stations immediately to prevent expansion. Remove any contaminated food items or packaging to stop pests from accessing food sources and reduce health risks. Perform thorough cleaning in the affected area, paying special attention to crevices and corners where pests hide.
Cleaning should use approved detergents and sanitizers to avoid spreading bacteria or allergens. If the pest sign indicates a heavy infestation, isolate the area temporarily until a pest control professional evaluates it. Prompt containment limits cross-contamination and reduces the chance of customer complaints or health violations. Delaying cleanup can allow pests to multiply, increasing control costs and downtime.
Setting Up Monitoring and Documentation Systems
Effective pest management requires consistent monitoring supported by detailed records. Establish a pest sighting log that records the date, time, type of pest evidence, location, and immediate actions taken. You can use a simple spreadsheet or dedicated pest control software. Ensure staff know how to fill out this log immediately after noticing any pest signs.
Set clear responsibilities for monitoring, such as daily visual inspections by designated employees and weekly checks by the maintenance or sanitation team. Include photos where possible, especially for unusual signs or new infestation spots. Document treatment methods, products used, and any follow-up measures to create a complete pest control timeline. This record helps verify regulatory compliance during inspections and assists pest professionals in assessing trends or recurring problems.
Scheduling Follow-Up Inspections and Verifications
After initial containment and documentation, plan regular follow-up inspections based on the severity of the pest problem. For minor signs, inspect the involved areas every 3 to 5 days over two weeks to confirm pest activity stops. Moderate to severe infestations require more frequent checks, sometimes daily, until pest control measures effectively suppress the population.
Engage either your in-house team trained in pest identification or a licensed pest control provider for verification inspections. Use the monitoring log to compare conditions before and after treatment, noting any reduction in pest sightings or contamination. Follow-ups also verify that control devices remain properly placed and functional. Keep your follow-up calendar visible, and don’t let scheduled checks lapse, as pests can re-infest quickly if neglected.
Effective follow-up reduces the risk of recurring infestations, protects food safety, and reduces costly emergency interventions later. Transparent documentation of inspections, findings, and responses makes reporting to health authorities straightforward, helping you maintain operational status and customer trust.
Step-by-Step Action Plan to Identify and Respond to Pest Signs in Your Operation
Start by gaining a clear understanding of pest indicators and establish a routine to monitor them closely. This plan will guide you through timely inspections and practical steps to catch infestations early and control risks effectively.
- Before You Start: Train your team to recognize key pest signs such as droppings, chew marks, and unusual odors. Use visual aids showing correct examples versus common confusions like dirt or food residues. This reduces misidentification, improving detection accuracy from the first inspection.
- Day 1: Conduct a thorough visual inspection during a low-activity period focusing on corners, storage units, and near water sources. Record any signs found, noting locations and types (droppings, damage, sounds). This establishes a baseline and shows hotspots that need attention.
- Week 1: Implement a daily quick-check checklist for your shift leads covering visual, auditory, and olfactory cues. Check garbage areas, food prep zones, and entry points for rodents or insects. Ensure the checklist is simple to follow and verify compliance with spot audits.
- After 2 Weeks: Review inspection records to identify persistent or escalating signs. Compare damage patterns against normal wear to avoid false positives, look closely at torn packaging or gnawed wires typical of rodents. Evidence of infestation requires escalating using your decision flowchart to involve pest control professionals.
- Monthly: Adjust inspection frequency and focus according to seasonal pest activity and local climate (e.g., more rodent activity in fall). Improved targeting prevents issues before they grow. Maintain detailed logs to track trends and treatment outcomes.
- Ongoing: Link findings to your operation’s maintenance and sanitation practices. For example, leaking pipes or cluttered storage often attract pests. Prioritize fixing structural issues promptly and train staff on proper waste management to remove pest attractants.
- Every 3 Months: Hold a team review of pest data and remediation steps. Discuss any common mistakes noticed such as overlooking small droppings or misidentifying stains. Reinforce correct identification skills and update protocols as needed to improve detection and response.
- Immediately After Sign Detection: Take corrective actions like deep cleaning, sealing entry points, or isolating affected stock. Verify success by seeing no new signs after the next scheduled inspection. Continued pest activity requires escalation to licensed pest control providers without delay.
Frequently Asked Questions
What Subtle Noises Might Indicate Pests in a Food Service Operation?
Scratching or rustling sounds near walls or ceilings often reveal rodents or hidden insects. Pay close attention after hours, as these pests are mainly nocturnal and quiet during daytime operation. Early detection through sound can prevent widespread contamination.
Can Changes in Customer Complaints Signal a Pest Problem?
An increase in reports about foul odors or spotting bugs can suggest an infestation. Track complaint patterns closely; sudden spikes warrant immediate inspection to protect your establishment’s reputation and health compliance.
How Can Pest Activity Affect Food Quality Before Visible Signs Appear?
Pests can contaminate food through saliva or urine, which often happens before you see damage. Regularly test or check stored food products for unusual smells and texture changes to catch issues early.
Are There Specific Operational Areas More Likely to Hide Early Pest Signs?
Storage rooms and under equipment are common hiding spots where early activity is missed. Inspect these zones weekly as they offer shelter and food sources that support pest survival.
Which Cleaning Practices Might Reduce False Alarms When Identifying Pest Signs?
Consistent deep cleaning removes residues that resemble pest droppings or buildup. This clarity helps your team distinguish between actual pest evidence and common dirt, speeding decision-making.
What Role Do Pest Behavior Patterns Play in Identifying Signs?
Knowing if pests prefer dry, wet, warm, or dark spaces helps target inspection efforts. For example, cockroaches favor moist areas, so check near sinks and drains regularly for early signs.
Wrapping Up
Recognizing a sign of pest in an operation is about spotting consistent evidence like droppings, damage, and unusual odors early enough to act before infestations worsen. Start today by training your staff to use a detailed inspection checklist each shift, focusing on high-risk spots like storage rooms and waste areas, so signs don’t go unnoticed during busy times. Regular, systematic inspections reduce surprises and help you catch problems when treatment is simpler and less costly. Keeping accurate records of these inspections also guides your decisions on when to escalate to professional pest control services, ensuring your operation stays compliant and minimizes risks to food safety.