How to Prepare for a Pest Inspection: Essential Steps for a Smooth Process
Preparing properly for a pest inspection involves clearing access points, tidying interior and exterior areas, and gathering relevant property history. Doing this helps the inspector accurately identify infestations and damage, saving you time and potential repair costs. Knowing how to prepare for a pest inspection lets you avoid common pitfalls like obstructed entry or missing documentation, which can delay the process or lead to incomplete results.
This advice applies to homeowners, property buyers, landlords, and real estate agents wanting a smooth inspection. You’ll find specific steps for organizing your home inside and out, managing paperwork, understanding what happens during the inspection, and how to handle different property types. Following these steps ensures the inspection is effective and gives you the clear information you need to protect your property.
Key Takeaways
- Schedule a pest inspection annually or before buying/selling a property to identify and address pest issues early.
- Clear clutter, vacuum thoroughly, and fix leaks inside to provide inspectors easy access and prevent pest harborage.
- Trim vegetation, remove standing water, and seal exterior cracks to minimize pest entry points before inspection day.
- Gather past pest reports, treatment records, and property history to help the inspector assess risks accurately.
- Expect a 1-2 hour inspection covering all areas; stay available to discuss findings and ask questions.
- Avoid hiding signs of pests or blocking access, as this leads to inaccurate results and costly follow-ups.
What Is a Pest Inspection and Why Is It Important?
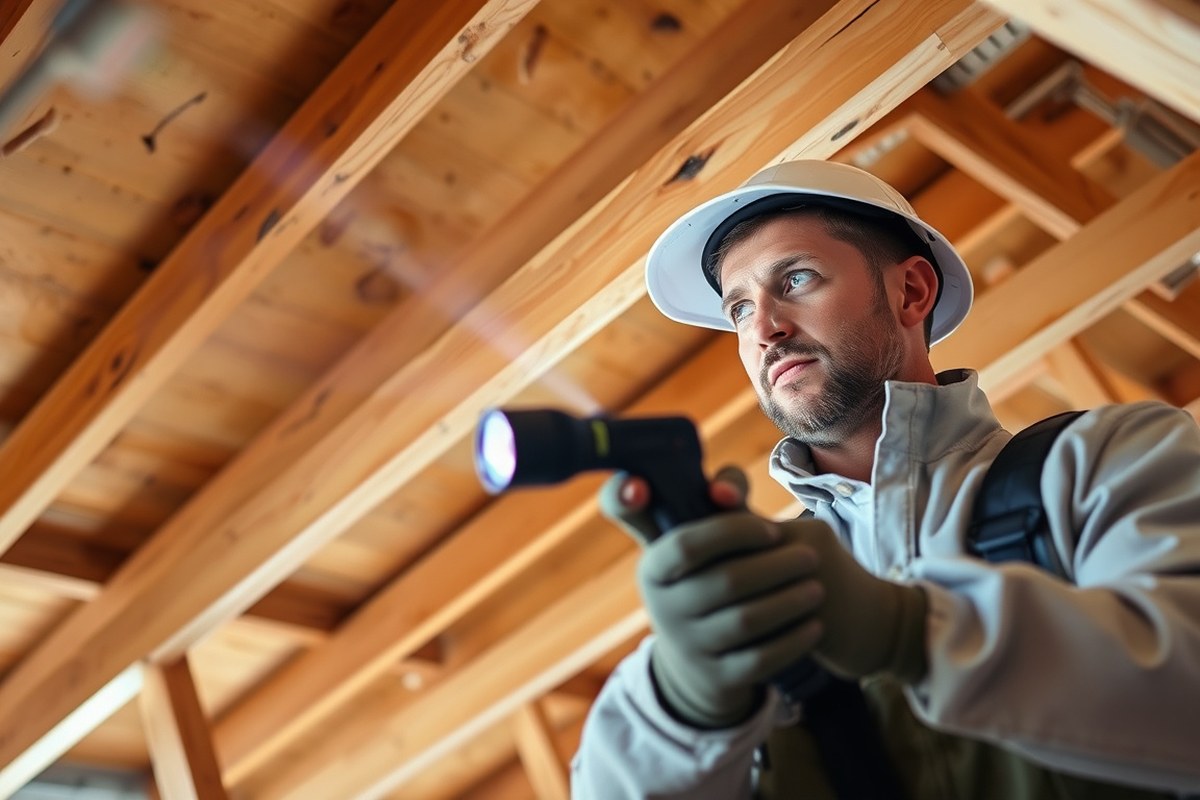
A pest inspection is a thorough examination of a property by a trained professional aiming to find evidence of pest activity or damage. Inspectors look for signs of common pests such as termites, carpenter ants, rodents, cockroaches, and sometimes wood-destroying fungi. Identifying these issues early prevents costly repairs and preserves the property’s condition and value.
The process involves visually checking accessible areas inside and outside the home, including crawl spaces, attics, basements, and around foundations. Inspectors use tools like moisture meters, magnifying glasses, and sometimes infrared cameras to detect hidden infestations or damage. You can expect the inspection to take between 45 minutes and two hours, depending on the size and condition of the property.
Accurate pest inspections rely on the inspector’s experience, the thoroughness of the examination, and the inspection conditions. Factors such as clutter, limited access, or recent pest control treatments can affect reliability. For example, recent pesticide use might hide live pests but won’t conceal structural damage or old infestation evidence. A credible inspection reports visible and probable pest activity rather than making absolute guarantees about areas the inspector cannot access safely.
Pest inspections serve as a important snapshot of the property’s current pest status. They help you avoid surprises later by revealing active infestations or conditions conducive to pests. This is especially important before buying or selling a home, where undisclosed issues could lead to legal or financial complications. Some states require official pest inspection reports during real estate transactions, showing the report’s role in protecting all parties involved.
The typical cost of a pest inspection varies widely based on the home’s size, location, and inspection depth. It often ranges from $75 to $200. Paying closer attention to inspectors who provide clear findings and recommendations helps ensure you get value for the cost. The best results come when you allow the inspector full access and prepare the home by clearing storage and fixing leaks that attract pests.
Problems arise when inspections are rushed, incomplete, or done by uncertified inspectors. Missing signs of active infestations can lead to costly damage left untreated. Also, some pests require specialized knowledge to detect. For older homes or properties with known issues, consider hiring an inspector who specializes in pest-related structural damage. This tailored approach improves detection accuracy and helps prioritize repair efforts.
When to Schedule a Pest Inspection and How Often to Repeat It
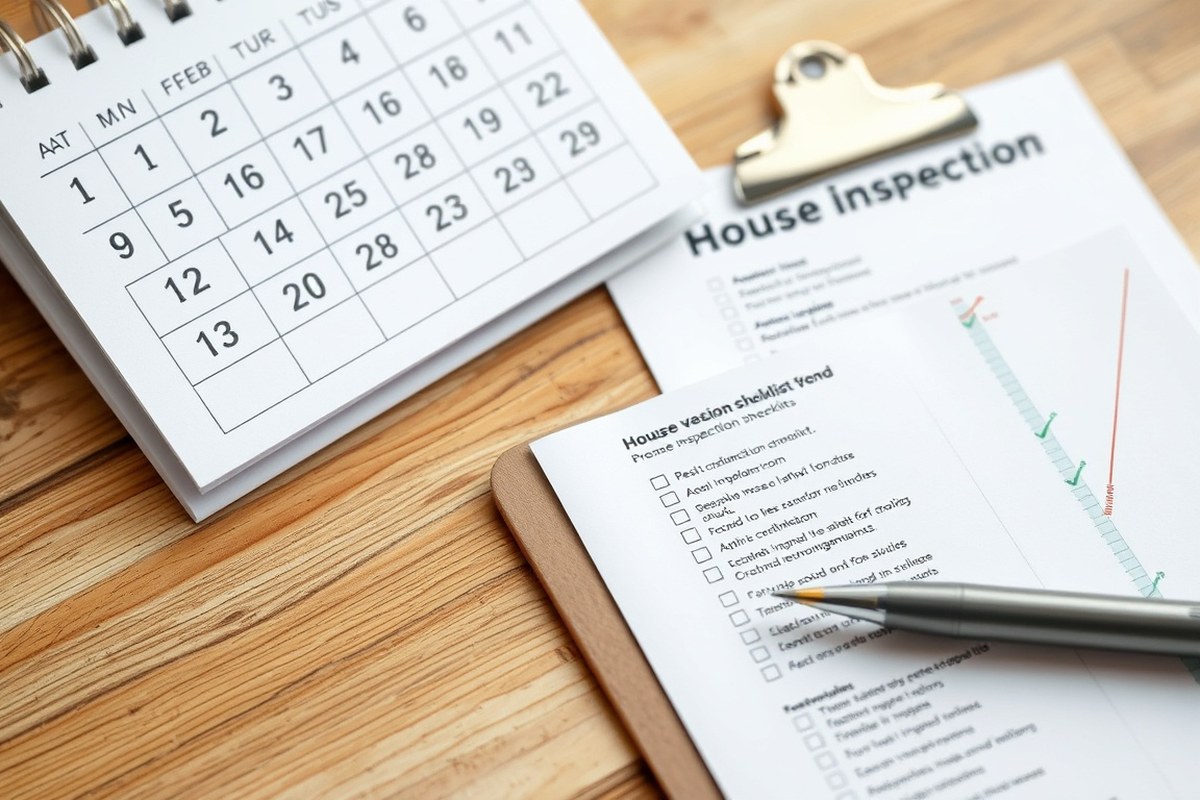
Schedule a pest inspection before any signs of infestation appear, ideally once every 12 months for most homes. Choose timing based on local climate and property specifics to improve detection chances and reduce pest-related damage. Proper scheduling and frequency help catch issues early and keep your home safe.
Ideal Inspection Timing by Region and Season
Spring and fall work best in many parts of the US because pests become more active as temperatures rise or fall. In warmer southern climates, schedule inspections just before the hot, humid summer months to catch termites and ants early. Northern areas benefit from inspections after winter thaw when pests resume activity.
Plan inspections around peak pest seasons in your region. For example, termite swarming often happens in early spring, so inspecting shortly after swarms can identify colonies before they spread. Avoid scheduling right after heavy rains or freezes because pests may hide away, reducing inspection accuracy.
Inspection Frequency Based on Property Type and Age
Newer homes generally need fewer inspections, about once a year, assuming no prior pest problems. Older homes, especially those built with wood susceptible to termites or with known moisture issues, should be inspected twice a year. Commercial properties with food storage or high foot traffic also require more frequent checks, usually every 6 to 9 months.
For rental properties, landlords should schedule inspections each time between tenants and at least once a year during tenancy. Condos and apartments might need inspections less often, but common areas require regular monitoring. Adjust frequency upward if past inspections found active infestations or damage to prevent costly repairs.
Weather Impacts on Inspection Accuracy
Dry, mild weather aids thorough inspections by allowing easy access to exterior foundations and revealing pest activity like mud tubes or droppings. Avoid scheduling on wet or freezing days since moisture can hide signs of termites and rodents, and inspectors might miss small gaps where pests enter. Extremely hot weather can push pests deeper into structures, hiding them from view.
Consider local rainfall patterns and temperature swings when setting inspection dates. For instance, in humid regions, schedule inspections shortly after dry spells for better results. Inspections during or just after storms often miss evidence, delaying necessary treatment. Communicating with your inspector about weather conditions helps choose the best day.
Schedule inspections during periods of stable, mild weather for the most accurate results and easier access to problem areas around your property.
Detailed Interior Preparation Checklist Before the Inspection
Preparing the interior of your home properly helps the pest inspector check all possible infestation sites and structural risks. You should clear clutter and allow access to critical areas without over-cleaning, which can hide pest signs. Gather any relevant paperwork or prior treatment records to support the inspector’s findings and save time.
Clearing Access to Common Inspection Areas
Give the inspector easy access to areas prone to pests. This includes basements, crawl spaces, attics, and utility rooms. Remove stored items from these spaces, especially near baseboards and corners, where pests often nest. Appliances like refrigerators and stoves should be pulled away from walls by several inches. Inside closets, clear at least one foot of space along the walls. For garages and storage rooms, organize items on shelves or keep them about 6 inches off the floor to avoid blocking the inspector’s view.
Focus on areas that provide warmth, moisture, and food sources such as kitchens, bathrooms, and laundry rooms. Check vents and pipe penetrations for visible seals; if they are blocked by boxes or debris, clear those obstacles. The goal is to make every potential entry point and hiding spot visible without moving heavy furniture or dismantling cabinetry. This saves time and lets the inspector see signs like droppings, damage, or activity without guesswork.
Cleaning vs. Overdoing It: What Helps and What Hurts
Light cleaning helps inspectors spot pest evidence such as eggs, shed skins, or spots on surfaces. Sweeping floors, wiping counters, and vacuuming corners can reveal hidden signs. However, scrubbing floors or washing walls aggressively right before inspection can remove these clues and reduce the thoroughness of the report. It also wastes your effort and may lead to underestimating the problem.
Don’t spray pesticides or use bait traps before the inspection unless advised. Inspectors need to see untreated conditions to assess infestations accurately. Decluttering benefits the inspection by improving visibility but avoid moving stored items beyond what is safe for you. Large projects like carpet shampooing or deep-cleaning inside walls should wait until after the report and any recommended treatments are completed.
- Sweep and vacuum floors the day before inspection.
- Wipe kitchen and bathroom countertops to highlight any pest activity.
- Remove clutter but avoid deep cleaning that erases pest signs.
- Do not apply pesticides or traps before the inspection.
- Move heavy furniture only if you can do it safely without damage.
- Keep pet areas clean but avoid disturbing possible signs of pests.
These steps create a balance: you show a clear environment without destroying the evidence the inspector needs to find. This improves accuracy and helps you plan proper treatment options.
Pre-Inspection Documentation to Gather
Bring records that provide context for your pest inspection. These include previous inspection reports, pest treatment invoices, warranty papers from pest control services, and maintenance logs showing repairs related to moisture or structural issues. Sharing this history with the inspector reduces redundant work and clarifies any recurring problems.
Have details about ongoing pest concerns ready. Note the specific pests you’ve seen, locations, dates, and any setups like bait stations or traps. If you recently had repairs, include information on plumbing fixes or foundation sealing that might influence pest activity. This detailed documentation deepens the inspector’s understanding and allows for a more targeted assessment.
Exterior Preparation Checklist for a Successful Pest Inspection
Preparing the exterior of your property is essential to give the pest inspector clear access and reveal any pest presence signs. You should clear clutter, trim vegetation away from the foundation, clean gutters, and check for moisture issues around windows and doors. These steps help the inspector work efficiently and improve the inspection’s accuracy.
Clearing Yard and Vegetation Near Foundation
Start by removing debris such as leaf piles, wood stacks, and old construction materials from around the home. Clutter invites rodents, termites, and insects as it provides hiding places and nesting areas. Keep at least 12 inches of space between plants and the foundation walls to reduce pest access routes and moisture buildup.
Trim tree branches away from the roof and siding by a minimum of 3 feet to discourage ants, squirrels, and other pests from bridging onto the house. Lawn areas close to the foundation should be mowed short and free of tall grass or weeds. Check for any bark mulch or wood chips touching siding and rake them back at least 6 inches to avoid attracting termites.
- Remove leaf, wood, and trash piles near the home
- Trim shrubs and plants to maintain 12 inches from foundation
- Cut tree branches 3 feet away from roof and siding
- Mow grass short around the building perimeter
- Rake away bark mulch or wood chips from siding by 6 inches
- Clear away old firewood or lumber stored against the house
These steps take from one to three hours depending on yard size and clutter levels. Doing this a week before the inspector arrives is ideal so signs like termite mud tubes or rodent tracks are visible. Rushing these preparations too close to the appointment may hide pest activity.
Inspecting and Preparing Gutters and Roof Eaves
Gutters and roof eaves can hide moisture buildup and wood damage, which attract termites and carpenter ants. Inspect gutters for blockages like leaves, twigs, and dirt that can hold water. Clean gutters thoroughly to allow proper water flow; standing water near the home increases pest risk.
Look under roof eaves for any signs of rotted wood, frass (wood dust), or small holes which can indicate wood-boring insect activity. Making minor repairs to broken soffits, fascia, or shingles before inspection helps the inspector properly assess the condition rather than focus only on damage. Check for nests or debris in the gutters or eaves that might block inspection paths.
- Remove leaves, sticks, and debris from gutters
- Check for signs of wood damage under eaves and repair visible defects
- Ensure gutters drain water away from foundation efficiently
- Clear nests or beehives in roof eaves before inspection
- Confirm downspouts extend 3 to 5 feet from house foundation
Cleaning gutters usually takes 30 to 60 minutes for an average house. Roof repairs may need a professional estimate if damage is extensive. Clear gutters and wide downspout extensions both reduce water pooling that fosters pests and make visual and moisture detection easier for the inspector.
Checking Entry Points and Moisture-Prone Zones
Inspect the perimeter of your home for cracks, gaps, or holes around pipes, vents, windows, and doors. These openings serve as easy pest entry points, especially for rodents and insects. Seal visible cracks with caulk or foam sealant, focusing on gaps larger than 1/4 inch.
Look specifically at areas prone to moisture such as around air conditioning units, sump pumps, basements, and exterior faucets. Moisture attracts termites, carpenter ants, and silverfish. Fix any leaking hoses or fixtures and remove standing water. Using a moisture meter or visual signs like peeling paint or mold can help identify hidden wet spots.
- Seal all cracks and gaps larger than 1/4 inch around foundation
- Check window and door frames for damaged weather stripping or gaps
- Remove standing water near exterior faucets and AC units
- Fix dripping hoses, pipes, and outdoor faucets
- Inspect basement or crawl space vent openings and screen them
- Look for peeling paint, mold, or wood rot at moisture-prone areas
These checks can take 1 to 2 hours depending on home size and condition. Patching gaps improves pest exclusion and lets the inspector verify seals and moisture damage. Overcleaning or painting just before inspection might cover clues that identify pest issues.
How to Prepare Documents and History for the Inspector
Collect and organize any previous pest treatment records and documented pest problems before the inspection to give the inspector a clear history. Providing this information helps the inspector focus on past trouble spots and evaluate whether earlier treatments have worked or need follow-up.
Gathering Past Inspection and Treatment Records
Start by locating all paperwork related to pest inspections and treatments performed on the property. This can include invoices, service agreements, treatment logs, and reports from pest control companies. These documents reveal the type of pest problems encountered, the methods used to address them, and how recently treatments were applied. Without this information, the inspector can only make assumptions based on current signs.
Check with previous owners, property managers, or your pest control company if you don’t have direct access to these records. If you get information in digital form, save it in one folder on your phone or computer for easy access during the inspection. Do not rely solely on memory or verbal descriptions, detailed records let the inspector check for recurring pests or resistant infestations.
Preparing a Summary of Noted Pest Issues
Create a straightforward overview of past pest problems you or previous owners noticed. This should include what pests were involved, where they appeared most often, and any recurring activity. Even unconfirmed sightings, like occasional ants near the kitchen or wood damage suspected to be termites, should be included. The goal is to give the inspector a starting point to examine critical areas closely.
Write this summary as a concise list or short paragraph so you can easily share it during the inspection. Highlight areas where you’ve taken steps yourself or noticed worsening conditions. Accurate, detailed descriptions improve inspection accuracy and help prioritize treatment if needed.
Communicating History Using a Sample Script
When you meet the inspector, clearly and openly share the organized records and summary. Use a simple script to ensure you cover all points without leaving out critical details. For example, say: “We found the last treatment was about eight months ago; the company used baiting for ants in the kitchen and a termiticide treatment around the foundation. Since then, we still see some ants near the pantry and occasional woodpecker holes, which we suspect could be termite-related.”
Be direct and concise while allowing the inspector to ask follow-up questions. Don’t withhold information out of worry it will reflect badly. Transparency improves service and avoids surprises in the final report. You can email or hand over copies of paper records in advance or bring them on-site to reference during the inspection.
Failing to share accurate past pest treatment details can result in incomplete inspections and overlooked persistent problems; always prepare and provide full documentation.
What to Expect During a Pest Inspection and How Long It Takes
The pest inspection focuses on identifying signs of infestation or damage in and around your home. Inspectors examine various areas where pests commonly gather or enter. A standard inspection usually takes between one and two hours, depending on your property’s size and condition. You don’t have to stay inside during the entire process, but being available to answer questions or provide access helps the inspection go smoothly.
Common Inspection Zones and Pest Signs Looked For
Inspectors pay close attention to entry points like doors, windows, and vents, where pests might gain access. They examine the foundation, crawl spaces, basements, and attics for evidence of termites, rodents, or moisture issues that attract pests. Inside the house, kitchens, bathrooms, and areas with plumbing often show signs of cockroaches, ants, or water damage linked to infestations.
Outside the home, the inspector looks at the roof, gutters, siding, and landscaping, focusing on wood-to-soil contact and debris that could harbor pests. They check for mud tubes near foundations for termites or nests under eaves for wasps. Signs of nesting, droppings, holes, or chewed materials alert the inspector to active infestations or risk points that need attention.
Typical Timeline from Start to Finish
The time required depends largely on your home’s size and complexity. A small, single-story house might take about 45 minutes to one hour, while larger or multi-story homes can require up to two hours or more. Inspectors need to evaluate both interior and exterior thoroughly, sometimes necessitating access to garages, sheds, or crawlspaces.
Some inspections include specialized tools like moisture meters or thermal cameras, which add a little time but improve detection accuracy. After completing the inspection, the inspector usually prepares a report that summarizes findings. This report is often available within a few hours to a day, either electronically or in print, allowing you to review the issues identified quickly.
How to Best Cooperate with the Inspector
Allow the inspector full access to all parts of your property, including locked rooms, attics, and basements. Clear clutter from floors and around walls in key areas to give the inspector space to examine surfaces properly. If you can’t be home, arrange a trusted person nearby to grant access and answer questions.
Be ready to share any pest history or recent treatments; this information helps the inspector focus on problem areas. During the inspection, remain available but avoid following closely, it can distract the inspector or slow down the process. When the inspection finishes, ask questions about their findings or recommendations, and take notes.
Common Mistakes to Avoid When Preparing for a Pest Inspection
Homeowners often make mistakes that reduce the effectiveness of a professional pest inspection. Avoiding these errors helps ensure the inspector sees the true condition of your property and identifies problems accurately.
Avoiding Premature Pesticide Use
Applying pesticides or insecticides before the inspection can interfere with the inspector’s ability to detect pests and their activity. Chemicals may mask signs of infestation or drive pests into hiding, leading to an incomplete or inaccurate report. Pesticides applied days or weeks before the inspection can also prevent identification of active infestations that need treatment.
Wait to use any pest control products until after the inspection and recommendations are given. When using a pesticide beforehand for reasons such as a health concern, notify the inspector in advance so they can plan their evaluation accordingly. This keeps the inspection honest and helps you avoid unnecessary treatments.
Not Over-Cleaning or Hiding Pest Evidence
Cleaning up too thoroughly or attempting to hide pest signs may seem like a good idea, but it actually hinders the inspection. Inspectors rely on visible evidence such as droppings, nests, webs, and damage to identify issues and target treatment. Removing everything or moving potential problem areas can make it harder to find trouble spots.
Instead of completely eliminating signs, focus on making the areas accessible and safe for inspection. For example, clear clutter so the inspector can get close to wall corners or behind appliances, but don’t scrub away termite mud tubes, rodent droppings, or carpenter ant galleries. Full disclosure helps inspectors give you an accurate assessment and treatment plan.
- Don’t paint over water damage or wood damage caused by pests
- Move stored boxes away from walls but don’t throw away damaged wood found nearby
- Clean heavily soiled areas only enough to prevent hazards for the inspector
- Don’t place bait stations or traps unless directed by the professional
- Avoid sealing cracks or holes until after the inspection
Follow these steps to ensure the inspector can work effectively without missing key signs of pests. Overdoing cleaning or hiding evidence can delay detection and lead to costlier problems later.
Ensuring Access Is Not Blocked
Blocked or locked spaces are a frequent problem during pest inspections. Inspectors need access to crawl spaces, basements, attics, utility rooms, and exterior foundation areas. When these spaces are difficult to enter, the inspection will be incomplete or require additional visits, costing you time and possibly more money.
Plan ahead by unlocking gates, doors, and cabinets that contain or reveal pest-prone areas. Clear away furniture, piles of firewood, garden tools, or debris that obstruct inspection paths. For homeowners with pets, secure animals safely out of the inspection zones to avoid interruption or safety risks.
- Unlock all interior and exterior doors, including basement and attic access
- Move stored items away from walls and under sinks
- Ensure crawl spaces are safe and accessible; remove obstacles or cover hazards
- Provide access to the roof or gutters if needed for termite or rodent inspection
- Inform the inspector about difficult access points beforehand
Making all areas reachable ensures a thorough inspection and helps avoid rescheduling. It also allows the inspector to examine hidden entry points pests could use.
How to Communicate Effectively with Your Pest Inspector
Communicating clearly with your pest inspector before and during the inspection sets the stage for accurate results and proper follow-up. You want to schedule the inspection with precise details and ask targeted questions to understand the scope and necessary treatments. Getting this right helps avoid surprises and ensures the inspection meets your specific needs.
Sample Phone Script to Schedule and Prepare
Begin the call by stating your name, address, and what type of property needs inspection. For example, say: “Hello, this is Sarah at 123 Main Street. I’d like to schedule a pest inspection for my single-family home. Could you tell me when your earliest availability is?” This approach gets right to the point and starts the scheduler thinking about your location and property type.
Next, clarify the inspection scope by adding something like: “Are your inspections complete enough to cover termites, rodents, and general pests? I want to be sure all potential issues are looked at.” This helps avoid miscommunication about what the inspector will check. Finally, confirm what you need to do to prepare and how long the inspection will take: “Can you tell me if I need to clear any areas or provide access to specific spaces? Also, how long should I expect the inspection to last?” Closing with these questions sets clear expectations.
Essential Questions to Ask During Inspection
During the inspection, ask the inspector to explain their findings in simple terms. Good questions include: “What signs of pest activity are you seeing? Are these active infestations or old evidence?” This lets you understand if pests are currently a problem or if issues happened in the past. It’s important so you don’t spend money treating something that is no longer active.
Request details about inspection techniques: “What methods are you using to check for pests behind walls or under foundations? Do you use moisture meters or specialized tools?” Knowing their process reassures you of the inspection’s thoroughness. Also, ask about areas of particular concern: “Are there any entry points or conditions that I should address immediately to prevent future infestations?” That information helps you plan maintenance and repairs beyond treatment.
Clarifying Treatment and Follow-Up Procedures
After the inspection, discuss the treatment options clearly. Say something like: “Can you describe the recommended treatments, how they work, and any safety precautions I should take?” This avoids surprises and allows you to prepare, especially if chemicals are involved. Also ask about timing: “How soon should treatment start, and how long will it take to complete?” This helps you schedule work around your availability.
You should confirm follow-up inspections or guarantees: “Do you offer any follow-up visits to confirm pests are gone? What warranties or guarantees come with your service?” Many companies provide limited warranties but only if follow-up inspections happen on schedule. Knowing this upfront protects your investment and keeps expectations clear.
Always document the scope and treatment plan in writing to avoid confusion and establish your rights for follow-up service.
Understanding the Inspection Report and What to Do Next
The pest inspection report details findings from the survey, including any evidence of pests, damage, and vulnerabilities. Understanding this report helps you decide what repairs or treatments are urgent, which can be postponed, and how to plan the work efficiently.
Typical Report Sections and What They Mean
Most pest inspection reports include several standard parts. You typically see a summary that highlights key findings, such as active infestations or damage severity. The main body breaks down specific issues by area, like the attic, basement, or exterior walls, and states whether pests were found or signs of past activity were noted. The report also often lists recommendations for treatment or repairs to prevent future problems.
Each issue will have a description, the inspector’s assessment of risk, and suggested next steps. For example, you might read about termite tubes near the foundation or rodent droppings inside walls. The report may use terms like “active infestation,” meaning insects or rodents are currently present, or “conditions conducive to infestation,” which means the environment supports pest activity but pests were not found at the moment.
Prioritizing Recommended Actions
Start by focusing on any active infestations. Pest control companies generally advise scheduling treatment right away because delaying can allow damage to worsen. Repairing structural damage might take longer, depending on how involved the work is. For example, fixing termite damage in wooden beams requires a professional carpenter and may need permit approval before starting.
Address safety hazards quickly as well, such as exposed wiring chewed by rodents or mold growth linked to pest moisture problems. Non-urgent repairs, like sealing cracks or improving ventilation, can wait until after treatment but should still be scheduled within a few months to prevent recurrence.
Costs vary widely based on the pest type and extent of damage. Treating a minor rodent problem might cost a few hundred dollars, while termite treatment plus repairs can run into thousands. Getting quotes from licensed pest control professionals and contractors helps you budget and set priorities based on your finances and property use.
Scheduling Treatments and Repairs
Professional pest treatments often happen within days to a week after the inspection, depending on availability and severity of infestation. Scheduling quickly reduces the chance of pests spreading or causing more damage. Some treatments require preparation, like clearing areas or vacating the home for several hours, so follow your pest control company’s instructions carefully.
Coordinate repairs after the treatment, especially structural fixes. Make sure any contractor you hire understands pest control guidelines to avoid undoing the treatment results. For example, using untreated wood or leaving gaps in foundation repairs can invite pests back inside. When the inspection shows widespread damage, prioritize the most critical areas first rather than trying to fix everything at once.
When buying a property, discuss the report with your real estate agent and the seller. You might negotiate repairs or price adjustments based on the findings. Some treatment warranties require follow-up inspections in six months or a year, so keep a copy of the report and receipts from any pest control service or repairs.
Special Considerations for Pets, Old Homes, and Commercial Properties
Pest inspections can be completed in homes with pets, older buildings, and commercial properties, but each setting comes with unique challenges requiring specific preparation steps. Knowing these helps ensure a thorough inspection without complications or delays.
Preparing Homes with Pets for Inspection
Inspections in homes with pets need extra care to protect both your animals and the inspector. You should secure pets in a separate room or crate for the duration of the visit. This reduces distractions and cuts down on any risk of accidental bites or escapes. Let your inspector know about any aggressive or anxious animals beforehand; this helps them plan safer inspection routes around the property.
Clear access to areas where pests often hide, such as under furniture, cabinets, and pet bedding. Vacuum floors and clean pet areas to remove hair and crumbs that could interfere with pest detection. Avoid using pet repellents or pest sprays close to the inspection day since residues might mask or confuse visible signs of infestation.
Additional Challenges with Older Structures
Homes built several decades ago often contain construction materials and hidden spaces different from modern houses. This means pest inspectors might need more time and specialized tools to uncover infestations behind old plaster walls, beneath original flooring, or inside damaged foundation wood. Prepare by giving inspectors clear access to attics, basements, crawl spaces, and any disconnected or unused rooms that may house pests.
Older homes sometimes suffer more extensive pest damage, such as dry rot combined with termite activity. Documenting any previous treatments or repairs helps inspectors understand the property’s pest history. Take note of any cracked or weakened areas, as these spots require close attention during the assessment. Expect the inspection to take longer than average, around two to three hours, depending on the home’s size and condition.
Differences in Commercial Property Inspections
Commercial properties present a broader scope of inspection due to their size, layout, and type of use. These buildings often have multiple pest entry points tied to loading docks, waste areas, and food storage zones. Prepare by ensuring all operational areas, especially kitchens, storage rooms, and refuse disposal sites, are accessible and clean. Coordinating with facility managers to schedule inspection times during low traffic or off-hours minimizes disruptions to business operations.
Inspectors may need to evaluate pest prevention systems already in place, like traps or bait stations, so provide any documentation on these. Depending on the property’s complexity, inspections can take several hours or require multiple visits. Clear communication about access permissions, safety protocols, and any hazardous conditions is essential to keep the inspection safe and efficient.
Step-by-Step Action Plan to Prepare for Your Pest Inspection
Follow these steps to get your property ready and yourself informed so the pest inspection runs smoothly and detects any issues promptly.
- Two Weeks Before Inspection: Schedule your pest inspection at least two weeks in advance, ideally during dry weather. This timing increases the chance to spot current pest activity and lets you prepare adequately.
- One Week Before Inspection: Clear clutter inside by removing boxes, furniture, and stored items at least six inches off the floor. This ensures inspectors can access baseboards, corners, and crawl spaces where pests hide.
- Four Days Before Inspection: Inspect exterior areas by trimming bushes and tree branches at least 12 inches from siding and rooflines. This removes pest pathways and lets the inspector check for entry points or damage clearly.
- Three Days Before Inspection: Gather all building and pest control records such as previous inspection reports, treatment receipts, and home repair documentation. Having these organized helps the inspector understand your property’s history and risk factors.
- One Day Before Inspection: Remove or secure pets in a safe area away from inspection zones and notify your pest inspector if your home is older than 30 years or is a commercial property, so they bring proper tools and safety gear.
- Day of Inspection: Be present or arrange to be reachable to answer questions and show any areas of concern. This will help the inspector perform a focused and efficient evaluation, usually lasting one to two hours.
- After Inspection: Review the detailed inspection report promptly and plan any recommended treatments or repairs within 30 days. Quick action on findings prevents pest infestations from worsening.
Frequently Asked Questions
Should I Notify Neighbors Before a Pest Inspection?
You don’t usually need to notify neighbors unless pests have spread between properties. Confirm with your inspector if infestations affect adjacent homes. It helps avoid surprises or complaints during the process.
Can I Stay Home During the Pest Inspection?
Staying home depends on your comfort and the inspector’s policy. Some prefer a clear space to work efficiently, so plan accordingly and give access to key areas the inspector needs to check.
How Far in Advance Should I Schedule My Pest Inspection Before Selling?
Schedule the inspection 2 to 4 weeks before listing your property. This allows time to address issues and provide reports to buyers, improving trust in your transaction.
Are Pest Inspections Effective in Detecting All Types of Pests?
Pest inspections focus on common and visible issues; some pests hiding in walls or underground might be missed. Regular inspections coupled with professional treatments reduce risks over time.
Should I Remove All Vehicles and Clutter from the Driveway and Yard?
Remove most vehicles and clutter to give inspectors clear access and visibility. Avoid moving heavy items if it risks damaging property; prioritize areas with signs of pest activity.
Is It Necessary to Turn Off All Water Sources Before Inspection?
Turning off main water sources is not generally required. Inspectors check for leaks or moisture that attract pests, so leaving water running helps identify problem spots.
Final Thoughts
Preparing carefully for your pest inspection helps you avoid delays and unexpected findings that might affect your property’s value or safety. Start today by gathering any previous pest control records and property maintenance documents; having these ready streamlines the inspector’s work and anchors their report in accurate history. Clear clutter both inside and outside to allow thorough access during the inspection, which usually takes one to two hours but can vary with property size. Keeping direct communication with your inspector will help you understand their findings and plan any necessary treatment or repairs efficiently.