Do You Own Pest Control? A Complete Guide to DIY vs Professionals
Owning pest control yourself means managing and treating pest issues without professional help. This approach can save money but demands knowledge of safe application, legal limits, and proper pest identification. You must weigh the severity of infestation against risks like toxic exposure or ineffective treatment. Doing your own pest control is legal in most states but requires strict adherence to product labels and local regulations to avoid fines or health hazards.
This article suits homeowners and property managers deciding whether to tackle pests solo or hire experts. It breaks down which household pests you can handle yourself, what equipment and startup costs you face, and how to apply treatments safely. You’ll also learn how to recognize when professional intervention is necessary, avoid common DIY mistakes, and compare costs and effectiveness between DIY and professional services. This helps you make informed, cost-effective decisions that protect your home and health.
Key Takeaways
- Owning pest control means handling prevention and treatment yourself using available products and techniques on your property.
- DIY pest control is legal for homeowners but requires following product labels and safety regulations to avoid health and legal risks.
- Common pests like ants, spiders, and roaches often respond well to DIY methods, while termite or large rodent infestations usually need professionals.
- Startup costs for DIY pest control range from $50 to $200 covering sprays, baits, protective gear, and basic inspection tools.
- Evaluate infestation severity by checking pest quantity, damage level, and recurrence before choosing DIY or professional intervention.
- Apply pest treatments step-by-step by reading instructions, using protective gear, targeting pest habitats, and avoiding overuse or misuse.
What Does It Mean to Own Pest Control Yourself?
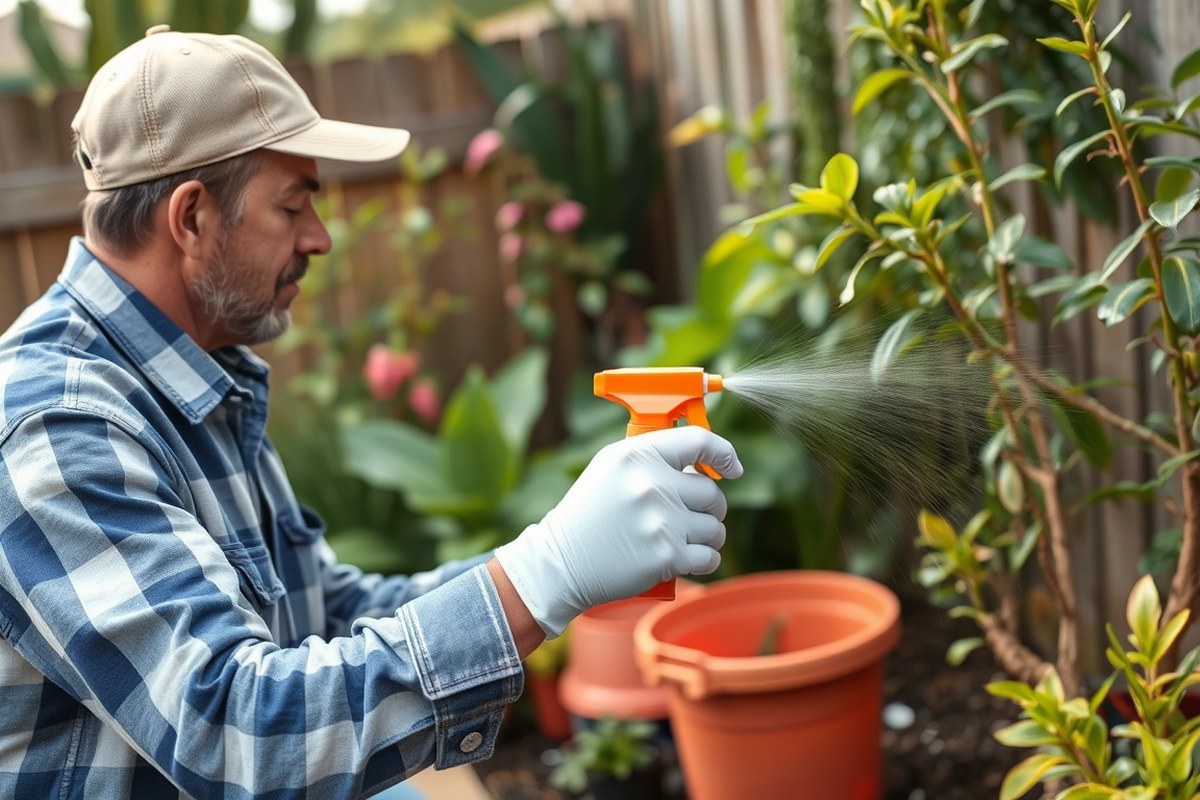
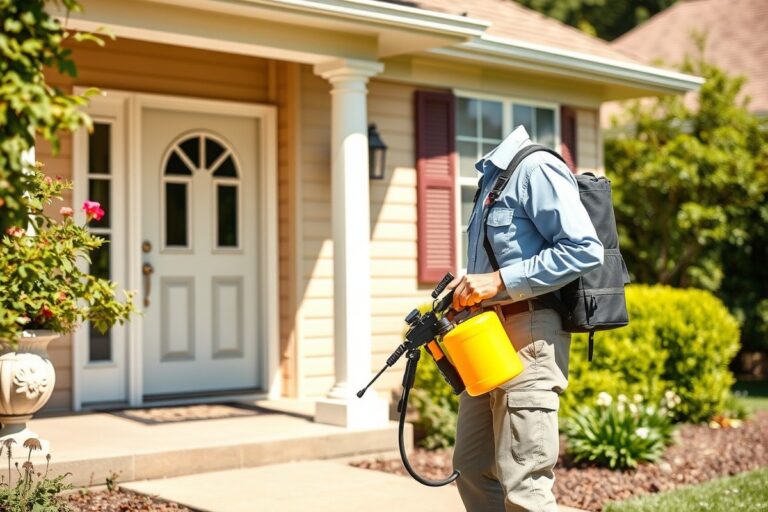
Owning pest control yourself means taking responsibility for managing pest problems in your property by performing treatments personally. This is different from owning a pest control company, which involves providing pest control services professionally for others. When you own pest control in the context of your home or property, you are essentially handling the identification, treatment, and prevention of pests through your own efforts without hiring external contractors.
Performing treatments yourself clearly counts as owning your pest control because you decide what methods and products to use and apply them directly. This can range from using store-bought sprays and traps to setting baits or sealing entry points. Owning pest control this way requires acquiring proper knowledge about pests, treatment application, safety measures, and local regulations. You also need to invest time in monitoring pest activity and retreating if necessary. It typically involves buying supplies such as insecticides, bait stations, or exclusion materials, which can add up to $50 to $200 depending on the pest and the size of your property.
Knowing exactly what owning pest control entails helps prevent common mistakes like using the wrong insecticide, overapplying chemicals, or failing to identify the pest correctly. Good results mean visible reduction or elimination of pests within days or weeks and preventing re-infestation by addressing the root causes, such as food and water sources or structural entry points. Poor results often happen due to incomplete treatment or misunderstanding the pest’s behavior, which can delay resolution and increase costs over time.
Owning a pest business, on the other hand, involves more than just doing treatments yourself. It requires licensing, proper training, equipment investment, insurance, and customer management. This is a regulated profession in most states, and the legal and financial responsibilities are much higher. If your goal is only to manage pests at home, you don’t need the business infrastructure or credentials that pest control companies must have.
To manage your own pest control effectively, start by identifying the pest precisely, choose appropriate treatments from trusted products, follow label instructions carefully, and observe safety precautions such as wearing gloves and ventilating treated areas. Monitor the treated zones regularly for activity and retreat as guided by the product or pest behavior. Avoid mixing chemicals or applying more than recommended, as this can cause health risks and damage the environment. Taking these steps ensures you are truly owning pest control in a responsible, practical way.
Is Doing Your Own Pest Control Legal and Safe for Homeowners?
Homeowners generally can apply pest control treatments themselves on their property, and this practice is legal. The EPA registers many pesticides for homeowner use, permitting you to purchase and apply these products without a specialized license. However, this permission usually applies only to over-the-counter pesticides labeled for residential use. Products designated for commercial or restricted use require professional application or a certified applicator license, which homeowners typically do not hold.
It matters because restricted-use pesticides contain chemicals that pose higher risks to human health or the environment. Hiring a licensed applicator or obtaining certification is mandatory in these cases to ensure safe handling and application. Before buying a product, check the label classification; it will clearly state if it’s restricted or requires a license. Using a restricted pesticide without proper credentials can lead to legal penalties and health hazards.
Safety is important whether you use common household pesticides or any other treatment. Always follow label directions exactly, including wearing recommended protective gear like gloves, masks, or eye protection. Ensure good ventilation when applying indoors. Avoid treating areas accessible to children or pets, and never mix products unless the label permits. Proper disposal of unused pesticides and containers also prevents environmental contamination and accidental exposure.
The cost of doing your own pest control is mainly the price of products, which can range from $10 to $50 for sprays, baits, or traps suitable for small infestations. The investment in protective equipment may add $10 to $30 if you don’t already have it. Safety precautions reduce the chance of accidental poisoning or ineffective application. Proper application, such as treating cracks, crevices, and known pest pathways, improves results. Overusing or spraying in the wrong conditions often wastes money and risks injury.
Legal rules can vary slightly by state or municipality, so check your local pesticide regulations. Some states require notification or permits for certain pesticide uses, especially on rental or commercial properties. During application, keep records of product name, amount used, date, and treated area. These help address any concerns or compliance checks.
Always read the entire pesticide label before use; following label instructions exactly is both a legal requirement and the best way to stay safe.
Which Household Pests Can You Control Yourself vs. Needing Professionals?
Most common household pests like ants, roaches, and spiders you can handle on your own using targeted products and consistent practices. Larger or more complex infestations, such as bed bugs or termites, usually require professional intervention because of the difficulty and safety risks involved. Identifying the pest correctly and understanding the treatment limits for each type helps you decide when DIY will work and when to hire an expert.
Common Pests Suitable for DIY Treatment
Small infestations of ants, cockroaches, spiders, silverfish, and occasional mice can be controlled effectively by homeowners. These pests usually respond well to bait stations, traps, and over-the-counter insecticides applied according to label instructions. Basic sanitation, sealing entry points, and removing moisture sources support the treatments’ success.
Effective DIY control involves setting baits in places pests frequent, such as near kitchen cabinets, cracks, and along baseboards. Repeat treatments weekly for at least 3 to 4 weeks to cover pest life cycles. DIY costs for these pests generally range from $20 to $75 per month for products if you apply treatments yourself.
Pests Requiring Professional Expertise or Licenses
Bed bugs, termites, carpenter ants, wasps, and rodent infestations heavier than a few mice typically need professionals. These pests often require specialized knowledge, equipment, or pesticides restricted by law to licensed applicators. For example, termite treatments involve soil applications or baiting systems that professionals install and monitor.
Professional treatment of these pests can cost hundreds to thousands of dollars depending on infestation severity and property size. Attempting DIY methods can lead to incomplete eradication and ongoing damage or infestation spread. Licensed exterminators also handle large rats or mice infestations that pose health risks beyond simple traps.
Factors Influencing DIY Effectiveness by Pest Type
Effectiveness of DIY pest control depends on pest biology, infestation size, access to treatment products, and your time commitment. Pests with easy-to-identify trails, like ants, are easier to target with baits. Pests that hide deeply, such as termites inside wood, are harder to treat yourself.
Small infestations detected early respond better. Larger infestations often require repeat treatments and monitoring beyond typical homeowner capabilities. Using products not approved for the specific pest or intended environments can reduce effectiveness and increase risks. The following table summarizes typical pests by DIY suitability and key considerations to help decide when to try home treatment or call a pro:
| Pest | DIY Suitability | Recommended Control Method | Common DIY Costs | Notes |
|---|---|---|---|---|
| Ants | High | Bait stations, sealing entry points, sanitation | $20-$50 for baits and sprays | Repeat baiting 3 to 4 weeks for success |
| Cockroaches | Moderate | Gel baits, traps, insecticidal dusts | $25-$75 for baits and insecticides | Sanitation critical; heavy infestations may need pros |
| Spiders | High | Regular vacuuming, insecticide sprays | $15-$30 for sprays | Control mainly by reducing other insects and webs |
| Bed Bugs | Low | Professional heat or chemical treatments | $500-$1500+ | DIY treatments usually ineffective or incomplete |
| Termites | Very low | Soil injections, baiting systems by professionals | $800-$2000+ | Structural damage risk; professional inspection important |
| Rodents (mice, rats) | Moderate to low | Traps for mice; complex infestations need pros | $10-$50 for traps | Rodent-borne disease risk; exclusions and cleanup needed |
Use this table as a decision guide: for pests with high DIY suitability, purchase the appropriate bait or spray, treat affected areas weekly, and fix conditions attracting the pests. For pests with low DIY suitability, schedule a professional inspection and follow their treatment plan to avoid costly mistakes. Always follow label instructions and local regulations regardless of method chosen.
What Are the Startup Costs and Equipment Needed for DIY Pest Control?
Starting your own pest control requires buying specific equipment, chemicals, and safety gear. The initial investment varies based on the pests you want to target and the treatments you choose. Understanding these costs helps you compare DIY expenses with hiring professionals.
Essential Tools and Protective Gear for Homeowners
You will need a sprayer or applicator designed for pesticides, which can cost between $25 and $80 depending on capacity and type. Protective gear includes nitrile gloves, goggles, and a respirator mask, critical for handling chemicals safely. Without proper gear, you risk exposure to harmful substances and potential health issues.
Basic tools also include a flashlight for inspecting dark areas and a scraper or putty knife for removing pests or their nests. Chemical-resistant clothing adds a layer of protection during application. Safety gear can add up to $60 or more but is non-negotiable for safe pest control.
Cost Breakdown Example for Common Pest Treatments
This table shows a typical set of equipment and supplies for treating common household pests like ants, spiders, and cockroaches. Prices can differ based on brand, quality, and region, but this gives a good starting point.
| Item | Price Range | Purpose |
|---|---|---|
| Handheld Pump Sprayer | $25, $50 | Applies liquid insecticides and sprays in hard-to-reach areas |
| Nitrile Gloves (pack of 50) | $10, $20 | Protect hands from chemicals |
| Protective Goggles | $10, $20 | Shield eyes from splashes and irritants |
| Respirator Mask (N95) | $15, $30 | Prevents inhaling harmful pesticide fumes |
| Insecticide Baits or Sprays (1 quart) | $15, $40 | Treats specific pests like ants, roaches, or spiders |
| Flashlight | $10, $25 | Helps inspect dark areas for pests or eggs |
| Scraper or Putty Knife | $5, $15 | Removes nests or dead pests |
A basic DIY pest control setup for one treatment can cost roughly $90 to $200 upfront. Buying larger quantities of chemicals or more durable equipment will raise costs. Compare this with hiring a professional, which might charge $150 to $300 per visit depending on your location and the pest problem.
Where to Buy Safe and Legal Pest Control Products
Purchase pesticide products from licensed retailers, hardware stores, or garden centers that sell EPA-approved chemicals. Do not buy from unverified online sellers, as product safety and legality may be compromised. Look for clear labels with active ingredients, usage instructions, and safety warnings.
Local regulations can limit what you can use as a homeowner, so check your state’s pesticide laws online. Some chemicals require certification or training to apply, which means DIY use is illegal or unsafe. Buying from reputable sources ensures you get quality products with adequate support if you need guidance.
How to Identify Pest Infestation Severity and Decide on DIY or Professional Help
Assessing the severity of a pest infestation accurately lets you decide if you can handle the problem yourself or if it’s safer and more effective to call a professional. Use clear signs and a checklist to evaluate the extent of the infestation, so you avoid wasting time or risking incomplete treatment.
Signs of Minor, Moderate, and Severe Infestations
Minor infestations usually involve seeing a few pests or evidence limited to one area. You might notice occasional ants near a food source or a single spider in a corner. These situations are often manageable with targeted DIY treatments since the pest population is small and localized.
Moderate infestations show repeated pest sightings or damage spread across multiple rooms or areas. You might find several cockroach droppings in the kitchen and bathroom or see a growing number of ants along baseboards. The infestation is becoming established, so DIY efforts will require more consistent treatment and monitoring.
Severe infestations come with heavy pest activity or serious damage. Example signs are large clusters of rodents, termite damage to wooden structures, or widespread bed bug bites. These cases require professional intervention due to the complexity, risks, and specialized equipment needed for effective control.
Infestation Indicators That Require Professional Service
Certain pest situations go beyond what safely and effectively works with DIY methods. Call a professional if you detect any of the following:
- Visible termite damage or hollow-sounding wood suggesting extensive infestation
- Signs of rodents nesting inside walls or ceilings, like droppings, gnaw marks, and scratching noises
- Widespread bed bug infestations confirmed by multiple live bugs, shed skins, and blood stains on bedding
- Allergic reactions or illnesses linked to pest exposure, such as severe asthma triggers from cockroaches
- Rapid pest reproduction overwhelming your efforts despite repeated treatments
- Infestation in sensitive areas like kitchens with food contamination or health code risks
Professional services provide inspections, safe use of stronger pesticides, and follow-up to ensure pests are eliminated. Attempting DIY in these cases often wastes money and may spread pests further.
Don’t wait until pests multiply extensively; early action using a checklist helps you catch problems while they’re easier to resolve.
Checklist to Evaluate Your Home’s Pest Problem
Use this checklist to score the infestation severity. For each item, assign 0 if you see no sign, 1 for minor presence, and 2 for clear evidence or repeated sightings.
- Number of live pests seen in the past week
- Amount and location of droppings or pest waste
- Visible damage to furniture, wood, clothing, or food packaging
- Presence of nests or webbing indoors or near windows/doors
- Areas of repeated pest sightings over multiple days or weeks
- Any health symptoms linked to pests, such as bites or allergic reactions
- Effectiveness and frequency of previous pest control attempts
Add your scores to get a rough total. A low total (under 5) often means a minor infestation manageable with DIY. A moderate score (5-10) suggests repeated treatment and close monitoring are needed. Scores over 10 or any high-risk signs listed earlier call for a professional inspection and treatment. Adjust the checklist depending on pest type, as termites and rodents need professional help earlier due to the damage they can cause.
Step-by-Step Safe and Effective Application of DIY Pest Treatments
Applying DIY pest control products safely and effectively means you carefully prepare your area, wear proper protective gear, follow precise application steps, and clean up correctly afterward. These measures reduce risks to your health and property and improve how well the treatment works.
Preparing Your Treatment Area and Equipment
Start by thoroughly inspecting and clearing the area you plan to treat. Remove all food items, dishes, utensils, pet bowls, and children’s toys to prevent contamination. Cover or move any exposed food preparation surfaces, linens, and furniture. Seal off vents and other openings that don’t need treatment to avoid spreading chemicals unintentionally. Lay down newspaper or plastic sheeting if you’re treating floors or decks to protect surfaces from stains or residues.
Also, check that your equipment, sprayers, dusters, gloves, is clean and functioning properly. Mix chemical solutions only in well-ventilated locations according to label instructions, using measuring tools to avoid over or under-dilution, which can reduce effectiveness or increase risks. Read the warning labels and safety data sheets for the product to know how much to apply and where.
Personal Protective Equipment to Wear
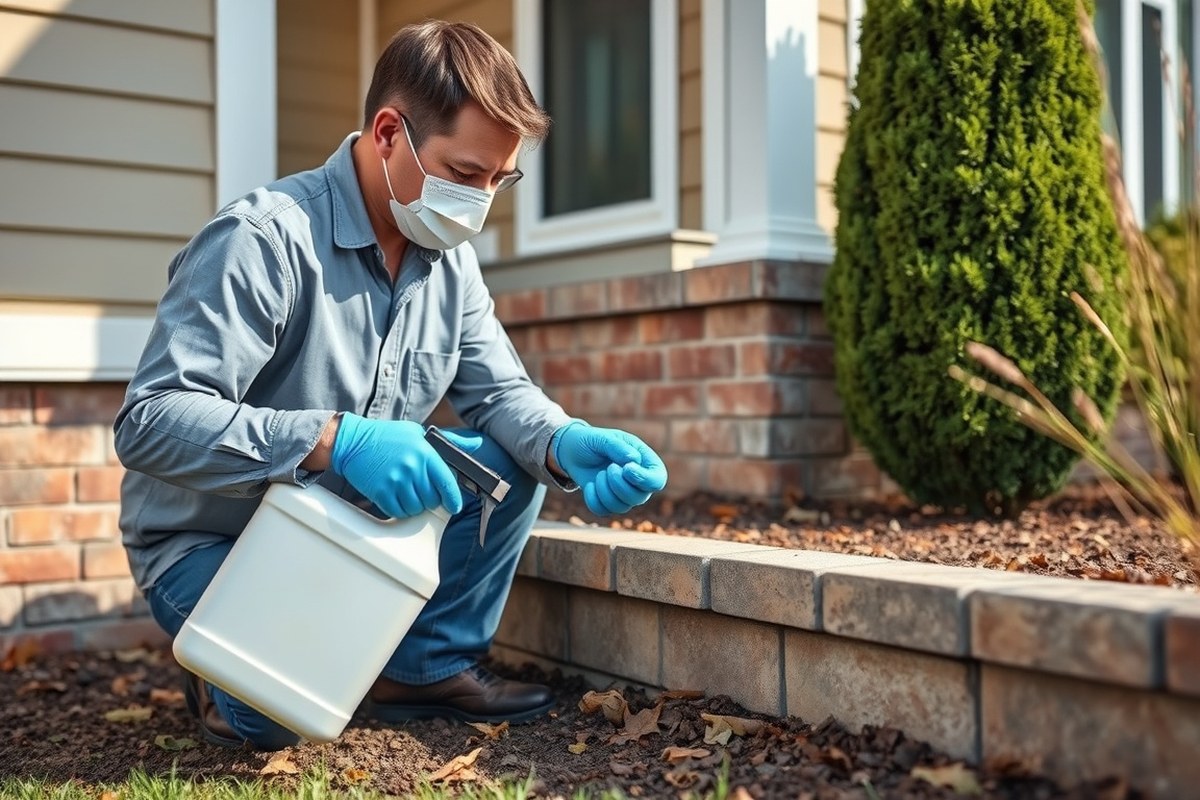
Proper protective gear protects your skin, eyes, and lungs from chemical exposure. Wear chemical-resistant gloves made of nitrile or neoprene when handling any concentrates or sprays. Use long sleeves and pants to stop sprays from contacting your skin. Eye protection, such as goggles or safety glasses that seal around your eyes, prevents splashes from causing damage. Consider a respirator or dust mask suitable for pesticide fumes if label instructions indicate airborne exposure risks.
Do not rely on cloth masks or bandanas, they do not filter out chemical vapors effectively. Remove all protective gear carefully after application without touching contaminated surfaces and wash your hands thoroughly with soap and water. Keep children and pets away during treatment, and until the product has dried or settled as directed on the label.
Applying Chemicals Safely and Accurately
Applying pest control products correctly improves their performance and reduces exposure hazards. Follow the product label step by step, using the recommended dosage and method. Avoid over-applying, which can lead to toxic residue buildup, or under-applying, which might not control the pest effectively. Treat only target areas such as cracks, crevices, baseboards, or infested plants.
Don’t spray chemicals on windy days outdoors to prevent drift onto non-target plants or neighbors’ property. Aim spray nozzles away from yourself and other people. Use slow, steady movements to apply an even coat without puddling. For granular products, distribute evenly by hand or with a spreader, keeping granules off sidewalks and driveways to avoid tracking into the home.
- Read and follow the product label completely before starting.
- Measure the chemical exactly as directed to avoid overuse.
- Apply the product to specified areas only, avoiding open spaces and lawns unless the label says otherwise.
- Use slow, controlled sprays or dusting to cover surfaces evenly without runoff.
- Keep children, pets, and uninvolved adults out of the treatment area until it is safe.
- Store unused product in its original container with the label intact.
Post-Treatment Cleanup and Storage
After completing the application, clean all equipment such as sprayers and brushes immediately with water and detergent to prevent clogging and contamination. Dispose of rinse water away from wells, storm drains, or water bodies. Remove and launder clothing worn during application separately from other laundry on the hottest water safe for the fabric.
Store leftover pesticides in their original containers with the label clearly visible. Keep the containers tightly sealed, dry, and locked in a cool, well-ventilated area out of reach of children and pets. Never store pesticides near food, feed, or drinking water. Proper cleanup and storage reduce accidental exposure risks and preserve product effectiveness for future use.
Common DIY Pest Control Mistakes and How to Avoid Them
Many homeowners make the mistake of either overusing or underusing pest control products, which reduces their effectiveness and can harm the environment or your family’s health. Overuse happens when people apply more pesticide than the label recommends, hoping for quicker results, but this wastes product and increases risks. Underuse occurs when you apply too little or miss critical areas, leaving pests unaffected and potentially resistant to treatments.
Misapplication is another common error. Using a product meant for outdoor use inside, or vice versa, can cause damage to your home or expose your family to unnecessary chemicals. Always read and follow the product label carefully to ensure you use the right product for your situation. The label also specifies how much product to apply and where. For example, granules need to be spread around the perimeter at a certain rate, while sprays require thorough coverage in cracks and crevices.
Some pests require specific approaches. Ant problems often need bait traps placed along trails rather than broad spraying. Rodent control calls for properly sealed bait stations to prevent accidental exposure to pets or children. Applying treatments only where pests are active saves money and avoids damaging plants or structures. You should inspect the treated area after a few days and reapply only if necessary, usually every 7 to 14 days depending on the product and pest.
- Use the smallest effective dose indicated on the label to avoid chemical buildup.
- Apply treatments during calm weather to prevent drift and wash-off.
- Wear gloves and protective gear as recommended on the label for your safety.
- Store unused pesticides in original containers, tightly sealed and out of reach.
- Target treatments by identifying exact pest entry points and activity zones.
- Do not mix pesticides unless explicitly stated to avoid dangerous reactions.
- Keep records of products used, dates, and treatment locations to track effectiveness.
Many DIYers skip monitoring after application. Effective pest control requires follow-up inspections and sometimes multiple treatments spaced out days apart. This helps determine if the approach is working or if a different product or method is needed. Remember that some pests, such as bed bugs, require professional methods due to hiding habits and resistance issues. Stick to recommended timing and dosages to avoid resistance build-up and reduce environmental impact.
How to Monitor DIY Treatment Success and When to Call a Professional
Monitoring the success of your DIY pest control efforts involves careful tracking of pest activity and treatment applications over weeks. Visible drops in pest numbers and fewer signs of damage are good indicators that your approach is working. Knowing when to stop DIY efforts and call a professional depends on the persistence of pests and any signs that infestations worsen despite your treatments.
Tracking and Documenting Treatments and Pest Activity
Maintain a clear record of each treatment step to evaluate progress effectively. Note the date, product or method used, application locations, and any immediate pest responses you observe. This habit lets you avoid over- or under-treating and helps identify which methods work best for your particular pest issue.
Equally important is keeping track of pest sightings or damage signs during and after treatment intervals. For example, document the number and location of ants, rodent droppings, or gnawed areas weekly. This ongoing assessment shows whether pest populations are decreasing or stable.
- Record treatment date, type, dosage, and coverage area
- Inspect and note pest activity before and after each treatment
- Use photos or detailed descriptions for damage or droppings
- Mark areas that require repeated attention
- Keep notes on environmental factors like weather that affect treatment
Using a simple notebook or spreadsheet is enough. Consistency allows you to compare results over time and make data-driven decisions about your pest control strategy.
Expected Pest Control Timelines by Common Pests
Timeline for seeing results varies widely by pest species and the severity of the infestation. For crawling insects like ants or cockroaches, you may notice fewer sightings within one to two weeks of a well-applied treatment. Severe infestations, however, might take three to four weeks to reduce noticeably, with multiple treatments needed.
Rodent control timelines depend on trap placement and bait acceptance; some homeowners see success in a few days, but it might take up to two weeks to remove all rodents. For termites or wood-boring insects, expect months to confirm elimination due to slow colony activity and the need for professional-grade treatments. Here is a rough reference guide:
- Ants, cockroaches: 1, 3 weeks
- Rodents: 3 days to 2 weeks
- Termites: Several months (usually professional treatment)
- Bed bugs: 2, 4 weeks with repeated treatments
- Fleas: 2, 3 weeks, factoring in pet treatments
Red Flags Indicating Professional Intervention Is Needed
Stop DIY efforts and call a licensed pest control professional if pest activity worsens despite following treatment schedules closely. Signs include increased sightings, expanded damaged areas, or evidence of pest breeding such as larvae, eggs, or active nests. Failure to reduce pests after 3, 4 weeks of consistent treatment also warrants expert help.
Professional intervention is critical if the pest poses health risks that DIY methods cannot handle safely, like venomous spiders or certain types of termites. If your treatment involves large volumes of pesticides, or if you are unsure about the pest species identification, experts have access to more effective tools and knowledge to address the problem safely.
Do not ignore signs of pest resurgence after multiple treatments; delays in calling a professional can lead to higher control costs and more damage.
Environmental and Health Best Practices for DIY Pest Control
Effective DIY pest control requires using methods that protect your home, family, pets, and the environment from harmful effects. Choosing non-chemical or integrated approaches can reduce health and environmental risks. Proper storage and disposal of pesticides are important steps to prevent contamination and accidental exposure.
Using IPM and Non-Chemical Control Strategies
Integrated Pest Management (IPM) combines multiple control methods focused on reducing pest populations with minimal use of chemicals. It starts by identifying the pest and assessing the level of infestation to avoid unnecessary treatments. Physical controls like sealing cracks, removing food sources, and setting traps often provide good results without chemicals. For example, sealing entry points with caulk or weatherstripping helps stop ants and cockroaches from entering your home.
Biological controls, such as encouraging beneficial insects that prey on pests, can also reduce pest pressure in outdoor gardens. Using sticky traps or pheromone traps monitors insect presence and targets only specific pests. Mechanical methods like vacuuming spider webs or manually removing pests immediately cut down their numbers. These strategies lower chemical use, reducing risk to pets and children, and protect beneficial insects and soil health.
Safe Disposal and Storage of Pesticides
Leftover pesticides and their containers must be handled carefully to prevent environmental contamination. Follow label instructions on disposal, which often recommend not pouring leftover pesticides down drains, toilets, or on the ground. Instead, use community hazardous waste collection sites where available. Many local governments organize free collection days for household hazardous waste including pesticides.
Always store pesticides in their original containers with labels intact, in locked cabinets away from children and pets. Keep them in dry, cool places to maintain product stability and prevent leaks. Never transfer pesticides to food or drink containers. Label any temporary containers clearly and ensure they are sealed. Check local regulations as some states have specific rules about storage requirements and disposal procedures.
Minimizing Environmental and Human Health Risks
Applying pest control products in direct sunlight or before rain increases runoff and reduces effectiveness, potentially harming nearby plants and water sources. Apply products on calm days to avoid drift that could affect non-target areas, pets, or neighbors. Use the minimal effective amount to reduce residue build-up and exposure risk. Personal protective equipment such as gloves, masks, and long sleeves limits your contact with chemicals.
Pets should be kept away from treated areas until surfaces dry and ventilation is restored. After application, wash hands thoroughly before eating or touching your face. Avoid using broad-spectrum pesticides indoors unless absolutely necessary, to protect beneficial insects and maintain indoor air quality. Monitoring pest populations after treatment ensures you don’t repeat chemical use unnecessarily. Every extra application increases environmental load and the chance for pest resistance to develop.
Comparing DIY Pest Control vs. Hiring Professionals by Cost, Risk, and Effectiveness
DIY pest control usually requires a lower upfront cost but demands consistent time and material investment. Hiring professionals costs more initially but often comes with guarantees and reduced personal risk. A decision depends on the infestation’s severity, your comfort with handling chemicals, and time availability.
Upfront and Ongoing Cost Comparison
DIY pest control starts with purchasing equipment and pesticides, which can range from $50 to $200 depending on the pest type and treatment frequency. You’ll need to replenish supplies regularly, typically every one to three months, costing $10 to $50 per refill. Time spent includes spot checks, applying treatments, and monitoring results, which can add up to several hours a month.
Professional pest control services tend to charge between $150 and $500 per visit based on property size and pest type. Many offer service contracts that include quarterly visits and guarantees, averaging $300 to $600 per year. These plans reduce the need for your direct involvement and may include retreats at no extra charge if pests return.
| Cost Factor | DIY Pest Control | Professional Pest Control |
|---|---|---|
| Initial Setup | $50 – $200 (equipment and pesticides) | $150 – $500 (inspection and first treatment) |
| Ongoing Monthly Cost | $10 – $50 (refills and materials) | Included in service contract (~$25-$50 per month) |
| Time Commitment | 2-4 hours/month | Minimal; service visits scheduled |
| Guarantee or Warranty | None or limited by product labeling | Commonly 30-90 day re-treatment guarantee |
The table shows that DIY approaches cost less upfront but require your ongoing attention and repeat purchases. Professional services charge more but offer convenience and protection against recurring problems.
Risks and Benefits of Each Approach
DIY pest control exposes you to potential risks, such as improper chemical use, inaccurate pest identification, and incomplete treatments. Using pesticides incorrectly can cause health hazards to your family or pets and trigger environmental harm. Benefits include cost savings and learning opportunities but require strict adherence to label instructions and safety practices.
Professional pest control reduces exposure to harmful chemicals, ensures correct pest diagnosis, and applies treatments designed for thorough elimination. Technicians receive training and often carry insurance for property damage or accidents. However, professional services may not eliminate pests instantly and sometimes require retreatments, which are usually covered under warranty.
Deciding Factors for Choosing DIY or Professional Service
Choose DIY if the infestation is minor, confined, and you have the time and willingness to follow safety guidelines exactly. Small ant problems, spiders, or isolated roaches often respond well to DIY strategies. You can track progress yourself and adjust treatment as needed without large costs.
Hire professionals if the infestation involves hard-to-reach areas, multiple pest species, or safety risks from chemical application. Situations like termite detection, bed bug eradication, or large rodent infestations require licensed expertise and equipment. Professional guarantees also make sense if you want legal compliance for rental properties or resale. Use this decision rule:
- Minor infestation + time to treat + safe product use = DIY
- Severe infestation + complexity + health risk + need for warranty = Professional
This framework helps balance cost, risk, and effectiveness tailored to your situation.
Your First Steps: A DIY Pest Control Action Plan
Decide if you want to handle pest control yourself by assessing your pest problem severity, legal limits, and safety needs. Then gather the right tools and apply treatments carefully while watching results.
- Before You Start: Inspect your property for pest signs to identify pests and infestation levels. Check local laws to confirm DIY pest control is allowed for your pest type and prepare appropriate safety gear. This step ensures you only treat what you can legally and safely handle.
- Day 1: Choose Your Approach: Compare the pests found to a known list of DIY manageable pests like ants, spiders, or roaches versus pests that require professionals, such as termites or bed bugs. If your pests fall into the manageable category, proceed with purchasing basic equipment, sprayers, baits, insecticides labeled for home use, and protective gloves. Avoid chemicals restricted for professionals only.
- Day 2: Acquire Startup Supplies: Buy DIY-specific pest control products, focusing on non-restricted insecticides and baits. Include monitoring tools like sticky traps. Budget between $50 and $150 depending on extent, this covers multiple spray bottles, baits, and safety gear. Skip expensive equipment unless dealing with extensive infestations.
- Day 3: Apply Treatments Carefully: Follow product labels exactly for mixing, application rates, and timing. Target areas like baseboards, entry points, and outdoor perimeters. Never exceed recommended doses to avoid health risks and environmental harm. Proper application reduces pest survival and minimizes reapplication costs.
- Week 2: Monitor Effectiveness: Check traps and treated areas twice weekly to track pest activity decrease. Use sticky traps to count remaining pests or see if new trails appear. Significant reduction by week two means treatment is working; ongoing activity at the same level suggests you may need a professional inspection.
- Week 3: Reassess Severity: Assess if infestations have lessened enough to keep managing yourself or if pest populations remain high. Persistent pests or those requiring specialized equipment indicate time to hire a licensed pest control professional for deeper treatment.
- Ongoing: Maintain Safe Practices and Prevention: Clean treated areas regularly, seal cracks, and remove food sources to prevent new pests. Use integrated pest management concepts to reduce chemical dependency. This keeps pests under control long term while minimizing health and environmental risks.
Frequently Asked Questions
What Kind of Liability Am I Responsible for If I Do My Own Pest Control?
You are liable for any harm caused by misuse of chemicals or equipment. Always follow label instructions and local regulations to minimize legal or safety risks during DIY pest control.
Can I Use the Same Pest Control Products Throughout the Year?
No, many products work best during specific seasons or pest life stages. Rotating treatments and timing applications increase effectiveness and reduce resistance for long-term control.
How Often Should I Inspect My Property for Pests When Doing Pest Control Myself?
Inspect at least once a month, focusing on common entry points and moisture-prone areas. Frequent checks help catch infestations early and inform ongoing treatment decisions.
Are There Benefits to Documenting My DIY Pest Control Efforts?
Yes, keeping records of infestations, treatments, and outcomes helps track progress and supports communication with professionals if needed later. It can also inform preventive maintenance.
How Do I Store Pest Control Products Safely at Home?
Store chemicals in original containers in a locked, cool, dry place away from children and pets. Proper storage prevents accidental exposure and maintains product effectiveness.
Can DIY Pest Control Worsen Certain Infestations?
Yes, improper application can scatter pests or promote resistance. Careless use may make infestations harder to control, so following guidelines and knowing when to call a professional is critical.
The Bottom Line
Owning your own pest control means taking full responsibility for identifying, treating, and monitoring pest issues safely and effectively on your property. Start today by carefully inspecting common trouble spots like kitchen cabinets and basements to assess pest presence and severity; this guides whether you should buy DIY products or call a professional. Keep in mind that using targeted, approved treatments according to label instructions reduces risk to your health and environment while improving chances for success. Tracking results weekly helps you determine if your efforts are working or if professional expertise is necessary to prevent further damage or infestation growth.