

How to Get Rid of Pest Snails: 10 Proven Methods That Work Fast
To get rid of pest snails quickly, start by identifying which snails are damaging your plants, then use targeted methods such as organic traps, copper barriers, or carefully applied chemical baits. Combining these approaches helps reduce snail populations while protecting beneficial insects and pets. You’ll see faster results by maintaining your garden to remove hiding spots and using natural predators like certain beetles to keep snail numbers in check.
This information is tailored for home gardeners, greenhouse operators, and small-scale farmers facing snail problems. You’ll find clear steps to match your climate and situation, avoid common mistakes, and track when your control efforts are working. Those details let you adjust your strategy so you can protect your plants efficiently and with the least risk to your environment.
Key Takeaways
- Inspect leaves and stems for irregular holes and slime trails to identify pest snails and assess their damage early.
- Use organic methods like handpicking, beer traps, and diatomaceous earth to reduce pest snails without harmful chemicals.
- Apply chemical snail baits carefully, following label instructions to balance effectiveness with safety for children and pets.
- Encourage natural predators such as birds, frogs, and beetles to help control snail populations biologically.
- Recognize that snails are most active in moist, cool weather and adjust control methods seasonally for better results.
- Install copper barriers around garden beds to deter snails by causing a mild electric shock on contact.
1. How to Identify Pest Snails and Their Damage
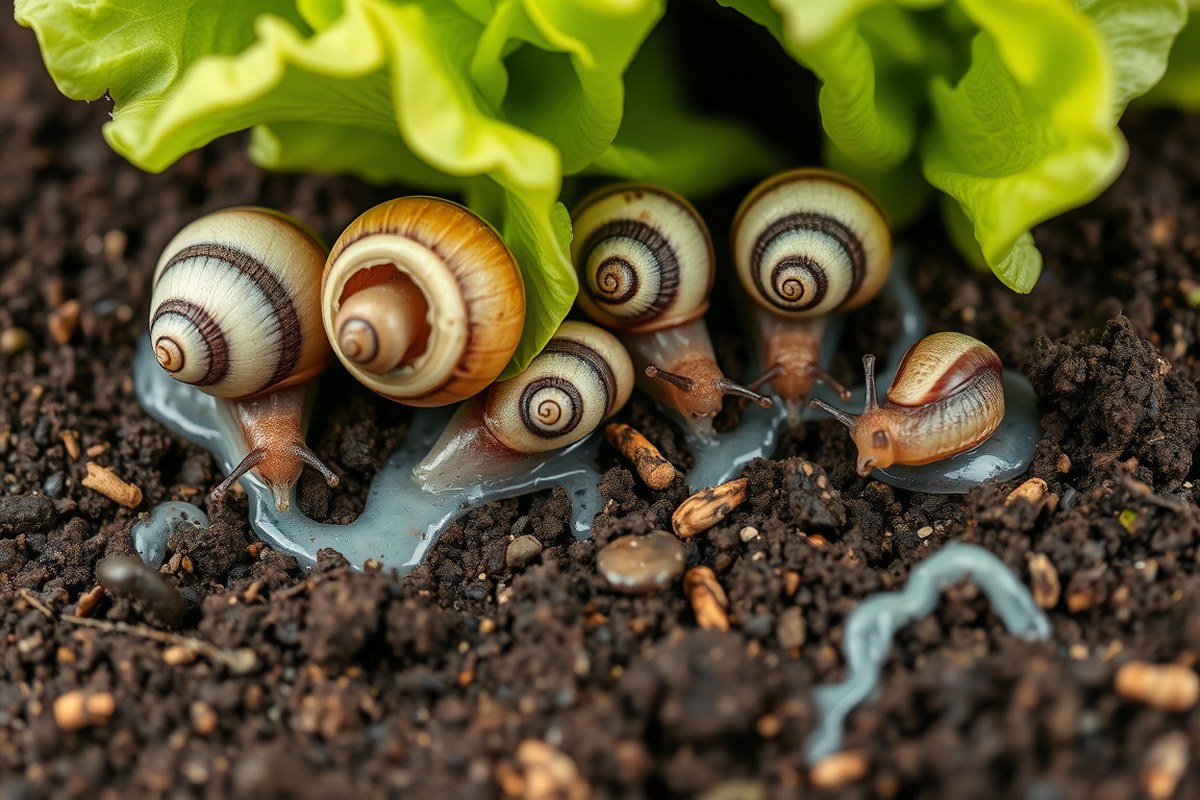
Pest snails can cause significant damage to gardens by feeding on leaves, stems, and fruit. Identifying the common garden pest snails and distinguishing them from beneficial snails or slugs is essential for targeted control. Recognizing the distinctive damage they cause helps you address the problem effectively.
Common Pest Snail Species in Gardens
The most common pest snails in gardens include the brown garden snail (Cornu aspersum), the white garden snail (Theba pisana), and the amber snail (Succinea putris). The brown garden snail is the most widespread and infamous; it has a shell about 1 to 1.5 inches in diameter with a brownish, patterned surface. The white garden snail features a lighter, almost white shell with brown bands and can be found in coastal or warmer regions. The amber snail is smaller, usually under 0.5 inch, with a translucent yellow to orange shell. Each species feeds on a wide range of plants, damaging many garden crops and ornamentals.
These snails thrive in damp, shaded environments, often hiding under leaves, mulch, or garden debris during the day. You might spot their slime trails on foliage or soil as indirect evidence of their presence. Knowing these species helps you target control methods because behavior and preferred hiding spots vary slightly between them.
Differences Between Snails, Slugs, and Beneficial Gastropods
Snails have visible, coiled shells carried on their backs, while slugs lack external shells or have very small, internal ones. This difference is key when identifying which gastropod you’re dealing with. Pest snails typically have larger shells and eat similar plants to slugs but often leave more noticeable slime trails because of their size. Beneficial snails, such as some species in aquatic gardens or rare land snails, generally do not harm garden plants and sometimes feed on algae or decaying matter.
Distinguishing pest snails from beneficial ones requires paying attention to size, shell shape, and habitat. Beneficial snails are often smaller, live in less commonly damaged areas, or have different diets. For example, many beneficial snails live near water features or in compost heaps without attacking healthy plants. Pest snails, on the other hand, are usually found actively feeding on leaves and young shoots at night or in moist conditions.
Typical Signs of Snail Damage on Plants
Pest snails leave characteristic irregular holes and notches on leaves, especially along soft stems and tender new growth. They often feed at night, so damage appears more prominent in the morning. Look for ragged edges on leaves, sections of leaf tissue missing, or entire seedlings eaten down to the stem. Snail damage tends to be uneven because their feeding patterns avoid tougher veins.
Another sign is the presence of shiny, silvery slime trails on leaves, soil, or pots. These trails help you locate hidden snails during the day. Pest snails may also leave holes in fruit like strawberries or tomatoes, which can expose the fruit to rot and pests. In severe cases, young plants might be completely stripped and fail to grow further.
Checking plants frequently, especially after rainy or humid weather, can help you spot damage early. Damage caused by other pests like caterpillars may look similar but usually includes frass (insect droppings) and different feeding patterns, so careful observation can help you avoid misidentifying the problem.
2. Effective Organic Methods to Get Rid of Pest Snails

Organic methods to control pest snails rely mainly on physical barriers, traps you can make at home, and plants that discourage snails from settling in your garden. These approaches reduce chemical use, protect beneficial insects, and can be tailored to your specific garden. You’ll need patience and persistence, since organic control often works best when used consistently over a few weeks.
Physical Barriers Like Copper and Eggshells
Physical barriers keep snails from reaching vulnerable plants by creating surfaces they avoid crossing. Copper strips are one of the most effective barriers because when a snail’s slime contacts copper, an unpleasant electric reaction deters them. You can install copper tape or flashing around individual pots, raised beds, or garden borders. The tape should be at least 2 inches wide and taped down firmly to prevent gaps. Replacing it every 1, 2 years avoids corrosion.
Crushed eggshells and coarse materials like diatomaceous earth form rough surfaces that slow or stop snails physically. Lay a 1- to 2-inch layer around plants or along garden rows. Eggshell barriers are low-cost, but they need replenishing after heavy rain or watering. Their effect is more mechanical abrasion than chemical, so snails might find ways around over time.
Keep physical barriers dry and intact; moisture can reduce copper’s effectiveness and wash away crushed materials.
DIY Traps: Beer, Boards, and Homemade Baits
Snails are attracted to fermenting beer, so beer traps lure and drown them effectively. Use small containers (like yogurt cups or mason jars) sunk so their rims are level with the soil, then fill each with about 3 inches of beer. The yeast smell draws snails overnight, and they fall in and drown. Replace the beer every 2, 3 days to keep it fresh. Check the traps daily and dispose of the snails to reduce the population.
Flat boards or damp cardboard pieces placed near plants can serve as shelters that snails seek during the day. In the morning, lift the boards and collect the hiding snails manually. This method requires daily attention but avoids chemicals and traps.
Homemade bait mixes combining egg shells (for abrasion), coffee grounds (to repel), and a little sugar (to attract) placed near snail pathways can discourage snails. Avoid using salt, which harms soil health.
- Use at least one beer trap for every 10 square feet in heavy infestation areas
- Place boards near moist, shady locations where snails hide
- Empty and refill traps every 2, 3 days
- Collect and remove snails from boards every morning
- Replace bait materials weekly to maintain effectiveness
DIY traps are inexpensive but need regular maintenance. They work well in combination with barriers and planting strategies for better control.
Planting Strategies to Repel Snails
Some plants naturally deter snails because their textures or scents are unappealing. Aromatic herbs like rosemary, thyme, and sage emit smells snails avoid. Their woody stems also make feeding difficult. You can plant these herbs as borders around more vulnerable plants to reduce snail access.
Other less palatable plants include ferns, lavender, and certain ornamental grasses. Intermixing these among your garden beds can create less attractive zones for snails. Avoid dense mulch or ground covers that provide hiding places for snails.
For a simple planting layout, place rows of rosemary or lavender at least 12 inches wide around vegetable beds, with regular pruning to keep plants healthy and aromatic. These plants need full sun and well-drained soil to thrive, so select locations accordingly.
3. Using Chemical Snail Baits: Safety and Effectiveness
Chemical snail baits are designed to kill snails effectively, but their safety around children and pets varies based on the active ingredients and application methods. Proper use and adherence to safety precautions limit risks, and understanding legal restrictions ensures compliance with local laws. Applying these baits as directed at the recommended frequency maximizes control while minimizing hazards.
Types of Chemical Baits Available
The most common chemical snail baits contain active ingredients like metaldehyde, iron phosphate, or molluscicides based on metal salts. Metaldehyde baits are fast-acting but tend to be toxic to pets and wildlife, requiring careful placement. Iron phosphate baits are considered safer for use around pets and children because iron phosphate occurs naturally in soil and breaks down without harmful residues. Both types come in pellet or granular forms that you scatter around affected plants or areas where snails congregate.
Recently, newer formulations include products with sodium ferric EDTA, which also targets snails with lower toxicity. The choice depends on your tolerance for risk and local product availability. Read the label carefully to confirm the active ingredient and specific use instructions. For example, iron phosphate baits often need moisture to be effective, so it’s best to apply them in the evening or before rain to encourage snail feeding activity.
Safety Precautions for Home Use
Always keep chemical baits out of reach of children and pets by applying them in areas where unintended exposure is unlikely. Place baits under plants, garden debris, or in bait stations designed to reduce access by non-target animals. Avoid scattering baits indiscriminately, especially around play areas or pet dishes. Use gloves when handling the bait and wash your hands afterward to prevent accidental ingestion or skin irritation.
Follow the application rate on the product label closely. Overapplication can increase risk to pets and beneficial wildlife without improving control. Typically, reapplication occurs every 7 to 14 days to maintain control until snail activity declines. Store unused bait in a sealed container, away from food, children, and pets. Be vigilant for signs of poisoning, including lethargy or unusual behavior in pets, and seek veterinary help promptly if exposure is suspected.
Regulations and Restrictions to Consider
State and local regulations vary regarding which chemical snail baits are approved for residential use. For instance, metaldehyde products have faced restrictions or bans in some regions due to their environmental impact and risks to wildlife. You should check with your state’s agricultural extension or pesticide regulatory agency to confirm which products are legal and recommended in your area.
Environmental concerns also guide application practices. Avoid baiting near water sources like ponds and streams to prevent runoff contamination. Some counties require specific disposal methods for unused pesticide products to protect the environment. Sale restrictions may limit where you can buy certain products, often requiring a licensed applicator for restricted-use pesticides. Familiarizing yourself with these rules helps avoid fines and protects your garden’s ecosystem.
4. Natural Predators and Biological Controls for Snail Management
Natural predators significantly reduce pest snail numbers by feeding on them, helping maintain balance in your garden. To control snails biologically, you can attract predatory animals or directly introduce beneficial organisms that target snails.
Key Predatory Insects and Animals
Several animals routinely prey on pest snails, including ground beetles, certain types of frogs, toads, and some birds such as thrushes. Ground beetles consume snail eggs and juveniles, making them valuable for early control. Frogs and toads eat adult snails and are most active at night, matching snail activity patterns. Birds can be effective but tend to feed during the day, so their impact varies with local bird species and garden layout.
In addition, some small mammals, including certain species of shrews and hedgehogs, feed heavily on snails. Introducing or encouraging native wildlife that fits these categories often improves snail management without chemicals. However, some predators might not establish themselves easily in urban or highly disturbed areas, requiring more active steps to support them.
Creating Habitat to Attract Predators
Providing shelter and food sources encourages natural predators to visit or stay in your garden. For ground beetles, leave patches of bare soil where they can hunt, and avoid over-tilling which destroys their habitat. Mulches like straw or leaf litter offer cover for frogs, toads, and beetles. Maintain moist areas such as shallow ponds or water dishes to support amphibians, as they depend on hydration and breeding sites.
Plant diversity matters too. Shrubs and perennials can offer nesting spots or shade for birds that feed on snails. Avoid pesticides that harm non-target insects and animals, as this reduces predator populations. If you live in areas with few native predators, installing birdhouses or toad shelters can promote their presence. These steps take time to show results, often weeks to months, as predator populations stabilize.
Using Nematodes and Biological Agents
Beneficial nematodes, especially species like Phasmarhabditis hermaphrodita, infect and kill snails after being applied to soil or mulched planting beds. You can purchase these nematodes from garden supply stores or online. Application requires moist soil and temperatures between 50°F and 86°F for best activity. Follow product instructions for water volume and timing; usually, multiple applications spaced a week apart improve effectiveness.
Biological agents offer a targeted approach, reducing snails without harming plants or most other insects. Their cost ranges from about $20 to $40 for enough nematodes to cover 500 to 1,000 square feet. They work best in smaller garden beds or greenhouses rather than large fields. Some products may require refrigeration and have a limited shelf life, so check storage instructions before purchasing. Combining nematodes with habitat improvements improve overall snail control.
5. How Weather and Seasonal Changes Affect Snail Activity
Snail activity increases significantly in mild, moist conditions and declines during dry or freezing weather. Understanding these patterns is essential for scheduling control efforts effectively, targeting peak snail movements to reduce their populations efficiently.
Snail Activity by Temperature and Moisture
Snails are cold-blooded creatures whose activity depends heavily on temperature and moisture. They typically become active when temperatures range between 50°F and 77°F, with peak activity closer to 60, 70°F. Moisture is even more critical; snails avoid dry conditions because they risk dehydration. After rainfall or during high humidity, snails emerge to feed and reproduce. During hot, dry spells or freezing conditions, they seek shelter underground or in protected areas and enter dormancy.
This behavior means dry or cold weather naturally suppresses snail movement, but it doesn’t kill them. You can expect a surge in snail presence within 24 to 48 hours following rain or irrigation, which lasts until conditions become unfavorable again. Knowing this pattern can help you anticipate when snails will be most vulnerable to control measures.
Seasonal Patterns in Snail Infestations
In regions with distinct seasons, snail populations tend to peak in spring and fall when temperatures are moderate and moisture levels are higher. During early spring, snails become active after winter dormancy, feeding on tender new growth. Fall offers a second peak when moist conditions return after summer dryness. Summer activity usually dips due to heat and dryness, while winter activity slows significantly in cold climates but may continue year-round in milder areas.
The timing and severity of these peaks vary with local climate. For example, coastal or temperate regions might see prolonged snail activity, while inland areas with hot summers and cold winters experience shorter active periods. Gardeners and farmers should track local temperature and rainfall trends closely to predict infestation timing accurately.
Timing Control Efforts for Maximum Effect
Targeting snail control when activity is highest improves treatment success. Begin monitoring your garden or crops early in spring, particularly after sustained rains or irrigation. Apply control treatments such as trapping or baiting within 1 to 2 days post-rainfall, when snails are actively feeding and moving. Repeat applications may be necessary during prolonged wet periods, typically every 7 to 10 days, considering product guidelines and snail resurgence.
Pause control measures during hot, dry summer spells or winter freezes when snails are inactive underground. Applying bait at these times wastes effort and chemicals, as snails are unlikely to encounter them. Instead, focus on habitat modification or physical barriers seasonally aligned with snail behavior.
Schedule snail control treatments soon after wet weather, within 48 hours, to catch snails while they are active and feeding for the best results.
6. Installing and Using Copper Barriers for Snail Control
Copper barriers work well as snail repellents because snails avoid crossing copper surfaces due to a mild reaction between their slime and copper. To install these barriers effectively, you need to secure continuous copper strips around your garden beds or plant pots, making sure they have no gaps that snails could slip through.
Why Copper Repels Snails
Copper repels snails because the metal reacts chemically with the mucus they produce to move. This reaction creates a small electrical charge that irritates the snail, discouraging it from crossing the copper strip. You won’t see snails trying to climb over continuous copper bands, which makes it a physical and natural deterrent.
This method does not kill snails; it simply keeps them away, reducing damage to plants without toxic chemicals. The effectiveness depends on keeping the copper surface clean and intact. Dirt or corrosion can reduce its repellent effect over time.
Selecting the Right Copper Material
Use copper tape or strips that are at least 1.5 to 2 inches wide to prevent snails from bridging the barrier. Choose tape with a sticky backing for easy application, or use thin copper sheeting if you want a more durable option. Copper flashing can last multiple seasons but might need tools to cut and shape.
For potted plants, copper tape works best wrapped snugly around the pot’s outer edge. In garden beds, copper flashing or tape can be installed as a low barrier around the perimeter. Avoid thin copper wire, as it’s easy for snails to cross.
Installation Best Practices and Maintenance
Proper installation ensures the copper barrier works reliably to keep snails out. Place the copper strips so they form an unbroken ring around plants or garden beds. Make sure the copper is flush against the soil or pot surface to prevent gaps at the bottom.
Maintain the barrier by cleaning it regularly with a damp cloth to remove dirt and corrosion that dulls the copper’s surface. Inspect for breaks or holes and repair them promptly to keep the barrier continuous. Reapply copper tape every 1 to 2 years depending on exposure and wear. Follow these steps to install a copper barrier around your garden area or pots:
- Measure the perimeter of the area or pot to determine how much copper tape or flashing you need.
- If using copper tape, clean the surface of the pot or bed edge with rubbing alcohol to ensure good adhesion.
- Cut the copper tape or flashing to length, allowing some overlap (about 1 inch) where ends meet.
- Apply the copper tape sticky side down slowly, pressing firmly to avoid bubbles or gaps.
- For flashing, bend and pin the edges with garden staples or use small nails if installing around a garden bed.
- Make sure no gaps larger than 1/4 inch remain where snails could squeeze through.
- Check and clean the copper barrier every 2 to 3 weeks during wet seasons when snails are most active.
- Replace worn or corroded copper material before it loses effectiveness.
7. Garden Maintenance Tips to Reduce Snail Habitats
Reducing snail habitats in your garden requires consistent upkeep and controlled moisture levels. Over-watering and untidy garden conditions create ideal environments for snails by providing shelter and food. Following targeted maintenance routines limits their population and prevents infestations.
Removing Hiding Places and Debris
Snails seek cool, damp spots to hide during the day, often under debris, leaves, and plant material. Clearing these hiding places denies them shelter and reduces breeding sites. Regular garden cleaning helps cut down snail numbers by exposing them to predators and dry conditions.
You should remove fallen leaves, weeds, grass clippings, and any wood or stone piles weekly. Check shaded garden beds and under pots where moisture accumulates. Snails use thick plant growth and dense ground cover as protection, so thinning overcrowded areas can also help.
- Clear away leaf litter and decaying plant matter regularly
- Remove unused pots, boards, or debris that create shaded hiding spots
- Thin dense ground covers and prune overly dense shrubs
- Turn over soil to disturb snail eggs and larvae
- Keep compost bins sealed and turned frequently
- Inspect garden edges and fence lines for snail habitats
Focusing on reducing clutter limits the moist microenvironments snails need to survive. Neglecting this can sustain a safe refuge for snails, making other control efforts less effective.
Watering Techniques to Limit Moisture
Snails thrive in moist conditions, so how and when you water plays a big role in snail control. Over-watering keeps soil and plant surfaces damp all day, which encourages snail activity and feeding.
Water your garden early in the morning rather than evening. This allows foliage and soil to dry before night when snails are most active. Avoid overhead watering; instead, use drip irrigation or soaker hoses to deliver water directly to the roots and keep leaves dry.
Adjust watering frequency based on weather and soil type. Sandy soils dry faster than clay and need different schedules. Monitor soil moisture by feeling a few inches down; avoid watering if the soil still holds moisture from the previous day.
Soil and Mulch Management
The types of mulch and how thickly they are applied can create favorable conditions for snails. Organic mulches like straw, leaves, and bark retain moisture, offering ideal hiding places if applied excessively. Using mulches that dry quickly or are less attractive to snails reduces their habitat.
Keep mulch layers around 1 to 2 inches thick and remove mulch during the wettest season if snail problems persist. In dry seasons, mulch can help retain necessary moisture for plants but watch for snail activity.
Consider inorganic mulches like gravel or crushed stone in problem areas since they don’t hold moisture as much as organic matter. Keep soil loose by regularly cultivating to break up hardened surfaces that shelter snails and their eggs. Healthy soil with good drainage discourages snail buildup.
8. Signs That Your Snail Control Efforts Are Working
Your snail control efforts are working if you observe fewer snails in your garden, fewer signs of new damage on your plants, and a reduction in snail slime trails and egg clusters. Regular monitoring is essential to confirm these changes and adjust your strategy. It usually takes a few days to a few weeks to see clear signs of success, depending on your control methods and the snail population size.
Detecting Decreased Snail Presence
Direct visual counts during early morning or late evening, when snails are most active, help you track their population. Use a flashlight at night to inspect common hiding spots such as under leaves, stones, and pots. Photograph the areas you check regularly to compare snail numbers over time. A visible decline in these counts indicates your control measures are reducing the snail population effectively.
Snail traps provide another monitoring tool. Check traps daily, note the number of snails caught, and remove the snails promptly. Trap catch numbers dropping consistently over a week or two signals reduced snail activity. Keep in mind that all monitoring requires consistency; skip days and you may miss important trends.
Take photos from the same angle and lighting each time to accurately compare snail numbers and spot trends.
Assessing New Plant Damage
Look closely at your plants for fresh holes or ragged edges on leaves, especially tender shoots and low foliage. New damage usually appears within a day or two after snails feed. Document with close-up photos weekly by marking problem spots with small stakes or flags. Less new damage than before starting control measures shows your efforts are protecting plants successfully.
Track a representative sample of vulnerable plants rather than the entire garden to save time. For example, select 10 plants across different garden zones and score damage severity on a scale from 0 (no damage) to 5 (severe damage). Over two to three weeks, a drop in average damage suggests snail pressure is easing.
Tracking Slime Trails and Egg Clusters
Snail slime trails are visible thin, shiny mucus paths left behind as snails move, often on leaves, garden furniture, or pathways. A reduction in the presence and length of these trails signals less snail activity in your area. Check the same spots twice a week (early morning offers the best chance to spot fresh trails) and photograph the results for comparison.
Snails lay small clusters of translucent or white eggs in moist soil or under debris. Inspect these preferred sites weekly. A decline in the number or size of egg clusters within two or three weeks after starting control indicates that the snail population is failing to reproduce as before. This step is particularly important if you rely on biological or organic controls that affect snail reproduction.
9. Common Snail Control Mistakes and Troubleshooting Tips
Many gardeners make common mistakes that reduce the effectiveness of their snail control efforts. These usually involve relying on a single approach, mistiming treatments, or improper handling of removed snails. When snails return after treatment, adjusting your methods and proper disposal are key to regaining control.
Relying on One Method Only
Using just one control method often fails because snails adapt or conditions allow them to persist. For example, relying solely on handpicking might reduce snail numbers temporarily, but without habitat reduction or barriers, new snails will keep coming. Combining tactics such as handpicking, copper barriers, and traps increases chances of success because each attacks different parts of the snail’s behavior and environment.
Start by assessing where snails gather and use physical removal regularly. Add a copper strip around key plants to deter snails from crossing. Complement that with organic baits or biological controls if suitable for your garden. Combining methods requires more effort but prevents snails from exploiting weak points in a single strategy.
Ignoring Timing and Environmental Factors
Snail activity peaks during cool, damp weather, often at night or early morning. Ignoring these patterns causes missed opportunities. Applying treatments like bait or handpicking during dry, hot days reduces effectiveness because snails hide and feed less. Treatments applied too late in the season or after heavy rains may not control the population properly.
Time your efforts for early morning or dusk when snails are out feeding, especially after rains or in moist conditions. Regularly check during wet weather. Restart efforts after heavy rains as new snails can arrive or hatch from eggs. This timing ensures you target snails when they are active and vulnerable.
Safe Disposal of Collected Snails
Failing to properly dispose of collected snails often leads to reinfestation. Simply dropping them in a compost pile or garden area can allow surviving snails to return. To prevent this, collected snails must be killed or removed far from your plants and garden.
The safest approach is to place them in a sealed plastic bag and dispose of it in your trash bin, or drown snails in a bucket of soapy water before discarding. Some gardeners use boiling water or freeze them before disposal. Avoid relocating them to nearby green spaces or woods because they may spread the problem to neighbors.
10. Adjusting Snail Control Techniques for Different Climates
Regional climate directly shapes which snail species you’ll encounter and how active they are throughout the year, so adjusting your snail control methods accordingly improves effectiveness. Understanding local temperature, humidity, and rainfall patterns helps determine the best times for intervention and which techniques to prioritize.
Snail Species by Climate Zone
Different snail species thrive in distinct climate zones, making identification linked to your region essential. In humid subtropical areas, species like the garden snail (Cornu aspersum) dominate, favoring moist, cool environments. Arid climates may see fewer snails overall, but drought-tolerant varieties like the brown garden snail can still cause damage during wetter periods.
Knowing your local species informs the best control approaches, since some snails avoid bright light or dry conditions, while others remain active longer. For example, tropical climates support constant snail activity year-round, leading to continuous garden damage. In colder northern zones, snails hibernate in winter, reducing damage during that period but requiring pre-hibernation control to limit population rebound in spring.
Climate-Specific Control Timing
Timing your snail control to local weather patterns significantly improves results. In warm, wet climates, snails reproduce and feed year-round, so treatments like baiting or hand-picking should occur continuously or at least monthly. Maintaining moist but not waterlogged soil in these regions also helps reduce the habitat snails prefer.
In temperate zones with cold winters, target snail control efforts in early spring and late fall. Apply baits or traps before snails become dormant or just as they emerge from hibernation when they are still vulnerable. Avoid intensive controls during freezing months since snail activity drops sharply, and treatments won’t reach them. During dry summers, you may see less snail activity, so limit efforts to monitoring and targeted spot treatment instead of widespread baits.
Tailoring Barriers and Baits Regionally
Adapting barriers and baits to local conditions can maximize their efficiency and minimize waste. Copper barriers are effective in humid and temperate climates if they stay dry, because copper reacts with snail slime to repel them. In very wet areas, copper strips must be installed with good drainage, or their effect diminishes rapidly when constantly wet.
For baiting, choose slow-release baits with active ingredients like iron phosphate in cooler regions where snails feed less frequently, allowing the bait to remain effective longer. In hotter climates, use faster-acting baits applied early in the evening or after rain to match peak snail activity. Applying baits at 3 to 4-foot intervals around garden edges creates a reliable barrier without excess chemical use. Avoid baiting if heavy rain is forecast, since rain can wash away or dilute the bait, making treatments less effective and increasing cost.
Step-by-Step Action Plan for Getting Rid of Pest Snails
Start by accurately spotting snails and damage in your garden, then move through targeted control steps using both organic and, if needed, chemical methods. Monitor results carefully throughout to adjust your approach effectively.
- Day 1: Identify Snails and Damage, Walk your garden early morning or after rain to find snails and check for typical damage like irregular holes in leaves. Confirm you’re dealing with pest snails rather than helpful species to avoid unnecessary control.
- Week 1: Remove Snails Manually and Set Traps, Collect visible snails by hand during damp conditions and place traps using beer or yeast water in shallow containers. Check and empty traps daily, which helps cut down populations immediately.
- Week 2: Apply Organic Controls, Spread crushed eggshells or diatomaceous earth around vulnerable plants to deter snails. These materials create physical barriers that affect snail movement without harming beneficial insects or plants.
- Week 3: Install Copper Barriers, Fit copper tape or strips around raised beds or pots; snails won’t cross copper due to a reaction with their slime. Secure barriers well and verify they remain intact and dry for best effectiveness.
- Week 4: Introduce Natural Predators, Encourage or release predatory beetles, toads, or ducks if viable for your garden size. These predators reduce snail numbers naturally but require a balanced habitat to thrive.
- After 5 Weeks: Evaluate Chemical Bait Use, If snail damage persists, apply iron phosphate-based snail baits according to label instructions for safe use around pets and wildlife. Avoid metaldehyde baits if local regulations ban them or if pets frequent the area.
- Ongoing: Maintain Garden to Reduce Snail Habitats, Keep garden free of excess mulch piles, debris, and moist shaded areas where snails hide. Regular pruning and tidy bed edges discourage snail shelter and breeding grounds.
- Monthly: Monitor and Adjust Control Measures, Check plants for new damage and snail activity after rain or during warm, moist seasons when snails are most active. Increase trapping or barrier checks accordingly, scaling back in dry or cold months when snails go dormant.
Frequently Asked Questions
What Time of Day Are Pest Snails Most Active?
Pest snails are mostly active at night or during damp, overcast days. They avoid bright sunlight to prevent drying out, so checking your garden late evening or early morning can help catch them when they feed.
Can Beer Traps Actually Reduce Snail Populations Effectively?
Beer traps attract snails with yeast aroma, causing them to drown in the liquid. While useful for monitoring, they rarely reduce large populations alone and work best combined with other control methods.
How Does Soil Type Affect Snail Infestation Levels?
Snails prefer moist, loamy soils with plenty of organic matter. Sandy or dry soils tend to limit snail survival. Adjusting soil drainage and reducing mulch can make conditions less favorable for snails.
Is Diatomaceous Earth a Good Option for Snail Control?
Diatomaceous earth can kill snails by scratching their soft bodies, but it must remain dry to work. It loses effectiveness when wet and needs frequent reapplication after rain or watering.
Can Relocating Snails to Wild Areas Reduce Garden Damage Long-Term?
Relocating snails can temporarily reduce garden numbers, but nearby snail populations often refill. It’s better to combine removal with habitat reduction and barriers to sustain control.
Does Pruning Plants Help Reduce Snail Habitats?
Pruning dense foliage reduces shaded, moist spots that snails prefer for daytime hiding. This practice lowers their shelter options and makes organic and contact methods more effective.
Final Thoughts
Start by setting up copper barriers 3 inches wide around your most vulnerable plants today; copper disrupts snails’ movement and reduces their access effectively. Keep an eye on signs like reduced leaf damage over the next two weeks to measure your progress without relying only on chemical methods. Regularly clear away debris and excess mulch that provide shelter to snails, since cutting off their hiding spots weakens their population and supports your control efforts.




One Comment