

How to Get Rid of Weeds Naturally: 8 Effective Methods That Work
The best way to get rid of weeds naturally is to combine methods like manual removal, boiling water, and mulching while encouraging healthy lawn growth to outcompete weeds. Using natural weed killers such as vinegar or flame weeding offers affordable and effective options without harsh chemicals. Timing matters: removing weeds before they set seed helps prevent their spread. These strategies work well for organic gardeners, pet owners, and anyone wanting safe, eco-friendly weed control around their home.
This article shares eight practical ways to get rid of weeds naturally, covering simple homemade solutions, advanced techniques like solarization, and preventive measures including pre-emergents and ground covers. You’ll learn how to manage weeds sustainably and keep your garden healthy without relying on synthetic herbicides or risking harm to your family, pets, or the environment.
Key Takeaways
- Choose natural weed killers like vinegar or boiling water to avoid chemical exposure and protect children, pets, and beneficial plants.
- Pour boiling water at 200 degrees directly on weeds for quick control, avoiding soil and nearby plants to prevent damage.
- Use vinegar with 5-9% acetic acid for spot treatment; stronger vinegar targets stubborn weeds but avoid spraying on wanted plants.
- Pull weeds within 24-48 hours after rain or watering to remove roots easily and reduce regrowth.
- Apply mulch or biodegradable jute mats to block weeds and improve soil, layering with nitrogen-rich compost to 12-18 inches thick.
- Use black plastic tarps for about six months to reliably kill weeds by blocking sunlight and heat, especially in large areas.
1. What Are Natural Weed Killers and Why Choose Them?
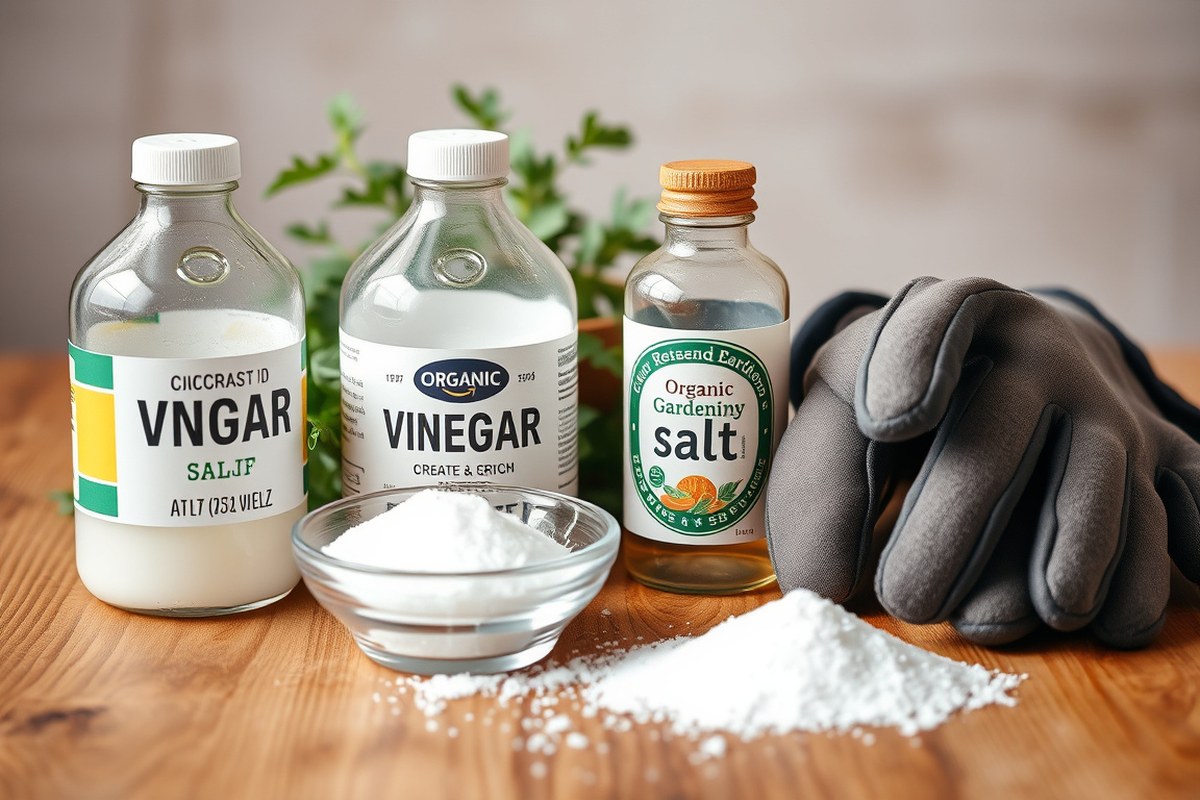
Natural weed killers are substances derived from everyday ingredients or harmless materials designed to control or eliminate weeds without synthetic chemicals. These include things like vinegar with acetic acid, boiling water, salt, or physical methods such as smothering weeds with cardboard or mulch. Many natural weed sprays combine white vinegar (ideally at 20% acetic acid concentration), a small amount of dish soap to help the solution stick, and salt to boost effectiveness on tough weeds. These products are often called kitchen-cupboard weed killers because they use simple household items.
Compared to chemical herbicides, natural weed killers offer several clear benefits. Most importantly, they reduce the risk to soil health and surrounding plants, since synthetic weed killers can harm your grass, flowers, or vegetables. They are also safer for the environment, breaking down quickly without leaving toxic residues. For homeowners with kids and pets, natural weed control means a much lower chance of accidental poisonings or chemical exposure. Because many synthetic herbicides carry warnings about keeping children and animals off treated grass for hours or days, natural methods allow safer access immediately after use. This peace of mind is a key reason organic gardeners and families prefer natural options.
Implementing natural weed control typically involves repeated applications and patience. You can spot-treat weeds with a solution of 20% vinegar mixed with a teaspoon of dish soap and a small amount of table salt per quart of spray. Apply this mixture directly to the leaves on a dry, sunny day for the best results. Over the course of several days to a week, the treated weeds will wilt and die. However, it may not eliminate deep-rooted, invasive weeds on the first try, so multiple treatments or combining methods like hand-pulling and mulching might be needed. Physical methods such as smothering weeds with cardboard or newspapers work well in garden beds where you want to avoid any herbicides; this blocks sunlight over several weeks, killing weeds gradually without damaging soil life.
The cost of natural weed killers tends to be low, especially when you use household items like vinegar or salt, often just a few dollars for enough to treat a small plot. On the other hand, commercial organic herbicides with high vinegar concentrations can cost between $20 and $40 per gallon. They are more expensive but often come ready-mixed and packaged for convenience. Some natural methods require more time and effort, including repositioning tarps or manually pulling weeds regularly, which might be less practical for large areas.
Good results from natural weed killers include visibly wilted and browned leaves within several days, indicating the plant can no longer photosynthesize and will die. Roots may also weaken, making it easier to pull the dead weeds out. What can go wrong is incomplete weed elimination when roots remain intact, causing regrowth. Natural weed killers, especially vinegar-based ones, work best on young, small weeds rather than established, deep-rooted species. Because the solutions can affect any plant they touch, applying carefully and targetedly prevents damage to desirable plants. Keeping children and pets safe is another priority; although natural ingredients are safer, tinted vinegar solutions and hot water treatments still need cautious use to avoid burns or irritation.
All in all, natural weed killers provide a safer, eco-friendly way to manage weeds that matches the values of organic gardening and families avoiding chemicals. They often require more persistence but reduce health and environmental risks, making them a practical choice for maintaining a healthy yard or garden where kids and pets frequent.
2. How to Kill Weeds Using Boiling Water Safely
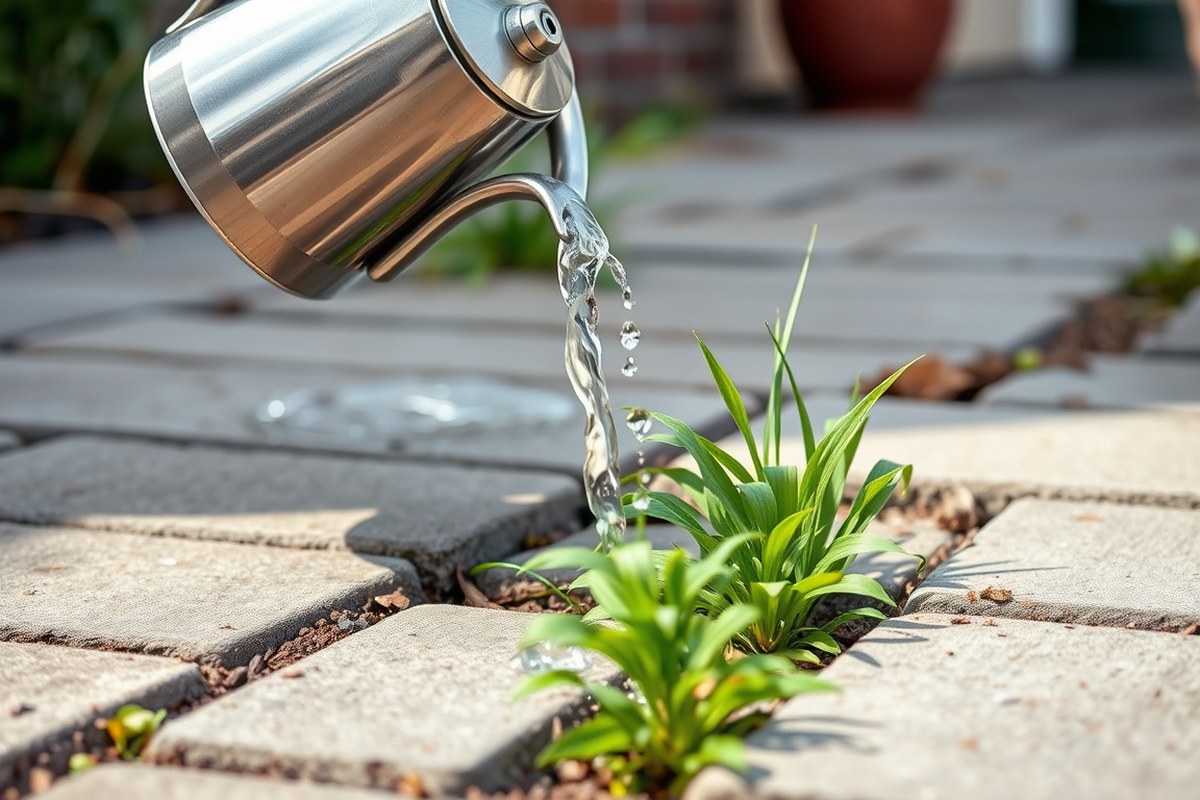
Boiling water kills weeds by cooking plant cells and damaging roots. It works best on young, small weeds but may not completely kill large weeds with deep roots. Applying boiling water only to targeted weeds prevents harm to nearby plants and keeps your soil healthy.
Why Boiling Water Works on Weeds
Boiling water causes immediate cell damage to plants by heating and rupturing their tissues. This heat destroys both the above-ground parts and small, shallow roots, which quickly kills tender and newly sprouted weeds. Since it does not contain chemicals, boiling water leaves no harmful residues in the soil, preserving beneficial organisms and soil structure.
This method works well on annual weeds or weeds that have not yet developed deep, extensive root systems. Large perennial weeds with thick roots may survive the first treatment, requiring repeated application or alternative removal methods to prevent regrowth.
Best Technique to Apply Boiling Water
For safe and effective use of boiling water on weeds, follow these steps to target unwanted plants while minimizing soil disturbance and protecting surrounding vegetation:
- Heat water in a kettle or pot until it reaches a rolling boil, around 212°F (100°C).
- Use a sturdy container such as a metal pot or heat-resistant watering can with a narrow spout for precise pouring.
- Identify the weeds you want to eliminate, avoiding any desirable plants nearby.
- Pore boiling water directly onto the weed leaves and crown, soaking the base to reach the roots.
- Pour slowly to prevent splashing onto adjacent plants or soil you want to protect.
- Repeat treatment after a few days if the weeds show signs of recovery.
- Dispose of any leftover hot water safely, allowing it to cool before pouring it onto bare soil or non-plant areas.
This process usually takes just a few minutes and requires minimal expense beyond heating the water. Expect to see weeds browning within a few hours, with complete die-off in one to three days if the roots have been effectively treated.
Safety Precautions Near Desirable Plants
Boiling water is not selective and harms any plant tissue it contacts, so apply it carefully to avoid damage to nearby flowers, vegetables, or lawns. Consider using physical barriers like cardboard or plastic sheets to shield good plants during treatment. Avoid using boiling water on delicate or shallow-rooted plants.
Apply boiling water on dry, calm days to reduce the risk of splash or wind drift. Keep children and pets away from the treatment area until the water has cooled. Boiling water can harm beneficial soil organisms if overused, so limit applications to targeted weeds only and avoid overwatering the soil with it.
Pour boiling water slowly and close to the ground to avoid splashing onto nearby desirable plants or soil life.
3. Using Vinegar and Other Homemade Weed Killers: Recipes and Tips
Vinegar works well as a natural weed killer because of its acetic acid content. Higher concentrations kill weeds faster, but even household vinegar can be effective with repeated applications. Salt and baking soda are less potent alone but boost vinegar’s effect or work for specific situations. Combining vinegar, salt, and dish soap creates a powerful spray that dries out weeds quickly. Reapplying every few days helps control tough or persistent weeds.
Choosing the Right Vinegar Concentration
The acetic acid in vinegar causes weeds to dry out and die by breaking down their cell membranes. Household white vinegar usually contains about 5% acetic acid, which can damage young or annual weeds with repeated treatments. For tougher or established weeds, horticultural vinegar with 10% to 20% acetic acid is more effective but must be handled carefully because it can irritate skin and eyes and harm nearby plants.
Using vinegar with higher acetic acid concentrations speeds up weed death, often working within 24 hours. Low-concentration vinegar may require multiple applications over one to two weeks to weaken and kill the plants fully. Avoid spraying vinegar near desirable plants because it can kill any vegetation it contacts.
Mixing Vinegar, Salt, and Soap Recipes
The most effective DIY weed killer combines vinegar, salt, and dish soap. Salt improve dehydration by drawing moisture from the roots and leaves. Dish soap functions as a surfactant, improving the mixture’s ability to cling to the leaves for better uptake. A typical formula uses 1 gallon of white vinegar mixed with 1 cup of salt and 1 tablespoon of liquid dish soap.
Stir or shake the mixture well to dissolve the salt completely before putting it in a spray bottle. Spray the weeds directly on their leaves, especially on a hot, sunny day, when the sunlight helps the acetic acid burn the foliage and the salt draws out moisture. Baking soda can also be used in the garden to target weeds and soil fungus but works best for spot treatments or in areas without nearby plants you want to keep.
For smaller batches, mix equal parts vinegar, salt, and dish soap in a spray bottle, spraying carefully to avoid contact with grass or flowers. Avoid using excessive salt, as it can build up in the soil and damage the ground long term.
Safe Application Timing and Frequency
Apply the homemade weed killer on a sunny, dry day with little to no wind to ensure the solution sticks to the weeds. Early morning or late afternoon is best to reduce evaporation and improve absorption. Avoid spraying before rain or watering, as moisture can wash the solution off the plants.
Reapply the mixture every 3 to 7 days for at least two to three weeks until weeds visibly dry out, shrivel, and die. Annual and young weeds respond faster than mature or deep-rooted perennials, which may require repeated treatments or manual removal. Use targeted spraying to keep the mixture off grass, flowers, and other plants you want to preserve.
Keep in mind that vinegar and salt can cause irritation to pets if ingested or contacted, so restrict access to treated areas until fully dry. Always store homemade solutions securely and label containers clearly to prevent accidental misuse.
4. Manual Weed Removal: Tools, Timing, and Techniques for Success
Manual weed removal works best with the right tools, timing, and technique to pull weeds out by the roots. Removing the entire root system prevents regrowth, especially for perennial weeds that can come back from any root fragments left in the soil. Using a tool like a cultivator to loosen soil before pulling helps avoid breaking the weed at the stem, which only leaves roots behind. Wet soil is easier to work with, letting you pull deeper, intact roots with less effort.
Timing your weed pulling matters. The best time is when the soil is moist, either after rain or after watering. Early spring and early summer are the ideal seasons when weeds are young and roots are less established. Catching weeds as seedlings is easier and prevents them from setting seeds that spread. Checking your yard every few days and pulling weeds while they’re fresh saves time in the long run.
You’ll need a few simple tools for effective manual removal, a hand trowel, a weeding fork or cultivator to loosen soil, and gloves to protect your hands. For larger areas or tougher weeds, a garden hoe or mattock can help. Tilling soil first can also loosen the ground and knock back multiple weeds at once, making individual removal less strenuous. Follow these steps for successful manual weed removal:
- Moisten the soil by watering the area or pulling weeds after rainfall to soften the ground and loosen roots.
- Loosen the soil around the weed roots using a cultivator, hand trowel, or weeding fork. This helps prevent breaking the roots and allows you to pull out the whole plant.
- Grasp the weed at the base near the soil line, avoiding pulling from the top, which risks breaking off the stem.
- Pull steadily and firmly to remove the entire root system, taking care to pull slowly if needed to avoid leaving root fragments behind.
- Dispose of the weeds away from your garden or compost them only if they have not produced seeds or roots that might regrow.
- Repeat regularly throughout the growing season, especially targeting seedlings before they mature.
- Use mulch after removal to block sunlight and prevent new weed seeds from germinating.
Spot treating young weeds instead of letting them grow larger saves effort. Large, established weeds often have deep roots that are harder to remove fully and may regrow if parts remain. Regular attention and proper root removal reduce the chance of weeds coming back. The investment in simple tools usually costs under $30 and pays off with healthier soil and plants over time.
5. Mulching and Ground Covers: Long-Term Weed Prevention Strategies
Using mulch and dense ground covers provides effective, long-term weed control by blocking sunlight and physically limiting weed growth. Applying mulch at the right thickness and combining it with landscape fabric where appropriate helps reduce weed emergence significantly. Dense plantings and ground covers further minimize bare soil, lowering the chance for weed seeds to take root in your garden beds.
Organic vs Inorganic Mulch Types
Organic mulches like wood chips, bark, straw, and shredded leaves are popular for natural weed control. They break down over time, enriching the soil and helping retain moisture, which benefits plants. Wood chips and bark typically last longer, often a year or more before needing replenishment, while straw decomposes more quickly but can be excellent for vegetable gardens. Inorganic mulches such as gravel, rubber, or landscape fabric topped with stones block weeds without decomposition but do not improve soil quality.
The choice depends on your gardening goals. Organic mulches improve soil health but require annual or biennial replacement at a cost of $30 to $60 per cubic yard for wood chips. Inorganic options last longer and need less maintenance but can be expensive upfront and may impact soil temperature, affecting plant roots. For beds with perennials or trees, organic mulch is often preferred because of its soil benefits.
Ideal Mulch Depth for Weed Prevention
Applying mulch at the correct depth is critical to suffocating weeds effectively. A layer between 4 to 8 inches thick is recommended to block sunlight and prevent weed seeds from germinating. Thinner layers under 3 inches might not suppress all weeds, while exceeding 8 inches can hinder water and air penetration to the soil and plant roots. You should add more mulch annually as it settles or decomposes, especially with organic materials.
For areas around young trees or newly planted shrubs, start with 4 inches to avoid excessive moisture buildup that can cause root rot. In established flower beds, 6 to 8 inches of mulch provides good coverage and weed suppression with less frequent replenishing. Keep mulch a few inches away from plant stems or tree trunks to reduce the risk of disease and pest issues.
Pros and Cons of Landscape Fabric
Landscape fabric acts as a physical barrier that blocks sunlight and inhibits weed growth beneath beds, paths, or gravel areas. It works well under mulch or gravel to reduce maintenance, particularly in pathways or perennial beds. However, fabric does not completely prevent weed seeds from settling on top or growing through small tears. Over time, soil and organic matter can accumulate on the fabric, encouraging occasional weed growth.
One downside is that landscape fabric can interfere with water and air movement to the soil unless it’s a permeable type. Non-biodegradable fabrics may also hinder soil life and root expansion if left indefinitely. Installation requires careful overlap at seams and anchoring to avoid gaps where weeds can penetrate. Consider fabric more suitable for gravel driveways, walkways, or areas where long-term mulch maintenance is difficult.
Do not place landscape fabric under plants that need frequent root expansion, as it can restrict growth and cause stress over time.
Best Ground Covers to Outcompete Weeds
Dense ground covers suppress weeds by shading the soil and competing for nutrients and moisture. Plants like Asiatic jasmine and liriope create thick mats that block most weed seeds from germinating. These evergreen ground covers are low-maintenance once established and can thrive in various light conditions. Perennials such as creeping thyme or ajuga also provide effective weed control with seasonal flowers, adding visual interest.
When selecting ground covers, match the species to your climate, soil type, and sun exposure. Dense turfgrass varieties can also crowd out weeds in lawns and open areas. Maintain healthy, thick plant coverage by watering and occasional fertilization to prevent bare spots where weeds often invade. Filling gaps between shrubs and border edges with mat-forming plants provides additional weed resistance while improving your garden’s appearance.
Plant ground covers densely, aim for spacing that allows foliage to overlap within a growing season to keep weeds from gaining a foothold.
6. Solarization, Tarping, and Flame Weeding: Advanced Natural Controls
Solarization kills weeds by using the sun’s heat trapped under clear plastic to raise soil temperatures to between 110°F and 140°F, which destroys weed seeds and seedlings. To start, clear the target area of debris and moisten the soil to help conduct heat. Then cover the soil tightly with clear plastic sheeting, securing the edges with soil or rocks to prevent heat escape. Leave the plastic in place for four to six weeks during the hottest months, typically summer, for the best results. Longer exposure can be necessary for tough perennial weeds or in cooler climates. Solarization works well on bare soil before planting a garden bed or lawn, but it requires full sun and warm weather to be effective.
Tarping controls weeds by blocking sunlight, which starves them of the light they need to grow. Unlike solarization, tarping relies on darkness rather than heat. Use heavy black plastic, landscaping fabric, or cardboard as tarps. Secure the edges firmly and leave them in place for several months, usually three to six months, depending on the weed type and local climate. It’s effective for clearing large patches of weeds, especially perennial ones, and is good for soil that can’t be disturbed immediately. Tarping also prevents weed seeds from germinating. While slower than solarization, tarping is useful in shaded or cooler areas where solar heat won’t build up enough to kill weeds.
Flame weeding involves a propane-powered wand that briefly exposes weeds to intense heat, causing their cell walls to rupture and the plant to die. To use a flame weeder safely at home, hold the flame close enough to burn the weed leaves but avoid setting soil or surrounding plants on fire. Pass the flame over weeds for just one to two seconds until the leaves wilt but do not let the flame linger. This method works best for young weeds and should be done when the weeds are dry to prevent fire spread. It costs about $50 to $150 for a basic flame weeder setup and propane tank. Flame weeding is an immediate control method, but it may require repeated applications because roots often survive.
Choose solarization when you want a natural, chemical-free way to sterilize soil before planting and have several weeks of hot sun available. Tarping fits better for shaded areas or long-term weed suppression where soil can be left fallow. Flame weeding works well for spot treatments of young weeds in established beds or driveways but demands caution due to fire risk. Never use flame weeders near dry grasses, mulch, or flammable structures, and keep a water source nearby. Both solarization and tarping need planning and patience, but they reduce weed pressure for months without herbicides, making them ideal for organic gardening. Flame weeders offer faster results but with more safety concerns and limited use in some garden areas.
7. Natural Pre-Emergents and Lawn Care Tips to Stop Weeds Early
Corn gluten meal acts as a natural pre-emergent herbicide by stopping weed seeds from rooting after sprouting, without damaging established grass or plants. Apply it in early spring when soil temperatures reach between 50 and 55°F, roughly 2 to 3 weeks before the last expected frost. This schedule targets weeds as they begin to emerge, increasing effectiveness. Spread around 20 pounds of corn gluten meal evenly across each 1,000 square feet of lawn or garden, then water lightly to activate it, taking care not to oversaturate and wash it away.
Maintaining the right mowing height also plays a significant role in reducing weeds. Keep your lawn mowed between 3 and 5 inches tall. Taller grass shades the soil, preventing weed seeds from getting enough sunlight to germinate and discouraging weed growth. Mow regularly and avoid cutting more than one-third of the grass blade length at a time to keep your lawn thick and healthy, which naturally crowds out weeds.
Watering habits are another critical factor in managing weeds naturally. Water deeply but infrequently, aiming for about 1 inch of water per week. Deep watering encourages grass roots to grow downward, making the lawn more drought-resistant and competitive against weeds. Shallow, frequent watering keeps the surface moist, encouraging weed seed germination. Early morning watering is ideal, as it reduces evaporation losses and fungal diseases. Adjust watering according to rainfall and soil type; sandy soils may need slightly more frequent watering, while clay soils hold moisture longer.
Applying corn gluten meal and following proper mowing and watering routines together create a lawn environment that is less hospitable to weeds. Healthy, well-maintained grass is the best natural defense, as dense turf blocks sunlight and occupies space weeds need to establish themselves. If you notice patchy areas where grass is thin, overseed those spots to prevent weeds from taking hold. Expect to apply corn gluten meal twice a year, once in early spring and again in late summer or early fall, to maintain its preventative effect. Avoid using it on newly seeded lawns, as it can inhibit grass seed germination as well.
A typical bag of corn gluten meal costs around $20 to $30 for 25 pounds, covering about 1,200 square feet. While not a fast-acting solution, it reduces weed pressure over time and fits well with an organic lawn care plan focused on minimizing chemical exposure. Watch for results after a few weeks when emerging weed seedlings fail to establish roots, indicating the pre-emergent is working. The main downside is that it won’t kill existing weeds, so combining this approach with manual removal or other natural weed control methods provides the best outcome.
8. Combining Natural Methods Safely for Best Long-Term Weed Control
Start by physically removing weeds by hand or with a garden tool, focusing on uprooting the entire plant including roots. This precise approach immediately reduces weed presence without harming nearby plants. After clearing visible weeds, apply natural herbicides like vinegar-based or citrus oil solutions only directly on the weed leaves to avoid drift onto desirable greenery. Use a spray bottle or brush for spot application when the weather is dry and no wind is present, limiting unintended exposure.
Once treated and cleared, cover bare soil around plants with a 2-3 inch layer of organic mulch such as wood chips or straw. Mulching reduces light to weed seeds preventing germination and helps maintain soil moisture. Avoid piling mulch against plant stems to prevent rot. This three-step cycle, manual removal, targeted natural herbicide use, and mulching, creates a layered defense that limits weed growth over time with minimal risk to your garden’s health.
Watch for signs that your strategy is working: fewer emerging weeds, slower growth of remaining ones, and healthy appearance of desired plants. If weeds persist or spread, check that herbicide applications stayed on target, mulch coverage is consistent, and manual removal reached roots completely. An increase in yellowing or wilting of your plants may indicate herbicide damage, meaning you should reduce spray frequency or switch to gentler options. Adjust timing to avoid treatments during vulnerable growth phases of your plants, like just after transplanting.
For vegetable gardens, focus on removing weeds manually and adding fresh mulch frequently, avoiding any herbicide near edible plants. In lawn areas, mowing high and overseeding thick grass help crowd out weeds, complementing your natural control efforts. Remember, patience is key as these eco-friendly methods require consistent care and monitoring over weeks or months to show full results.
Always use natural herbicides in calm, dry conditions and apply them only to the weed leaves to protect nearby plants and reduce chemical spread.
Step-by-Step Action Plan for Natural Weed Control
Follow these steps to start removing and preventing weeds naturally while keeping your garden or lawn healthy. Track your progress to adjust methods for the best results.
- Before You Start: Identify common weeds in your garden using a plant guide or app to know what you’re dealing with and avoid harming desirable plants. Clear visible weeds by hand to prepare for treatment.
- Day 1: Apply boiling water directly on small, isolated weeds to kill them at the root. Wait 2 to 3 days, if the weeds turn brown and wilt, the treatment worked.
- Day 2: Spray homemade vinegar-based weed killers on tough, broadleaf weeds during a dry, calm day to prevent runoff. Check back in 3 to 4 days for browning and reduced growth.
- Week 1: Add a 2- to 3-inch layer of mulch around your plants and in bare soil areas to block weed seeds from sprouting. Monitor weekly; fewer new weeds indicate success.
- Week 2: Use manual tools like a hoe or hand weeder to remove any remaining weeds in the early morning when soil is moist for easier removal. Inspect the area weekly to catch new sprouts early.
- Month 1: Start solarization by covering bare, weedy patches with clear plastic sheets during hot months to kill seeds and roots beneath. After 4 to 6 weeks, lift the tarp, soil should look dry with fewer weeds.
- Ongoing Seasonal Care: Mow and water your lawn properly to strengthen grass and use natural pre-emergent techniques like corn gluten meal to prevent weed seeds from germinating. Reduced weed patches over time means these steps are effective.
- Regular Review: Combine these natural methods carefully and adjust based on what weeds persist or return. A consistently low weed presence and healthy plants show your plan is working well.
Frequently Asked Questions
Will Salt and Vinegar Kill Weeds Permanently?
Salt and vinegar can kill weeds but not permanently. Salt damages soil, making it hard for any plants to grow, so it’s not recommended for large areas or gardens. Vinegar kills the above-ground part but may not kill roots, so weeds can return.
What Will Kill Weeds Immediately?
Boiling water and flame weeders kill weeds quickly. They destroy plant cells on contact, but you must be careful not to harm nearby plants or yourself. Immediate results usually mean the weed dies above ground but may regrow later.
What’s the Best Thing to Kill Weeds Permanently?
The best permanent method combines manual removal, mulch, and preventive care. Pulling weeds by the roots stops regrowth, while mulching blocks light and stops new weeds. Long-term lawn care, like healthy grass, also prevents weeds. Constant maintenance is key.
How Do Amish Get Rid of Weeds?
Amish gardeners often rely on manual removal and mulching. They avoid chemicals and use traditional tools to pull weeds by hand and cover soil with organic materials to prevent new growth naturally. Consistent effort keeps weeds under control.
Does Vinegar Harm the Soil When Used as a Weed Killer?
Vinegar mainly affects the weed’s foliage and doesn’t usually harm soil health if used carefully. However, repeated heavy use can change soil acidity. Apply vinegar directly on weeds only and avoid spraying near desirable plants.
Can Planting Certain Crops Prevent Weeds Naturally?
Yes, planting ground covers or dense crops shades soil and crowds out weeds naturally. Cover crops like clover or rye suppress weeds by limiting light and taking up space, reducing weed seed germination.
Before You Go
Using natural methods to control weeds keeps your garden healthy and safe for your family, pets, and the environment. Start today by removing a small patch of weeds manually and then applying a homemade vinegar solution to the freshly cleared soil. This simple step helps you see immediate results and reduces the need for chemical herbicides in your outdoor space.





One Comment