How to Get Rid of Mites on Chickens: A Complete Step-by-Step Guide
To get rid of mites on chickens, start by identifying the type of mite and treating both the birds and their coop. Use natural remedies like wood vinegar or safe chemical treatments, combined with thorough cleaning and heat or power washing of the coop. Timely treatment aligned with mite life cycles and preventative steps such as quarantine and coop design adjustments are key to stopping re-infestation.
This advice suits backyard chicken owners and small-scale poultry farmers dealing with persistent mite problems. You’ll learn how to spot different mites, choose and apply treatments safely, clean the environment, and monitor progress to protect your flock and prevent future outbreaks.
Key Takeaways
- Identify chicken mites by their species to tailor treatment effectively, noting northern fowl mites feed on blood and complete life cycles in 5, 12 days.
- Repeat mite treatments every 7, 10 days to target newly hatched mites before they reproduce and reinfest your flock or coop.
- Use natural options like neem sprays and pyrethrin-based insecticides for quick mite kills, applying carefully and following label directions.
- Power wash coop surfaces with very hot water (above 113°F) or raise temperatures to at least 120°F to kill mites on contact and sanitize.
- Quarantine new chickens for 2, 3 weeks and treat for parasites to prevent introducing mites into your established flock.
- Prevent mite infestations by designing coops for easy cleaning and drying, plus using temperature extremes, below -4°F or above 125°F, to reduce mite survival.
How to Identify and Treat Chicken Mites Effectively
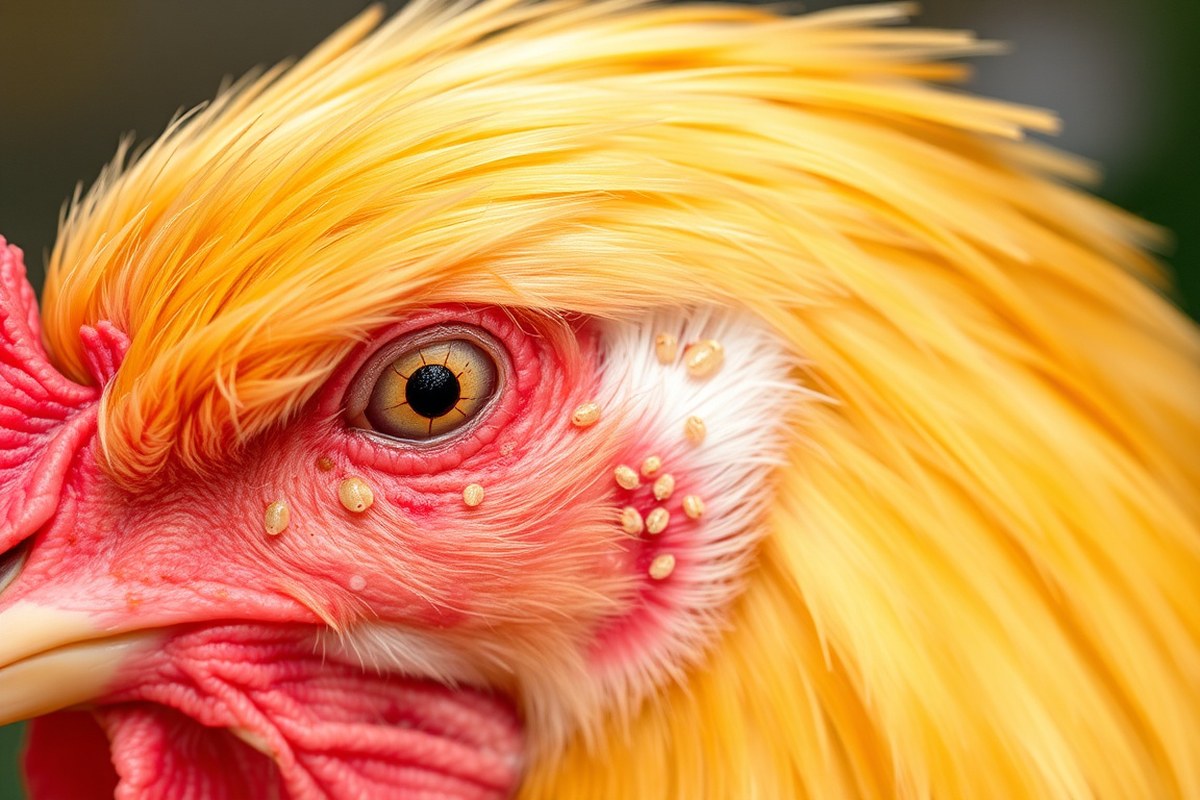
Chicken mites are tiny parasites that feed on your birds’ blood, causing discomfort and sometimes serious health issues. They typically hide in the coop during the day and swarm your chickens at night. Early signs include irritated skin, feather loss, and weight loss when mite numbers reach around 500 or more. You might spot tiny dark specks moving on your birds or in their feathers. Catching an infestation early helps you avoid more severe problems and costly treatments.
The fastest way to kill mites on chickens is to apply a targeted treatment like a pyrethrin-based spray or powder that kills mites quickly. It’s important to treat both your chickens and their coop at the same time. Mites lay eggs that hatch in 5 to 7 days, so you generally need to retreat your flock and clean the coop 7 to 10 days after the first treatment. This second treatment breaks the mite lifecycle by killing newly hatched mites before they mature and reproduce. Here is a clear step-by-step approach to identify and treat chicken mites effectively:
- Inspect your chickens regularly for mites by checking under wings, around the vent, and on the skin near feathers. Look for red or dark specks, irritated skin, missing feathers, or scaly legs if scaly leg mites are suspected.
- Confirm an infestation once you see multiple mites or your chickens show signs of distress, such as weight loss or scratching. Treatment is recommended when mite counts approach 500 or more.
- Choose an appropriate mite treatment, such as pyrethrin-based sprays, powders, or products like Kilverm. Natural options like garlic extract sprays also help for mild cases.
- Apply the treatment to your chickens carefully, following label instructions. Dust powders into feathers and spray liquids on vents, abdomens, and other affected areas to kill adult mites and newly hatched ones.
- Clean and treat the coop simultaneously with heat (above 113°F), power washing, or insecticides to remove mites hiding in cracks, nests, and roosts. Remove bedding and debris before treatment.
- Retreat both chickens and coop 7 to 10 days after the first application to kill mites that have hatched from eggs. Skipping this step risks reinfestation.
- Monitor your flock over the next few weeks for any signs of mites returning and repeat treatments as needed.
Following these steps requires about two weeks, including initial treatment and the important second round. Costs vary depending on products used but expect insecticide or powder prices to range from $15 to $40 and time investment for inspection, treatment, and cleaning to be a few hours per cycle. Missing the second treatment or allowing wild birds near your coop can cause mites to return quickly, so strict biosecurity and regular checks help maintain a mite-free flock.
Types of Chicken Mites and How to Tell Them Apart
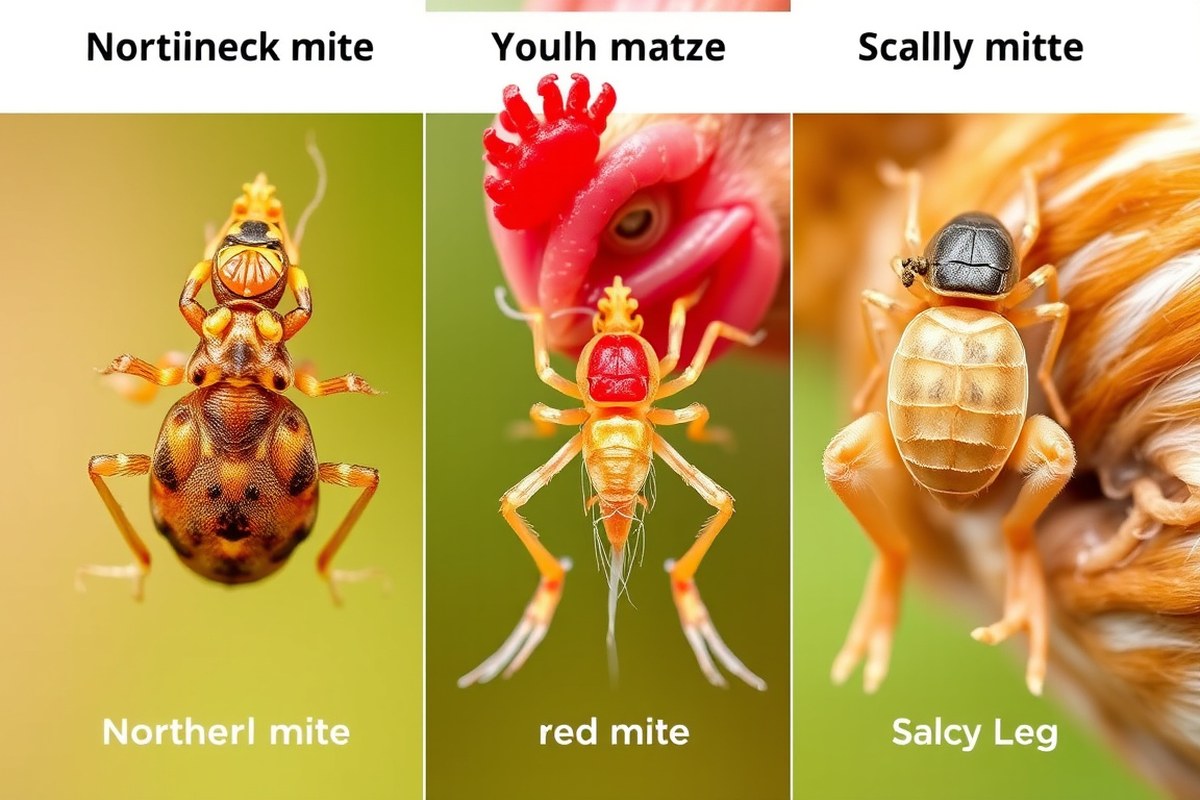
Three main types of mites commonly affect chickens: northern fowl mites, poultry red mites, and scaly leg mites. Each lives in different habitats, causes distinct signs, and requires different treatment approaches. Knowing how to tell them apart helps you direct your flock care effectively and prevent serious health problems.
Northern Fowl Mite Characteristics
Northern fowl mites live on the chicken at all times, day and night, feeding on blood and skin debris. They mostly infest the vent, under the wings, and around the neck. Heavy infestations cause irritation, feather loss, and anemia, which reduces egg production and weight gain.
These mites are small, measuring about 0.6 mm for adult females, and appear dark gray to black when full of blood. Since they remain on the bird continuously, you can often see them crawling on feathers, especially near the vent area. Their constant presence makes them easier to spot during daylight.
Poultry Red Mite Details
Poultry red mites spend most of the daylight hours off the chicken, hiding in cracks and crevices of the coop. They emerge at night to feed on blood, causing itchy discomfort. Red mites are slightly larger than northern fowl mites, about 1.5 mm in length, and appear reddish after feeding.
Because red mites hide away from the bird during the day, they are harder to detect without thorough coop inspection. They cause similar issues as northern fowl mites, including anemia and stress, which lead to decreased egg production and weaker birds. These mites can survive for weeks without a host, increasing infestation risks.
Scaly Leg Mite Features
Scaly leg mites infest beneath the scales on chickens’ legs and feet. These tiny burrowing mites differ from northern fowl and red mites because you can’t see them without magnification. They lead to thickened skin, crusts, and raised scales on the legs. Chickens with heavy infestations might limp or have swollen legs.
Since these mites burrow into the skin, they require different treatment methods from surface-feeding mites. Detect them by checking legs regularly for rough, scaly lesions, particularly on older birds or those with limited leg mobility. Early treatment is essential to prevent permanent damage.
Below is a comparison table to help you recognize and differentiate these mites based on key traits and behaviors. This knowledge guides your inspection routine and treatment choices.
| Mite Type | Habitat | Size | When on Bird | Signs on Chicken | Visibility |
|---|---|---|---|---|---|
| Northern Fowl Mite | Living on chicken feathers (vent, neck, under wings) | ~0.6 mm (adult female) | Day and night | Feather loss, irritation, anemia | Visible crawling on feathers |
| Poultry Red Mite | Hiding in coop cracks, roosts | ~1.5 mm (adult female) | Only at night | Itchiness, anemia, stress | Not visible on bird during day |
| Scaly Leg Mite | Under leg scales (burrowing) | Microscopic (not visible) | Always on legs | Leg crusting, thickened scales, lameness | Signs visible, mites not visible |
Regularly check your flock’s vent feathers during the day for northern fowl mites and inspect coop crevices at night with a flashlight to spot poultry red mites.
Natural and Chemical Treatments: When and How to Use Them
Choosing between natural and chemical mite treatments depends on the severity of the infestation and your hens’ specific needs. Natural treatments work well for mild to moderate problems and ongoing prevention, while chemical treatments become necessary with heavy infestations or resistant mites. Applying each option properly and timing your treatments ensures the best control and safety for your flock.
Effective Natural Remedies for Mites
Natural treatments provide a gentle, poultry-safe way to reduce mite populations, especially when you catch the problem early. Herbs with strong scents and natural mite repellents like neem oil help deter mites but usually require repeated application every one to two days until the entire mite life cycle is disrupted. Setting up dust-bathing boxes filled with a mix of dirt and food-grade diatomaceous earth lets chickens groom themselves regularly, which reduces the number of mites on their feathers.
Consistent coop cleaning paired with natural deterrents keeps mite populations low over time. Removing old bedding and supplementing with natural sprays or strong-smelling herbs, such as rosemary or garlic, can improve results. Combining several natural methods lowers the risk of resistance and improves eggs’ production and your flock’s overall health without chemical exposure.
Safe Chemical Options for Chickens
For moderate to severe infestations, chemical treatments like permethrin-based sprays or powders offer fast and effective control. Products such as Kilverm have been approved for use on poultry and work even against mites that have developed resistance to older treatments. Chemical options may be necessary if your hens are losing blood overnight to red mites, which can exceed 3 percent of blood volume and lead to declining egg production.
Applying chemicals requires careful attention. Treat your chickens directly and follow the two-treatment schedule: apply the product, wait 7 to 10 days, and then apply again to ensure you eliminate mites from all life stages. You still want to combine chemical use with thorough coop cleaning to address mites hiding in the environment and reduce the chance of reinfestation.
Using Diatomaceous Earth Correctly
Diatomaceous earth (DE) is a natural, organic powder made from fossilized algae and is safe to use on chickens when it is food grade. The sharp particles physically cut into the exoskeletons of mites, dehydrating and killing them. Applying DE in your chickens’ dust boxes allows birds to use their dust-bathing behavior as a self-treatment method. Mixing DE with play sand or dirt makes dust baths more effective and comfortable for the birds.
Spread DE lightly over coop surfaces and fresh bedding after cleaning to reduce mites in the environment. Avoid heavy application, which can irritate chickens’ respiratory systems. Repeat dusting every few days until mites are gone, taking care to treat the entire coop area. DE is affordable, often costing under $20 for several pounds, and with regular use, helps maintain mite control while avoiding chemicals.
How to Clean and Treat the Chicken Coop Against Mites
Thoroughly cleaning and treating your chicken coop is essential to eliminate mites that can live in the environment for up to 10 months. Since red mites hide in cracks, corners, and bedding during the day, simply treating your birds won’t stop reinfestation. Proper coop sanitation combined with residual treatments creates a barrier that prevents mites from returning. Power washing or heat treatment can effectively reduce mite populations by targeting their hiding spots.
Heat treatment works because most mites can’t survive sustained temperatures above 100°F. Using a heat gun or portable heaters, raising coop temperature to at least 115°F for a few hours can kill mites and their eggs. Power washing removes dirt, manure, and some mites mechanically, especially when focused on roosts, walls, and floor cracks. Regular cleaning also reduces organic matter where mites thrive. Here’s a detailed list of steps to follow when cleaning and treating your coop to control mites:
- Remove all bedding and nesting materials. Place used bedding into a sealed plastic bag before disposing of it in an outdoor bin to avoid spreading mites.
- Scrape and sweep every surface. Focus on roosts, walls, corners, and floor cracks where mites hide. Removing organic matter lowers mite survival chances.
- Power wash the coop if possible. Use a high-pressure nozzle to clean all surfaces thoroughly. Avoid power washing electrical components or materials that can retain moisture causing rot.
- Dry the coop completely. Use a fan, open windows, or heaters. Mites need moisture to survive, so a dry environment helps in control.
- Apply a residual mite spray or neem oil. Use EPA-approved products made to kill mites or neem oil to coat surfaces including roosts and corners. Neem oil also repels mites naturally.
- Consider heat treatment if infestation persists. Raise the coop temperature to 115°F or higher for 3 to 4 hours using portable heaters or a heat gun. Monitor temperature carefully to avoid damaging the coop.
- Replace bedding with clean, dry material. Fresh bedding reduces mite habitats and encourages healthy coop conditions.
- Repeat cleaning and treatments weekly for at least 3 weeks. This cycle disrupts mite life cycles, which complete in about 7 days, helping prevent reinfestation.
Monitoring a coop after treatment is important since mites can survive off their hosts for months under favorable conditions. Regular cleaning keeps mite populations low and prevents costly issues. Expect initial persistence in heavily infested coops, but consistent sanitation and targeted treatments gradually reduce and control mites.
Understanding Mite Life Cycles and Treatment Timing
Chicken mites reproduce rapidly, making the timing of treatments critical. Their life cycle can complete in as little as 7 days under favorable conditions, with eggs hatching into larvae and then developing into mature mites that feed on your flock’s blood. This rapid cycle means that treatments targeting only adult mites will not fully eliminate the problem, as eggs and larvae can survive and lead to a population resurgence.
To effectively control mite infestations, plan to apply treatments every 7 to 10 days. This range covers the typical time it takes for mite eggs to hatch and for larvae to develop into adults. By treating the chickens and their environment a second time within this window, you kill newly hatched mites before they start reproducing, preventing the cycle from continuing.
For example, if you apply a treatment on Day 1, schedule the next treatment between Day 8 and Day 11. This approach helps ensure you target any mites that were in the egg or larval stages during the first round. Some mites, like northern fowl mites, complete their cycle in as few as 5 days, so leaning toward the shorter treatment interval can be safer in warmer months when reproduction speeds up.
Monitoring your flock closely during treatment is important. Since mites are tiny, between 0.5 and 1 millimeter, they can be hard to detect early. Signs of irritation or feather loss usually appear after the mites have had time to multiply, so catching an infestation early helps reduce treatment frequency and severity. Treatments often involve either natural or chemical methods, but all require that you stick to the repeat schedule to break the mite life cycle.
Failing to treat at recommended intervals risks the mites bouncing back, sometimes worsening your flock’s stress and health problems. Chickens can suffer from anemia and even death if infestations get severe. Keep in mind, mites spread easily through direct contact, so any new birds introduced to your flock should be quarantined and checked carefully to avoid reintroduction during treatment periods.
Stick strictly to a 7 to 10-day treatment repeat schedule to ensure that mite eggs and larvae don’t escape and restart the infestation cycle.
Preventing Mite Infestations with Quarantine and Coop Design
You should always isolate new chickens for 2 to 3 weeks before adding them to your flock. This quarantine period allows you to monitor the birds for mites or other parasites and apply any necessary treatments. Introducing unquarantined birds risks bringing mites into your healthy flock, since mites can survive off the host for weeks, especially red mites, which live up to 34 weeks off birds.
Maintaining a clean, dry coop is key to preventing mite outbreaks. Mites thrive in warm, humid environments, with late spring and summer being the peak season for infestations. Keep the coop well-ventilated and reduce moisture to create an unfavorable environment for mites. In cold climates, red mites can die off when temperatures inside the coop drop to around -4°F.
Modifying the coop can also help lower mite risks. Painting the interior surfaces with a non-toxic, moisture-resistant paint seals cracks and reduces hiding spots for mites. This limits the areas needing spray treatments and makes cleaning more effective. Remove any infested bedding, nest boxes, or materials promptly to cut down mite populations and make treatments more successful.
- Quarantine all new birds for 2 to 3 weeks before introducing them.
- Inspect quarantined birds daily and apply parasite treatments as needed.
- Keep coop temperature low in winter or ventilated in summer to discourage mites.
- Paint coop interiors to seal cracks and reduce mite hiding spots.
- Remove and replace bedding or nesting materials regularly.
- Limit wild bird access to coop areas to reduce parasite risks.
- Implement routine cleaning of feeders, perches, and waterers.
Preventing mite infestations relies on consistent biosecurity and maintenance. Quarantine is the first line of defense for new birds. Regular cleaning and controlling temperature and humidity help keep mite populations low year-round. Avoiding materials that harbor mites and sealing the coop’s surfaces minimizes treatment needs. Watch the seasonal temperature changes and adjust your cleaning and inspection routines accordingly to stay ahead of mite outbreaks.
Safety Considerations and Risks with Mite Treatments
Using chemical or natural mite treatments on chickens requires careful attention to safety for you, your flock, and the food they produce. Treatments like Desecticide work by targeting neurological receptors unique to mites. This makes them effective against parasites while being safe for chickens, humans, and pets. Because this type of product is designed for food animals, you generally don’t need a waiting period before eating eggs or meat from treated birds. Still, always follow the product label instructions precisely for dosing and application methods.
Mite treatments can have side effects if misused. Over-application or applying treatments in poorly ventilated areas could stress or harm chickens, causing excessive preening or skin irritation. Some chickens with very sensitive skin might experience mild redness or feather loss. To avoid these issues, apply only the recommended amount directly to affected birds and their roosting spots. Use a spray or dust method that evenly coats areas where mites hide, such as under wings and around vents. Make sure chickens are dry before treatment and allow the area to air out afterward.
Because mites feed on blood, heavy infestations can seriously weaken chickens, reducing their egg production by stressing the birds and causing blood loss. Mites often bite around the vent area, leaving wounds that may become prone to infection. Treating mites promptly is critical to prevent these health setbacks. After treatment, monitor your flock for signs of irritation or ongoing mite activity for several days, and consider retreatment in 7 to 10 days to catch newly hatched mites.
Regarding humans, chicken mites can bite you but cannot live on human skin or reproduce there. Bite reactions vary, ranging from minor itching to mild swelling. Wearing gloves and protective clothing when applying treatments helps reduce skin exposure to mites and chemicals. Washing hands thoroughly after handling chickens or cleaning coops minimizes risks.
In some situations, extra precautions help. If you keep a small flock mainly for eggs, clean nesting boxes and remove eggs before treating hens to avoid chemical exposure to the eggshells. For meat birds, use treatments approved for food animals to avoid residues. Poultry used in shows or breeding should also be treated carefully to comply with any event or program rules.
Costs of mite treatments vary by product and flock size. A bottle of Desecticide may cost $15 to $30 and treat dozens of chickens, making it an affordable option. Using it safely requires time to spot-apply treatments and clean the coop, but doing this every 7 to 10 days for several weeks typically clears infestations. Skipping regular cleaning or applying treatments unevenly can lead to persistent mite problems, increasing long-term costs and flock health risks.
Monitoring Treatment Success and Troubleshooting Persistent Mites
Monitoring your chickens after treatment is essential to confirm mites are fully cleared and to prevent reinfestation. Keep checking your flock regularly, especially during the active months of mite presence. If mites persist, adapt your treatment plan promptly.
Signs Mites Are Gone
Look for clearly improved feather health and skin condition on your chickens, particularly under the wings and around the vent. Absence of scratching, restlessness, and visible mites or mites’ dark droppings on the skin or coop surfaces suggests you’ve successfully cleared the infestation. Healthy chickens will be more alert and regain normal behaviours.
Use a flashlight during physical exams to inspect common hiding spots clearly. You should see no moving mites or their eggs on the chicken or inside the coop. Performing these checks about once a week over a few weeks after treatment provides a reliable sense of clearance.
Steps If Mites Persist
Persistent mites usually mean treatment wasn’t fully effective or environmental control was incomplete. Repeat or adjust treatments based on the mite type and product label instructions. For example, permethrin requires at least two applications spaced 5 to 6 days apart, since the mite life cycle can cause re-emergence if only treated once.
Continue treatments especially from May through October, as poultry red mite activity peaks during hot months. Re-clean and treat the coop thoroughly if mites persist, paying close attention to cracks, wood joints, and roost supports where mites hide. Follow this checklist to control persistent infestations:
- Apply treatment at least twice, 5 to 6 days apart
- Regularly inspect chickens every 3 to 7 days post-treatment
- Deep-clean coop and nesting areas before reapplying chemicals
- Remove bedding and replace with fresh material
- Use dust or spray treatments specifically labeled for poultry
- Consider isolating heavily infested birds to reduce spread
- Maintain treatment and monitoring through peak mite season
Persistent mite issues might require switching treatment types or consulting a veterinarian if chemical resistance or incorrect diagnosis is suspected.
Avoiding Treatment Mistakes
Common mistakes include applying only one round of treatment, neglecting coop sanitation, and failing to inspect regularly. Missing the timing window in the mite life cycle or using underdosed products reduces effectiveness and allows mites to rebound.
Another misstep is treating only the birds while ignoring the coop environment where most mites hide. Poor application methods such as uneven spraying or insufficient coverage also cause failure. Using products not approved for poultry can harm birds or be ineffective.
Always strictly follow the product label instructions for dosage, timing, and safety precautions to avoid harm and treatment failure.
Addressing mites takes sustained effort, combining thorough environmental cleaning with repeated, correctly timed treatments. Consistent monitoring helps you catch recurring infestations before they become severe.
Step-by-Step Action Plan to Eliminate and Prevent Chicken Mites
Follow these steps in order to identify, treat, and prevent mites in your chickens and coop. Each action includes a way to check your progress and ensure the mites are gone.
- Before you start: Inspect your flock closely for signs of mites, such as irritated skin or feather loss, and determine the type of mite to choose the right treatment. Success is confirmed when you identify mite presence and type accurately.
- Day 1: Apply the recommended treatment to your chickens, choosing natural or chemical options based on severity and safety guidelines. A good sign is reduced scratching and fewer visible mites within a day or two.
- Day 2, 3: Thoroughly clean and disinfect the coop, focusing on cracks, roosts, and nesting boxes where mites hide. You’ll know it worked when no new mites are found in these areas during your next checks.
- Week 1: Repeat the treatment on the chickens if needed, based on the mite life cycle and product instructions, to catch newly hatched mites. Look for continuing signs of improvement and fewer mites on your birds.
- Week 2: Monitor chickens and coop daily for any return of mite activity, using feather checks and coop inspections. Successful control shows no signs of mites or irritation returning.
- Ongoing: Maintain good coop design and biosecurity by quarantining new birds and performing regular cleanings. Prevent recurrence by spotting problems early before mites establish again.
- If mites persist: Consult product instructions and consider professional advice. Adjust treatments safely and revisit your cleaning routine to break the mite cycle effectively.
Frequently Asked Questions
What Kills Mites on Chickens Fast?
Chemicals like Spinosad can kill mites quickly, but natural treatments work well if caught early. Retreat in 5-7 days to kill newly hatched mites.
Can Humans Catch Mites Off Chickens?
No, chicken mites are species-specific and cannot infest or reproduce on humans. Treating chickens and coop stops potential irritation.
Can a Chicken Recover from Mites?
Yes, chickens can recover with prompt treatment, improved coop hygiene, and supportive care to restore health.
Will Dawn Dish Soap Kill Chicken Mites?
Dawn dish soap can help remove mites temporarily but isn’t a lasting solution; use it only as part of a broader treatment approach.
How Long Do Chicken Mites Survive Off the Host?
Chicken mites can survive off chickens for up to 2 weeks, hiding in the coop until they find a host.
Are Mite Infestations Seasonal in Backyard Flocks?
Infestations often increase in warm, humid seasons but can occur anytime with poor coop conditions.
Wrapping Up
Getting rid of mites on your chickens requires a thorough approach that includes treating the birds, cleaning the coop, and preventing future infestations. Start by carefully inspecting your flock today to spot any signs of mites early, which lets you act before the problem worsens. Taking this first step helps protect your chickens’ health and comfort while saving you time and effort in the long run.