
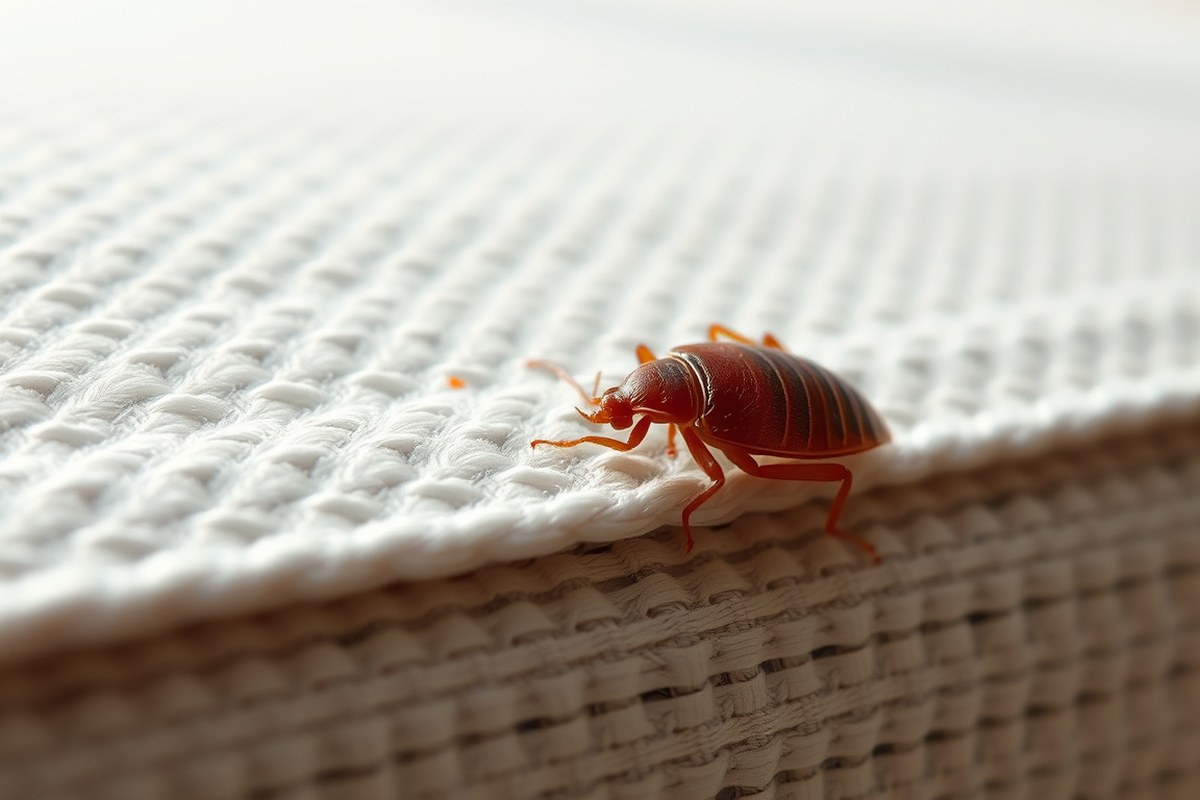
What Is the Hardest Pest to Get Rid of? Complete Guide to Identify and Eradicate Stubborn Pests
The hardest pest to get rid of varies by location and situation, but bed bugs often top the list due to their rapid reproduction and resistance to common treatments. Their ability to hide in tiny cracks and develop resistance to pesticides makes eradication slow and costly. You’ll find this information important if you’re dealing with persistent infestations or want to avoid costly mistakes in your pest control efforts.
This article breaks down the factors that make pests tough to eliminate, how long it typically takes, and compares costs and methods for treatment. It covers tools and chemicals that work best, eco-friendly options, and how to monitor if your efforts are succeeding. You’ll also learn when to call a pro and how to prevent reinfestation through proper post-treatment steps and regional considerations.
Key Takeaways
- Termites, bed bugs, and cockroaches top the list as hardest pests due to their nesting habits, resilience, and rapid reproduction rates.
- Eliminating tough pests may take weeks to months, depending on infestation size, pest type, and treatment method used.
- Professional extermination often costs more initially but ensures thorough removal compared to variable effectiveness of DIY treatments.
- Effective pest control combines physical tools, targeted chemicals, and newer treatments like heat or biocontrol agents for stubborn infestations.
- Use bait stations, traps, and regular inspections to monitor pest activity and measure treatment success over time.
- Common mistakes include improper chemical use, ignoring pest hiding spots, and inconsistent treatment timing, which prolong eradication.
Which Pest Is Considered the Hardest to Eliminate and Why?
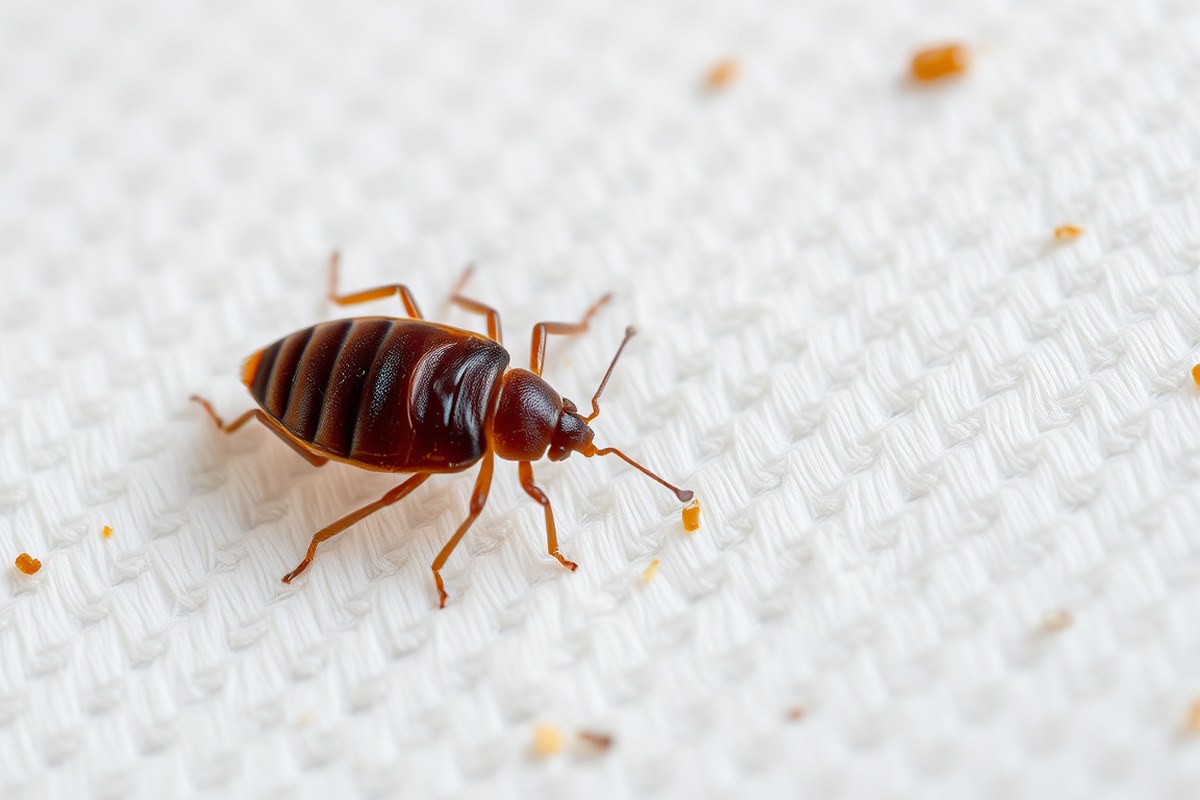
The hardest pests to eliminate typically include bed bugs, termites, and cockroaches because of their biology and behavior. Their ability to hide, reproduce quickly, and resist common treatments makes them persist long after initial control attempts.
Top Hardest Pests Explained
Bed bugs rank among the toughest pests due to their small size, nocturnal habits, and tendency to hide in tiny cracks and crevices. They feed on human blood and can survive months without feeding, which allows them to outlast many treatment gaps. Termites pose a serious challenge because they live inside wood structures, making detection difficult until damage becomes visible. Their colonies can number in the hundreds of thousands, supporting continuous reproduction and feeding deep within walls and foundations. Cockroaches combine rapid reproduction with an ability to squeeze through very narrow spaces and withstand many pesticides. Their preference for warm, moist environments inside buildings keeps them well protected.
Each of these pests has unique characteristics that complicate eradication, meaning a one-size-fits-all method will fall short. Precise identification and targeting are required to adapt control strategies effectively.
Key Biological and Behavioral Traits
These pests share biological traits that increase survival during and after treatment. Bed bugs hide during daylight and reproduce quickly, with females laying around five eggs daily. Their eggs have a hard coating that resists many insecticides, and bed bugs can develop resistance to commonly used chemicals. Termites maintain large, subterranean colonies protected by soil or wood, creating a hidden environment where many insecticides cannot reach. They communicate chemically to repair tunnels and defend the colony, so partial treatments may miss key sections.
Cockroaches produce offspring rapidly and can develop resistance to multiple classes of pesticides. They are also scavengers, surviving on minimal resources which let them endure temporary food scarcity during treatment. Their behavioral adaptation to avoid treated surfaces slows elimination.
Why Some Pests Resist Standard Treatments
Resistance happens because these pests have genetic or behavioral adaptations. For bed bugs, repeated exposure to pyrethroids, a common insecticide group, has led to widespread resistance, requiring alternative chemicals or heat treatments above 120°F to kill all life stages. Termite resistance comes less from chemicals and more from physical barriers; many insecticides cannot penetrate deep into wood where termites tunnel, so baiting methods combined with targeted treatments often work better.
Cockroaches evade control by avoiding baits and sprays through cautious foraging behavior. Combined with pesticide resistance, this means multiple treatment types and consistent sanitation efforts are needed. Using integrated pest management techniques that combine traps, baits, repellents, and cleaning offers a better chance at breaking their life cycles.
How Long Does Eradicating Tough Pests Typically Take?
Eradicating tough pests usually takes several weeks to a few months, depending on the species and infestation level. The process involves an initial treatment to reduce the population significantly, followed by scheduled follow-ups to catch any survivors or new arrivals. These follow-ups are essential to confirm full elimination and prevent quick reinfestation.
Initial Treatment Phase
The first round of pest control aims to tackle the bulk of the infestation quickly and decisively. This phase often involves applying insecticides, baits, or traps targeted to the specific pest. For example, bed bug treatments typically require a thorough cleaning and insecticide application carried out over one or two days.
This phase’s length depends on the pest’s biology and hiding spots. Termites may need multiple zones treated inside and outside the structure over several hours, while cockroach treatments might be completed in one visit. Expect an initial treatment to last from a single day to a week to cover all affected and hard-to-reach areas comprehensively.
Monitoring and Follow-Up Intervals
Follow-up visits typically occur every 2 to 3 weeks after the initial treatment, especially for pests like bed bugs, cockroaches, or fleas, which have life cycles that allow survivors to hatch after the first round. These intervals allow for monitoring of pest activity and retreating areas as needed before the pests reproduce again.
The number of follow-ups varies. Persistent infestations may require three to five visits or more. Termites often need quarterly inspections and possible retreatments for 1 to 2 years due to their hidden colonies and slow lifecycle. Failure to schedule proper follow-ups can lead to incomplete eradication and costly reinfestations.
Keep a detailed log of each treatment date and the pest activity you observe to track progress and provide your pest control provider with accurate updates.
Factors Influencing Treatment Duration
The length of pest eradication depends largely on the pest’s reproduction rate, nesting habits, and the environment. Bed bugs reproduce every 16 days and hide in tiny cracks, so treatments must repeat until all life stages are gone. In contrast, ants can be dealt with faster if their trails and nests are accessible.
Environmental conditions like temperature and humidity also play a role. Some insecticides work slower at low temperatures, extending the treatment timeline. Heavily cluttered or structural features such as wall voids, basements, or crawl spaces make inspection and treatment more difficult, requiring longer and more intensive efforts.
The thoroughness of initial preparation affects how well treatments work. For bed bugs, washing and vacuuming bedding and clothing beforehand improves pesticide effectiveness and shortens the eradication process. Without proper prep, pests hide and evade treatment, pushing timelines further out.
Cost Comparison: Professional Extermination vs DIY Methods
Professional extermination typically costs more upfront than DIY methods but often delivers more thorough results, especially for severe infestations. DIY expenses vary widely depending on the pest, size of the infestation, and the tools or chemicals used. Comparing these costs helps decide the most practical path based on the infestation level and budget.
Cost Breakdown by Pest Type
Different pests require different approaches, which affects overall expenses. For example, eliminating bed bugs generally costs more than dealing with ants because bed bugs need multiple chemical treatments and sometimes heat treatments. Termites often require both chemical and physical barriers, raising costs further. Rodent control is usually less expensive but may involve replacement of chewed wiring or insulation. The severity of the infestation changes costs too. A mild ant problem might be handled with a $20 store-bought bait, while a building-wide termite infestation can cost thousands of dollars in professional treatment. The pest type directs which tools and chemicals you need, influencing costs directly.
DIY Equipment and Chemical Expenses
DIY pest control usually involves purchasing sprays, bait stations, traps, or dusts. Basic ant baits cost around $10 to $30 per box, whereas professional-grade insecticides or rodenticides range from $25 to $60. Tools like sprayers, protective gloves, and respirators add $20 to $50 initially, especially if you want to apply chemicals safely. For tougher pests like bed bugs, heat treatment kits or UV light traps can push expenses into the $100 to $300 range. Mistakes like under-treating or using ineffective products add time and repeat treatment costs, making DIY more expensive in the long run if you have severe infestations. You also need to factor in ongoing purchases; chemical reapplications might be necessary every few weeks, adding to the cost over months.
Professional Service Price Ranges
Professional exterminators charge based on pest type, home size, and treatment complexity. For rodent or ant control, expect $150 to $300 for an initial service, with follow-up visits costing $50 to $150 each. Termite treatments often start around $1,200 and can exceed $4,000 depending on method and property size. Bed bug treatment usually costs from $500 to $1,500 per session, with multiple sessions commonly required. The benefit is a tailored, targeted approach and usually a warranty or guarantee against re-infestation for several months or years. Some companies offer monthly or quarterly service contracts that spread the cost but add up over time. When infestations are severe or involve structural pests, professional services provide expertise and stronger products not available to consumers, which justifies the higher cost.
Tools, Chemicals, and Innovative Treatments for Stubborn Pests
Getting rid of the hardest pests requires a mix of targeted tools, chemical treatments, and newer approaches like heat or freezing, all chosen to suit the specific pest and environment. Understanding how different methods work together or separately helps you achieve better results and avoid wasted effort or damage.
Chemical Treatments and Resistance
Effective chemical pest control often starts with choosing the right pesticide formulation, liquid sprays, dusts, baits, or foggers, based on the pest’s habits and hiding places. For example, cockroach baits containing hydramethylnon or fipronil work best indoors where pests feed on the poisoned bait over time. For termites, liquid termiticides applied around a home’s foundation create a barrier that prevents colony expansion. Pesticide resistance develops when pests survive repeated exposure, so rotating active ingredients or combining treatments helps maintain effectiveness. Overusing pyrethroids on bed bugs, for instance, can cause resistance, requiring you to switch to chemical classes like neonicotinoids or desiccants.
Applying chemicals correctly matters, too. Use a calibrated sprayer to cover cracks and crevices but avoid contamination of non-target areas. Read product labels for concentration, protective gear, and re-entry times. Costs vary widely: a quart of a professional-grade insecticide can cost $30 to $70 and covers 1,000 to 2,000 square feet, while spot treatments for smaller infestations cost less. Poor application or skipping label precautions might leave pests unaffected or create hazards.
Mechanical and Thermal Methods
Mechanical methods include vacuuming, traps, exclusion, and physical removal. Vacuuming bed bugs from mattresses and carpets provides instant reduction of visible pests but won’t reach eggs in hidden spots. Sticky traps monitor rodent or crawling insect activity and help catch individuals early. Physically sealing cracks, windows, and vents stops pest entry but requires thorough inspection to identify all points. These methods involve close inspection, patience, and repeated effort to be effective.
Thermal treatments use heat or cold to kill pests without chemicals. Heating infested rooms to 120°F or above for several hours kills bed bugs, lice, and wood-boring insects. Specialized equipment like portable heaters, fans, and temperature monitors are necessary for uniform heat distribution. Freezing infested items at 0°F for at least four days can eradicate small insects like carpet beetles or moth larvae. These methods often cost several hundred dollars for equipment rental or professional service and require proper safety measures to avoid fire or property damage.
Recent Technological Innovations
New technologies are easing the control of tough pests through better detection and more precise treatments. Electronic monitoring devices use sensors to detect termite movement or rodent presence in concealed spaces, allowing targeted treatment rather than widespread pesticide use. Heat sensors and infrared cameras quickly locate bed bug clusters inside walls or furniture. These tools often come with software or apps that help track pest activity and treatment progress over time.
Advances in bait technology include slow-release gels or micro-encapsulated pesticides that increase bait attractiveness and residual effectiveness. Some companies now use cold atmospheric plasma or essential oil vaporization as chemical-free methods to disrupt pest behavior or kill insects. These innovations usually come with higher upfront costs or limited availability but show promise in reducing chemical reliance. You can decide whether to invest depending on infestation severity and your tolerance for pest risks.
Safe and Eco-Friendly Strategies for Managing Hard Pests
Safe and eco-friendly pest control methods can manage difficult pests effectively without exposing your family or pets to harmful chemicals. These approaches focus on natural substances and biological agents that reduce pest populations while minimizing environmental impact. By combining these green strategies with careful precautions, you can keep your home pest-free and safe.
Natural Repellents and Barriers
Natural repellents work by making your home or garden less attractive to pests. Essential oils such as peppermint, eucalyptus, and citronella are commonly used because they interfere with pest senses. For example, dilute 10 to 15 drops of peppermint oil per cup of water and spray around window sills, doorways, and baseboards every few days. This method deters ants and spiders effectively without toxic residue.
Physical barriers provide protection by blocking pest entry points. Install weather stripping and door sweeps to seal gaps under exterior doors, and use fine mesh screens on vents and windows. You can also fill cracks with caulk to prevent crawling insects from entering. These measures reduce the need for chemical treatments and help manage pests like rodents and cockroaches by cutting off their access.
Apply natural repellents regularly, especially after rain or cleaning, to maintain their effectiveness.
Biological Control Options
Biological control involves introducing predators or parasites that target specific pests. Nematodes, tiny worms that attack soil-dwelling pests like grubs and fungus gnats, can be spread in lawns or garden beds following package instructions, this typically involves watering them into the soil during warm weather. Ladybugs and lacewing larvae feed on aphids, scale insects, and mites; releasing them near affected plants helps reduce pest numbers naturally.
Using biological controls requires patience because their effects may take a week or more to become visible. Monitor pest levels to decide if repeated releases are needed. This approach avoids the risks of chemical pesticides but works best as part of integrated pest management alongside other tactics.
Safety Guidelines for Families and Pets
Even natural pest control products can be risky if misused around children and pets. Store all treatments out of reach and apply repellents or biological agents only in well-ventilated areas. Avoid spraying essential oils directly on pets or their bedding, as some oils can irritate or harm animals. When using nematodes or insects for control, make sure they are from reliable sources and applied according to label directions.
To combine green methods with conventional treatments, use non-toxic options first, then apply limited chemical treatments in targeted spots away from common living areas if necessary. Inform everyone in your household about treated zones and time limits for re-entry. Cleaning floors and surfaces regularly also helps reduce contact risks and supports pest control success.
Wear gloves when applying repellents or handling biological controls to protect yourself and reduce contamination risks.
How to Monitor Your Pest Control Efforts for Success or Failure
Monitoring your pest control efforts involves looking for clear signs that the infestation is shrinking or continuing, tracking pest activity regularly, and readying to change tactics if the treatment isn’t working. Effectively watching these changes helps you decide whether to stay the course or try something else before the problem worsens.
Signs of Decreasing or Persistent Infestation
Look for fewer visible pests, reduced pest damage on plants, furniture, or stored goods, and no new pest droppings or nests. These signs usually mean your current control methods are working. In contrast, if you keep seeing live pests, their droppings, or increased damage after a week or two of treatment, the infestation may still be active or growing.
Pest signs also depend on the species. For example, with cockroaches, fewer sightings during the day and fewer fresh droppings suggest progress, since roaches avoid light and produce droppings near hiding spots. Termite damage progressing or new mud tubes indicate failure to control termites. Monitoring such specifics helps assess results accurately.
Tracking Using Traps and Visual Inspections
Set up traps at regular intervals around affected areas and check them daily or every few days, noting the number and type of trapped pests. Sticky traps work well for crawling insects like spiders or roaches, while pheromone traps attract moths or beetles. Record each trap’s catch in a log to compare over time.
Visual inspections are equally important. Inspect baseboards, behind appliances, inside cabinets, and outdoor entry points weekly. Look for fresh droppings, shed skins, or signs of entry like holes or gnaw marks. Taking photos each visit helps document changes. Tracking over 2 to 3 weeks gives a reliable picture of treatment effectiveness.
Adjusting Strategy Based on Monitoring Results
If monitoring shows little or no reduction in pest numbers after two weeks, change your approach promptly. For instance, try different baits or chemicals approved for your pest type or increase the frequency of treatment applications. Sometimes pests develop resistance to one chemical, so rotating products can help.
Consider nonchemical methods if chemicals aren’t effective. These include sealing cracks, improving sanitation, or removing food sources. If you catch signs of reinfestation or new pest species, reassess your entire control plan. Keeping detailed notes on what you tried and any results will help you or a professional decide the next steps.
Common Mistakes in Pest Elimination and How to Fix Them
Many people fail to fully eliminate tough pests because they misidentify the pest, treat only part of the infestation, or ignore how pests reproduce and hide. Avoiding these errors means confirming what pest you’re dealing with, completing the entire treatment cycle, and timing interventions to match pest lifecycles. Doing so makes your efforts more effective and reduces the chance of reinfestation.
Misidentification of Pest Species
Incorrectly identifying the pest type is a common and costly mistake. Using treatments meant for one species on another can waste time and money, and may allow the real pest to continue spreading. For example, treatments effective against common ants won’t work on termites, which require specialized approaches. Make sure to capture or photograph the pest clearly and compare it to reliable identification guides online or consult a local extension office.
You can also contact pest control professionals to confirm species before starting treatment, especially with persistent infestations. Some pests look similar in different life stages, so verify the adult and immature forms. Misidentification leads to wrong bait or chemical choice, and that often means repeated treatments without success.
Incomplete or Skipped Treatments
Stopping treatment too soon or skipping applications is another widespread problem. Many pests hide in multiple spots or return from eggs, so one round of treatment rarely solves the problem for good. Follow the full treatment schedule recommended for your pest, for example, bed bug protocols often require multiple visits over a few weeks to cover all life stages. Skipped spots or interrupted treatments give pests time to recover and reproduce again.
Accuracy matters here. Treat all known and potential pest locations, not just the visible areas. For instance, cockroaches breed behind cabinets and inside wall voids, so surface treatment alone misses a large part of the population. You can improve completeness by inspecting thoroughly before and after each treatment and documenting what was treated. This way, you catch missed areas early and avoid costly repeat cycles.
Ignoring Reproductive Cycles and Hiding Behavior
Tough pests often reproduce rapidly and hide in hard-to-reach places. Ignoring this means treatments kill only the active adults, while eggs, larvae, or pupae survive to restart the infestation. Understanding typical lifecycles helps you time treatments correctly and plan repeated applications. For example, mosquito larvae live in water and mature in approximately 7-10 days, so repeated larvicide applications should align with this schedule.
Some pests shelter during the day and come out at night, so applying treatments when they are inactive or unreachable reduces effectiveness. Using light or bait traps to monitor activity times lets you plan intervention for maximum exposure. For pests with hard-to-access nests, combining chemical treatments with mechanical removal or habitat modification improves results by breaking the lifecycle.
Regional, Seasonal, and Environmental Factors Affecting Control Difficulty
Pest control difficulty varies widely with location, climate, and specific property conditions. These factors shape pest behavior, reproduction rates, and treatment responses, making tailored approaches necessary. Adjusting your strategy by region, season, and environment improves the chances of effective control.
Regional Variations in Pest Prevalence
Pests are not equally troublesome everywhere. For example, subtropical and tropical areas tend to have higher populations of termites and mosquitoes year-round, requiring persistent prevention. In contrast, northern regions may see seasonal spikes in rodents or cockroaches that seek indoor shelter during colder months.
Different regional pests require treatments suited to local habits. Wood-boring ants in the Pacific Northwest need different bait formulations than fire ants common in the Southeast. Soil moisture and temperature influence chemical degradation rates, so products effective in one state may lose potency faster in another. Understanding your region’s pest profile helps you select the right chemicals and treatment intervals.
Always verify that a pesticide is registered for use in your state, as local restrictions can limit options and impact results.
Seasonal Behavior and Lifecycle Changes
Pests undergo lifecycle changes that affect the timing and methods of control. Spring and summer often bring increased insect activity and reproduction, making treatments more effective at targeting immature stages like larvae and nymphs. Late fall and winter see many insects become dormant or hide indoors, shifting control towards exclusion and sanitation.
Adjust treatment frequency seasonally to match pest activity. For example, applying ant baits in early spring targets foraging workers before colony expansion. In cold climates, rodent-proofing and sealing entry points before winter keeps mice from nesting inside. Monitoring pest population changes through the year guides when to intensify or ease treatments, reducing wasted effort and expense.
Do not apply insecticides outdoors in freezing weather, as low temperatures can render them ineffective and expose non-target wildlife needlessly.
Property Conditions Impacting Success
Site-specific features like landscaping, building materials, and moisture levels directly impact pest harboring and treatment success. Dense shrubbery or stacked firewood next to a house can shelter pests like ticks and spiders, requiring vegetation trimming and debris removal to complement chemical control. Cracks in foundation walls or damaged window screens provide pest entry points that physical repairs must address.
Moisture is a key facilitator for pests such as termites, cockroaches, and silverfish. Fix leaking pipes and improve drainage to reduce these infestations. Properties with crawl spaces or basements may need different pacing and product placement than slab foundations. Applying granular barriers around the perimeter can help at high-risk sites, but relying on pesticides without correcting the environment often leads to reinfestation.
Effective pest control requires combining chemical treatments with property maintenance; ignoring your home’s vulnerabilities can double your control time and cost.
When to Call a Professional and Understanding Treatment Regulations
Hiring a professional becomes necessary when pest infestations surpass basic DIY handling or pose health and structural risks. Professionals use specialized tools and chemicals not typically available to homeowners, applying treatments with more precision and within regulated safety standards. Understanding when to call them involves assessing infestation size, pest type, and prior control attempts, alongside awareness of the legal requirements governing pesticide use.
Assessing Infestation Severity
Start by examining the extent of the infestation to decide if professional help is needed. A good rule is that small, isolated pests like a few ants or spiders can often be managed with store-bought sprays or traps, while widespread colonies or nests indicate a tougher problem. Note signs such as multiple entry points, large quantities of droppings, or damage to the structure or belongings, all of which suggest a severe infestation.
Use a checklist: observe pest numbers daily for a week, inspect entry points, and check whether DIY attempts have reduced sightings. If pests continue to multiply despite consistent DIY treatments, escalate to a professional. Pests like bed bugs, termites, or carpenter ants usually require expert identification and treatment because of their ability to hide deep in walls or structures and their significant damage potential.
Keep in mind that some pests present health hazards, such as rodents carrying diseases or wasps with venomous stings. In cases involving allergic reactions or infestations in places like schools or food businesses, professionals equipped with specialized knowledge and equipment are necessary for safe and effective removal.
Professional Methods vs DIY
Professionals have access to stronger pesticides and commercial-grade equipment like thermal foggers and dusters that effectively target pests in hard-to-reach places. They begin with a thorough pest inspection, identifying species and infestation sites to tailor a treatment plan that often involves several visits. In contrast, DIY methods mostly rely on consumer products with lower toxicity and less targeted application.
Professional treatments include integrated pest management approaches, combining chemical, biological, and mechanical controls that reduce chemical use and lower the risk of resistance. Professionals also apply pesticides according to stricter guidelines, ensuring proper dosages and avoiding overuse that could harm indoor air quality or pets. This contrasts with common DIY mistakes like overapplication or wrong product selection, which can worsen infestations or leave hazards behind.
Costs for professional treatments vary by pest type, infestation size, and region but typically range from $300 to $1,000 per treatment cycle. Professionals may offer ongoing maintenance contracts to catch reinfestations early. DIY solutions cost less upfront but might require repeated attempts, which can add up if the infestation persists or grows.
Legal and Safety Considerations
Pesticide application is heavily regulated by federal and state laws designed to protect human health and the environment. Professionals must be licensed to purchase and apply many restricted-use pesticides that homeowners cannot buy. These include substances that require precise handling to avoid contamination of food, drinking water, or living spaces.
Regulations also dictate record-keeping, notification rules, and the use of personal protective equipment (PPE). Licensed applicators follow label instructions that specify the allowed application rates, timing, and safety measures, such as ventilation periods after treatment. Ignoring these rules can lead to fines, ineffective treatment, or health risks.
Homeowners should ensure any pest control company they hire complies with local licensing requirements and ask about the chemicals they plan to use. Always inform occupants about treatment schedules, evacuate pets if needed, and follow post-treatment instructions to reduce exposure. Relying on professionals helps avoid unintentional misapplication that can endanger health and violate the law.
Preventive Measures and Post-Treatment Steps to Avoid Reinfestation
Preventing reinfestation involves a mix of sealing entry points, maintaining cleanliness, and ongoing monitoring. These steps reduce the chances pests return after treatment by eliminating shelter, food, and access. A proactive approach keeps your space less attractive and more secure against stressed, persistent pests.
Home Sealant and Structural Repairs
Sealing cracks, gaps, and other openings on your property is one of the most effective ways to prevent pests from returning. Start by inspecting foundation walls, door frames, window sills, and where plumbing or electrical wiring enters the building. Use silicone or polyurethane caulk for small cracks and expandable foam for larger holes. Pay special attention to areas around pipes and vents since pests like rodents and insects exploit even tiny spaces.
Repair damaged wood, loose siding, and worn weather stripping promptly because pests often prefer compromised building materials for nesting. Replacing broken screens and sealing attic or crawlspace vents with fine metal mesh keeps out flying insects and rodents. These repairs also improve the overall energy efficiency of your home, which is an added benefit. Structural maintenance costs vary depending on the damage scale but expect minor repairs to run from $100 to $500, while major work on foundations or siding can reach several thousand dollars.
Regular Cleaning and Monitoring
Keeping your living or work area clean removes food sources that attract pests. Clean countertops, sweep floors daily, and store food in airtight containers made of glass or hard plastic. Declutter storage areas and keep garbage sealed and taken out regularly to deny pests harborage. For example, food crumbs under kitchen appliances are common hotspots for ants and cockroaches.
Monitoring means routinely checking for signs of pest activity after treatment. Set a schedule to inspect common pest entry points and potential nests at least once a month. Look for droppings, shed skins, gnaw marks, or trap captures if you use sticky or bait traps around your property. Early detection allows you to act before infestations grow significant. Maintaining logs or photos during these inspections helps track trends and treatment effectiveness over time.
Ongoing Pest Prevention Maintenance
Maintaining a pest-free environment requires persistence beyond initial control. Regularly trim tree branches and shrubs away from the building since they can act as bridges for pests, especially ants and rodents. Keep firewood and debris at least 20 feet from your home’s foundation. Periodic professional inspections every 6 to 12 months can catch new vulnerabilities you might miss and allow targeted preventive treatments.
Seasonal pest pressures change the risk level, so adjust your prevention accordingly. For example, rodents seek indoor refuge as temperatures drop, while flying insects become more active in warm months. Applying barrier treatments around the foundation twice a year can help. Costs for upkeep vary with home size and local risk but budgeting a few hundred dollars annually for maintenance and inspection is reasonable for preserving a pest-free space.
Step-by-Step Action Plan for Tackling Difficult Pests
Start by identifying the hardest pest affecting your property along with the reasons it resists elimination. Use a structured timeline to track your treatments, monitoring results carefully to adjust your strategy as needed.
- Before You Start: Identify the Pest and Assess Impact Confirm which pest is present using physical signs or professional identification services. This step is critical since different pests require distinct treatments; knowing this helps avoid wasted effort and expense.
- Day 1, 7: Choose Treatment Method and Prepare Tools Decide between professional services or DIY based on the pest type, infestation size, and your budget. Gather all necessary tools and chemicals recommended for tough pests, such as specialized baits for rodents or insect growth regulators for cockroaches. Proper preparation ensures efficient application and safety.
- Week 1, 3: Apply Treatments Following Label Directions Apply pesticides or methods precisely as specified, avoiding overuse to minimize health risks and environmental impact. Mark treatment dates and areas treated to track coverage. Effective application depends on following these directions exactly.
- Week 2, 4: Monitor Pest Activity and Treatment Effectiveness Use traps, visual inspections, or motion sensors to gauge pest decline. Significant reduction in sightings or captures indicates success; if you see no change, reconsider treatment type or application thoroughness. Monitoring helps catch failures early to avoid persistent infestations.
- After 4 Weeks: Address Common Mistakes and Adjust Plan Look for issues like inconsistent treatment timing, untreated entry points, or signs of reinfestation. Correct by sealing cracks, cleaning food residues, or repeating treatments selectively. Fixing these common errors improves odds of permanent control.
- Month 2 and Beyond: Implement Preventive and Maintenance Measures Reduce future risk by eliminating pest attractants such as standing water and clutter, maintaining barriers, and scheduling periodic monitoring. Long-term prevention limits the possibility you’ll face the hardest pests again and avoids costly repeated treatments.
- As Needed: Know When to Call a Professional Contact a licensed pest control expert if infestation spreads despite your efforts, if pests require restricted-use pesticides, or if local regulations prohibit certain treatments. Professionals provide expertise and access to advanced methods that may be essential for resistant pests.
Frequently Asked Questions
What Makes Certain Pests Harder to Eliminate Than Others?
Some pests are harder to eliminate because they reproduce quickly, hide in hard-to-reach places, or develop resistance to common treatments. Pests like bed bugs can survive without feeding for months, requiring multiple, targeted treatments to fully get rid of them.
Can Seasonality Affect How Difficult Pest Control Efforts Will Be?
Yes, seasonality influences pest activity and treatment success. For example, termites are more active in warm months, so treatments then are more effective, while rodent infestations might worsen in winter as they seek indoor shelter. Timing treatments with pest life cycles improves outcomes.
How Does Pest Behavior Impact the Success of DIY Treatments?
Pest behavior like nesting habits and food preferences can limit DIY methods. Ants that farm aphids or termites inside wood structures often need professional-grade baits and fumigation because surface sprays don’t reach their colonies. Understanding behavior helps pick the right tactic.
What Role Does Proper Identification Play in Controlling Hard-To-Get-Rid Pests?
Correctly identifying the pest is important since different species require different treatments. Mistaking carpenter ants for termites, for example, could lead to ineffective control because they have different nesting habits and damage patterns. Professional inspection helps ensure targeted action.
Are Multiple Treatment Methods More Effective Than a Single Approach?
Using multiple methods often improves success because it addresses pests at various life stages and hiding places. For instance, combining baiting, spraying, and heat treatments targets bed bugs better than any single method alone, reducing the chance of survivors and reinfestation.
How Important Is Pest Sanitation and Home Maintenance in Preventing Tough Infestations?
Sanitation and repairs reduce food, water, and shelter for pests, lowering infestation risk. Fixing leaks, sealing cracks, and cleaning crumbs helps block entry points and eliminates what pests need to survive. This support makes chemical or physical treatments more effective and lasting.
Key Points to Remember
Termites rank among the hardest pests to fully eliminate because they live hidden inside structures, making direct treatment challenging and often requiring multiple visits over months. You can start by inspecting your home’s foundation and wooden areas for mud tubes or damaged wood, then applying a termiticide labeled for your specific infestation type to prevent colony expansion. Monitoring devices like bait stations provide valuable feedback on treatment progress and can help you decide when professional intervention becomes necessary to avoid costly damage. Taking these steps today can reduce the chance of widespread infestation and save you money in the long run.






One Comment