How to Get Rid of Shin Splints Safely: A Complete Recovery & Prevention Guide
To get rid of shin splints safely, start with rest, ice, and gentle stretching, then gradually strengthen your lower legs. Adjusting your footwear and avoiding high-impact activities until the pain stops also helps speed up recovery. Most runners return to pain-free activity within 3 to 6 weeks when they treat shin splints properly.
This information suits runners and fitness enthusiasts struggling with shin pain. You’ll find clear steps for immediate relief, long-term healing, and prevention strategies to keep shin splints from coming back. Guidance on exercises, footwear choices, and when to seek medical advice will support a safe and effective path to recovery.
Key Takeaways
- Rest for 24-48 hours by avoiding use of the injured leg, then gradually resume low-impact activities to heal shin splints effectively.
- Stop exercising immediately if shin pain returns, and take an additional 1-2 weeks off from repetitive activities to prevent worsening.
- Use ice packs on your shins for 15-20 minutes several times daily to reduce inflammation and pain during the initial injury phase.
- Strengthen your tibialis muscles with targeted exercises to reduce shin splint risk by up to 73 percent.
- Wear flexible, cushioned shoes or orthotics suited to your foot type to prevent shin splints and support recovery.
- Apply compression sleeves during daily activities to improve circulation and speed up healing of shin splints.
How to Get Rid of Shin Splints: Immediate and Long-Term Steps
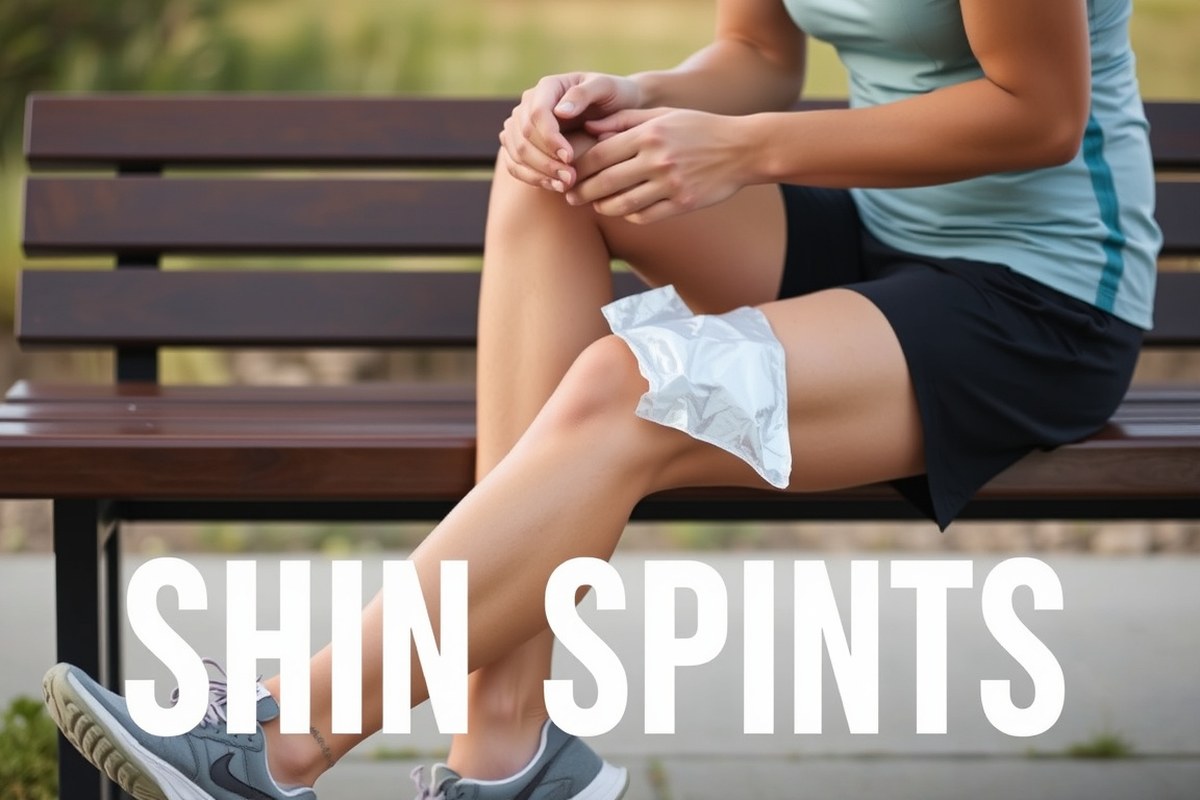
The first step when you feel shin splint pain is to stop the activity causing the discomfort immediately. Continuing to run or perform high-impact exercises can worsen the injury and extend recovery time. Early rest allows the inflamed muscles and connective tissues along your shins to begin healing without added stress.
Shin splint recovery usually spans 3 to 6 weeks for most runners to return to pain-free running, though it can take up to 3 to 6 months for complete healing in some cases. The recovery process follows clear phases: initial rest to reduce pain, gradual rehabilitation to restore strength and flexibility, and a cautious return to running to avoid relapse. Follow these steps to structure your recovery:
- Stop the aggravating activity. The moment you feel shin splint pain, cease running or jumping to prevent further injury. Rest completely for the first 24 to 48 hours, minimizing weight-bearing on the affected legs as much as possible during this period.
- Use ice to control swelling. Place ice packs on your shin area for 15 to 20 minutes every 2 to 3 hours over the first 48 hours. This approach helps to decrease inflammation and ease discomfort.
- Engage in active rest with low-impact activities. Once acute pain lessens, usually after 2 or 3 days, switch to activities such as swimming, cycling, or yoga. These allow you to maintain fitness without putting stress on your shins.
- Begin strengthening and stretching exercises. After pain subsides, introduce rehab exercises focused on your calves, shins, and foot muscles. Strength grades typically show shin splint sufferers produce about 30 percent fewer single-leg calf raises compared to healthy runners, highlighting the importance of targeted muscle rehab.
- Monitor pain and adjust activity accordingly. Gradually reintroduce running or weight-bearing activities, starting with short, easy sessions. Stop immediately if you feel shin pain return. If pain recurs, give yourself an additional 1 to 2 weeks of rest before trying again.
- Return to running cautiously. Increase your running volume and intensity by no more than 10 percent per week once pain-free for several consecutive days. Avoid hills, hard surfaces, or speedwork initially to prevent overload.
- Maintain preventive routines. Even after you return to full running, include regular strength exercises and flexibility work to reduce the risk of shin splints coming back.
Knowing when to rest and when to resume activity depends entirely on your pain levels during and after exercise. Pain-free sessions signal readiness to progress, while any shin pain means you should pause and rest longer. Sticking to this phased plan reduces the risk of turning a temporary issue into a chronic setback.
What Causes Shin Splints and Why Am I Prone to Them?
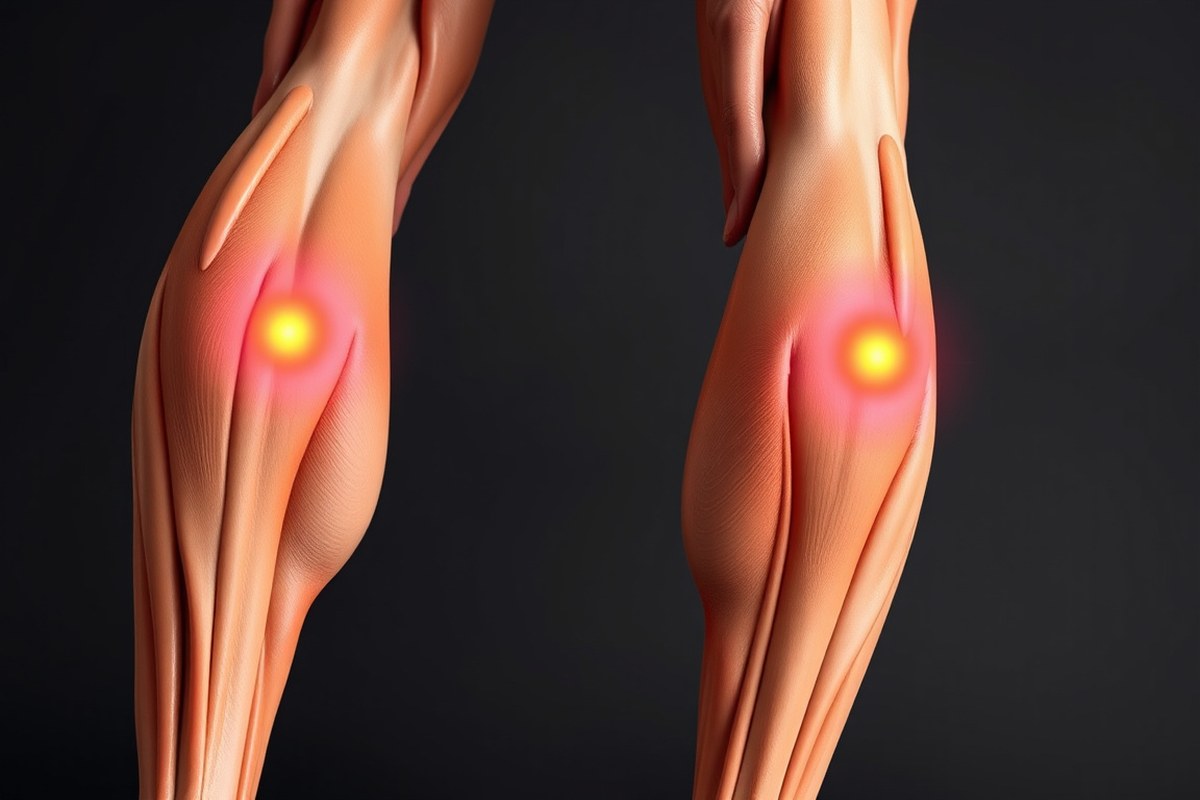
Shin splints refer to pain along the front or inside edge of your lower leg, commonly triggered by repetitive stress on the shinbone and the connective tissues that attach muscles to the bone. This pain usually arises from overuse injury, when the tibialis anterior or tibialis posterior muscles get irritated from too much high-impact activity such as running, hiking, or dancing. The irritation can cause inflammation where these muscles attach to the tibia, leading to discomfort especially while bearing weight or moving the foot.
Activities that place repeated stress on your legs, like running on hard surfaces or abruptly increasing your workout volume and intensity, significantly raise your risk. Running mechanics also matter; for example, overpronation, when your foot rolls inward excessively with each step, can strain the tibialis posterior muscle and surrounding tissues. Tight calf muscles or an inability to properly flex your foot upward toward the shin also contribute by limiting normal ankle motion, forcing your shin muscles to work harder than usual.
Foot shape plays a notable role in how prone you are to developing shin splints. People with flat feet or low arches often experience excessive pronation, increasing the load on the shin muscles and bones. Conversely, overly high arches can reduce foot flexibility, concentrating impact forces on the tibia. Worn-out or improper footwear fails to provide needed cushioning and support, further elevating the risk. Visiting a specialty athletic shoe store during recovery allows you to be fitted properly for shoes suited to your foot type and running style, which can prevent future injury.
Beginners or runners returning after a break face a higher chance of shin splints because their bones and muscles have not yet adapted to new or increased stresses. Rapid increases in mileage, hill training, or switching running surfaces without enough conditioning contribute to overloading the shin area. Muscle imbalances, especially weakness in the lower leg or core, reduce shock absorption and allow undue stress on the shinbones.
Wear supportive shoes tailored to your foot type, and avoid increasing your running volume by more than 10% per week to lower shin splint risk.
Understanding these causes and risk factors helps you identify what might be contributing to your shin pain. Taking steps to address muscle tightness, using appropriate footwear, managing training loads, and improving running mechanics are all practical ways to reduce your susceptibility. Ignoring these factors or pushing through pain can worsen the injury, sometimes leading to stress fractures, a more serious bone injury requiring longer recovery.
Rest, Ice, Compression, and Elevation (RICE): What Works Best and When
The RICE method, rest, ice, compression, and elevation, is effective in managing shin splints when applied correctly and at the right time. Using rest and low-impact activities helps avoid worsening pain while icing reduces inflammation in the first days. Compression and elevation support healing by promoting blood flow and limiting swelling. Switching to heat therapy is best after the acute pain and swelling have gone down to help loosen tight muscles.
Correct Use of Rest and Activity Modification
Complete rest is not always necessary for shin splints, but reducing high-impact activities is important. Avoid running or jumping until the pain subsides, usually for a few days to a week. You can keep moving with low-impact exercises like swimming, cycling, or yoga to maintain fitness without stressing your shins. Gradually reintroduce running once the shin pain is mild or gone, following proper warm-up and stretching routines.
Balancing rest and gentle activity helps prevent stiffness and muscle weakening while protecting the injured tissue. Overdoing rest can lengthen recovery, but pushing through sharp or worsening pain usually delays healing.
Timing and Techniques for Ice Therapy
Ice therapy is most effective during the first 48 to 72 hours after shin pain starts. Apply ice packs for 20 to 30 minutes at a time, repeated 4 to 8 times daily. Use a towel or cloth between the ice and skin to prevent frostbite. Frozen peas or gel packs are convenient and affordable options. A good checklist for ice application:
- Apply ice for no more than 30 minutes per session
- Rest for at least 1 hour between ice sessions
- Use a thin barrier like a cloth between ice and skin
- Focus on the most painful areas along the shin
- Stop if skin becomes numb or painful
After 3 to 5 days, when swelling and sharp pain decrease, switch to heat therapy to improve blood flow and loosen tight tissues. Heat packs or warm towels should be applied for 15 to 20 minutes, but never immediately after activity or on inflamed areas.
When and How to Use Compression and Elevation
Compression helps reduce swelling and supports muscles during healing. You can use compression socks or sleeves designed for running or medical compression bandages wrapped snugly but not tightly around your lower leg. Over-compression may cut off circulation, so aim for firm but comfortable pressure.
Elevation reduces blood pooling and swelling. Raise your leg above heart level whenever you sit or rest, especially during the first few days of shin splints. Combine elevation with ice to maximize the anti-inflammatory effect. Effective compression and elevation habits include:
- Wearing compression socks during and after exercise for better muscle support
- Elevating your legs on a pillow or chair for 15 to 30 minutes several times daily
- Removing compression at night to allow circulation
- Avoiding continuous tight bandages that cause numbness or increased pain
- Using ice while improve to reduce inflammation
The Best Exercises to Heal and Strengthen Your Shins
To heal and strengthen your shins effectively, consistently perform stretches and strengthening exercises targeting calf muscles and the tibialis anterior, combined with cautious foam rolling. Aim to do these exercises daily or at least three to four times a week, particularly after running or other weight-bearing activities. Starting with gentle stretches can ease shin splint pain, while gradual strengthening helps prevent future injuries.
Key Shin and Calf Stretches to Include
Stretching tight calf muscles and the shin area can relieve pain caused by shin splints. Proper calf stretches improve flexibility, reducing muscle tension that pulls on your shin bone. Perform stretches both before and after running or intense exercise to maintain muscle elasticity.
- Calf Stretch Against Wall: Stand facing a wall with one foot forward and the other back. Keep both heels on the ground and gently lean forward, bending the front knee while keeping the back leg straight. Hold this stretch for 30 seconds and switch legs.
- Seated Shin Stretch: Sit on your heels with toes pointed straight back. Lean your body backward to stretch the front of your shins. Hold for 20 to 30 seconds.
- Toe Point and Flex: Sit on the floor with legs extended. Point your toes away from you, then flex them back toward your body. Repeat 10 to 15 times to stretch your shin muscles.
- Standing Achilles Stretch: Stand with feet hip-width apart and raise your heels off the ground to stretch your calves. Hold for 15 seconds, then slowly lower heels to the floor.
Incorporate these stretches for about 5 to 10 minutes daily, particularly on days when you run. Avoid bouncing during stretches to prevent muscle strain.
Strengthening Exercises for Tibialis Anterior and Calves
Strengthening muscles that support your shin helps reduce the recurring strain that leads to shin splints. Focus on the tibialis anterior (the muscle along the front of your shin) and the calves. Strengthening these muscles improves shock absorption and stability while running or walking.
- Toe Raises: Stand with feet flat on the ground. Slowly lift your toes while keeping heels grounded. Hold for 2 to 3 seconds, then slowly lower. Perform 3 sets of 15 reps.
- Heel Raises: Stand on a step or flat surface. Raise your heels off the ground so you’re on your toes, then slowly lower back down. Do 3 sets of 15 reps.
- Ankle Circles: Sit or lie down and lift one foot off the ground. Rotate your ankle slowly in circles 10 times clockwise, then 10 times counterclockwise. Repeat with the other foot.
- Heel Walking: Walk forward on your heels with your toes raised off the ground for 30 seconds. Rest and repeat 3 times.
Begin strengthening exercises once pain decreases and your shins are ready. Performing these exercises 3 to 4 times per week can build endurance without overloading healing muscles. Adjust repetition and sets according to your comfort level to avoid aggravation.
How to Foam Roll Safely for Shin Pain Relief
Foam rolling a few key leg muscles can reduce inflammation and support recovery, but avoid rolling directly on painful shin areas. Target muscles like the calves and hamstrings to improve circulation and muscle relaxation without risking further irritation.
- Position the Foam Roller: Sit on the floor and place the foam roller under your calf muscle, avoiding the front of your shin.
- Apply Gentle Pressure: Lift your body slightly with your hands and slowly roll your calf over the foam roller from the ankle to the back of your knee.
- Roll Slowly: Move back and forth for 1 to 2 minutes per leg, stopping if you feel sharp pain.
- Roll Hamstrings: Place the foam roller under your hamstrings and repeat the slow rolling process to release tension in your upper leg.
Perform foam rolling after workouts or on rest days for 5 to 10 minutes. Avoid rolling directly over the shin bone or inflamed areas, as this can worsen shin splint pain. Consistency and gentle technique promote healing and muscle recovery.
Footwear and Orthotics: Choosing and Using Shoes to Prevent Shin Splints
Choosing the right footwear is key to preventing and recovering from shin splints. Look for shoes designed specifically for running or your preferred sport, as they tend to offer better shock absorption and support needed to reduce strain on your shins. Your foot type strongly influences your shoe choice: flat feet need stability or motion-control shoes, while high arches benefit from cushioned shoes to absorb impact.
Orthotic inserts or arch supports can add extra cushioning and alignment correction, especially if your feet contribute to your shin pain. Shock-absorbing insoles can help reduce inflammation and provide comfort while your shins heal. However, expensive orthotics aren’t always necessary; simple over-the-counter inserts that match your foot shape can be effective.
Replacing shoes regularly prevents wearing down the cushioning and support that protect your shins. A good rule is every 6 months or about 500 miles of running. Worn-out shoes lose shock absorption and may worsen your symptoms or cause new injuries.
Different terrains call for specific shoe features. For instance, trail running shoes have grippier soles to handle uneven surfaces, while road running shoes provide more cushioning for hard pavement. Using shoes suited to your running environment lowers the risk of shin splints. Use this checklist when buying running shoes to reduce shin splints risk:
- Know your foot arch type (flat, neutral, high).
- Choose shoes designed for your sport and terrain.
- Look for shock absorption in the midsole.
- Ensure appropriate fit, snug but not tight, with some toe room.
- Consider adding orthotic inserts if you have overpronation or underpronation.
- Plan to replace shoes after 6 months or 500 miles of use.
| Shoe/Insert Type | Pros | Cons |
|---|---|---|
| Neutral Running Shoes | Good shock absorption; flexible for average arches | Not ideal for flat or high arches |
| Stability/Motion-Control Shoes | Support for flat feet; controls overpronation | Can feel stiff; less cushioning feel |
| Cushioned Shoes | Extra shock absorption for high arches | Less stability for flat-footed runners |
| Shock-Absorbing Orthotics/Insoles | Additional arch support and cushioning | May require fitting; cost varies ($20, $100+) |
| Trail Running Shoes | Improve grip on uneven terrain | Heavier; less cushioning on hard surfaces |
Rotate shoes if you run frequently on different surfaces to match the demands of each terrain. Check shoe tread and midsole foam regularly: uneven wear or compressed foam means it’s time for replacement. Adjust your footwear choice if shin splints continue despite following these guidelines.
Replace your running shoes every 6 months or after 500 miles to maintain proper support and prevent shin splints. Continuing in worn-out shoes can worsen your injury.
Planning a Safe Return to Running and Sports After Shin Splints
You can safely start running again after shin splints only once the pain has fully disappeared during and after activity. Pushing through pain increases the risk of a stress fracture in your shinbone. A gradual return is essential to avoid setbacks.
Begin by reducing volume and intensity to about half of what you did before the injury. Avoid hills, uneven terrain, and hard surfaces like concrete initially. Monitoring pain closely during your return helps you adjust the plan to your needs.
Use the following step-by-step plan to guide your safe return to running and sports after shin splints. Each step represents a milestone, and moving to the next depends on pain-free progress. Track your shin pain daily to decide when to slow down or stop.
- Rest until pain-free: Stop running and intense lower leg activities until you can walk and run without any shin pain during or after.
- Resume light activity at 50% volume: Start with half your usual running distance or time at 50% of your pre-injury intensity. Focus on flat, soft surfaces like grass or a track.
- Increase volume gradually: Increase distance or time by no more than 10% to 20% each week if pain remains absent. Maintain lower intensity and avoid hills or uneven ground for at least four weeks.
- Monitor pain levels: Use a pain scale from 0 (no pain) to 10 (severe pain). Stop or reduce activity if pain reaches 3 or higher during or after exercise. Persistent pain means returning to the previous step or rest.
- Reintroduce higher intensity slowly: After consistent pain-free running at increased volumes, gradually increase your running intensity. Avoid sprinting or steep hill work until confident in your shin strength.
- Vary terrain cautiously: Slowly include harder surfaces and mild hills, observing for any shin discomfort. Switch surfaces weekly rather than daily to allow adaptation.
- Incorporate strength and flexibility exercises: Add shin-specific strengthening and stretching exercises to your routine to support ongoing recovery and reduce re-injury risk.
- Maintain regular self-assessment: Keep a training log noting distance, intensity, terrain, and any shin pain. This helps spot patterns or triggers early and guides adjustments to your plan.
Recognizing Complications and Knowing When to Seek Medical Help
Worsening shin splint symptoms or the development of stress fractures require prompt medical attention to prevent further damage. Pay close attention if your initial pain, usually along the inner edge of the shin and described as dull or sore, escalates into sharp or persistent pain during rest. Stress fractures often cause localized tenderness, swelling, and sometimes visible bruising. These symptoms suggest the bone may be compromised, needing professional diagnosis and treatment.
Self-treatment should stop and a doctor should be consulted if your pain lasts longer than two weeks despite rest and standard care or if the pain intensifies, becomes sharp, or affects daily activities. Difficulty bearing weight or noticeable swelling also signals the need for evaluation. A healthcare provider can differentiate between shin splints and stress fractures using a physical exam and imaging techniques like X-rays or MRI scans, which are the standard diagnostic tools for assessing bone integrity.
Early diagnosis is important. If a stress fracture is confirmed, you may need to avoid weight-bearing activities for 6 to 8 weeks and possibly wear a walking boot. Physical therapy or referral to a sports medicine specialist could be part of the recovery plan depending on the severity. Untreated stress fractures risk worsening, which could lead to prolonged downtime or surgery.
- Pain progressing from dull soreness to sharp or constant pain
- Swelling, bruising, or visible edema around the shin
- Pain that does not improve or worsens after 10-14 days of rest
- Tenderness localized to a small spot on the shin bone
- Difficulty walking or bearing weight on the leg
- Persistent weakness or instability in the lower leg
Use these warning signs as a checklist to decide whether to seek medical care. Your doctor might start with a physical examination and recommend X-rays, although early stress fractures sometimes do not show on X-rays and may require MRI or bone scans. Costs vary: basic X-rays typically range from $200 to $1,000, depending on location and insurance. MRI scans can cost $1,000 or more but provide more detail on soft tissue and bone stress.
Professional treatment can include immobilization, anti-inflammatory medications under guidance, and a tailored rehabilitation regimen. Avoid returning to sports too soon, as repeated microtrauma can worsen the injury. Follow-ups with your healthcare provider ensure recovery is on track and help prevent recurrence.
Common Mistakes and Prevention Strategies for Reliable Shin Splints Recovery
Healing shin splints requires avoiding common mistakes that can prolong recovery and using prevention strategies that adjust to your activity, season, and terrain. Careful attention to training practices, footwear, and body care will help you heal faster and reduce the chance of shin splints returning.
Avoiding Common Treatment Pitfalls
One major cause of delayed shin splints recovery is pushing through pain without proper rest. Overloading your shins too quickly after symptoms appear slows healing and can worsen the injury. Foam rolling the shins and calves is a low-cost, effective technique to reduce tightness, improve blood flow, and speed recovery. Neglecting warm-up and cool-down routines that prepare and relax your muscles also hampers healing and increases reinjury risk. Common treatment mistakes to avoid include:
- Skipping rest days and returning to running too soon
- Warming up inadequately or not cooling down after runs
- Ignoring muscle tightness by not foam rolling or stretching
- Continuing to run on hard or uneven surfaces without variation
- Wearing worn-out or inappropriate footwear for your foot type
- Failing to strengthen weak tibialis anterior muscles that support the shin
Correcting these errors by gradually reducing intensity, spending 5-10 minutes on warm-ups/cool-downs, and foam rolling daily can reduce shin splints by up to 73 percent according to studies targeting tibialis strengthening. Prioritizing rest and muscle care leads to more reliable and faster recovery.
Changing Training and Terrain Safely
Adjusting your running environment and exercises helps prevent shin splints from returning through different seasons and surfaces. Gradually increasing mileage and intensity by no more than 10 percent weekly avoids sudden overload to your shins. Switching to softer terrains like grass, trails, or tracks reduces impact forces that strain your shinbones. Pay attention to these prevention tips across different situations:
- Run on softer surfaces during the initial recovery weeks
- Introduce hill training slowly, focusing on proper form
- Rotate running shoes every 300-500 miles to maintain cushioning
- Wear shoes with good arch support or orthotics if you overpronate
- Warm up with dynamic stretches targeting calves and feet before running
- Include cross-training activities like swimming or cycling on off days
Do not increase your running intensity or distance abruptly; allow your shins to adapt over several weeks for sustained injury prevention.
Changing your training environment deliberately and maintaining variety in workouts allows your muscles and bones to strengthen while minimizing overuse risk.
Incorporating Nutrition and Natural Remedies
Nutrition supports bone and muscle healing by providing key nutrients like calcium, vitamin D, and protein. Include dairy products, leafy greens, nuts, and lean meats in your diet to promote tissue repair. Staying hydrated aids circulation and reduces muscle cramps that strain your shins. Natural remedies such as applying ice and using anti-inflammatory herbs like turmeric may help reduce pain and swelling during recovery.
Complement these efforts with daily stretches for your calves and tibialis anterior to maintain flexibility. Consistent foam rolling also supports circulation and tissue health even during rest weeks. While these practices do not replace medical treatment if symptoms worsen, they can speed healing and decrease recurrence risk when combined with proper exercise and rest.
Step-by-Step Action Plan to Beat Shin Splints
Follow this plan to relieve shin splints safely and return to running without pain. Track your progress by noting reduced discomfort and improved strength.
- Day 1, 3: Rest completely from running and apply ice to your shins for 15-20 minutes every 3-4 hours. You’ll know it’s working when swelling and sharp pain start to fade.
- Day 4, 7: Begin gentle shin-strengthening exercises like toe raises and ankle circles twice a day. Progress is clear when you can do exercises without increased shin pain afterward.
- Week 2: Switch to low-impact cardio such as swimming or cycling to maintain fitness without stressing your shins. Improvement shows as your pain stays low during and after activity.
- Week 3: Select running shoes that fit well and provide good cushioning, or use orthotics if recommended. You’ll notice less discomfort walking or running short distances.
- Week 4: Resume running with short, easy sessions on soft surfaces, adding about 10% more distance each run. Continue RICE treatments as needed. Success means running pain-free for 15, 20 minutes.
- Ongoing: Keep strengthening your lower legs and schedule weekly checks on your footwear’s condition. Prevention is confirmed when shin pain does not return despite regular training.
- If pain worsens or doesn’t improve after 4 weeks: Consult a healthcare professional to rule out stress fractures or other issues requiring treatment beyond self-care.
Frequently Asked Questions
How Long Does It Typically Take to Get Rid of Shin Splints?
Most runners recover from shin splints in 3 to 6 weeks with proper treatment, including rest and exercises to strengthen the shins. Staying consistent with care helps ensure a timely return to pain-free running.
Can Shin Splints Heal Without Medical Treatment?
Shin splints often improve with rest and self-care, but medical advice accelerates recovery and prevents complications. Doctors can prescribe treatments or refer you to physiotherapists for faster relief.
Is It Okay to Run Through the Pain of Shin Splints?
Running through shin splint pain often worsens the injury and prolongs recovery. It’s important to stop when pain begins and rest for at least 1 to 2 weeks to allow healing.
Can Shin Splints Cause Permanent Damage If Untreated?
Untreated shin splints may lead to stress fractures or chronic pain. Early rest and proper care reduce the risk of long-term damage or complications.
Do Tight Calf Muscles Contribute to Shin Splints?
Yes, tight calves can increase shin splint risk by limiting ankle flexibility. Stretching and calf-strengthening exercises help reduce pain and prevent recurrence.
Will Changing Shoes Alone Get Rid of Shin Splints?
Switching shoes may help, but it won’t fix shin splints by itself. Proper footwear combined with strengthening, rest, and stretching offers a more effective solution.
Before You Go
Shin splints often improve with proper care, but the key is consistent action and avoiding risky habits. Start by evaluating your running shoes today to ensure they provide enough support and cushioning for your stride. Taking this step helps reduce excess stress on your shins and can speed your recovery while lowering the chance of recurrence.