How to Get Rid of Piercing Bump: A Complete Guide That Really Works
How to get rid of piercing bump starts with identifying the exact type of bump you have. Most piercing bumps are irritation bumps that usually clear up within six weeks with proper care and cleaning. Changing jewelry repeatedly doesn’t help and may actually make the bump worse.
This advice helps anyone dealing with bumps on new or old piercings, including nose and cartilage piercings. You’ll learn how to spot different types of bumps, use safe home treatments like salt soaks, select the best jewelry, and know when it’s time to see a professional for help.
Key Takeaways
- A piercing bump usually appears as a small red or skin-colored lump caused by irritation, friction, or poor jewelry and often resolves within six weeks.
- Use saline soaks for fresh or actively irritated bumps under two weeks old, switching to chamomile compresses if no improvement occurs after two weeks.
- Keep your jewelry in place without removing or changing it for at least six weeks to allow proper healing and reduce bump risk.
- Persistent bumps may take several months to fade, and some can last between 12 to 24 months, so patience is essential during treatment.
- Identify bump types by timing and appearance: irritation bumps appear early and improve with saline; granulomas form around six weeks; keloids usually develop after three months.
- Select proper jewelry made of high-quality materials and avoid frequent changes to minimize friction and irritation that cause bumps.
What Is a Piercing Bump and Why Does It Form?
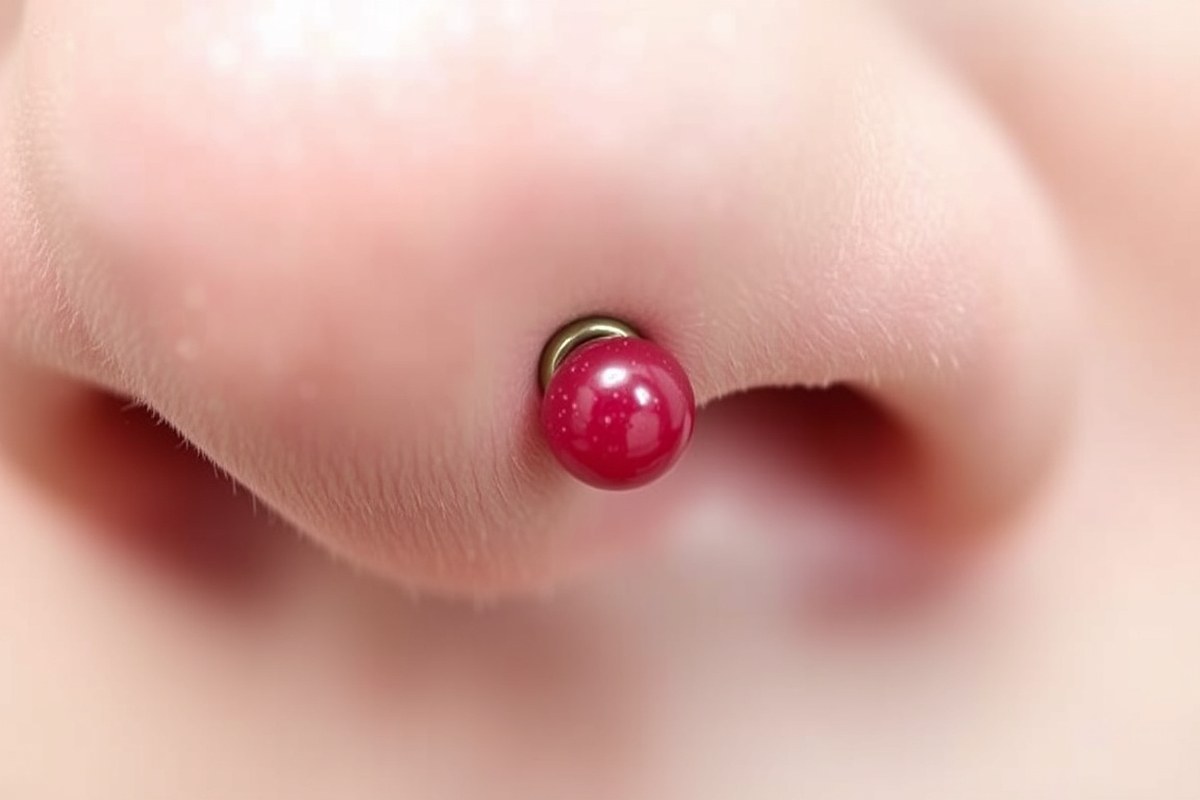
A piercing bump is a small raised area of skin that forms around a piercing site. It develops as part of your body’s natural healing process and immune response to the trauma caused by piercing the skin. This bump often happens because your body sees the pierced tissue as an injury, triggering localized inflammation. The immune system sends cells to protect and repair the area, which can result in swelling and a visible bump. This reaction usually includes new tissue growth or excess collagen forming around the wound.
Common causes of piercing bumps vary by piercing type but generally include irritation from friction, pressure, or allergic reactions to the jewelry. For example, nose piercings frequently develop bumps because the nose is exposed to mucus, often touched, and rubbed by face masks, increasing irritation. Cartilage piercings also tend to form bumps since the tissue is less flexible and slower to heal compared to earlobes. Poor jewelry choices or sleeping on the piercing can cause constant friction or pressure, irritating the skin and promoting bump formation.
Also, the use of improperly cleaned hands or harsh chemicals can exacerbate inflammation, introducing bacteria that delay healing and lead to bumps. Avoiding touching or rotating the jewelry excessively is important, as squeezing or popping the bump can damage tissue and cause the bump to become larger or infected.
Some bumps form quickly within the first few weeks and resolve on their own when irritation decreases, while others last longer, especially if caused by more significant tissue reactions like granulomas or keloids. An irritation bump tends to be small, red, or skin-colored, and sits right at the piercing hole. These bumps usually improve within six weeks of proper care. Nose and cartilage piercings have a higher risk of this kind of bump due to location and tissue type. Granulomas often appear after several weeks or months and require different approaches, while keloids can grow progressively over months or years, extending well beyond the original piercing site.
How to Identify Your Piercing Bump Type: Irritation, Granuloma, or Keloid

To tell if your piercing bump is irritation, granuloma, or keloid, check its size, color, texture, timing, and growth pattern. An irritation bump is usually small and soft, appearing within weeks of piercing, while granulomas develop slower and can bleed easily. Keloids form months later, feel firm, and grow beyond the piercing area. Watch for infection signs like redness, warmth, and pus, which require prompt care.
Signs of an Irritation Bump
An irritation bump tends to be small, soft, and skin-colored or slightly red. It often shows up within the first few weeks to three months after getting pierced or may appear after accidentally snagging the jewelry. These bumps usually occur due to pressure, friction, or trauma, such as from tight clothing or rough handling.
You might notice the bump becomes tender but not intensely painful. It stays close to the piercing hole and often shrinks once the irritant is removed or care improves. These bumps are generally easy to treat at home with proper cleaning and avoiding further irritation.
Identifying a Granuloma
Granulomas appear as small, red or flesh-colored fluid-filled bumps that can bleed easily if touched. They often start forming around 6 to 8 weeks or more into healing and result from ongoing low-level trauma or irritation. Some swelling and tenderness might occur, but pain is usually mild.
Granulomas may persist despite home care and sometimes need adjustments in jewelry or professional treatments. They tend not to grow beyond the piercing site but can cause discomfort and bleeding, especially if caught or picked at frequently.
Characteristics of Keloids
Keloids are firm, rubbery, and sometimes shiny growths that extend beyond the original piercing wound. They usually develop 3 to 12 months after the piercing and can continue growing over time. Unlike irritation bumps or granulomas, keloids are a type of abnormal scar tissue linked to a genetic predisposition.
Keloids often feel less painful, though they may be itchy or cause mild tenderness. They rarely shrink without medical treatment and do not respond well to home remedies aimed at irritation bumps. Seeing a professional is advised if you suspect a keloid, especially if it grows beyond the pierce site.
Infection Warning Signs
Infected bumps can occur at any stage of healing and usually look swollen, red, and warm to the touch. Pus or yellow-green discharge may appear, sometimes with a foul smell. You might also experience increasing pain, spreading redness around the piercing, and possibly fever with severe infection.
Infections require careful attention. Mild infections might improve with good cleaning and proper wound care, but moderate to severe infections need prompt medical evaluation to avoid complications.
Never pop or squeeze any piercing bump, especially if it looks infected; doing so risks worsening the infection.
Use this step-by-step decision tree to identify your piercing bump type safely:
- Observe the bump’s size and color: Is it small, soft, and skin-colored or red (irritation), red and fluid-filled (granuloma), or firm and growing beyond the piercing (keloid)?
- Check the timing: Did it appear within weeks after piercing (irritation), after 6-8 weeks (granuloma), or several months later (keloid)?
- Feel the bump: Is it tender but not hard (irritation), bleeds easily (granuloma), or firm and rubbery (keloid)?
- Look for discharge: Is there none (irritation or keloid) or yellow/green pus (infection)?
- Note growth or spread: Does the bump shrink with less irritation (irritation), stay stable or slowly improve (granuloma), or grow beyond wound edges (keloid)?
- Assess for warmth, swelling, or fever, which suggest infection needing medical care.
- Based on these points, choose appropriate home care or seek professional help.
| Bump Type | Appearance | When It Appears | Main Cause | Self-Treatable? |
|---|---|---|---|---|
| Irritation Bump | Small, soft, skin-colored or slightly red | Week 1-12, often after snag or trauma | Pressure, friction, poor jewelry choice | Yes – remove irritants and keep clean |
| Granuloma | Red or flesh-colored, fluid-filled, bleeds easily | 6-8 weeks or later during healing | Ongoing low-level trauma or irritation | Sometimes – may need jewelry change or professional care |
| Keloid | Firm, rubbery, often shiny; grows beyond wound | 3-12 months or more after piercing | Genetic predisposition, abnormal scar tissue | No – professional treatment needed |
| Infected Bump | Red, swollen, warm, pus-filled | Any healing stage | Bacterial contamination | Mild yes; severe requires medical attention |
Proper Cleaning and Aftercare to Heal Piercing Bumps Fast
Cleaning your piercing correctly with saline soaks helps reduce irritation and promotes faster healing of the bump. Using a properly prepared saltwater solution gently removes buildup without disrupting the delicate skin around your piercing. Regular, controlled cleaning combined with avoiding over-cleaning supports your piercing’s natural recovery.
How to Prepare a Saline Soak Solution
Use a simple mixture of non-iodized sea salt and distilled or boiled water to make a saline soak that mimics your body’s natural fluids. This solution cleanses the area and draws out impurities without harsh chemicals or harsh scrubbing. Avoid using table salt because additives can irritate the skin.
- Heat 1 cup (8 ounces) of distilled water to a warm, comfortable temperature (around 100°F or 38°C).
- Stir 1/4 teaspoon of non-iodized sea salt into the water until it completely dissolves.
- Let the solution cool enough to safely soak your piercing without burning your skin.
- Store any unused saline in a clean, covered container for up to 24 hours, making a fresh batch daily.
Correct Technique for Soaking a Piercing
Apply the saline soak carefully to avoid disturbing your piercing or pushing bacteria deeper into the wound. Keep your hands clean and avoid excessive rubbing or using harsh cleansers. Soaking helps soften any crusting or discharge so you can gently remove it without causing further irritation.
- Wash your hands thoroughly with soap and water before touching your piercing or saline solution.
- Submerge the piercing area in the saline soak for 5 to 10 minutes or use a sterile gauze or cotton ball soaked in saline and hold it gently against the bump.
- After soaking, use a clean cotton swab or gauze to carefully remove any loosened debris or crust without pulling on the skin.
- Pat the area dry with a clean paper towel or let it air dry; avoid using cloth towels that may harbour bacteria.
Recommended Cleaning Frequency
Consistent yet gentle cleaning plays a key role in healing. Over-cleaning can irritate the bump more and slow healing, so balance is important. Most bumps improve within six weeks when you clean once or twice daily and minimize touching or twisting your jewelry.
- Soak your piercing once or twice a day with the saline solution, depending on the bump’s severity and your piercer’s advice.
- Continue the saline soaking and gentle cleaning routine daily until the bump completely resolves or a professional advises otherwise.
- Avoid excess cleaning beyond this routine, aggressive rubbing, or using alcohol and hydrogen peroxide, which dry and irritate skin.
Jewelry Selection and Changes That Help Prevent and Reduce Bumps
Choosing the right jewelry material is key to preventing and reducing piercing bumps. Hypoallergenic metals like implant-grade titanium and surgical stainless steel are the safest since they rarely cause allergic reactions or irritation. If you have a gold piercing, make sure it is solid 14 karat or higher; avoid gold-plated or filled jewelry, as the plating can wear off and trigger bumps. Niobium and biocompatible plastics are also good options for sensitive skin. Switching to these materials can help reduce ongoing irritation, although it won’t instantly remove existing bumps.
It’s best to keep your initial piercing jewelry in place for at least 6 weeks to allow proper healing. After this period, consider downsizing or switching jewelry only if you notice persistent bumps caused by excessive pressure, friction, or an allergic reaction. Jewelry that’s too large or heavy can create irritation bumps due to constant movement or pulling on the piercing site. Perfectly fitting jewelry should feel comfortable without moving too much or pressing hard against your skin.
Changing jewelry too soon may cause more harm than good. Repeatedly removing and reinserting jewelry during the healing phase raises the risk of introducing bacteria and causing fresh irritation or infection. Removing jewelry without professional advice can lead to the hole closing prematurely, which traps bacteria inside and worsens the bump. Once the piercing is fully healed, usually after several months depending on the location, you can switch jewelry more freely.
- Choose implant-grade titanium, surgical stainless steel, niobium, or solid 14k+ gold
- Avoid gold-plated, costume, or cheap metals that often irritate skin
- Leave initial jewelry in for a minimum of 6 weeks before changing
- Downsize or change jewelry if your bump is caused by excess pressure or friction
- Avoid frequent jewelry changes during healing, limit to only when necessary
- Consult a professional before removing jewelry from an irritated or infected piercing
- Ensure new jewelry fits snugly without causing pressure to reduce bump risk
Check your piercing jewelry regularly for signs of wear or loose fittings. When downsizing, choose smaller gauge or thinner posts that don’t move excessively but still allow airflow to the piercing. For cartilage and nose piercings, this can reduce irritation significantly, helping the bump shrink over 2 to 8 weeks with proper care. Avoid overly tight jewelry that presses the skin together, as this often worsens moisture and irritation bumps.
Good healing depends on how well your jewelry fits and what it’s made of combined with consistent aftercare. Jewelry material can be one of many factors in bump formation, so if changing metals doesn’t improve your bump, consider other causes such as infection, trauma, or skin sensitivity. Consult a professional piercer or healthcare provider if unsure about the best jewelry for your piercing or if bumps persist despite following these guidelines.
Safe Home Treatments to Reduce Piercing Bumps: From Salt Soaks to Oils
Using a 0.9% sodium chloride saline soak is the safest and most effective way to treat most irritation bumps at home. Apply a sterile saline solution twice a day by soaking a clean cotton ball or gauze for 5 to 10 minutes on the bump. This method removes bacteria and excess fluids, which helps reduce swelling. Avoid making your own saltwater mixes, as incorrect salt levels can worsen skin irritation.
If you notice the bump persisting beyond two weeks despite saline soaks, add a chamomile compress. Steep a chamomile tea bag in hot water for 5 minutes, let it cool to a warm but comfortable temperature, then apply as a compress for 5 to 10 minutes once or twice a day. Chamomile has mild anti-inflammatory properties that can soothe persistent irritation.
Massage and oils might seem helpful but require caution. Never pop or squeeze the bump, which can cause infection or scarring. Instead, gentle massage with a professional ointment like BodyJ4You Bump Solution can sometimes reduce redness, swelling, and scarring when applied in a thin layer around (not inside) the piercing after cleaning. Always clean your hands before touching your piercing. Avoid essential oils, undiluted tea tree oil, or DIY ointments, as these can worsen irritation or cause allergic reactions.
| Treatment | How to Use | Pros | Cons | Timing |
|---|---|---|---|---|
| Saline Soaks (0.9% Sodium Chloride) | Soak cotton ball 5-10 min, twice daily | Kills bacteria, safe, easy, inexpensive | Requires consistent application | Up to 2 weeks |
| Chamomile Compress | Warm tea bag compress 5-10 min once or twice daily | Soothes inflammation, mild natural remedy | Only for persistent bumps after saline use | After 2 weeks of no improvement |
| Massage with BodyJ4You Bump Solution | Apply thin layer around piercing once daily | Reduces redness and swelling, may prevent scarring | Not a first-line treatment, avoid inside piercing | After cleaning; ongoing as needed |
| Popping or Squeezing Bump | Never do | None | Increases risk of infection and scarring | Not recommended |
Avoid treatments involving homemade salt soaks, essential oils, undiluted tea tree oil, or ointments not designed for piercings. These can irritate your skin or delay healing. Applying gentle pressure with specialized piercing patches might help draw out fluids slowly, but it’s best used under professional guidance.
Never pop or squeeze a piercing bump to avoid infection; instead, stick to gentle saline soaks and consult a professional if it worsens.
How to Reduce Irritation and Prevent Further Piercing Bumps
Reducing irritation and preventing further piercing bumps depends largely on avoiding friction, pressure, and accidental snagging. Pressure on healing piercings, especially cartilage ones, is the main cause of bumps. This includes sleeping with weight on the piercing, which can cause swelling and disrupt healing. Wearing tight headphones, helmets, or glasses can also irritate the site. Jewelry that moves excessively or is the wrong size may cause ongoing friction too. Addressing how you sleep, dress, and go about daily activities can help minimize these triggers.
Sleeping position matters most for cartilage piercings, such as in the ear or nose. Avoid lying on the pierced side by using a donut pillow made of soft foam or memory foam. This cushions the area and prevents direct contact with bedding. If a donut pillow isn’t available, try avoiding firm pillows or sleep on your back until the piercing has fully healed, usually several weeks. For nose piercings, avoid sleeping face down or pressing your nose into the pillow, since this causes constant pressure and irritation.
Jewelry movement is another common cause of irritation bumps. For hoop earrings, if the ring rotates frequently during the healing phase, it can wear on the piercing site and trigger a bump. Switching to a stud or barbell that fits snugly and doesn’t move helps reduce this risk. Downsizing the jewelry bar can prevent snagging and pulling caused by loose or oversized jewelry, especially with nose and cartilage piercings.
- Remove headphones or use over-ear styles that do not press on the piercing.
- Wear loose collars and soft fabrics to avoid rubbing against neck or lip piercings.
- Be mindful when handling hair, hats, or scarves that can snag jewelry.
- Keep active movements gentle and avoid bumping the piercing during sports or exercise.
- Use clean hands to avoid unnecessary touching or twisting.
- Choose implant-grade jewelry to reduce metal sensitivity and irritation.
- Switch to smaller jewelry sizes as swelling decreases to prevent excess movement.
Everyday activities can cause accidental knocks that irritate healing tissue. Clothing such as tight collars, zippers, or scarves can catch on jewelry and pull on the piercing, leading to bumps. Touching the piercing too often also increases irritation and risk of infection. Avoid over-cleaning or using harsh chemicals on the site, as these disrupt natural healing. Applying gentle pressure or squeezing the bump can worsen inflammation and introduce bacteria. Following a routine that limits these common mistakes helps keep irritation low and supports a smoother healing process.
When to Consult a Professional About Piercing Bumps and What to Expect
Consult a professional when your piercing bump shows signs of infection, persistent growth like keloids, worsening symptoms, or doesn’t improve after a few weeks. Clear communication about your symptoms helps your piercer or doctor provide accurate advice and treatment. Knowing what treatments to expect and their costs prepares you for the visit and ensures you get the right care.
Signs You Need Medical Attention
A bump that feels increasingly painful, hot, or swollen, especially with yellow or green discharge, indicates a possible infection and requires a doctor’s evaluation. Also seek help if the bump has a bad smell, spreading redness, or you develop a fever, as these can signal deeper infection needing antibiotics. Persistent bumps that continue growing or feel like firm tissue could be keloids or hypertrophic scars, which a dermatologist should assess. When irritation or bumps last beyond two to three weeks despite proper aftercare, or if you notice signs of jewelry causing irritation or too much tightness, a professional piercer can help.
Use this checklist to decide if you should see a professional: Is your bump worsening despite care? Is there colored discharge or bad odour? Is swelling, warmth, or redness spreading? Do you have systemic symptoms like fever or chills? Has the bump been present longer than three weeks without improvement? Are you concerned about firm or raised tissue around the piercing? Any yes means it’s time to seek expert advice.
How to Prepare for Your Piercer or Doctor Visit
Describe your symptoms clearly and specifically to help your piercer or medical provider understand your issue quickly. Say, “I have a bump at my [piercing location] that has been present for [duration]. It is [describe size, color, pain level]. I have noticed [discharge color, smell, heat, changes]. I have been cleaning with [methods], but it hasn’t improved.” For example: “My nose piercing has a red, painful bump about the size of a pea for three weeks. There’s yellow discharge and it feels warm.”
Bring any information about your piercing history like when and where it was done, your aftercare routine, and any changes in jewelry. Avoid removing or changing jewelry right before the visit unless directed. Document symptoms with photos taken in good light over days or weeks to show progression. This helps professionals make an accurate diagnosis and tailor treatment.
Overview of Professional Treatments and Costs
Treatment varies by condition: infections often require prescription antibiotics, sometimes topical or oral, prescribed by a doctor. Keloids or hypertrophic scars need medical attention, often starting with corticosteroid injections that can shrink keloids by 50 to 80 percent. Dermatologists may offer laser therapy or surgical removal, but these procedures can be costly, ranging from $200 to over $1,000 depending on severity and location.
Professional piercers can adjust or replace jewelry with suitable materials to reduce irritation, and perform safe bump drainage or cleaning for certain types of bumps caused by friction or trauma. Piercer consultations typically cost between $30 and $75, depending on location and complexity.
Persistent or complicated piercing bumps usually require a combination of treatments and follow-ups. Insurance may not cover cosmetic or elective procedures, so prepare for out-of-pocket costs. Getting treatment early often means lower costs and better results, avoiding long-term scarring or infection risks.
Common Mistakes with Piercing Bump Care and How to Fix Them
Over-handling a piercing bump can slow healing or worsen irritation. Touching your bump with unwashed hands or frequently rotating the jewelry raises the risk of infection. Avoid fiddling with your piercing as much as possible, and clean it gently only two or three times daily with sterile saline solution to maintain natural moisture. Cleaning more than that, such as five or six times a day, removes essential oils and may cause further dryness and damage.
Using the wrong type or size of jewelry often leads to irritation and bumps. Implant-grade materials like titanium or surgical steel reduce the chance of allergic reactions. Jewelry that is too tight or too loose can pull on healing skin, causing inflammation. Keep jewelry securely in place and avoid changing it repeatedly during healing, as this disrupts tissue and delays recovery. Removing jewelry too early can cause the piercing hole to close or increase scarring. Several common errors in bump care and easy corrections include:
- Over-cleaning: Cut back to two or three gentle saline rinses daily.
- Over-handling or twisting jewelry: Keep hands off and avoid unnecessary movement.
- Wrong jewelry type or length: Switch to hypoallergenic, implant-grade options sized for healing.
- Frequent jewelry changes: Limit swaps until the bump fully heals.
- Removing jewelry too soon: Leave it in place unless a professional advises otherwise.
- Using harsh chemicals or ointments: Use only sterile saline and avoid irritants.
Recovering from these mistakes means stopping overhandling right away and returning to gentle cleaning. Confirm that your jewelry suits your piercing type and healing skin. When unsure, consult a licensed piercer to help select the right jewelry instead of guessing. Allow your piercing time to heal and minimize any stress on the area.
Switch to implant-grade jewelry if you notice ongoing irritation to reduce bump formation and support healing.
Getting back on track with care after mistakes can take a few days to weeks. Proper care reduces swelling, redness, and bump size. Should the bump persist after correcting these factors, seek advice from a professional to rule out infection or other complications. Following these steps improves the chance of smooth healing without unnecessary delays.
Step-by-Step Action Plan to Get Rid of a Piercing Bump
Follow this plan to identify, treat, and prevent piercing bumps safely while deciding when to seek professional help.
- Before You Start: Clean your hands thoroughly before touching the piercing to avoid introducing bacteria. This prevents infection and ensures safe care.
- Day 1: Gently clean the piercing twice daily with a sterile saline solution or recommended salt soak. Notice reduced redness and swelling to confirm it’s working.
- Week 1: Switch to jewelry made from hypoallergenic materials like titanium or surgical steel if irritation persists. Improvement shows as decreased bump size and less tenderness.
- Week 2: Apply a small amount of recommended gentle oil, such as vitamin E, around the bump to support healing. Expect softer skin texture and calmer appearance.
- During Care: Avoid twisting or removing jewelry unnecessarily and keep hair, makeup, and irritants away from the area. Steady improvement without added irritation indicates good practice.
- After 3 Weeks: Assess the bump type: if it remains raised and firm, it may be a keloid; if soft and red, likely a granuloma; if mildly swollen or sensitive, it’s probably irritation. Identifying the type guides next steps.
- When Bump Persists Beyond 4 Weeks or Worsens: Schedule a consultation with a professional piercer or dermatologist. Professional assessment is needed if pain, pus, or growth occurs despite care.
- Ongoing: Continue proper aftercare and avoid new trauma to the piercing to prevent future bumps. Clear skin without swelling or redness means successful healing.
Frequently Asked Questions
Does a Piercing Bump Eventually Go Away?
Yes, most piercing bumps go away within about six weeks with proper care like saline soaks and leaving it alone. Persistent bumps after this time may need a different treatment.
What Causes Piercing Bumps?
Piercing bumps usually result from the body’s immune response to the wound, causing inflammation, irritation from jewelry or friction, or poor aftercare. Low-quality jewelry can also trigger these bumps.
How Can I Remove Old Piercing Bumps?
Old piercing bumps often need consistent treatment with saline soaks and avoiding irritants. For stubborn bumps, see a professional for advice instead of popping or changing jewelry repeatedly.
Why Is My Piercing Bump Rock Hard?
A rock-hard bump could be a keloid or scar tissue forming, which is thicker and different from typical irritation bumps. These often require professional treatment for removal or reduction.
Can Changing Jewelry Help Get Rid of a Piercing Bump?
Changing jewelry often makes bumps worse by irritating the piercing. Stick to well-fitting, high-quality pieces and avoid frequent changes until the bump heals.
Is It Safe to Pop a Piercing Bump at Home?
No, popping piercing bumps risks infection and worsens the bump by introducing bacteria and damaging tissue. Always avoid squeezing or popping.
The Bottom Line
Dealing with a piercing bump requires consistent care and attention to avoid worsening the condition. Start by cleaning your piercing gently twice a day with a sterile saline solution, avoiding harsh chemicals that can irritate the skin further. Monitoring your bump while maintaining good hygiene can speed healing and reduce the chance of complications. If you notice unusual changes or persistent swelling, schedule a visit with a professional piercer or dermatologist to address the issue safely.