What Is One Way to Keep an Operation Pest Free: The Key Step That Works
One way to keep an operation pest free is to maintain thorough sanitation. Removing food scraps, standing water, and clutter eliminates the attractants pests rely on to enter and survive. This step stops infestations before they start by denying pests the resources they need inside your facility. You’ll learn how sanitation works alongside sealing entry points and regular inspections to create a strong defense against pests.
This information is designed for business owners, facility managers, and restaurant operators who must protect their operations from pest threats. You’ll get clear guidance on tools, common pitfalls, tailored strategies for different industries, and when to bring in professional pest control. The focus is on practical, actionable steps that reduce risk and keep your environment clean, safe, and pest free year-round.
Key Takeaways
- Maintain strict sanitation by regularly cleaning food debris and waste to remove pests’ primary food sources and breeding grounds.
- Seal cracks, gaps, and openings in walls, doors, and windows to physically block pests from entering the facility.
- Schedule consistent pest inspections and monitor pest activity to catch infestations early and target interventions effectively.
- Use EPA-approved baits, traps, and non-toxic repellents matched to pest types for safe and ongoing management.
- Adjust pest prevention strategies based on the facility’s industry, layout, and specific pest risks for targeted protection.
- Account for seasonal changes and environmental conditions that influence pest behavior and adjust controls accordingly.
Why Sanitation Is the Single Most Effective Pest Prevention Method
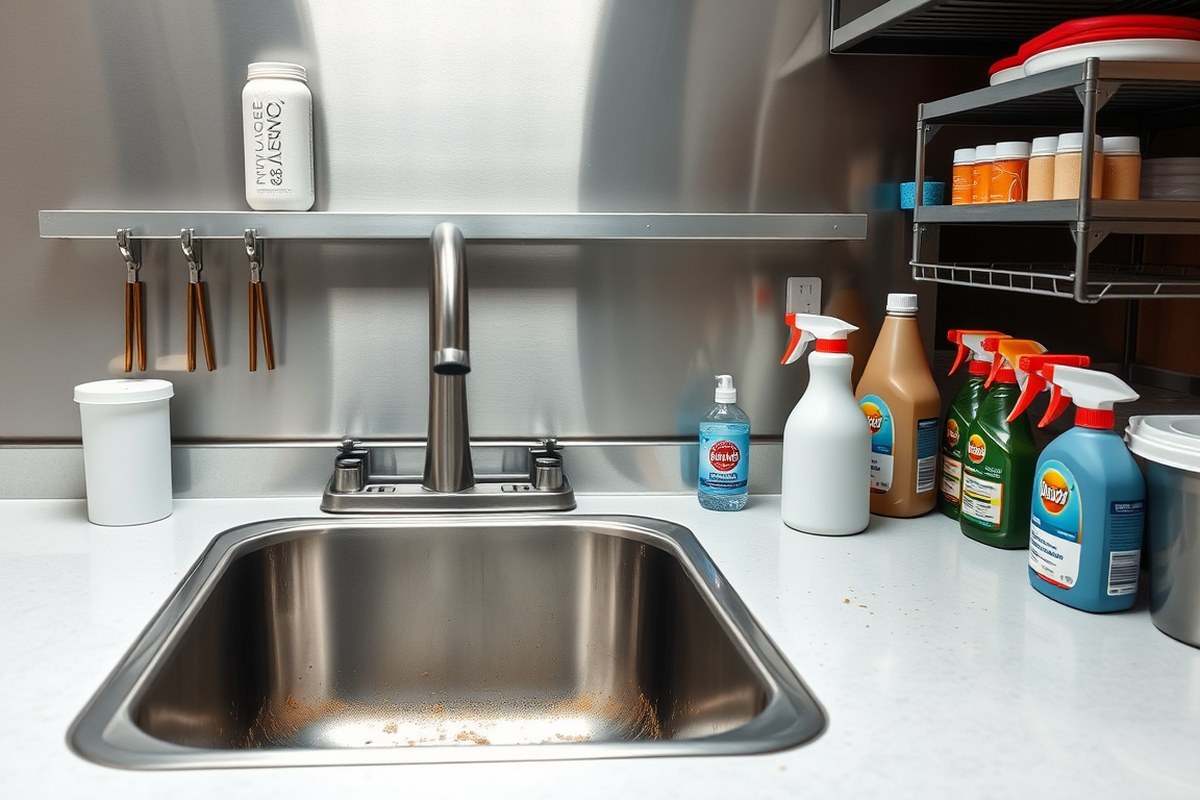
Sanitation is the most effective method to keep an operation pest-free because it removes the main attractants like food, water, and shelter that pests need to survive. Without these, pests have no reason to invade or stay inside a facility, greatly reducing the risk of infestation. Proper cleaning and waste management directly cut off pest access to their resources.
How Pests Are Attracted to Unsanitary Conditions
Pests such as rodents, cockroaches, flies, and ants are drawn to environments where food crumbs, grease, spills, and standing water accumulate. These substances provide them with easy meals and breeding grounds. When trash bins overflow or floors are sticky, pests find consistent food sources, making these places suitable nesting sites.
Unsanitary conditions also create moist hiding spots for pests. Leaks under sinks, clogged drains, and damp cardboard can harbor insects and rodents. Pests look for warmth and shelter, so cluttered, dirty spaces offer safe harbor, increasing their chances of establishing colonies.
Key Sanitation Practices That Reduce Pest Food Sources
Start by cleaning all food contact surfaces daily using approved sanitizers. This includes countertops, cutting boards, stoves, and shelves. Remove grease buildup behind and under equipment at least weekly to deny pests hidden food sources. Sweep and mop floors every day, paying special attention to corners and under fixtures where debris can accumulate.
Empty trash bins frequently and use containers with tight-fitting lids. Clean around dumpsters regularly to prevent spill buildup. Wash garbage cans inside and out weekly to remove residues. Immediately clean up spills or dropped food from storage and preparation areas to prevent attracting pests.
Maintain drains by flushing with hot water and enzyme-based cleaners weekly to prevent organic buildup that attracts flies and cockroaches. Fix leaks and remove standing water. Remove cardboard boxes and paper debris promptly as these materials can harbor pests and hold moisture.
Adapting Sanitation Routines for Different Operation Types
Restaurants require high-frequency sanitation with a focus on grease and food residue removal. Daily deep cleaning behind cooking equipment and sanitation of dining areas helps reduce pest access to food. Food processing plants should include routine sanitation of conveyor belts, storage bins, and packaging stations, often requiring specialized cleaning schedules to meet strict hygiene regulations.
Retail food stores need to manage product spills on shelves and keep storage rooms and back areas clean and dry. Trash removal here might need to happen more than once a day during busy periods. Warehouses should focus on the storage of materials off the floor and maintaining clean aisles to eliminate pest hiding spots.
High-risk zones like loading docks, waste areas, and dishwashing stations demand targeted cleaning more frequently. For example, disinfecting drain grates and floor drains at least twice a week in these locations helps keep pests at bay. Regularly training staff to identify and immediately address sanitation lapses adds a layer of ongoing pest prevention.
Sealing and Eliminating Entry Points to Deny Pest Access

Blocking pest entry points directly limits their access to the facility, stopping infestations before they start. Sealing gaps and cracks requires targeted methods suited to common weaknesses in your operation’s structure. A systematic approach to choosing materials and inspecting barriers ensures long-term pest exclusion and protects your operation’s hygiene and compliance.
Common Pest Entry Points Identified by Industry
Pests often invade facilities through structural weaknesses. In food service and retail operations, door gaps, vents, and loading dock areas are typical entry points for rodents and insects. Manufacturing sites with heavy machinery may have wall joints and equipment openings vulnerable to crawling pests. Warehouses and storage facilities frequently face pest entry at overhead doors, skylights, and utility penetrations.
Recognizing which points suit your industry helps focus sealing efforts where they matter most. Pests like rodents can squeeze through holes as small as a quarter of an inch, while flying insects exploit vents and open windows. Areas where utilities enter the building, pipes, cables, wiring, are common overlooked entry points. Doors and windows that are left open or have worn weather stripping invite pests continuously.
- Door sweeps and thresholds worn or missing
- Cracks around pipes, cables, and vents
- Holes in walls or foundation, especially where materials meet
- Open loading dock doors and damaged dock seals
- Damaged window screens or missing panels
- Roof penetrations like skylights or HVAC vents
- Utility chases and poorly sealed electrical conduits
Different pests exploit different gaps depending on their size and behavior, making this list a baseline to adapt. A pest-specific survey can identify additional vulnerabilities, guiding customized barrier strategies.
Materials and Tools for Effective Sealing
Choosing the right sealing material depends on the location and type of gap, as well as environmental factors like moisture and temperature. For interior cracks and small holes below ½ inch, silicone or acrylic caulk works well because it adheres to various surfaces and handles slight movement. Larger gaps need tougher solutions like steel wool backed with expandable foam or metal flashing, especially for rodent-proofing.
Facilities with outdoor exposure or heavy moisture require weather-resistant sealants. Polyurethane caulk withstands temperature swings and remains flexible, making it ideal for exterior wall joints. For industrial sites, epoxy or acrylic-latex compounds help seal concrete cracks that pests could enter through. Permanent sealing must consider future access needs; removable gaskets or well-fitted door seals let you maintain barriers without damage. Installing barriers follows this checklist:
- Inspect and measure all gap sizes and surfaces around doors, windows, and walls.
- Clean surfaces to remove dirt, oils, and loose material for better adhesion.
- Choose sealant or barrier material based on gap size and environment.
- Apply sealant or insert barrier material; for gaps over ¼ inch, fill with steel wool before caulking.
- Replace worn door sweeps and weather stripping; adjust doors to close tightly.
- Check vents and screening; repair or replace damaged panels.
- Document installed barriers for future inspection and maintenance.
Sealing work requires manual labor and some specialized materials, with costs varying by facility size and damage extent. Small-scale sealing projects may cost a few hundred dollars in materials and labor. Large operations or those with difficult access points may need professional installation, increasing cost but ensuring durable, correctly selected barriers. Underbudgeting for quality materials and labor often leads to premature barrier failure and pest reentry.
Inspecting and Maintaining Barriers over Time
Sealing is not a one-time fix. Materials degrade, door seals wear out, and new penetrations occur during maintenance or upgrades. Establish a routine inspection schedule to check all previously sealed points at least quarterly, more often in high-risk seasons or industries. Look for cracks reopening, sealants peeling, or signs of pest attempts to gnaw or push through.
Keep a maintenance log of findings and repairs to track barrier integrity trends. For example, replacing door sweeps every one to two years is typical, while caulk may last five years before needing touch-up. Pest activity near sealed points signals the need for immediate re-sealing or alternative exclusion methods. Regular maintenance means you catch vulnerabilities early and avoid costly infestations.
Always wear gloves and safety glasses when handling steel wool or epoxy sealants to avoid injury and skin irritation.
Implementing Regular Pest Control Inspections and Monitoring
Regular inspections and monitoring reveal pest activity in its early stages, allowing you to respond before infestations spread. Set a consistent schedule and keep detailed records to track pest presence and treatment effectiveness. Adjust inspection frequency based on the operation’s risk level to use resources efficiently.
Setting Inspection Intervals Based on Operation Risk
High-risk operations like food processing plants or restaurants need weekly inspections due to constant exposure to food and waste. Facilities with less pest attractants, such as office buildings, may conduct inspections monthly or quarterly. Urban locations often require more frequent checks than rural ones because pests are more prevalent there. Adjust intervals also according to seasonality; in warmer months, pests are more active, so increase inspections during that time. A basic inspection schedule template looks like this:
- High-risk (food service, warehouses): weekly inspections
- Medium-risk (offices with occasional food storage): biweekly to monthly inspections
- Low-risk (non-food retail, storage buildings): quarterly inspections
- Increase inspections during spring and summer by 25 to 50%
- After a pest sighting or treatment, inspect daily for one week, then return to regular schedule
Document adjustments so everyone on the team understands when to be extra vigilant. Consistency matters more than frequency alone for catching early pest signs.
Recording and Interpreting Inspection Data
Use a simple checklist to record each inspection. Note location, pest signs, and conditions that may attract pests. Common checklist items include:
- Visual sightings of insects, rodents, or droppings
- Damage to packaging or structures
- Unusual odors or nesting materials
- Moisture levels and leaks
- Sanitation and waste levels
Keep records in a bound logbook or digital spreadsheet. Include the date, inspector’s name, findings, and actions taken. Review these records weekly to detect trends, such as repeated signs at the same location, which indicate a developing problem. Reliable records help verify methods that work and those needing adjustment.
Early Detection Indicators and How to Respond
Signs like fresh droppings, gnaw marks, shed skins, or live insects caught on traps show that pest control methods may need reinforcing. Lack of these indicators after inspections suggests your methods are effective. When signs appear, respond promptly with targeted cleanup, sealing entry points, or spot treatments. Follow this sequence when you detect pests:
- Isolate the affected area to prevent spread
- Increase inspection frequency around that site to daily
- Check for underlying causes like food or water sources
- Apply an appropriate control method based on pest type and location
- Document the response and monitor for changes over the next two weeks
Early intervention often reduces the need for broad treatments and lowers costs. Ignoring early signs leads to bigger infestations, requiring more labor and material expenses.
Safe and Effective Tools for Ongoing Pest Management
Using pest control tools and products that are safe around people and food is important to maintain a pest-free environment without risking contamination. Non-toxic and low-toxicity options offer ongoing management by targeting pests while minimizing health hazards. Choosing the right tools depends on your facility’s specific needs, pest types, and regulatory requirements.
Types of Non-Toxic and Low-Toxicity Pest Control Tools
There are several categories of pest control tools designed to minimize harm to humans and food products. Physical devices like traps and screens prevent pests from entering or catching them without chemicals. Botanical and biological products use natural ingredients or organisms to deter pests with limited toxicity. Low-toxicity chemical products have active ingredients approved for use in food handling areas under strict guidelines.
Choosing the appropriate product balances effectiveness and safety. Mechanical traps suit rodents and crawling insects in areas where poisoning risks are unacceptable. Botanical repellents such as essential oils can deter flying insects but might need frequent reapplication. Low-toxicity insecticides based on boric acid or diatomaceous earth work well indoors with less risk but require careful placement to avoid contamination.
| Product Type | Example Tools/Products | Safe Use Areas | Frequency of Application |
|---|---|---|---|
| Mechanical | Glue boards, snap traps, door sweeps, mesh screens | Food prep, storage, dining areas | Daily to weekly checks, replace as needed (every 1-4 weeks) |
| Botanical/Biological | Essential oil sprays (peppermint, citronella), beneficial nematodes | Non-food contact zones, perimeter landscaping | Weekly or after cleaning |
| Low-toxicity chemical | Boric acid powders, diatomaceous earth, silica gels | Cracks, crevices, under appliances (non-exposed surfaces) | Reapply every 4-6 weeks or after deep cleaning |
Most chemical-free methods focus on exclusion and trapping, while low-toxicity chemicals serve as targeted barriers. Combining these with sanitation and structural maintenance improves pest control without raising contamination risks.
How to Safely Use Chemical Versus Non-Chemical Methods
Proper use of pest control tools ensures safety for people and food. Mechanical traps should be placed away from food preparation lines and checked regularly to avoid decomposition issues. Use tamper-proof bait stations for any chemical products to prevent exposure.
Non-chemical options like essential oil sprays often require multiple applications per week and should be used in well-ventilated non-food spaces. Avoid spraying over food or food-contact surfaces to prevent residue. Low-toxicity powders apply best in inaccessible voids and under equipment rather than open areas.
Read and follow all label instructions and local regulations for any pesticide use. Train staff on proper placement, timing, and disposal of pest control devices. Interrupt pesticide applications during business hours to reduce exposure, scheduling treatments after closing when possible.
Integrating Tools into an Overall Pest Prevention Plan
Combine safe pest control tools with sanitation and facility maintenance for durable pest management. For example, use door sweeps and screens to block entry, place glue traps along pest travel paths, and apply boric acid powder in wall voids where pests nest. Rotate product types to reduce pest resistance and prevent buildup.
Set a schedule for inspection and servicing of traps and products. Weekly walkthroughs identifying signs of pest activity allow timely adjustments. Adjust product placement seasonally, more insect sprays in warmer months, increased rodent trapping in colder months.
Keep clear records of methods used, locations, and observed pest levels. Evaluate effectiveness quarterly and modify tools or frequency as needed. A pest log helps inform decisions about adding or scaling back chemical options, always aiming to keep risk to people and food minimal.
Tailoring Pest Prevention to Different Facility Types and Industries
Adjusting pest prevention to match your facility’s layout, operation type, and specific pest threats helps target the right risks and avoid wasted effort. Different industries face distinct pests and challenges that require tailored strategies based on what pests seek and where they thrive. Identifying your facility’s unique risks enables you to build a focused plan that fits your operation.
Common Pests and Prevention Priorities by Business Sector
Food service facilities usually face ants, cockroaches, rodents, and flies because food and moisture attract them. Their prevention needs emphasize strict sanitation, regular waste removal, and sealing potential pest entry points near food prep areas. Warehouses often deal with rodents and stored product insects like beetles or moths. Here the focus shifts to inspection of incoming goods, using pallets to keep materials off floors, and controlling gaps around loading docks where pests enter.
Healthcare facilities require very tight control against pests like flies, ants, and cockroaches because of sanitation standards and patient safety. Any prevention method must prioritize non-toxic, residue-minimizing solutions and thorough monitoring. Manufacturing plants differ widely depending on the product but generally demand physical barriers and routine inspections to protect machinery and inventory. Recognizing the dominant pests in your sector dictates which prevention tactics address their habits and habitats effectively.
Assessing Facility-Specific Risk Factors
Start by mapping your facility’s layout to spot high-risk areas such as food storage, waste disposal zones, or water sources. These spots commonly attract pests. Check around doors, windows, and utility lines for entry points. Consider the season and local environment since pests fluctuate with temperature and humidity, impacting your vulnerability at different times. Understanding these factors guides when and where to intensify prevention.
Conducting pest identification is important. Detect signs like droppings, damage, or sightings to determine exactly which pests pose threats. This effort prevents using unsuitable methods, for instance, rodent bait won’t affect stored product beetles. Combining pest ID with facility features lets you prioritize resources to the greatest threat. Regular monitoring with traps or inspections also reveals emerging problems early before infestations spread.
Developing a Customized Pest Prevention Plan
Build a plan that links your industry, pest threats, and site-specific risks. For example, a restaurant facing cockroaches requires tight control of grease buildup, sealing cracks near kitchen drains, plus frequent inspections around food prep areas. A warehouse contending with rodents should focus on blocking access at loading docks, cleaning out cardboard debris, and trapping along walls where rodents move. Each tactic corresponds to the pests’ behavior patterns and preferred shelter.
Estimate the time and cost needed for tasks such as sealing, cleaning, and monitoring. Sealing gaps might take a maintenance crew a few hours and cost a couple hundred dollars in materials but dramatically reduce pest entry points. Staff involvement is critical, so training workers to report signs or maintain cleanliness supports the plan without adding significant expense.
Start pest prevention by identifying your facility’s primary pests and the locations they invade most; this clarifies where to focus efforts first.
Seasonal and Environmental Factors Affecting Pest Activity
Pest activity changes with the seasons, temperature, and humidity levels in your region. Adjusting your pest prevention strategies to match these factors reduces the risk of infestations and targets the right pests at the right times.
Seasonal Pest Behavior Patterns
Pests tend to follow predictable patterns throughout the year. For example, rodents seek indoor shelter as temperatures drop in fall and winter, increasing the risk of infestations inside facilities. In spring and summer, flying insects like flies and wasps become more active, drawn by warmth and food sources. Many insects also lay eggs during these warmer months, which means their populations spike in early summer.
Planning a timeline around these patterns helps you allocate resources efficiently. Begin rodent-proofing and sealing gaps in early fall before colder weather pushes rodents indoors. Increase insect monitoring and trapping from late spring to early fall when their activity peaks. Adjusting efforts seasonally prevents unnecessary treatments during low-risk periods and focuses control when pests are most likely to invade.
Impact of Humidity and Temperature on Infestations
Humidity and temperature affect pest survival and reproduction. High humidity favors cockroaches, silverfish, and mold-related pests because they thrive in moist environments. Conversely, low humidity can slow insect development, reducing their activity. Temperature influences pests too; many species have an optimal range near 70°F to 90°F for reproduction and feeding. Outside these ranges, they may become dormant or seek sheltered microclimates.
In regions with hot, humid summers like the Gulf Coast, prioritizing moisture control reduces cockroach and termite risks. Using dehumidifiers and repairing leaks helps lower humidity indoors. In cooler northern climates, monitor temperature fluctuations and pest activity indoors, since pests may move inside during cold spells. Maintaining consistent indoor climate control helps reduce pest-friendly conditions year-round.
Preparing for Peak Pest Seasons
Start preparing for peak pest seasons at least one to two months in advance. This means intensifying inspections, cleaning, and preventive maintenance before pests become a visible problem. For example, if you operate in the Midwest, begin fall rodent-proofing in early September. This may include sealing entry points with steel wool or metal flashing, trimming vegetation away from buildings, and setting traps along common runways.
Adjust the frequency of pest service visits according to seasonal risks. Increasing monitoring visits from monthly to every two weeks during spring and summer improves early detection of insect activity. Document pest sightings and environmental conditions to detect trends and refine service schedules. Avoid overusing pesticides outside of peak times to reduce resistance and exposure risks.
Common Pest Prevention Mistakes and How to Fix Them
Common mistakes in pest prevention often create gaps that let pests in despite best intentions. Identifying these errors quickly and applying practical fixes keeps your efforts effective over time. Early detection through a troubleshooting checklist helps catch problems before they grow into infestations.
Overlooking Sanitation Detail and Clutter
Ignoring small sanitation issues and allowing clutter builds pest harborage sites. Even when general cleaning happens, food debris behind equipment or in corners invites pests like cockroaches and ants. Cluttered storage areas prevent proper inspection and pest treatment.
Prevent this by establishing daily cleaning routines that include hard-to-reach places. Use checklists to verify no food particles or spills remain. Keep storage areas organized with clear aisles and shelves off the floor to allow inspection and discourage pests.
Ignoring Minor Facility Repairs
Small structural problems often serve as entry or breeding points for rodents and insects. Cracks in walls, gaps around doors, and damaged weather stripping provide easy access. Even tiny holes from cable penetrations can let pests inside.
Schedule regular inspections focused on repairs that impact pest control. Fix cracks with proper sealant, replace damaged door sweeps, and fill gaps with materials appropriate to the location, like steel wool combined with caulk for rodent prevention. Maintaining these repairs costs less than dealing with infestations.
Failing to Involve and Train Staff Properly
Staff members who don’t understand their role in prevention may unintentionally undermine pest control efforts. For instance, workers storing food improperly or neglecting daily cleaning steps create openings for pests. Lack of training reduces early pest sign recognition.
Hold quarterly training sessions that teach pest risks specific to your operation, proper sanitation, and importance of reporting sightings immediately. Use a simple script for staff to follow when they find signs like droppings or gnaw marks. Encourage a reporting culture where no concern is ignored.
- Allowing open trash containers both inside and outside
- Neglecting grease traps and drains during cleanings
- Ignoring small holes in screens or doors
- Storing unused equipment or boxes directly on floors
- Ignoring pest signs such as droppings or mud tubes due to disbelief or apathy
- Using ineffective pest control products without follow-up inspections
- Failing to notify the pest control provider about changes in facility layout
Fix these mistakes by assigning clear responsibilities and following documented standard operating procedures. Regularly review these procedures with staff and management to ensure consistency. This approach prevents repeated problems that waste time and resources.
Use a troubleshooting checklist to catch early pest incursions. Check suspected areas daily or weekly depending on risk level. The checklist should include:
- Look for droppings, shed skins, or insect parts near food prep and storage
- Inspect door seals and window screens for gaps or tears
- Check for gnaw marks or burrows around pipes and walls
- Monitor traps, sticky pads, or pheromone devices for captures
- Smell for unusual odors indicating pest colonies, such as rodent urine
- Note any sightings or reports from staff promptly
- Review recent changes in cleaning schedules or supply deliveries that might affect pest activity
Track these findings on a log for your pest control provider or in-house team to analyze. Quick action on any issues reduces pest population growth and damage risk. Adapt the checklist interval for different facility types; food operations may require daily checks, while warehouses can perform weekly.
Educating Staff to Support Pest Prevention Efforts
Training staff on pest prevention and embedding clear operational procedures creates a frontline defense against infestations. Well-informed employees recognize early signs and follow protocols that reduce attractants and block pest entry. This ongoing education strengthens overall pest control efforts by making everyone responsible and vigilant.
Key Topics Every Staff Member Should Know
Start training with basic pest identification. Teach staff to spot common pests by size, color, and behavior, such as flies near waste or rodents gnawing packaging. Understanding pest habits, like when and where they feed or nest, helps staff respond quickly. Provide clear information on why pests present health and operational risks to motivate careful attention.
Next, cover sanitation practices specific to their roles. Explain how food scraps, spills, and clutter invite pests and how regular cleaning disrupts their cycles. Make sure employees know how to properly store food and dispose of waste to minimize pest attractants. Also include instructions for keeping drains and sinks clean, as standing water encourages insects.
Outline facility-specific pest control policies. Review how to report signs of infestation and the importance of prompt communication. Go over restricted areas where pest control treatments occur, so staff avoid disturbing traps or chemicals. Finally, discuss the importance of routine inspections and their role in maintaining a pest-free environment.
Integrating Pest Prevention into Daily Routines
Assign clear pest control tasks in job descriptions and daily checklists. Direct kitchen staff to clean food prep surfaces and empty trash at set intervals, while maintenance workers check for leaks and seal cracks on their rounds. Set specific times for inspecting vulnerable areas like loading docks and storage rooms to catch early warning signs.
Encourage the use of simple pest-prevention habits, such as closing doors and windows promptly and avoiding leaving food out overnight. Reinforce soft skills like careful waste handling and equipment cleaning that prevent pest access. Providing written reminders or posters in work areas helps sustain awareness without disrupting workflow.
Regular refresher training, quarterly or semi-annual depending on turnover and pest pressure, keeps knowledge current. Use brief stand-up meetings or short videos to review key points and share infestation alerts. This continuous learning prevents complacency and ensures procedures adapt if pest risks or facility changes occur.
Encouraging Staff Reporting and Accountability
Establish a clear, simple pest sighting reporting process accessible to all staff. This can be a dedicated phone number, an app, or a physical logbook located in break areas. Prompt reporting enables fast responses that prevent minor issues from becoming serious infestations.
Make pest prevention a shared responsibility by including related tasks in daily checklists and performance reviews. Recognize employees who regularly identify problems or follow protocols to reinforce positive behavior. Accountability fosters a culture where pest control is part of everyone’s job, not just the pest management team’s.
Provide channels for anonymous reporting to catch issues that might otherwise go unreported due to fear of repercussions. At the same time, timely feedback to the whole staff on pest findings and corrective actions demonstrates management’s commitment and maintains transparency. This two-way communication is essential for sustained vigilance.
Clear communication and documented procedures allow staff to act confidently and quickly on pest issues, preventing infestations before they grow.
Sample training script: “Pests like rodents and insects find easy access through food spills, garbage left uncovered, and cracks around doors. Your job includes keeping food storage clean, emptying trash on schedule, and checking for signs of pests like droppings or damage. If you see anything suspicious, report it immediately using the log by the break room. Following these steps helps protect our customers, products, and your work environment.” Sample staff pest control checklist: Check that food containers are sealed; empty trash and replace liners; clean floors and counters; report any pest signs like droppings, gnaw marks, or dead insects; confirm doors and windows close properly; inspect storage areas for spills or water leaks; record any findings in the pest logbook at shift end.
Performing a Self-Audit to Identify Pest Vulnerabilities
Performing a self-audit identifies weak points in your operation where pests can enter or thrive. It focuses on sanitation, entry points, and procedures to spot risks before pests become a problem. This process requires a detailed checklist, careful inspection, and thorough documentation to guide improvements.
Preparing for the Audit and Gathering Tools
Start by assembling everything needed to conduct a methodical walk-through. You need a detailed checklist covering sanitation, structural gaps, and operational tasks. Bring a flashlight, a camera or smartphone for photos, a notepad or digital device for notes, and measuring tools to check potential entry gaps.
Preparation also means scheduling the audit during typical operating hours or times when pest activity is suspected to be higher. This reveals real-world conditions rather than idealized scenarios. Assign someone familiar with daily operations to assist or carry out the audit to ensure you capture practical insights.
Inspecting Critical Areas by Function
The inspection focuses on zones where pests are most likely to find food, shelter, or entry, like kitchens, storage rooms, waste disposal areas, loading docks, and utility zones. Examine each section according to its function and potential vulnerabilities. For example, check kitchens for food spills and accumulation; loading docks for gaps under doors or damaged seals; and waste areas for improper trash management.
Pay particular attention to corners, cracks, floor-wall joints, and behind equipment where debris accumulates unnoticed. Look for moisture sources such as leaking pipes or condensation, since they attract pests. Confirm that trash containers are covered and emptied regularly. Record each observation against your checklist to maintain consistency.
Documenting Findings and Planning Corrective Actions
After completing the inspection, fill out a self-audit report summarizing risks, damaged areas, and procedural flaws. Include photos or sketches highlighting problem spots. This documentation guides your corrective efforts and tracks progress over time.
A practical report template lists each audit category, identifies the problem, its severity (e.g., low, medium, high risk), and the recommended fix with deadlines and responsible personnel. For example, an entry point might read: “Door sweep missing on loading dock, high risk. Install new door sweep within 1 week. Assigned to maintenance.”
Maintain a record of audit results and interventions. Schedule follow-up audits monthly or quarterly depending on facility size and pest pressure. This recordkeeping shows your diligence and helps comply with inspection standards common in food service or healthcare facilities.
- Review and customize a complete self-audit checklist tailored to your operation’s layout and pest risks.
- Gather tools: flashlight, camera or smartphone, notepad/tablet, measuring tape.
- Schedule the audit on a typical workday during active hours.
- Inspect critical zones functionally: kitchens, storage, waste areas, loading docks.
- Use the checklist to rigorously assess sanitation, structure, and operational practices.
- Document findings with notes, photos, and sketches directly on the checklist.
- Prepare an audit report listing risks, their severity, and corrective actions with deadlines.
- Assign responsibilities and establish a follow-up audit schedule for monitoring progress.
| Audit Category | Issue Identified | Risk Level | Recommended Action | Deadline | Responsible Person |
|---|---|---|---|---|---|
| Sanitation – Kitchen Floor | Food debris under prep tables | High | Implement daily deep cleaning under all equipment | Within 3 days | Kitchen Supervisor |
| Structural – Loading Dock | Gap under dock door, approx. 1 inch | High | Install door sweep and weather seal | Within 1 week | Maintenance Manager |
| Operational Procedure – Waste Handling | Trash bins left uncovered overnight | Medium | Enforce policy to cover bins and empty daily | Immediate | Operations Manager |
When to Consider Professional Pest Control Services
Relying on one pest prevention method rarely keeps an operation fully pest free. Knowing when to hire professional pest control services depends on signs of ongoing infestation, the scale and risk level of your facility, and your capacity for consistent pest management. Choosing a qualified provider requires asking specific questions to assess expertise, approach, and costs to protect your investment.
Limitations of Single Prevention Methods
No single pest control method can guarantee a pest-free environment because pests adapt and exploit different vulnerabilities. Sanitation alone might reduce food sources but doesn’t address access points or hidden nesting areas. Sealing entry points helps keep pests out but requires ongoing maintenance to remain effective. Even regular monitoring can miss early infestations if inspections are infrequent or not properly documented.
Some pests need targeted treatments that go beyond routine cleaning or exclusion. For example, rodents can gnaw through small gaps or resist traps, and pest populations grow quickly without professional baiting or extermination. When you apply only one method, you risk missing entire parts of the infestation cycle, letting pests persist or return. For complete control, combining methods is necessary, but complex situations often require expert help.
Signs Indicating Need for Professional Intervention
Persistent or worsening pest sightings despite your prevention efforts indicate it’s time to bring in professionals. Visible droppings, nests, damage to inventory, or unusual odors suggest an established infestation. Multiple pest types at once, such as rodents mixed with cockroaches, also show that your current approach is insufficient. Professional evaluation identifies the extent and source of the problem that DIY methods might miss.
The size and type of your operation matter too. Facilities like restaurants, food processing plants, or healthcare settings face higher risks and stricter regulations. These locations benefit from experts who understand compliance requirements and use specialized products safely. Facing regulatory inspections calls for professional documentation and ongoing service agreements to ensure pest management meets standards.
High-risk zones or costly damages justify professional intervention sooner. For example, a warehouse with large food stocks needs rapid containment to avoid millions in losses. Grocery stores with public access require immediate responses to protect brand reputation and customer safety. In these cases, professionals don’t just treat infestations; they implement integrated pest management plans that adapt over time.
Key Questions to Ask Pest Control Providers
Start by asking how the provider assesses your specific facility’s pest risks and if they offer a written inspection report with findings and recommendations. This shows how thorough their initial evaluation is, which is important for effective long-term control. Inquire about their treatment methods, including chemical and non-chemical options, to ensure they match your facility’s safety rules and pest challenges.
Check if the pest control service has experience in your industry and understands compliance with local health and safety codes. Proper licensing and certifications confirm they operate within legal and environmental guidelines. Also ask about their monitoring schedule and guarantee policies: professional services typically provide routine follow-ups and may offer free retreatments if pests recur within the contract period.
Costs vary widely based on pest type, facility size, and treatment frequency. Getting detailed quotes lets you compare services accurately. Clarify what costs cover, such as inspections, treatments, materials, and reporting. Reliable professionals explain what results to expect and the timeframe for noticeable improvement, often within a few weeks for minor issues. Lack of near-term results or worsening pest activity signals a need to adjust the treatment plan.
Your First 30 Days: A Quick-Start Plan to Keep Your Operation Pest Free
Start with a clear, step-by-step approach that targets sanitation, entry points, and ongoing monitoring. Each action creates a foundation for long-term pest prevention tailored to your specific operation.
- Day 1: Conduct a thorough self-audit of your facility focusing on sanitation practices and structural vulnerabilities. Use a checklist to identify food residue, standing water, and gaps around doors or windows. Success means documenting at least three actionable problem areas to address immediately.
- Day 3: Seal all identified entry points using weather-resistant materials like silicone caulk or metal mesh. Pay special attention to gaps larger than ¼ inch near pipes and vents. Verify success by ensuring no new pest sightings along those sealed areas over the next week.
- Week 1: Deep clean all areas where food is stored, prepared, or disposed of, including behind equipment and in drains. Remove debris and use degreasing agents where needed. Effective cleaning should reduce evidence of pest activity such as droppings or gnaw marks.
- Week 2: Initiate a regular pest control inspection routine, either with trained staff or a professional service. Schedule inspections biweekly to monitor traps and signs of pest activity. Knowing it worked means consistently low or no pest alerts from these inspections.
- Week 3: Provide targeted training to staff on sanitation standards and pest monitoring procedures. Include clear examples of what to watch for and the importance of prompt reporting. Success shows up as staff identifying and reporting issues early enough to prevent infestation.
- Week 4: Implement safe pest control tools like bait stations or non-chemical traps tailored to your industry requirements. Place them near hotspots identified in your audit but away from food handling areas. Evaluate effectiveness by tracking pest captures or declining sightings over two weeks.
- Ongoing: Adjust your plan seasonally by increasing monitoring during warmer months or rainy seasons, when pest activity often rises. Stay alert to environmental changes such as nearby construction or waste accumulation. A stable or reduced pest presence during these periods indicates your prevention strategy is effective.
Frequently Asked Questions
What Is One Way to Keep an Operation Pest Free?
One way to keep an operation pest free is by maintaining strict sanitation practices. Clean areas immediately after use, remove garbage daily, and store food in sealed containers to reduce attraction and breeding grounds for pests. This limits pest access to resources and lowers infestation risk.
How Often Should Pest Control Inspections Be Scheduled for an Operation?
Pest control inspections should occur at least monthly to catch early signs of infestation. More frequent checks may be necessary in food processing or high-risk environments to prevent pests before they multiply and cause damage or contamination.
Can Landscaping Affect Pest Control Efforts Around a Facility?
Yes, poor landscaping can provide shelter and pathways for pests. Keeping grass trimmed, removing debris, and maintaining a clear perimeter around buildings reduce nesting sites and limit pest entry points. Proper exterior maintenance supports indoor pest prevention.
What Role Do Moisture Controls Play in Pest Prevention?
Moisture control removes water sources necessary for many pests to survive. Fix leaks, use dehumidifiers in damp areas, and ensure proper drainage to deny pests access to hydration, reducing their ability to establish themselves inside operations.
Is It Effective to Use Electronic Pest Repellers in a Commercial Operation?
Electronic pest repellers have limited effectiveness and are not a reliable standalone solution in commercial settings. Use them as a supplement, but focus on proven measures like sanitation and sealing entry points for better pest management results.
How Can Pest Prevention Be Adapted for Seasonal Changes?
Seasonal shifts affect pest activity and breeding cycles. Increase monitoring and sanitation during warmer months when pests are more active, and inspect for overwintering sites in colder seasons to adjust prevention strategies accordingly.
Key Points to Remember
Keeping your operation pest free relies heavily on maintaining strict sanitation routines that eliminate food and water sources pests need to survive. Start today by inspecting high-traffic and storage areas for spilled food or leaks and clean them promptly; this hands-on approach immediately removes attractants. This simple action reduces pest pressure significantly and supports all other prevention measures you have in place. Consistent daily cleaning combined with monitoring helps you catch issues early before pests establish themselves.