How to Do Pest Control at Home by Yourself: A Complete Step-by-Step Guide
You can handle pest control at home by yourself effectively by identifying common pests early, using the right tools and safe products, and following proven step-by-step methods to eliminate infestations. Managing pests yourself cuts costs and lets you control which treatments you use, focusing on safety and prevention. This approach works best if you understand pest behavior and choose control methods based on your specific problem and home environment.
This information suits homeowners, renters, and DIY enthusiasts who want affordable, practical solutions without immediate professional help. You’ll learn how to spot pests, select proper tools, apply treatments correctly, and prevent future issues. The guide also covers when pesticide use is safe indoors and outdoors and explains when a professional might be necessary. Seasonal and regional strategies help tailor pest control efforts to your location and conditions for better long-term results.
Key Takeaways
- Identify pests by signs like droppings, damage patterns, and sighting common species such as ants, cockroaches, or rodents to target control effectively.
- Use essential DIY tools like gloves, baits, traps, and approved safe pesticides, always following product instructions to reduce health risks.
- Follow step-by-step methods including cleaning, sealing entry points, setting traps, and using targeted sprays for proven pest control results.
- Compare DIY methods by weighing their cost, safety, and effectiveness, noting that some pests require repeated treatments for control.
- Maintain a pest-free home by eliminating food sources, reducing moisture, sealing cracks, and regular inspection to prevent future infestations.
- Apply pesticides indoors or outdoors carefully, choosing the right product, timing, and protective gear to minimize exposure and environmental impact.
How to Identify Common Household Pests and Infestations

Pest control starts with knowing which pests commonly invade homes and how to tell a small presence from a serious infestation. Identifying typical pests and their signs helps you decide when to act and how aggressively. Early detection limits damage and reduces the effort needed to control pests yourself.
Common Insect Pests and Their Signs
Common insect pests include ants, cockroaches, spiders, silverfish, and termites. Each has distinct behaviors and physical signs you can spot. Ants often leave small trails leading to food or water sources. Cockroaches hide in dark, moist areas and leave droppings resembling coffee grounds. Look for these clear signs to identify common insects inside your home:
- Small black or brown ants marching in lines, especially near crumbs or spills
- Flat, oval-shaped cockroach droppings or shed skins around sinks and cupboards
- Clusters of tiny eggs or webbing, indicating spiders or their egg sacs
- Silvery, fast-moving silverfish near damp basements or bathrooms
- Wood damage appearing blistery or hollow, often signaling termites
Recognizing these signs requires periodic inspection of typical pest harboring spots like kitchen corners, under appliances, and basement crevices. Many insect pests are more active at night, so check these areas using a flashlight after dark.
Signs of Rodent Infestations
Rodents such as mice and rats leave behind distinct signs that help you detect them early. Unlike insects, they require larger entry points and cause more structural damage. Rodents gnaw on wood, wires, and cardboard, so finding chewed materials is a strong indicator. Common evidence of rodents includes:
- Droppings roughly 1/4 to 3/4 inch long, typically near food or nesting sites
- Odd noises like scratching or scurrying behind walls, especially at night
- Grease marks or dirt smudges along walls and baseboards from fur oil
- Gnawed holes or frayed wiring inside cabinets or near electrical outlets
- Nests made from fabric, shredded paper, or insulation in hidden spaces
Rodents multiply quickly. Seeing just a few droppings or hearing noises means immediate steps are needed to prevent a larger infestation that causes health risks and fire hazards from chewing electrical wires.
Early vs. Severe Infestation Indicators
Distinguishing early pest presence from a severe infestation depends on the quantity and distribution of signs. A few ants in the kitchen could mean a minor issue, while long trails of ants in multiple rooms suggest a nesting colony nearby. One cockroach spotted is concerning but can be a lone traveler; many roaches or egg cases point to an established infestation. Here is a checklist to help gauge infestation severity:
- Minor presence: Occasional pests or scattered signs localized in one area
- Moderate presence: Multiple signs in several areas, including droppings, damage, or sightings
- Severe infestation: Large numbers of pests seen regularly, widespread damage, and active breeding evidence like eggs or nests
Severe infestations often require repeated treatments and possibly professional help. Acting during minor or moderate signs can control pests faster and with less cost and disruption.
How to Monitor Pest Activity
Regularly monitor pest activity by conducting scheduled inspections inside and outside your home. Focus on moisture-prone areas like under sinks, basements, crawl spaces, and around foundation cracks. Use sticky traps or bait stations to detect pest movement and population size over time. Follow these tips to keep track of pests effectively:
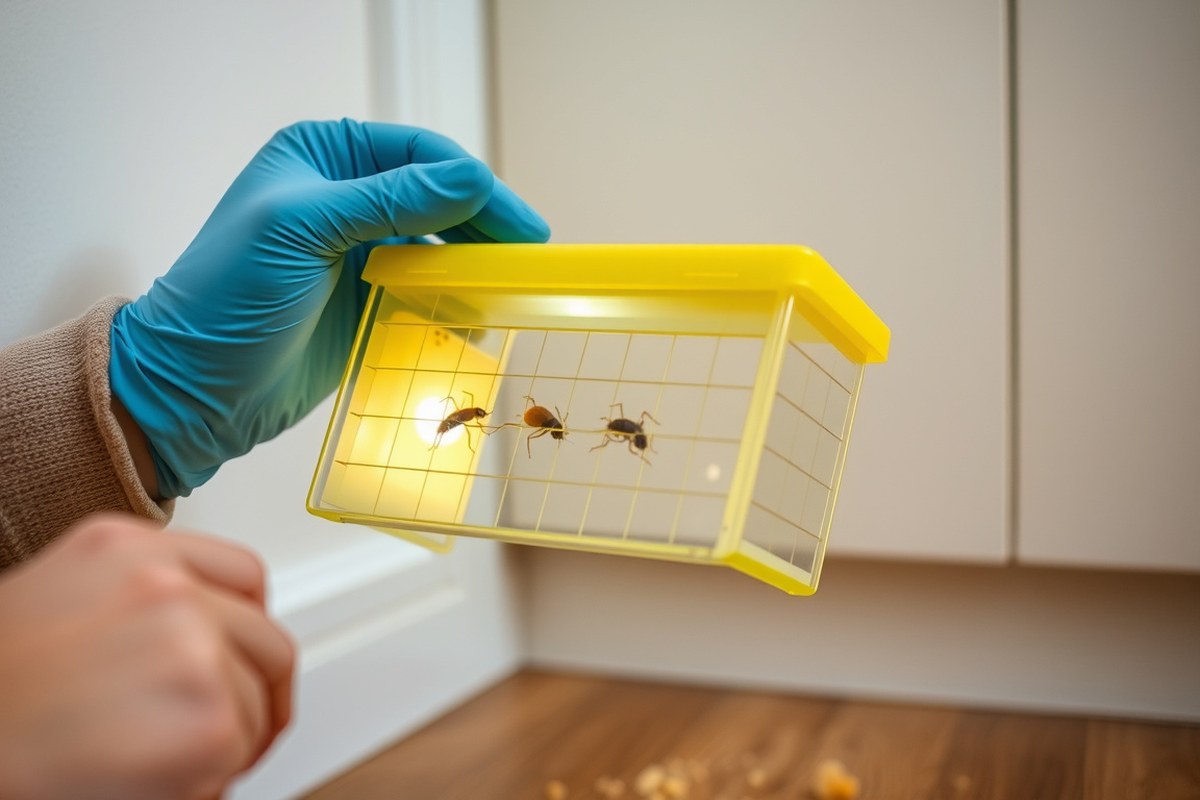
- Set sticky traps in suspected high-traffic areas and check weekly for catches
- Mark and photograph new signs like droppings, holes, or trails for comparison
- Record the location, type, and amount of pest evidence to identify trends
- Remove clutter and seal gaps during monitoring to discourage pests and narrow down entry points
- Adjust inspection frequency based on season; pests increase in warmer months
Monitoring helps prevent surprises and guides targeted treatments. Note that a sudden increase in signs during a short period often signals a growing infestation needing immediate attention.
Essential Tools and Safe Products for DIY Pest Control

To tackle pests yourself, you’ll need a basic set of tools and careful product choices focused on safety for kids and pets. Selecting the right mix of sprays, traps, and protective gear ensures effective pest control without unnecessary risks in your home.
Chemical vs. Natural Remedies
Chemical treatments often provide quick results but require careful handling to avoid harming household members or pets. These products typically contain active ingredients like pyrethroids or boric acid, which target specific pests but can irritate skin or respiratory systems. Use chemical pesticides in small amounts, only where pests congregate, and always follow label instructions for dilution and ventilation.
Natural remedies, such as diatomaceous earth, essential oils (like peppermint or neem), and homemade vinegar sprays, offer safer alternatives with less risk of toxicity. They can take longer to control infestations but reduce exposure to hazardous chemicals. For example, sprinkle food-grade diatomaceous earth in dry areas where insects walk; it disrupts their exoskeletons without harming pets if applied carefully.
Types of Traps and Baits
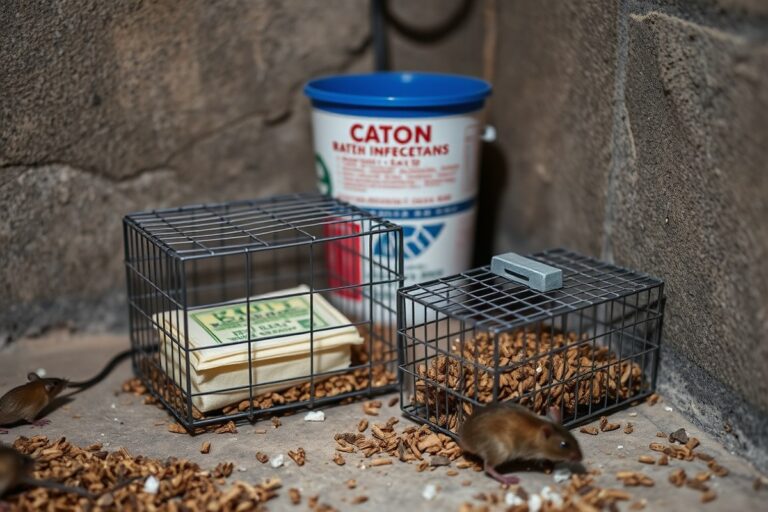
Choosing the right traps depends on the pest type and household environment. Snap traps and glue boards work well for rodents and crawling insects but require placement out of reach from children and pets. Electronic traps offer a chemical-free solution that kills pests instantly.
Baits come in gels, stations, or granular forms designed to attract pests like ants and cockroaches. Station baits keep poison contained, limiting access for non-target animals. Bait must be placed in areas pests frequent but away from food preparation zones for safety.
| Trap/Bait Type | Pests Targeted | Safety Considerations |
|---|---|---|
| Snap Traps | Rodents, large insects | Place out of children’s reach |
| Glue Boards | Cockroaches, spiders | Use in corners, avoid areas pets access |
| Electronic Traps | Rodents | Chemical-free, safer for indoor use |
| Gel Baits | Ants, cockroaches | Use enclosed stations if possible |
| Granular Baits | Outdoor insects | Avoid rain exposure, use around perimeter |
The choice between traps and baits hinges on the pest’s habits and how accessible treatment areas are. Rotate between methods if initial results are slow.
Safety Gear and Precautions
Wear gloves, preferably nitrile or rubber, when handling any pesticides or traps to avoid skin contact. Use goggles to protect your eyes if spraying liquids, and a mask if dust or fine powders are involved. Proper ventilation matters; open windows or use fans when applying products indoors.
Keep children and pets out of treated rooms until surfaces dry completely, which can take from a few hours up to 24 hours depending on the product. Store all pest control materials in locked cabinets away from non-users. Dispose of used traps and containers per local waste regulations to prevent unintended exposure or environmental harm.
Pet- and Child-Friendly Options
Look for products labeled pet-safe or child-safe, particularly those that use natural ingredients like diatomaceous earth or essential oil blends. Avoid sprays with harsh chemicals or strong fragrances that can trigger allergies or poisoning.
Bait stations sealed against pets are preferable for ant or cockroach control. Sticky traps should be placed where pets cannot access them to avoid ingestion or accidental trapping. For rodent problems, use electronic traps or mechanical snap traps instead of poison, which poses significant risks to animals and children.
Always read and follow product labels to confirm safety guidelines; improper use is the main cause of accidental poisonings or ineffective pest control.
Step-by-Step DIY Pest Control Methods That Actually Work
Performing DIY pest control requires following clear steps: prepare the area by inspecting and cleaning, apply treatments carefully, and then monitor and clean up afterward. Adjust these steps based on the pest type to improve effectiveness and safety, indoors or outdoors.
Preparation: Inspection and Cleaning
Start by thoroughly inspecting your home to identify where pests are active and what conditions support their presence. This helps you target treatments effectively and avoid waste. Clean the affected areas by removing food crumbs, debris, and clutter that provide pests with shelter and sustenance.
Inspection includes looking behind appliances, under sinks, in corners, and any cracks or crevices where pests hide. Use a flashlight and magnifying glass if needed. Wash kitchen counters, sweep floors, and vacuum carpets to eliminate potential pest habitats.
Treatment: Application Techniques
Applying pesticide or other control methods demands following product instructions precisely for safety and effectiveness. Use designated products for indoors versus outdoors and wear protective gear such as gloves and masks. Target pests in their known hiding spots, like baseboards and cabinet edges indoors or garden beds outdoors.
Avoid over-application to reduce health risks and prevent pests from developing resistance. For liquids, use a measured spray, and for baits or gels, place small amounts where pests travel but children and pets can’t reach. Repeat treatments if recommended, usually after 7 to 14 days, to catch new pests that hatch.
Post-Treatment: Monitoring and Cleanup
After treatment, check the treated areas daily for signs of pest activity or dead pests. This monitoring shows whether the method worked or needs repeating. Re-clean the area to remove dead pests and residual pesticide according to product guidelines.
Maintain the cleanliness that discouraged pests from the start. Dispose of vacuum bags outdoors. Monitor traps or bait stations regularly and replace them if they fill up or stop working. Pest control effectiveness improves with consistent follow-up.
Handling Different Pest Types
Ants need baits placed along their trails rather than general sprays, as they carry poison back to the nest. For cockroaches, gel baits and residual sprays in cracks work best, combined with moisture control. Rodents require traps or poison placed in secure bait stations outside the reach of pets.
For bed bugs, preparation involves laundering bedding at high heat and vacuuming mattresses before applying specialized insecticides. Fleas respond well to combined indoor vacuuming, washing pet bedding, and outdoor yard treatments. Tailor your methods to each pest’s habits and hiding places for best results.
- Inspect and identify pest areas, noting entry points and nest locations.
- Clean thoroughly to remove food and shelter sources.
- Select appropriate products labeled for your pest and setting (indoor or outdoor).
- Apply pesticide following label directions: dosage, protective gear, and spot size.
- Secure pets and children away from treated areas until safe, as stated on the label.
- Monitor pest activity daily and apply additional treatments as needed after 7, 14 days.
- Clean treated spots, dispose of dead pests safely, and maintain preventive cleaning.
Comparing DIY Pest Control Methods: Effectiveness, Cost, and Safety
You can use natural, chemical, or mechanical methods to control pests at home, each with specific pros, cons, costs, and safety aspects. Natural remedies work best for minor issues and preventions, chemical treatments are often necessary for stubborn or health-risk pests, and mechanical methods offer targeted control without chemicals. Choosing the right method depends on the pest type, infestation level, budget, and safety needs.
Natural Remedies: Uses and Limits
Natural or homemade remedies rely on substances like vinegar, essential oils, diatomaceous earth, and soap sprays. These options are safe to use around children and pets and are inexpensive, often under $20 for materials. They work by repelling insects, disrupting exoskeletons, or cleaning away scents that attract pests.
These remedies are effective against light infestations of ants, spiders, and flies but struggle with larger or hidden populations like termites or cockroaches. Applying them requires frequent repetition, sometimes daily applications, because they break down quickly and don’t kill pests outright. For example, mixing a solution of water and peppermint oil sprayed around windowsills and door frames can deter ants but won’t eliminate nests.
Overuse of acidic substances like vinegar can damage surfaces or plants if not diluted properly. You should test small areas before widespread application to avoid unwanted effects. Natural methods are best as a preventative or supplementary strategy, not the sole solution for serious infestations.
Chemical Treatments: When and How
Chemical pesticides provide stronger, faster control over difficult pests such as termites, bed bugs, and carpenter ants. They come as sprays, baits, dusts, or foggers. Pest-specific products usually cost between $10 and $50 per treatment. You should always read and follow product labels carefully for application rates and reentry times.
Applying chemicals safely requires protective gloves, masks, and sometimes eye protection. Avoid spraying near food, water sources, and ventilation intakes. For example, treating bed bugs often involves a combination of residual sprays and mattress encasements applied to cracks and crevices, which can reduce infestations significantly within weeks.
Chemical methods depend on the accuracy of targeting pests; indiscriminate use may cause resistance, harm non-target species, or pose health risks. When infestations are extensive or involve toxic pesticides, hiring a licensed professional is advisable.
Mechanical Methods: Traps and Barriers
Mechanical pest control includes traps, physical barriers, and manual removal. Common examples are sticky traps for insects, snap traps for rodents, and door sweeps to block entry points. These methods are chemical-free and safe around children and pets.
Traps generally cost between $5 and $30 each and require regular checking and disposal of captured pests. Barriers like fine mesh screens or sealing cracks with caulk reduce pest access effectively. You can install weatherstripping on doors and windows for under $20 to prevent insects and rodents from entering.
The effectiveness relies on thoroughness and persistence. Traps catch only a portion of the population, so repeated use and combining with sanitation helps. Mechanical control is useful for early infestations or alongside other treatments but may be less practical for widespread problems.
Cost Breakdown for DIY Approaches
The cost of DIY pest control varies widely depending on the methods and materials chosen, the size of the infestation, and the type of pest involved. Below is a comparison table outlining key factors for each category.
| Method | Typical Cost Range | Materials Needed | Effectiveness | Safety Considerations |
|---|---|---|---|---|
| Natural Remedies | $5, $20 per treatment | Essential oils, vinegar, diatomaceous earth, soap | Good for small infestations; repels or deters | Safe for household; risk of surface damage if misused |
| Chemical Treatments | $10, $50 per product | Insecticidal sprays, baits, dusts, foggers | Effective for severe infestations; kills pests | Requires PPE; avoid food and pets; follow label exactly |
| Mechanical Methods | $5, $30 per trap or barrier | Sticky traps, snap traps, caulking, screens | Moderate; best combined with other methods | Safe; requires regular maintenance |
For example, controlling an ant problem using natural sprays with peppermint oil might cost $15 total but demands repeated applications. Chemical baits could cost $25 and give results in a few days, but require precise placement. Setting up door sweeps and sealing cracks may be a one-time cost of around $20 with ongoing pest exclusion benefits.
The balance between cost, safety, and pest threat level will guide your choice. Combining methods often improves results while reducing chemical dependence and risk.
How to Prevent Future Pest Infestations and Maintain a Pest-Free Home
Preventing future pest infestations requires consistent maintenance, good hygiene, and environmental management around your home. Taking specific, targeted steps reduces attractants and entry points, lowering the chances pests establish themselves. Regularly repeating treatments and inspections keeps control active before pest populations grow.
Sealing Entry Points and Cracks
Closing all openings where pests can enter is one of the most effective preventive measures. Pests such as rodents, ants, and spiders use cracks in walls, gaps around windows, doors, and utility pipes to get inside. Seal these with caulk for small gaps, foam sealant for larger spaces, or weatherstripping on doors and windows. Pay attention to areas around vents, foundation cracks, and attic openings.
Check seals seasonally since weather changes can cause materials to shrink or crack over time. Repair damaged window screens and install door sweeps to limit access. For pipe penetrations, use steel wool combined with sealant to block rodents because they can chew through softer materials.
Unsealed entry points allow pests easy access; even a quarter-inch gap is enough for many insects or mice.
Proper Food Storage and Cleanliness
Food and water are prime attractants for household pests, so store all edible items in airtight containers made of glass, plastic, or metal. Avoid leaving food out overnight and clean kitchen surfaces after every meal to remove crumbs or spills. Empty trash daily and use trash cans with tight-fitting lids.
Keep pet food sealed and clean feeding areas regularly. Eliminate standing water from sinks, pet bowls, or plant saucers, as moisture can attract cockroaches and mosquitoes. Routine vacuuming and mopping reduce insect eggs and food debris on floors.
- Store grains, cereals, and snacks in sealed containers
- Wipe counters, stove tops, and dining tables after every use
- Take out garbage at least once daily
- Clean under appliances where food crumbs collect
- Fix leaky pipes promptly to reduce moisture buildup
Maintaining high hygiene standards directly lowers pest pressure by removing what they need to survive.
Seasonal Preventive Actions
Adjust your pest prevention routines depending on the season since pest activity changes throughout the year. For example, in spring and fall, focus on sealing entry points and cleaning gutters to prevent rodents and insects from nesting near your home. In summer, keep the yard free of standing water and trim shrubs and grass to minimize pest hiding spots.
In winter, inspect basements and crawl spaces for drafts and moisture, which attract pests seeking warmth. Set traps for rodents early in colder months before they move indoors. Clear away debris and leaf piles around your property year-round since these provide shelter for pests.
Scheduling these seasonal tasks every 3 to 6 months helps maintain control and anticipate pest pressures. Your local climate will influence the timing and specific pests to watch.
Routine Inspections and Treatments
Repeat pest control treatments every 4 to 6 weeks in active seasons to break pest reproduction cycles. Use non-chemical methods like bait stations and traps combined with spot treatments of safe sprays if necessary. Regularly inspect common infestation sites such as kitchens, basements, attics, and exterior foundation walls. Keep a checklist of inspection points and treatment records. For example:
- Examine window seals and door frames for gaps
- Check under sinks for leaks and dampness
- Inspect pantry for signs of weevils or moths
- Monitor rodent traps and replace bait as needed
- Look for new insect trails or droppings around baseboards
Documenting your actions helps you detect new or recurring problems early. Avoid overusing pesticides as this can cause resistance or harm beneficial insects. Focus on prevention and mechanical controls first, applying chemicals only when necessary.
When and How to Safely Use Pesticides Indoors and Outdoors
Applying pesticides safely at home means selecting the right product, using it correctly according to label instructions, and taking precautions to protect children, pets, and plants. You need to understand legal restrictions on pesticide use and keep sensitive areas like gardens safe from damage. Proper safety practices reduce health risks and keep pesticides effective at controlling pests without creating new problems.
Choosing the Right Pesticide Formulation
Select pesticides formulated for the area you intend to treat, indoor pesticides differ from outdoor ones because they have different active ingredients and safety requirements. For indoor use, choose baits, traps, or sprays labeled specifically for indoor application; avoid outdoor garden products inside to prevent human exposure to harsher chemicals. Outdoor pesticides often come as granules, dusts, or sprays that withstand weather conditions.
Look for products with clear usage instructions and those approved by the Environmental Protection Agency (EPA) or your state pesticide regulatory agency. Avoid broad-spectrum insecticides in favor of targeted products aimed at specific pests to limit the impact on beneficial insects and plants. Take note of concentration levels, as overusing concentrated pesticides indoors can increase exposure risk to household members. Using ready-to-use sprays can simplify application, but larger infestations may require diluted concentrates applied with sprayers for even coverage.
Protective Measures During Application
Before applying any pesticide, read the entire label carefully because it shows exactly how much product to use, where to apply it, and necessary protective gear. Always wear gloves, long sleeves, and, depending on the product, a mask to avoid inhaling fine sprays or dust. Keep children and pets out of treated areas until the pesticide dries or the label allows re-entry, which can range from 30 minutes to several hours.
Indoors, close windows and doors during application but ventilate the space fully afterward to reduce indoor air residues. Avoid spraying near food preparation areas or utensils. Outdoors, apply pesticides on calm days to prevent drift onto neighbors’ property or unintended plants. For spray products, use a hand sprayer with a consistent nozzle setting to prevent over-application. Dispose of unused pesticides according to local hazardous waste guidelines rather than pouring them down drains or soil beds to avoid environmental contamination.
Legal Considerations and Usage Limits
Federal law requires that anyone using a pesticide at home follows the product label; disregarding label instructions violates the law and can cause harm. Many states have additional rules on restricted-use pesticides that only certified applicators may purchase or use. Generally, consumer-grade pesticides for home use do not require licenses, but using them improperly can still lead to fines or health risks.
Store pesticides locked away, out of reach of children or pets, and avoid mixing products unless the label explicitly says it is safe. Some municipal or regional governments may ban certain chemicals or have seasonal restrictions, especially near water sources or schools. Before buying, check your local extension office or state agriculture department for banned substances or specific local rules that could affect your choice or timing of pesticide use.
Garden-Friendly Pest Control Practices
When treating pest problems in your garden, avoid broad applications that might harm beneficial insects like pollinators or earthworms. Use spot treatments whenever possible, applying pesticides only to plants or areas showing pest damage or activity. Shield desirable plants by covering them with cloth or plastic sheeting if you must spray nearby, and water the soil before application to reduce pesticide runoff into roots.
Choose pesticides compatible with edible plants to avoid chemical residues on vegetables or herbs. Many insecticidal soaps and horticultural oils work well on garden pests without lasting toxicity. Apply these products late in the afternoon or early evening to reduce exposure to daytime pollinators and allow the product to dry overnight. Monitor your plants after treatment to identify any signs of phytotoxicity, like leaf burn, and avoid repeated applications that exceed label limits to protect plant health.
Recognizing When to Call a Professional Pest Controller
You should call a professional pest controller when the infestation is extensive, hard to locate, or involves pests with specific health risks or structural damage potential. DIY methods often fail against stubborn pests or hazardous situations that require specialized knowledge, equipment, and treatments.
Signs DIY Efforts Are Failing
One clear sign DIY pest control isn’t working is if pest activity persists or increases after several treatment attempts over a few weeks. For example, multiple cockroach sightings despite cleaning and bait use mean you may be missing nesting sites or dealing with pesticide resistance. Continued pest damage, such as chewed wires, holes in wood, or droppings, also shows your efforts aren’t stopping the problem.
Another indicator is if you can’t identify the pest accurately or the infestation involves multiple pest species interacting. Misidentification can lead to ineffective treatments, wasting time and money. Persistent bites, allergic reactions, or health symptoms linked to pests mean you may need a professional to assess and safely handle the situation. If the pests seem to spread beyond the reachable areas, like inside walls or crawl spaces, professional tools and inspection techniques become necessary.
Pests Requiring Professional Treatment
Termites are notoriously difficult to control on your own because they live hidden in wood structures and require specialized baiting systems or chemical barriers. Trying over-the-counter products usually results in wasted effort and continued damage. Similarly, bed bugs demand professional heat treatments or fumigation since they hide in cracks, resist many pesticides, and multiply quickly.
Rodents also often call for pro assistance, especially if you have large infestations. They reproduce fast, can chew through walls and wiring, and carry disease risks. Professionals use traps, baits, and exclusion techniques to remove existing rodents and block entry points permanently. Wasps, hornets, or bees that build nests near your home pose a risk of stings and allergic reactions. Removal at height or in confined spaces is safer with specialized gear and training.
Avoiding DIY Pest Control Pitfalls
Common mistakes include misidentifying pests, which leads to wrong product use or missed treatment targets. You should start by correctly identifying the pest through reliable guides or local extension services to choose a suited treatment plan. Another error is applying pesticides excessively or in unsafe ways, which can harm pets, children, and the environment. Always follow label instructions strictly, wear protective gear, and avoid spraying near food or water sources.
Many DIYers give up too soon or use a single method like traps or sprays alone. Pest control often needs a combination of cleanup, exclusion, and repeated treatments. Set a schedule for follow-up inspections and treatments over several weeks. Another risk is failing to seal entry points, letting pests return after treatment. Use caulk, steel mesh, or door sweeps to block pest access zones systematically.
How to Choose a Reliable Pest Control Service
Check for licensing and certification from your state’s pest control regulatory agency to ensure the company meets professional standards. Ask for references or reviews from past customers to gauge reliability and effectiveness. A good service will provide a written plan covering inspection, treatment methods, safety measures, and follow-up visits.
Discuss pricing upfront and beware of unusually low quotes that might indicate cutting corners. Understand the warranty or guarantee terms and what it covers. Reliable companies focus on integrated pest management approaches, which minimize pesticide use and prioritize long-term prevention. They should also explain how they protect your family and pets during treatments.
Seasonal and Regional Strategies for Better DIY Pest Control
Timing pest control efforts according to the seasons and regional climate makes treatments more effective and prevents recurring problems. Sticking to a schedule based on when pests are most active and choosing the right methods for humid or dry areas keeps your home better protected year-round.
Common Seasonal Pest Patterns
Many household pests follow predictable seasonal cycles linked to temperature and humidity. In early spring, ants, termites, and spiders emerge as they seek food and warmth after winter. Summer brings an increase in mosquitoes, fleas, and flies, which thrive in warmer weather and standing water. Fall typically ramps up rodent activity as these animals prepare for colder months, often seeking shelter indoors. Winter usually sees a drop in many pests, but rodents may still be active inside homes.
Pest control timed to these cycles targets the pests before they fully establish. For example, treating for ants and spiders in March or April reduces infestations before summer. Rodent baiting in October to early November helps stop them from invading as temperatures drop.
Adjusting Methods for Humid vs. Dry Climates
Humidity and dryness affect pest behaviors and the effectiveness of treatments. Humid climates often encourage fungal-based pests like mold mites and increase populations of mosquitoes, cockroaches, and silverfish. Dry climates, on the other hand, favor pests such as scorpions, certain ants, and spiders adapted to arid conditions.
In humid areas, use moisture-reducing measures alongside insecticides: repair leaks, ventilate crawl spaces, and use dehumidifiers to limit habitat. Products like boric acid or gel baits work well for cockroach control because moisture helps them find food and water sources. For dry areas, target cracks and crevices where pests shelter to block access inside.
- In humid climates, focus on reducing moisture and use water-based sprays sparingly to avoid spreading mold
- In dry climates, use dust insecticides or silica gel to target dry, crevice-dwelling pests
- Seal gaps around doors and windows to prevent desert pests like scorpions from entering
- Adjust treatment frequency: humid areas might need quarterly checks, dry areas biannual visits may suffice
- Keep landscaping tidy to reduce pest harborage regardless of climate
Your choice of treatment chemicals and methods must fit the local climate to maximize pest control and minimize waste or resistance.
Timing Treatments for Maximum Effect
Scheduling treatments at the right time improves pest control results. For ants and termites, apply controls during early seasonal emergence before colonies grow large. Use granular baits outdoors in spring and late summer, combined with interior gel baits. Mosquito control is most effective just before and during peak breeding season, applying larvicides in standing water and spraying adult insects weekly until fall.
Follow product label instructions for reapplication intervals. Some treatments last 30 days, others up to 90 days. Scheduling quarterly inspections and spot treatments matches pest life cycles and prevents buildup. Avoid heavy treatments during extreme heat or rain, as both reduce chemical effectiveness and can harm beneficial insects.
Do not overapply pesticides; follow label timings and amounts carefully to avoid pest resistance and environmental harm.
Keep a treatment calendar noting dates of service and next steps. For example:
- March: Inspect and bait for ants and termites
- June through August: Mosquito control and fly traps
- September: Rodent baiting and sealing entry points
- December-February: Inspect and clean to prevent overwintering pest problems
Regional Pest Challenges and Solutions
Different regions face unique pests influenced by local environment and human activity. The Southeast, with high humidity and heat, often struggles with termites, cockroaches, and mosquitoes year-round. The Southwest’s dry, hot climate has common pests like scorpions, spiders, and some desert ants.
Homeowners in humid regions benefit most from moisture control, regular inspections for carpenter ants and termites, and habitat reduction around foundations. In dry regions, sealing entry points tightly and focusing on outdoor barriers for scorpions and ants reduces indoor infestations.
- In the Midwest, fluctuating temperatures mean pest control timing must adapt, rodent control in fall, insect control in spring and summer
- The Pacific Northwest’s damp environment requires mold and mildew prevention alongside pest control
- Urban areas demand careful pest management to avoid attracting neighbors’ pests or violating local rules on pesticide use
Choosing pesticides labeled for the pests common in your region and following local weather conditions will lead to better results and safer application.
Step-by-Step Action Plan for DIY Home Pest Control
Follow this plan to identify, eliminate, and prevent pests using practical steps and safe products. Each phase builds on the last, so you stay organized and track your progress effectively.
- Before you start: Inspect your home to identify the type and location of pests. Look for droppings, nests, damaged materials, or live insects in kitchens, basements, and entry points. Knowing exactly what pest you have directs your treatment and saves time.
- Day 1: Gather essential tools and safe products such as a flashlight, gloves, sealing caulk, bait traps, and EPA-registered pesticide sprays designed for indoor use. Use products labeled for your specific pests and apply only where recommended to avoid risks to children and pets.
- Day 2-3: Begin targeted DIY treatments based on your pest type. For example, set cockroach traps near suspected locations and apply bait gel in cracks. For ants, place bait stations along trails. You’ll know treatments work when pest sightings reduce noticeably within a week.
- End of Week 1: Seal entry points such as gaps around windows, doors, and pipes with caulk or weatherstripping. This step prevents new pests from entering and complements active treatments. Check for reduced sightings or activity around those areas.
- Week 2: Clean and remove food or water sources that attract pests. Store food in sealed containers and fix leaks to limit their survival. A decrease in pest activity confirms these changes are effective.
- After 2 weeks: Monitor pest traps and inspect treated areas. If pest activity continues or worsens, carefully consider using approved pesticides outdoors only, following label instructions strictly. Avoid indoor pesticide use unless absolutely necessary and you are confident in proper handling.
- Month 1 and ongoing: Prevent future infestations by maintaining cleanliness, inspecting your home monthly, and adjusting treatments seasonally. For example, check for spiders and fleas more often in spring and early fall, depending on your region.
- At any time: If infestation grows beyond your control or involves hazardous pests like termites or venomous insects, contact a licensed pest control professional. Attempting to handle such situations yourself can risk safety and worsen damage.
Frequently Asked Questions
What Is the Best Way to Handle a Small Ant Trail in the Kitchen?
The best way is to wipe the trail with soapy water and apply vinegar near entry points. This removes the trail pheromones ants use to navigate and discourages them from returning through the same path.
Can Sealing Cracks in Walls Stop Pests from Entering Completely?
Sealing cracks reduces pest entry but may not stop all pests since some can enter through drains or vents. Focus on sealing gaps larger than 1/16 inch and maintain regular inspections.
Is It Effective to Use Natural Repellents Like Essential Oils for Pest Control?
Natural oils like peppermint or tea tree can repel some pests briefly but aren’t reliable alone for infestations. Use them alongside thorough cleaning and exclusion methods for better results.
How Often Should I Clean to Reduce the Chances of Pests at Home?
Clean floors and surfaces daily in areas like kitchens to remove crumbs and spills that attract pests. Regular cleaning limits food availability, which discourages infestations.
Does Outdoor Pest Control Affect Indoor Pest Populations?
Outdoor pest control can reduce the number of pests entering your house by targeting breeding sites and reducing populations near the foundation. Trim vegetation and keep mulch away from walls for better results.
Can Traps Be Used for All Types of Household Pests?
Traps work well for rodents and some insects like cockroaches but not all pests respond to traps. Identify the specific pest before choosing the right trap type.
Before You Go
Effective pest control starts with regular inspection and early intervention to stop infestations from spreading. Begin by sealing gaps around doors and windows with silicone-based caulk, since pests often enter through cracks as small as 1/8 inch. Cleanup is essential too, remove food residues and store dry goods in airtight containers to limit pest access, reducing the need for pesticides. Taking these steps today helps maintain a pest-free home and can minimize future treatments or professional calls.