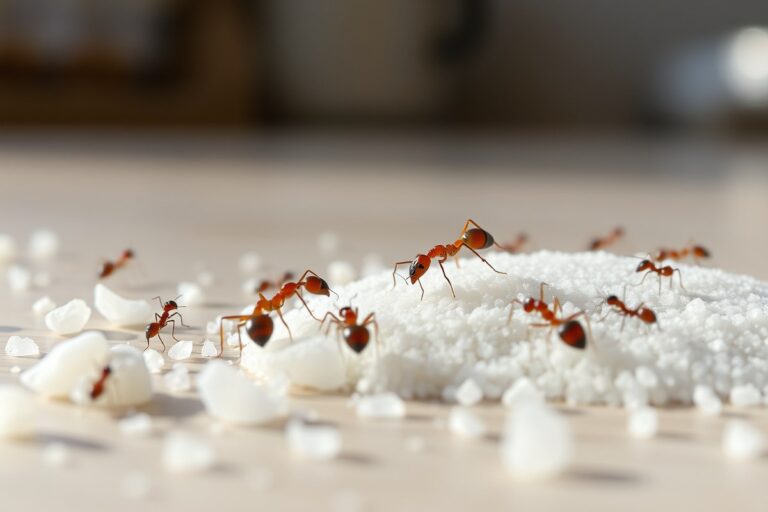
How to Get Rid of Ants Outside: 8 Proven Methods for Lasting Control
Getting rid of ants outside is easier than you might think. You can use natural remedies like borax, coffee grounds, or garlic, along with commercial baits and targeted treatments to keep your yard ant-free. Proper identification of ants and thorough nest removal are key to lasting control.
This information is perfect for homeowners and gardeners who want effective, simple ways to reclaim their outdoor spaces from ants. You’ll learn proven methods for stopping ants, preventing future invasions, and knowing when professional help is needed to protect your lawn and garden.
Key Takeaways
- Identify ant species to choose targeted treatments, as over 25 types behave differently and respond uniquely to pesticides.
- Ants invade yards seeking food and shelter, so remove attractants like uncovered trash and standing water to reduce visits.
- Use natural remedies like essential oil sprays or vinegar for initial ant control, repeating treatments every 3 days for best results.
- Apply commercial ant baits only when temperatures are between 50°F and 90°F, placing traps in the evening if too hot.
- Spot-treat nests by saturating soil with water for 15 to 30 minutes to drown ants, repeating after 22 to 23 hours as needed.
- Prevent reinfestation by storing trash bins 10 feet from your home and washing them monthly with an ammonia solution.
1. How to Identify and Understand Common Outdoor Ant Species

Most outdoor ants fall into a few common species that you can recognize by size, color, and behavior. Look for Argentine ants, which are small, dark brown, and aggressive; they often create sprawling colonies that take over yards by outcompeting other ants. Carpenter ants are larger, black or dark red, and tunnel through wood to build hidden nests in decks or home’s siding without eating the wood. Pavement ants, small and brownish with striped thoraxes, favor nesting under patios or driveways, emerging as they tunnel through cracks. Fire ants stand out with reddish bodies and painful stings; they typically build dome-shaped mounds in sunny, open areas.
Identifying the species is important because it determines the best control approach. Argentine ants spread quickly and require colony-wide treatments because they form multiple connected nests through budding, meaning nests can multiply when disturbed. Carpenter ants need treatments that penetrate wood tunnels, as their nests can hide deep inside wooden structures outdoors. Pavement ants are best found by following their trails which lead back to shallow nests under hard surfaces. Fire ants are visible due to their large mounds, making focused baiting and mound treatments effective.
Check for signs of ants by inspecting moist wood under decks, the edges of patios, any cracks in your concrete walkways, flower beds near your home, and areas where vegetation touches built structures. Watch for trails of worker ants traveling to food or water sources or carrying food back to a nest. Carpenter ants leave sawdust piles near wood, while fire ants vigorously defend their mounds and swarm quickly if disturbed.
Many species build colonies under patios or decks because these spots provide shelter from weather and predators. Pay special attention to mulch beds and damp soil near these structures. Carpenter ants tunnel inside wooden decks or siding, creating hidden nests that can cause damage, while pavement ants nest just beneath patios or slabs. Checking these areas regularly for ants, sawdust, or mounds can help you catch infestations early.
Deciding on treatment starts with matching the ant species to the correct method. For example, use slow-acting non-repellent baits for Argentine and pavement ants, which workers carry back to the queen, effectively targeting the whole colony. Carpenter ants need treatments that seep into wood tunnels, often requiring a higher concentration or professional-grade insecticides. Fire ants respond to mound drenches or granular baits applied directly to their visible nests.
Recognizing ant species and their nesting habits lets you target control efforts where they work best. Spend 10 to 15 minutes following ant trails around your yard to locate nests and assess species. This upfront work saves time and expense by avoiding guesswork and repeated treatments. Expect modest costs for insecticides or baits, natural products start around $10, while professional-grade sprays for tough species like carpenter ants cost more but offer better results. Proper identification helps prevent treatments that scatter ants and multiply nests, making infestations worse instead of better.
2. Why Ants Invade Your Yard and Garden

Ants come to your yard and garden mainly searching for food, water, and shelter. These small insects follow scent trails and take advantage of outdoor conditions that provide easy access to what they need to survive. Understanding what attracts ants outside and how their activity changes with the seasons helps you decide the best times and methods for treatment.
Food and Water Sources That Attract Ants
Ants are drawn outdoors by readily available food like sugary substances, crumbs, and plant sap. Sweet liquids such as maple syrup or spilled soda are especially attractive to common black ants. Also, aphids on plants secrete honeydew, which serves as a natural food source for ants, encouraging colonies to settle near or inside gardens. Moisture is another critical factor, outdoor water sources like leaky irrigation pipes, potted plants with excess water, pet water bowls, and damp soil all invite ants looking for hydration.
To reduce ant attraction, promptly clean up food spills and avoid leaving pet food or sugary juices outside. Fix any water leaks and improve drainage around your garden to limit accessible moisture. Keeping aphid populations under control can also cut down on ant food supplies in plants, making your yard less hospitable overall.
Seasonal Patterns in Ant Behavior
Ant activity depends heavily on temperature and the time of year. In many regions, ants become most active during spring and summer months when temperatures rise above 70°F. This is when colonies expand and worker ants forage aggressively for food and water. Late summer and early fall are key periods for ants to gather resources to survive the colder months, often increasing outdoor activity.
During colder seasons, ants slow down and retreat deeper into their colonies or move indoors where warmth and constant food supply exist. Dry spells can also push ants closer to homes and gardens as they search for water. Planning treatments during early spring and late summer when ants are most active and exposed yields better results. Treating nests or foraging trails in cooler weather or winter tends to be less effective.
Adjust your pest control efforts seasonally by monitoring ant activity and applying treatments before colonies grow too large or before ants move indoors for the winter. This timing ensures more complete control and cuts down on repeated treatments.
How Weather Influences Treatment Success
Weather conditions significantly affect how well outdoor ant control methods work. Rain or heavy watering shortly after applying insecticides can wash away treatments, reducing their effectiveness and forcing you to reapply. Very hot and dry conditions may cause bait formulas to dry out or become less attractive to foraging ants.
Plan your ant control applications on dry days with mild temperatures, ideally between 60°F and 80°F, to maximize bait uptake and insecticide residue persistence. Avoid treatments right before rain forecasts. Also, drought conditions can increase ant activity near homes as water sources dry up, so adjusting timing to address this behavior prevents surprise invasions. Maintaining clean outdoor areas, reducing moisture, and treating at the right time improves your chances of success and reduces unnecessary chemical use.
Apply ant treatments during dry, mild-weather days and reapply after heavy rain to ensure the insecticide remains effective.
3. Effective Natural Remedies to Repel or Kill Ants Outdoors
Natural remedies like diatomaceous earth, borax baits, essential oils, vinegar, and certain spices offer effective ways to repel or kill ants outside. These options rely on non-toxic, often inexpensive ingredients and require proper application to work well. Using each method correctly increases the chance of disrupting ant trails, killing workers, and ultimately reducing infestations without harsh chemicals.
Using Diatomaceous Earth Safely Outdoors
Diatomaceous earth (DE) is a powder made from fossilized algae that damages ants’ exoskeletons and causes dehydration. It works mechanically, so ants don’t develop resistance. Use food-grade diatomaceous earth only. Avoid breathing in the dust and keep it away from wet areas because moisture reduces its effectiveness.
Apply DE in dry, shady spots where ants travel or nest, such as along garden edges, under mulch, and near foundation cracks. Repeat applications every 7 to 10 days after rain or watering. Use about 1 to 2 ounces per linear foot in a thin layer to avoid wasting product.
- Wear a mask and gloves to avoid inhaling dust and skin irritation.
- Use a duster or a sieve to spread a thin, even layer along ant trails and nest entrances.
- Focus on dry surfaces and shaded locations to keep the powder active longer.
- Reapply after rain or watering to maintain contact with foraging ants.
- Keep pets and children away from freshly applied areas until dust settles.
Making Homemade Borax Baits with Precision
Borax mixed with a sugary liquid attracts worker ants who carry it back to their colony, eventually killing the queen and colony members. Use a 3:1 ratio of sugar to borax for an effective homemade bait. Too much borax can repel ants, while too little won’t kill them. Place baits near ant trails but away from pets and wildlife.
- Combine 3 tablespoons of sugar with 1 tablespoon of borax powder in a bowl.
- Slowly add about 1 cup of warm water and stir until sugar and borax dissolve completely.
- Soak cotton balls or small pieces of paper towel in the solution.
- Place the soaked cotton balls on shallow containers or jar lids near active ant trails but out of reach of children and pets.
- Check the bait stations daily and re-soak or replace baits as needed over 1 to 3 weeks.
- Reduce sugary food and water sources in the area to encourage ants to take the bait.
Preparing Essential Oil Ant Repellent Sprays
Essential oils such as peppermint, tea tree, eucalyptus, and cinnamon oil repel ants by masking their scent trails. They are best used as a preventative spray on patios, door frames, and around garden beds. Mixing these oils with vinegar or water creates a natural spray that discourages ant entry and disrupts foraging paths.
Mix oils carefully to avoid overpowering scents that could irritate humans or pets. Store prepared sprays in dark bottles and shake well before use. Reapply every 3 to 5 days or after rain for continued effectiveness.
- Fill a spray bottle with 1 cup of water.
- Add 10-15 drops of peppermint or eucalyptus oil.
- Add 1 tablespoon of white vinegar for extra repellent power.
- Shake well to mix the ingredients thoroughly.
- Spray along ant trails, entry points, and around your yard’s perimeter.
- Reapply every few days, especially after rainfall or watering.
- Test in a small area first to check for any plant sensitivity or staining.
4. Choosing and Using Commercial Ant Baits and Insecticides Outside
Commercial ant baits work by attracting worker ants with a food source that contains slow-acting insecticide. The ants carry the bait back to their colonies, sharing it with the queen and other ants, which can eliminate the entire colony over time. Bait stations are typically placed along ant trails or near nests. This method is effective because it targets ants below the surface where sprays might not reach. Expect to see more ants visiting the bait initially as they discover it, but the colony declines within days to weeks.
Choosing the right commercial ant bait depends on the ant species and outdoor conditions. Liquid bait stations, like Terro Ant Kill Bait Stations, contain sweet liquid that attracts sugar-feeding ants, while granular baits can work better for ants attracted to protein or grease. Insecticide sprays provide fast knockdown but do not eliminate colonies unless used repeatedly. Pet-safe options are available, often containing less toxic ingredients, but always keep baits and sprays out of reach of children and pets.
Timing influences the success of chemical treatments. Apply baits when ants are actively foraging, generally in early morning or late afternoon when temperatures are between 70°F and 85°F. Avoid spraying during rain or when the ground is wet, as moisture can dilute or wash away treatments. Repeat baiting every 7 to 14 days until you see no more ant activity. The table below compares common types of commercial ant treatments for outdoor use, including effectiveness, safety, and cost considerations.
| Product Type | How It Works | Application | Safety Notes | Cost Range |
|---|---|---|---|---|
| Liquid Bait Stations | Slow-acting insecticide in sweet liquid attracts ants to carry poison back to colony | Place near ant trails or entry points; keep dry and shaded | Keep away from kids and pets; low toxicity if used properly | ~$12 for 12 stations |
| Granular Baits | Ants collect granules and bring to nest, targeting colony | Scatter near nests or high-traffic areas on soil or mulch | Use with caution around pets; follow label instructions | $10, $20 per bag |
| Insecticide Sprays | Contact kill ants quickly on contact but may not penetrate nests | Spray directly on trails and nests; avoid wet conditions | Select pet-safe formulas; restrict access until dry | $8, $25 per bottle |
| Ant Traps (non-bait) | Trap ants inside so they cannot leave, reducing population | Place where ants are active; replace as needed | Generally safe; keep out of reach | $10, $15 per pack |
Follow these steps for safe and effective use of ant baits and insecticides outdoors:
- Identify active ant trails and nest entrances before treatment.
- Place bait stations or granular bait near these areas, avoiding direct sunlight or standing water.
- Use insecticide sprays to treat visible ants or nests, applying during dry weather and cooler parts of the day.
- Keep children, pets, and wildlife away from treated zones until the products dry or are removed.
- Repeat treatments every one to two weeks until ant activity ceases.
Applying commercial ant treatments wisely reduces chemical use and increases overall effectiveness. Keep a close watch for ant activity after the first application because colony elimination can take multiple treatments over several weeks. If the infestation persists, contacting a licensed pest control professional is advisable to ensure safety and full removal.
5. Spot-Treating and Removing Ant Nests in Soil or Mulch
Targeting ant nests directly offers the most efficient way to reduce outdoor ant populations. Using boiling water, spot sprays, and mechanical removal can disrupt colonies effectively while protecting your plants and soil.
Careful Use of Boiling Water to Kill Nests
Pouring boiling water on ant mounds can kill ants instantly by scalding them and collapsing tunnels. It is a straightforward, chemical-free method that works well for visible nests in soil or mulch. However, boiling water may not reach deeper tunnels, so some ants might survive.
Ensure your plants are at least several inches away because the hot water can damage roots and foliage. Applying boiling water directly on ant colonies once every few days gives better control, especially during warmer months.
- Bring a pot or kettle of water to a full rolling boil (212°F).
- Locate the ant nest on soil or mulch, avoiding plant bases if possible.
- Slowly pour the boiling water directly into the mound’s main entrance and surrounding tunnels.
- Check the area after 24 hours for active ants and repeat as needed, up to 3 times.
- Avoid pouring boiling water near desirable plants or seeds to prevent damage.
Warning: Boiling water may harm plant roots if spilled on vegetation, so apply it carefully and only on bare soil or mulch.
Applying Spot Sprays on Soil and Mulch
Spot sprays containing targeted insecticides or natural ingredients provide a way to drench ant nests without chemicals spreading widely. These sprays kill ants on contact and help to penetrate tunnels, reaching more of the colony.
Choose sprays labeled safe for outdoor use near plants, and apply them directly to the nest at early morning or late evening to reduce evaporation. Following label directions ensures safe use around children and pets in your yard.
- Select an ant spray formulated for outdoor soil or mulch application and safe near plants.
- Identify the root of the ant mound or entry holes to target with spray.
- Apply the spray generously on and around the mound to drench the nest thoroughly.
- Wait 24 to 48 hours before watering the treated area to avoid washing away the treatment.
- Repeat spot treatment if ant activity returns after 5 to 7 days.
Tip: Avoid spraying on windy days to prevent drift that can harm nearby plants or beneficial insects.
Mechanical Removal and Disturbance Techniques
Disrupting ant nests by physically disturbing or removing soil and mulch can help expose ants to predators and unfavorable conditions. This method works best combined with other treatments like boiling water or sprays.
Removing mulch around nests reduces shelter and moisture, making the area less attractive to ants. For large mounds, digging and transferring soil away from your garden can break tunnels and reduce colony strength.
- Use a garden trowel or small shovel to carefully remove mulch and soil around the ant nest.
- Break up tunnels and mound structure to expose ants to air and predators.
- Dispose of removed soil away from your garden and outdoor sitting areas.
- Apply boiling water or spot spray immediately after disturbing the nest for best results.
- Keep mulch depth thin around treated areas to discourage recolonization.
Tip: Mechanical disturbance alone rarely eliminates the colony but makes chemical or boiling water treatments more effective.
6. Preventing Ants from Returning to Outdoor Areas
Stopping ants from returning after treatment requires ongoing care to make your outdoor spaces less inviting. Keeping your yard clean and free of debris removes both food sources and shelter spots that ants prefer. Rake up leaves, cut back tree branches touching your home, and regularly clear away fallen fruit or other organic matter.
Removing attractants is key. Outdoor garbage cans and compost bins should have tight-fitting lids. Clean these containers often to avoid lingering food particles that draw ants. Place garbage and compost bins away from your home’s foundation and ant trails to reduce the chance of ants entering your living spaces.
Planting ant-repellent plants around your garden or near outdoor seating zones can act as a natural barrier. Mint is a well-known choice; its scent deters ants and other insects. Other herbs like rosemary, garlic, and tansy also repel ants but require checking if they thrive in your local climate. Use pots if your soil is poor or if you want to move plants seasonally.
- Clear away leaves, branches, and other debris regularly
- Seal garbage cans and compost bins; clean them often
- Position bins away from your house and known ant trails
- Plant mint or other ant-repellent herbs around outdoor areas
- Use baby powder or diatomaceous earth along home perimeters as barriers
- Fill cracks and gaps in your home’s exterior to block ant entry
- Water plants and soil carefully to avoid creating moist nesting sites
Maintaining physical barriers also helps prevent reinfestation. Baby powder spread lightly along cracks and entry points can keep ants out without chemicals. Filling crevices in foundations or patios eliminates easy access for ants to move from soil into your home. Keep irrigation targeted and moderate to avoid overly damp soil, which attracts some ant species to nest near your home.
Costs for long-term prevention vary. Mint plants typically cost between $5 and $15 each at garden centers. Baby powder is inexpensive and lasts months when used sparingly. Time spent on cleaning and yard upkeep is ongoing but pays off by reducing repeat ant issues. Watch your yard for new ant activity especially in warm months and adjust your strategies accordingly.
7. Common Treatment Mistakes and How to Avoid Them
One of the main reasons ant treatments fail is using the wrong pesticide for the species you are trying to control. There are about 25 common ant species in the US, and each reacts differently to various chemicals. Applying a product designed for carpenter ants won’t effectively eliminate fire ants, for example. To improve success, identify the ant species first and pick a targeted treatment. Matching pesticides to the species can increase kill rates within a week.
Baiting ants in direct sunlight is a frequent mistake that reduces effectiveness. High temperatures can cause baits to dry out or evaporate, making them less attractive or even toxic to ants before they collect the bait. Instead, place baits in shaded, cool areas and check them regularly to keep the bait fresh. This allows ants to feed on the bait and carry it back to the nest, increasing the chance of colony elimination.
Treating just the visible ants without finding and treating the nest can lead to repeated infestations. Ants can travel up to 25 feet from their nest for food, so spot treatments far from the colony may fail. Use inspection strategies to locate nests in soil, mulch, or under stones. Direct nest treatments or baiting near the nest sites improve long-term results compared to random spraying.
Knowing when to switch methods is important if your current approach doesn’t reduce ant numbers after two weeks. Sometimes natural remedies work best in preventing ants but not in eliminating large colonies. Commercial baits and insecticides usually show results in seven days, so lack of progress after this period suggests changing tactic or consulting a professional. Continuing with the same failed method wastes time and money and allows the ants to strengthen their presence.
- Always identify the ant species before buying pesticides.
- Place ant baits in shaded areas away from direct sun.
- Search for and treat the ant nest directly whenever possible.
- Monitor bait stations regularly and refresh bait as needed.
- Switch treatment methods if no improvement in 7 to 14 days.
- Avoid spraying non-specific pesticides that kill foragers only.
- Keep food and trash sealed to reduce attraction during treatment.
Effective ant control outdoors requires patience and precision. Applying treatments at the right time and place avoids wasted product and repeated effort. Using pest-specific pesticides supports quicker colony collapse, while watching weather and ants’ behavior helps you time your actions for best results. Poor placement, wrong chemicals, or ignoring the nest can all cause treatments to fail.
8. Monitoring Success and Knowing When to Call a Professional
Knowing if your ant control efforts are working requires careful observation over several weeks. After applying treatments like baits or insecticides, check the treated areas every few days for ant activity. You should see a noticeable decline in ants visiting those spots within 7 to 14 days. Successful control means fewer ants foraging, less visible nest activity, and no new trails appearing. Keep in mind, some treatments like baits work slowly because ants carry the poison back to their nest to affect the colony over time.
Keep a simple checklist to monitor progress. Note down the date and location of treatments, the number of ants seen before and after, and any changes in ant behavior. For example, when you placed sugar-based bait pods near known trails at dusk, record how many ants visited or entered the bait station each day. Also, inspect the treated soil or mulch for fresh ant hills or digging. Ant visits to baits stopping after two weeks along with reduced nest activity usually mean the treatment is working. Dispose of old bait traps after about one month to avoid attracting ants without killing them, following the product instructions.
Knowing when to call a professional helps avoid prolonged infestations or damage. Ant activity that continues at the original level or worsens after 2 to 3 weeks of proper treatment signals the problem might be larger or more complex. Large colonies, nesting inside structures, or species resistant to common treatments require professional assessment. Professionals use a multistep approach combining sprays, baits, and barriers for thorough elimination. Also, concerns about using chemicals or spotting nests in hard-to-reach places can be addressed by a licensed pest control specialist.
Maintaining treatment areas safely involves regular inspection and cleaning around bait stations and treated soil. Avoid overwatering treated spots, as excess moisture can reduce bait effectiveness. Remove debris and mulch that encourage ants to nest close to your home. When disposing of old bait traps, seal them in a plastic bag and place them in outdoor trash to prevent pets or wildlife from accessing toxic substances.
Avoid touching bait or insecticide with bare hands and always follow label instructions for safe placement and disposal.
Step-by-Step Action Plan to Get Rid of Ants Outside
Follow these clear steps to identify, treat, and prevent ant problems in your yard and garden. Track your progress and adjust as needed to keep ants away for good.
- Before You Start: Identify the ant species in your yard by observing their size, color, and nest location to choose the most effective treatment. Success means feeling confident in which ant you’re targeting.
- Day 1: Remove food sources, standing water, and debris from outdoor areas to reduce ant attraction. Check for fewer ants and less activity around these spots by evening.
- Day 2: Apply natural remedies like diatomaceous earth or vinegar spray around ant trails and nests. Monitor the treated areas for reduced ant movement within 48 hours.
- Days 3, 5: Set out commercial ant baits near active trails and nests, following label instructions carefully. Confirm bait acceptance by ants and watch for decreased ant numbers in the next few days.
- Week 2: Spot-treat identified nests by digging out soil or mulch around them and applying targeted insecticide if needed. Check for nest activity decline or absence after treatment.
- Week 3: Implement preventative measures like sealing entry points, maintaining dry soil, and regularly cleaning surfaces to stop ants from returning. Ensure no new nests or trails appear during this phase.
- After 4 Weeks: Monitor your yard weekly for ant activity to catch any re-infestation early. If ant numbers increase despite treatments, consider contacting a professional pest control service.
Frequently Asked Questions
What Natural Ingredient Can Effectively Kill Ants Outside?
Borax is a proven natural ingredient to kill ants outside effectively. It disrupts their digestive system when carried back to the nest, eliminating the colony over time.
Can Coffee Grounds Help in Getting Rid of Ants Outdoors?
Yes, coffee grounds repel ants outside by disrupting their scent trails. Sprinkling used grounds near nests or entry points deters ants without harmful chemicals.
Is Garlic a Good Way to Repel Outdoor Ants?
Garlic can repel outdoor ants due to its strong smell. Placing crushed garlic cloves around ant trails or nests can discourage their presence naturally.
How Can I Find Hidden Ant Nests in Soil or Mulch?
Inspect shaded, moist areas where soil meets mulch to find hidden ant nests. Look for small soil mounds or trails leading to these spots as signs of activity.
Are Commercial Ant Baits Safe to Use Outside Around Pets?
Many commercial outdoor ant baits are safe but always follow label instructions carefully. Use baits in spots inaccessible to pets to prevent accidental ingestion.
What’s the Best Way to Keep Ants from Returning After Treatment?
Removing food sources and sealing entry points helps keep ants from returning. Maintaining dry soil and clearing debris reduce nesting opportunities near your home.
The Bottom Line
Getting rid of ants outside requires a mix of identifying the problem, using the right treatments, and keeping your yard less inviting to them. Start by checking your garden beds or mulch areas for small ant trails or nests today, then apply a targeted natural remedy or ant bait based on what you find. This approach helps you tackle the problem at its source and keep ants from coming back. Keep an eye on your progress in the following days to see if further action is needed or if it’s time to contact a pest control professional.