How to Get Rid of Flying Termites: Effective Steps for Fast Control
Getting rid of flying termites starts with quick identification and sealing entry points to stop new swarms. Use natural and DIY methods indoors while focusing on outdoor treatments to eliminate existing colonies. These steps help control the infestation effectively and prevent future damage.
This information helps homeowners, property managers, and DIY pest control fans who notice swarming termites around their property. You’ll learn how to tell flying termites from ants, spot infestation signs, act fast with inexpensive treatments, know when to call a pro, and keep them from coming back season after season.
Key Takeaways
- Identify flying termites by their equal-length wings and thick, straight antennae, unlike flying ants with uneven wings and elbowed antennae.
- Turn off outdoor lights and close garage doors during swarms to contain flying termites in one area for easier control.
- Use beneficial nematodes every two weeks to effectively kill termites and their eggs, preventing colony regrowth.
- Keep firewood and lumber stored at least 20 feet from your house and improve above the ground to minimize termite access.
- Call a professional for a full home inspection if you spot flying termites indoors since they indicate reproductive activity.
- Apply boric acid treatments knowing it can take up to 72 hours to fully kill termites through the colony’s food chain.
What Are Flying Termites and Why Do They Swarm?
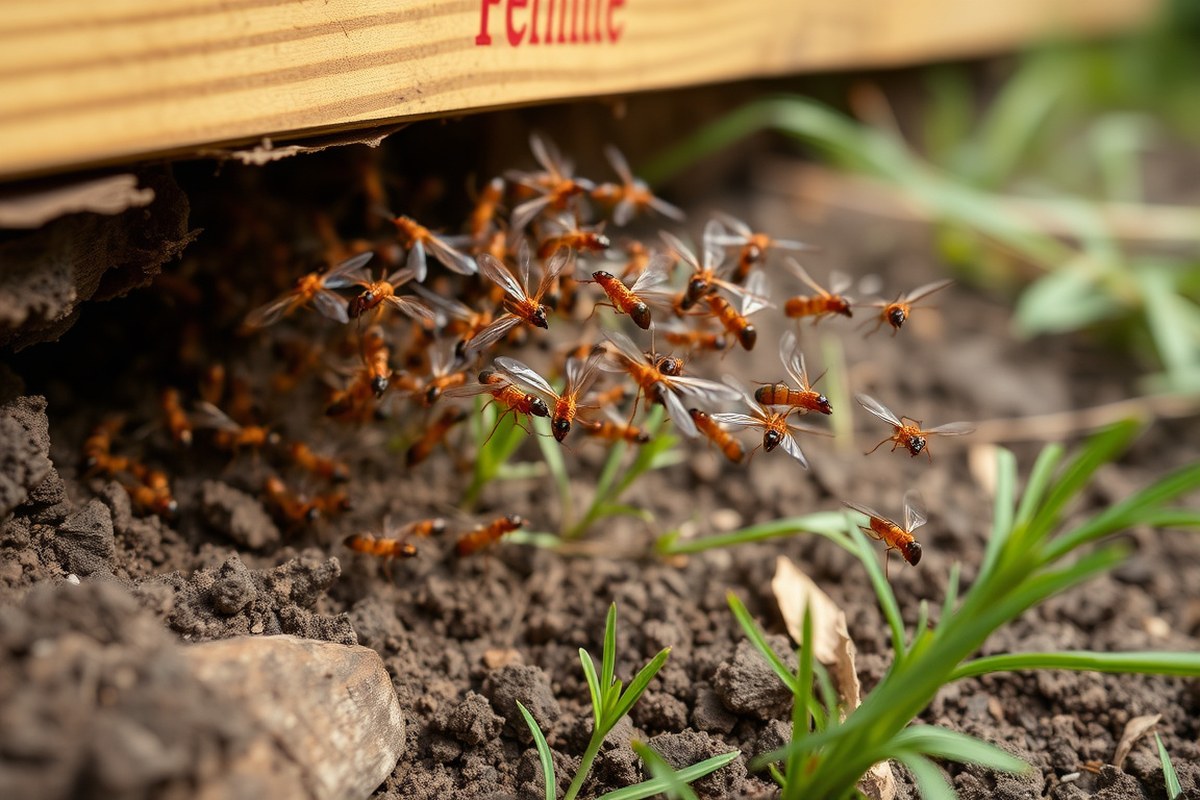
Flying termites, known as alates or swarmers, serve as the reproductive members of a termite colony. Their main function is to leave their original nest, find partners, and establish new colonies. These winged termites only appear when a colony has matured, so seeing them near your home usually indicates a mature colony nearby. That’s why spotting flying termites should lead you to check your property for active infestations and think about professional pest control.
Flying termites swarm mainly during warm months, typically between May and June. The exact timing varies based on local climate and termite species, with some swarms delaying until after rainy or humid weather, which helps them survive while searching for a place to settle. These swarms often happen during the late morning or early afternoon when conditions are sunny and calm. Weather plays a key role; experienced homeowners notice swarms occur after a significant rain or on warm, still days.
The lifespan of flying termites is short. Once they leave the colony, they live only a few days to a week. Their purpose during this time is to swarm, pair off, shed their wings, and begin new colonies. If they fail to find a mate or establish a new colony quickly, they die. This brief window highlights why killing individual swarmers alone won’t solve termite problems. The colony they come from remains active and capable of causing damage. Effective termite control focuses on locating and treating the colony itself, not just getting rid of the flying termites you see.
Understanding why termites swarm is important. Swarming allows the colony to spread and reproduce. Only mature colonies produce these reproductive termites, so a swarm signals your property could have a hidden termite issue. Checking for signs like mud tubes on basement walls or damaged wood can help confirm the presence of a colony. Early detection and professional inspection are essential steps to avoid costly damage and repeated swarms. For homeowners, regularly monitoring your property during the peak swarming season and responding quickly to any sightings can reduce the chances of an infestation growing unnoticed.
How to Identify Flying Termites vs. Flying Ants Accurately
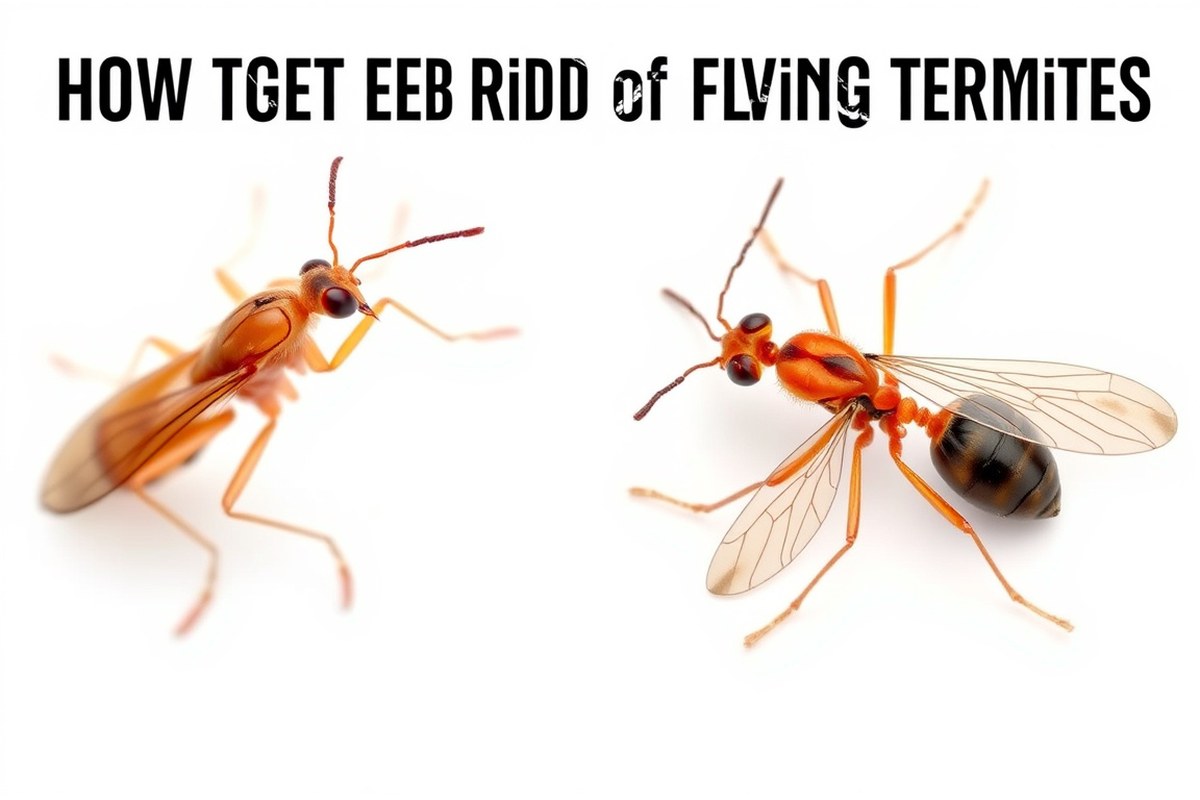
Flying termites and flying ants look very similar at first glance, but there are key features you can check to tell them apart accurately. Identifying whether you have flying termites is important because termites cause wood damage, whereas flying ants typically do not, though carpenter ants can still threaten your property. Pay close attention to their wings, antennae, body shape, and even their size and color to make a confident identification.
Termites have two pairs of wings that are roughly equal in length, often about twice as long as their 1/4 to 3/8 inch bodies. Their antennae are straight and bead-like rather than bent or elbowed, and their waists are broad and uniform without pinching. In contrast, flying ants have distinctly elbowed antennae, two pairs of wings with the front wings larger than the hind wings, and a pinched waist that clearly narrows between the thorax and abdomen. Flying ants’ wings tend to be sturdier, while termite wings are fragile and shed easily.
| Feature | Flying Termites | Flying Ants |
|---|---|---|
| Wing Size | Two pairs, equal length | Front wings larger than back wings |
| Antennae Shape | Straight, bead-like | Elbowed or bent |
| Body Shape | Uniform, broad waist | Pinched waist |
| Wing Texture | Fragile; easily shed | Sturdier |
| Typical Size | About 1/4 to 3/8 inch long (body only) | Similar size range |
| Color | Dark tan to brown | Varies; often darker, sometimes black |
| Damage Risk | Indicates termite wood damage risk | May indicate ants or carpenter ants |
The best way to carry out this identification is to capture a specimen without damaging its wings. Use a jar or clear container at dusk or near light sources where swarms occur. Examine the insect under good lighting or with a magnifying glass to observe the antennae and waist shape closely. Confirm the wing sizes by laying the insect flat on a sheet of paper.
Make sure to correctly identify whether you have termites or ants before starting any treatment, as using the wrong approach can waste money and allow the infestation to get worse.
Keep in mind that both flying ants and termites swarm seasonally, so timing alone won’t help you distinguish them. Paying close attention to these physical traits gives you reliable identification, allowing you to take proper steps to protect your home.
How Do Flying Termites Enter Homes and What Are Infestation Signs?
Flying termites usually get inside a home through small cracks, gaps, and moist or damaged wood areas. Their presence indoors generally means a colony is either in your house or very close to it. Spotting termite activity early and inspecting typical entry points helps you control the infestation before it causes serious damage.
Typical Entry Routes for Flying Termites
Termites often enter homes by exploiting weaknesses in the building’s exterior. They don’t chew through solid concrete but take advantage of gaps around windows, doors, utility pipes, and poorly sealed vents. Once inside, they seek moist wood, which serves as food and shelter. Common entry points include:
- Cracks or gaps in foundation walls or concrete slabs
- Openings around plumbing or electrical wiring
- Unsealed or deteriorating door and window frames
- Expansion joints or gaps in siding material
- Attic vents and roof eaves with openings
- Wood-to-soil contact where external wood touches the ground
Sealing these gaps with caulk, weather stripping, or metal mesh can reduce termite access. Regular maintenance to fix wood rot or siding damage is also key to limiting their entry.
Environmental Conditions Favoring Termite Intrusion
Flying termites thrive in warm, humid environments with readily available moisture and wood. The soil near your foundation should be dry and free of excess mulch or debris, as moist ground helps termites survive and reach your home. Conditions that encourage termite intrusion include:
- High humidity levels inside crawl spaces or basements
- Leaking pipes, faucets, or irrigation systems near the foundation
- Poor drainage that leads to standing water or soil saturation
- Excess mulch piled against siding or foundation walls
- Wooden decks, fences, or firewood stored directly on the ground
- Cracks and crevices retaining moisture after rain or watering
Keeping wood at least 6 inches above soil and improving drainage around your home reduces favorable conditions for termites. Using dehumidifiers in damp crawl spaces also helps prevent infestations.
Visual Indicators of Active Termite Presence
Detecting termite activity early can save you thousands of dollars in repairs. Flying termites indoors are a red flag that a colony might already be established inside or right outside your home. Look for signs such as discarded wings, mud tubes, and damaged wood. A checklist of common termite signs includes:
- Shed termite wings near windowsills, doors, or light fixtures
- Mud tubes or tunnels on foundation walls, wooden beams, or crawl spaces
- Blistered or hollow-sounding wood when tapped
- Frass, tiny wood-colored pellets, around baseboards or furniture
- Swarmers emerging inside walls, attics, or basements
Document when and where you find these signs and make a detailed inspection of the area to locate the colony.
Tools for Detecting Hidden Termite Colonies
Visual inspection is your first step, but some termite activity lies behind walls or under floors. Using the right tools can help detect these hidden colonies sooner. A basic detection kit includes a flashlight, a screwdriver, and a moisture meter. Specific steps to use these tools include:
- Shine the flashlight along baseboards, corners, and wooden structures to spot mud tubes or subtle damage.
- Gently probe suspected wood areas with a screwdriver; soft or hollow spots can signal termite tunneling.
- Measure moisture content in wood and surrounding materials; termite infestations often cause unusually high moisture levels, typically over 20% moisture content.
For more advanced detection, professionals use infrared cameras or acoustic emission detectors, but basic homeowner tools often suffice for initial checks.
Common Areas to Inspect for Termite Activity
Regular inspection focuses on vulnerable home areas where termites are likely to nest or feed. Pay close attention to these spots and inspect them at least twice a year, especially during or after termite swarm seasons. Key inspection sites include:
- Basements and crawl spaces, particularly near foundation walls
- Around wooden door and window frames, including trim and sills
- Wooden floors, especially if they show signs of warping or discoloration
- Areas where wooden structures contact the ground, such as porch supports and decks
- Attics and roof eaves, where swelling or weakened wood can mean infestation
Use a flashlight and probing tool on these surfaces. Note any mud tubes, damaged wood, or swarmers, and act promptly if signs are present. Early detection reduces repair costs and stops infestations before they worsen.
Immediate Actions and DIY Methods to Remove Flying Termites
Spotting flying termites inside your home calls for quick action to prevent a full-blown infestation. Start by containing the swarm, cleaning affected areas, and then use safe chemical options or natural methods to eliminate the swarm and their potential nests.
Initial Containment and Cleaning
Flying termites inside the house indicate reproductive termites getting ready to settle and start new colonies. Immediate containment and cleaning reduce the chance they establish themselves. Avoid using fans or sprays immediately; instead, capture and remove them first.
- Turn off all indoor and outdoor lights near entry points to reduce termite attraction.
- Close windows and doors to restrict termite movement within your home.
- Use a vacuum cleaner to gently capture flying termites without crushing them.
- Empty the vacuum contents into a sealed bag and dispose of it outside, away from your home.
- Wipe down surfaces with a damp cloth to remove any termite residue or pheromones.
- Inspect windows, baseboards, and walls for signs of additional termites or entry points.
Cleaning right away and limiting termite movement helps keep the problem small. Vacuuming is fast and cheap, costing just your vacuum electricity, but don’t reuse the vacuum bag contents indoors.
Safe DIY Chemical Treatments
Some household chemicals can kill flying termites safely and quickly when applied correctly. Products with active ingredients like borates disrupt termite biology and are low in toxicity to humans and pets, making them good choices for DIY treatment.
Sprays containing boric acid or borate salts can be sprayed directly on detected termite swarms and around common entry points like window frames and door sills. Follow all label instructions carefully, including recommended dilution and drying periods.
A ready-to-use solution might cost around $10 to $30 for a spray bottle. Repeat applications every few days over two weeks improve results, as some termites may escape initial contact.
Natural Remedies and Beneficial Nematodes
For a chemical-free approach, beneficial nematodes offer targeted termite control. These microscopic parasitic worms infect and kill termites and their larvae. Purchase nematodes from garden centers or online, usually costing $20 to $40 per treatment.
Apply nematodes by mixing them into water as directed on the package and soaking soil around your home’s foundation and termite entry points. Keep the soil moist afterward to help nematodes survive and move toward termite colonies. Repeat treatments every two weeks until termite activity subsides.
Rubber mulch placed around your yard has also been reported to deter termite swarms by making soil less inviting. Combining trapping, vacuuming, and these natural methods offers a safer overall approach for homes with children and pets.
How Professional Treatments Work and When to Call Experts
Professional termite treatments target both visible flying termites and their hidden colonies with methods designed for complete eradication. Boric acid acts as a slow-acting stomach poison that termites ingest when grooming or feeding. Once consumed, it disrupts their digestive systems and eventually kills them. Spot foams work by expanding into cracks and voids where termites hide, delivering insecticide directly to infestation sites. These foams help reach places sprays cannot, improving overall control.
Expect up to 72 hours for boric acid to fully affect the termites, as it takes time to disrupt their organs and eliminate them. Colony elimination can take weeks to months depending on the treatment type, colony size, and environmental conditions. Professional pest control often uses bait systems that termites carry back to their nests, dispersing the toxin throughout the colony and stopping reproduction. Termiticides applied around your home create a chemical barrier to block termites from entering or exiting, while total colony elimination systems combine multiple approaches for thorough results.
Calling a professional becomes necessary when you spot flying termites inside or near your home, especially if you see mud tubes or wood damage. DIY methods may kill some alates but won’t address the larger colony behind the infestation. Licensed pest control companies provide inspections that detect early signs of infestation before significant damage occurs. For example, a typical professional inspection lasts 1 to 2 hours and costs between $75 and $150, depending on your home’s size and location.
Professional treatments usually range from $500 to $1,500 but vary widely by the severity of the infestation and treatment method. Baiting systems might cost more initially but reduce pesticide exposure and offer ongoing monitoring. After treatment, professionals often recommend follow-up visits every 6 to 12 months to ensure the infestation remains controlled. Homeowners with active termite contracts benefit from faster response times and discounted treatment pricing.
Do not delay calling a licensed professional once you discover flying termites; early intervention prevents costly structural damage and limits the spread of the colony.
Preventing Future Infestations: Home Sealing and Yard Maintenance
Sealing your home effectively blocks flying termites from entering and reduces the risk of future infestations. Begin by inspecting areas where walls meet the ground, around windows and door frames, and any openings for pipes or cables. Use high-quality silicone or polyurethane caulk to fill cracks and gaps that are larger than 1/16 inch. Weatherstripping doors and windows can prevent termites from slipping inside through tight spaces. Installing fine wire mesh over vents and weep holes also stops termite entry without disrupting airflow.
Proper yard and landscape maintenance helps make your property less tempting to flying termites by removing their food sources and breeding grounds. Termites are attracted to moist wood and decaying organic material, so keeping the area around your home’s foundation dry and clear is key. Avoid piling mulch or leaf litter directly against building walls because this can trap moisture and provide easy access points. Maintain a gap of at least 6 to 12 inches between soil or mulch and wooden portions of your home’s exterior to discourage termite activity.
- Remove dead trees, stumps, and fallen branches promptly.
- Store firewood and lumber at least 20 feet from your home and improve it off the ground.
- Keep gutters clean and direct downspouts away from the foundation to reduce moisture buildup.
- Trim back vegetation so that branches do not touch your home, preventing termite bridges.
- Check for and repair leaks under sinks, pipes, and in the irrigation system.
Regularly inspect wooden structures such as fences, decks, and porches, treating them with wood preservatives designed to resist termites. Applying these treatments every 2 to 3 years costs around $50 to $150 per 100 square feet, depending on product choice and application method, and helps prevent termites from establishing colonies. Avoid excessive watering near the foundation and use landscaping fabric beneath mulched areas to improve drainage. These combined efforts reduce termite habitat and make your home less accessible to flying termites looking to settle.
Managing Lights, Seasonal Variations, and Common Homeowner Mistakes
Flying termites often come indoors drawn by lights, especially during their active swarm periods that vary by region. Controlling lighting outside and understanding termite swarming cycles help reduce their presence around your home. Many homeowners make mistakes like over-spraying or ignoring light sources, which can make infestations worse rather than better.
Seasonal and Regional Swarming Patterns
Termite swarming typically happens during specific seasons that depend on local climate. In warmer southern regions, swarms may occur early in spring or during humid summer evenings, while northern areas often see swarms in late spring or early summer after rains. For example, Formosan termites, common in the southern US, usually swarm at night in warmer months from March to June, while subterranean termites in northern states swarm during the day around May or June after rainfall. Knowing exactly when swarming happens in your area lets you prepare by sealing entry points and adjusting outdoor habits during those months.
The timing and intensity of swarms also depend on humidity, temperature, and rainfall. Swarms typically start when soil temperatures reach about 70 to 80 degrees Fahrenheit and humidity is high, signaling ideal conditions for colony reproduction. This range means some regions might experience multiple swarming events in a year, while drier or cooler areas see fewer. Tracking local pest reports or speaking with a local extension office can give you more precise swarm dates. Preventive measures are best timed a few weeks before expected swarms to reduce the chance of flying termites entering your home.
Light Management During Swarm Season
Flying termites are strongly attracted to light sources, especially porch, window, and garage lights. This attraction can cause large groups to gather around illuminated areas at night and sometimes fly inside if lights are left on near open doors or windows. To reduce this risk, turn off or dim outdoor lights during swarm season, ideally starting dusk until late evening when most termite swarming occurs. Closing garage doors and curtains during these times also prevents their entry and helps contain any that are nearby.
Switching outdoor bulbs to yellow “bug lights” or low-intensity LED options reduces attraction because these lights emit wavelengths less visible to termites. Using rubber mulch around your landscape instead of wood mulch may also deter termites, as some homeowners have reported fewer swarms near rubber mulch zones available from hardware stores.
Trying to trap or spray flying termites near lights outside usually doesn’t work well and can scatter them indoors or nearby. Instead, focus on managing lights and sealing structures. Limiting light exposure can cost nothing but a small change in habits and some inexpensive bulbs, but it plays a key role in controlling flying termite activity during peak seasons.
Top Mistakes and How to Fix Them
One common error is treating flying termites exclusively with sprays or insecticides at the outdoor level without removing conditions that attract them. Over-relying on chemical sprays can drive flying termites indoors or cause colonies underground to shift and grow stronger. Instead, focus on reducing entry points, removing wood debris, and maintaining dry soil around foundations.
Another frequent mistake is not recognizing that turning on bright lights inside at night invites more flying termites into the home. Keep interior lights low or off near windows when you spot swarms outside. Closing screens and door gaps is also critical, as tiny cracks as small as 1/16 inch let flying termites in.
Neglecting seasonal preparation is a major oversight. Homeowners who wait until they see swarms inside have missed the best time to act. Begin exterior maintenance and inspection 1 to 2 months before local swarm periods. This includes checking vents, sealing cracks with caulk or foam, and keeping gutters clean to avoid moisture buildup that attracts termites.
How to Monitor Treatment Success and Decide Follow-Up Actions
After treating flying termites, closely monitor the treated areas for at least 4 to 6 weeks. Effective treatment usually results in fewer sightings of winged termites indoors and outside near your home. Check for a drop in new swarms, fewer shed wings, and the absence of fresh mud tubes or damaged wood. Regularly inspecting these signs helps you determine if your efforts are succeeding or if further action is necessary.
Distinguishing harmless swarms outdoors from dangerous ones inside or near your home is critical. Outdoor swarms often occur around lights or mulch and may not indicate an infestation close to your structure. However, sighting flying termites inside your home, especially near windows, doors, or in wall voids, suggests a colony is established nearby. Multiple swarms over weeks or visible wood damage often signal a deeper problem requiring repeat treatment or professional inspection. Use this checklist after treatment to monitor progress and decide next steps:
- Observe indoor and outdoor termite activity weekly for at least six weeks.
- Look for fresh mud tubes on foundations or walls.
- Check for new wing sheds near windowsills and entry points.
- Inspect wooden elements for new damage or softened areas.
- Note any repeated swarms in the same locations.
- Record changes in termite numbers compared to pre-treatment observations.
- Schedule a professional inspection if signs persist or worsen after six weeks.
When signs of activity continue beyond six weeks despite treatment, or if you find new damage, plan for a follow-up application or consult a termite specialist. Ongoing swarming or freshly built mud tubes indicate a surviving or nearby colony. Costs for follow-up treatments vary but typically range from $200 to $800 depending on the severity and method used, professional inspections start around $75 to $150, a worthwhile investment to protect your home’s value.
Keep detailed notes and photos each week; this record helps spot patterns and provides essential information to pest control professionals if follow-up is needed.
Step-by-Step Action Plan to Get Rid of Flying Termites
Follow these clear steps to identify, eliminate, and prevent flying termite infestations effectively in your home.
- Day 1: Identify the Insects, Capture a flying insect and compare its features to reliable guides to confirm it’s a termite, not an ant. Accurate ID ensures proper treatment choice.
- Day 2: Inspect Your Home, Check common entry points like cracks, windows, and wood surfaces for winged termites or mud tubes. Finding signs means infestation is present.
- Day 3: Remove Visible Termites, Use a vacuum or soapy water spray indoors to eliminate flying termites immediately. Success shows in reduced insect sightings indoors within days.
- Week 1: Apply DIY Treatments Locally, Treat affected wooden areas with approved liquid termiticides or baits following label instructions. Monitor for dead termites and reduced activity over 1, 2 weeks.
- Week 2: Call a Professional If Needed, If termite activity persists, schedule a licensed pest control inspection and treatment. A certified technician can provide complete elimination and warranty options.
- Week 3: Seal Entry Points, Repair cracks, gaps, and damaged wood to block future termite access. Confirm success by absence of new termite sightings after sealing.
- Month 1: Adjust Outdoor Lighting and Yard Care, Replace bright porch lights with yellow bulbs and clear wood debris from near your foundation to reduce attraction. Less flying termite presence around your home indicates progress.
- Ongoing: Monitor and Maintain, Use termite detection stations or regular inspections to catch early signs of re-infestation. Continue preventive maintenance for at least one year.
Frequently Asked Questions
What Is the Fastest Way to Get Rid of Flying Termites Indoors?
The quickest way is to eliminate entry points and use insecticides on visible swarmers. Combine this with professional colony treatment to stop new termites from entering your home.
Are Natural Remedies Effective for Controlling Flying Termites?
Natural remedies can help reduce flying termites temporarily but won’t eliminate colonies. Use natural traps or barrier plants outside while arranging professional treatment for lasting results.
How Often Should I Inspect My Home for Flying Termite Activity?
Inspect your home for flying termites at least twice a year, especially during spring or warm weather. Regular checks help detect swarms early and prevent serious infestations.
Can Flying Termites Damage Furniture or Just the Structure?
Flying termites can damage both furniture and structural wood. They swarm to reproduce but their colony eats wood inside your home, which may include wooden furniture.
Do Flying Termites Die After Swarming Season?
Most flying termites die soon after swarming as they mate and establish new colonies. However, remnants inside your home can indicate an active colony needing treatment.
Is It Necessary to Treat the Entire Yard If I Find Flying Termites Outside?
Treating your yard can reduce outdoor termite populations, but indoor prevention is essential to stop entry. Yard treatments help but won’t replace sealing your home and professional indoor control.
Before You Go
Getting rid of flying termites requires a clear identification and quick response to prevent damage to your home. Start today by carefully inspecting areas where you noticed the swarm and remove any discarded wings or visible termites to assess the situation. Taking this step quickly helps you determine if you can handle the problem with DIY methods or should contact a professional for treatment. Regular monitoring after this will protect your home from further termite damage.