

How Do Pest Control Get Rid of Termites: 8 Effective Methods Explained
Professional pest control gets rid of termites by identifying the infestation, applying targeted treatments like liquid termiticides or baiting systems, and monitoring the area to prevent re-infestation. Experts use specialized tools to detect termite activity and choose the most effective method based on the termite species and severity of the problem. Treatments vary by situation, with costs and safety measures tailored to homeowners’ needs.
This information is for homeowners, property managers, and DIY enthusiasts wanting to understand how pest control handles termite infestations. You’ll learn about detection techniques, treatment options with their pros and cons, what to expect during the process, and tips to avoid common mistakes. Knowing this helps you make informed decisions to protect your property from termite damage effectively.
Key Takeaways
- Professional pest controllers use targeted liquid termiticides, baiting systems, and sometimes fumigation to eliminate termite colonies effectively.
- Inspectors check moisture-prone areas, wood damage, and mud tubes to detect termite presence before choosing a treatment method.
- Liquid treatments provide immediate barrier protection, bait systems monitor and control colonies slowly, and fumigation kills all termites but is costly and disruptive.
- Termite treatment often requires initial inspection, application of products, and follow-up visits over several months to ensure colony elimination.
- Costs vary widely by infestation size, treatment type, and region, with safety protocols protecting residents and minimizing environmental impact.
- Regular monitoring and barrier maintenance by professionals help prevent termite return after treatment completion.
1. How Professional Pest Control Experts Eliminate Termites
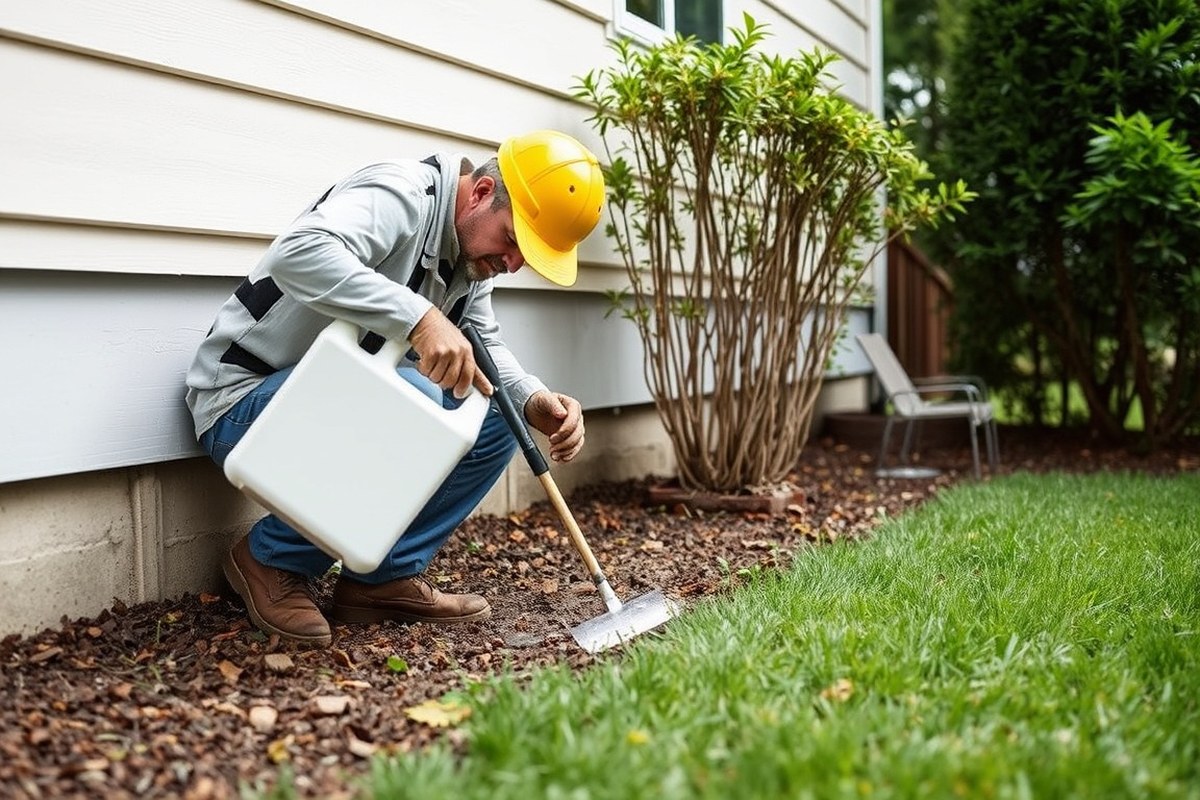
Professional pest control experts rely on a few key methods to eliminate termites effectively. The main approaches include chemical soil treatments, termite baiting systems, and fumigation when infestations are severe. These methods target termites in different ways to disrupt their colonies and prevent further damage to your property.
Chemical soil treatments are commonly used to create a barrier around a home’s foundation. Technicians apply liquid termiticides into the soil either by trenching or drilling holes through concrete slabs, then injecting the chemicals around the perimeter and beneath the structure. This treatment either repels termites or kills those that attempt to cross the treated zone. The chemicals work by breaking down the termites’ nervous system, leading to death. These treatments are effective for protecting existing structures but require careful application to ensure full coverage and prevent gaps where termites can enter.
Termite baits provide a different strategy by exploiting termite behavior. Professionals place bait stations containing slow-acting insecticides strategically around the home. Worker termites find the bait, feed on it, and share it with the colony through social interactions. Since the insecticide is slow-acting, the termites carry it back, gradually eradicating the entire colony. Baiting systems require ongoing monitoring and can take several months to fully eliminate nests but avoid heavy chemical use near your home and target only termites, reducing harm to other insects.
Fumigation is reserved for the most extensive termite infestations, especially drywood termites that live inside the wood above ground. This process involves enclosing the entire structure in a large tent and pumping in a gas that penetrates wood and cracks. The fumigant kills all life stages of termites within the wood and hidden areas. Fumigation requires homeowners to vacate the property for several days and can be more costly than localized treatments. However, it provides a thorough elimination when other methods may not reach every termite.
The choice among these methods depends on factors like termite species, infestation size, building type, and budget. Chemical treatments generally shield foundations and prevent new colonies, bait systems help track and control colonies actively for longer durations, and fumigation offers a one-time, intensive removal but with more disruption. Good results mean no termite activity detected during follow-up inspections and no new damage visible. Treatment failures often come from incomplete soil treatment coverage, poor bait maintenance, or reinfestation from untreated conditions. Professionals combine these approaches or choose one based on a thorough assessment to ensure effective termite control suited to your situation.
2. How Pest Control Professionals Detect and Inspect for Termites
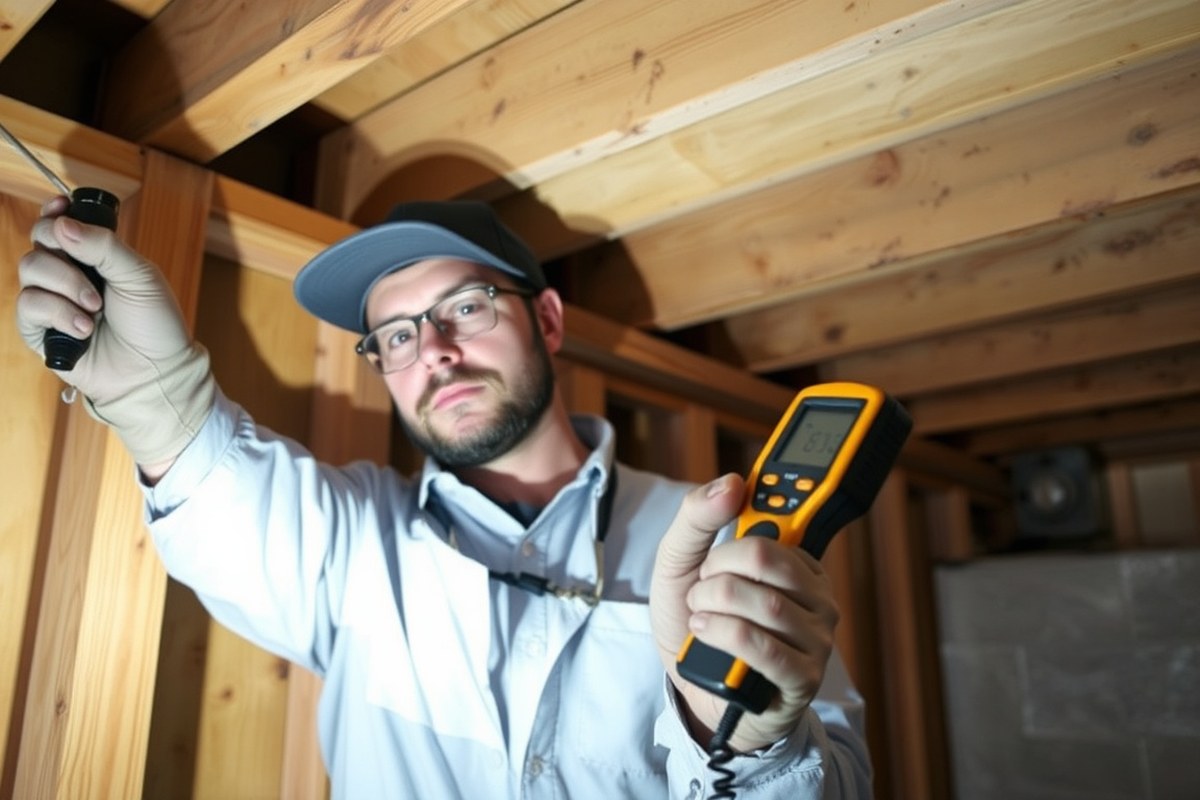
Termite detection relies on a combination of visual clues, specialized equipment, and thorough inspections. Professionals look for specific signs that reveal active infestations and use sensitive tools to detect termites hidden behind walls or under floors. Identifying the infestation’s scope guides effective treatment choices.
Visual Signs of Termite Activity
Inspectors begin by scanning common termite hotspots such as wooden structures, foundations, and crawl spaces. Visible signs include mud tubes on walls or foundations, damaged wood that sounds hollow when tapped, and piles of discarded wings near entry points. Swarmers, or winged termites, emerging inside or outside the home also indicate an active colony.
Some subtle signs reveal early infestations, like blistered or bubbling paint and soft wood surfaces. Spotting these early can save significant repair costs by enabling prompt treatment.
- Small mud tubes running along foundation walls or wood
- Hollow-sounding wood when tapped
- Swarmers or discarded wings near windows, doors, or light fixtures
- Cracked or peeling paint due to moisture from termite tunnels
- Frass, which are small sawdust-like droppings
- Soft or damaged wooden beams, floors, or furniture
Visual inspections require experience since some signs can be mistaken for other pests or moisture damage. Careful scrutiny distinguishes termites from similar issues like carpenter ants or water rot.
Use of Moisture Meters and Probes
Moisture meters help detect areas of improve humidity within wood or building materials, which termites prefer. These handheld devices measure moisture levels, guiding inspectors to high-risk spots that warrant further probing. A sudden rise in moisture often corresponds to active termite galleries.
Probing involves gently poking suspected wood areas with an awl or screwdriver to check for soft spots or hollow cavities. Combined with moisture readings, this method helps locate active tunnels beneath the surface that aren’t immediately visible.
- Use a moisture meter to scan wood surfaces for unusually high moisture
- Mark these areas for subsequent probing
- Carefully probe wood with a screwdriver or awl to test integrity
- Listen and feel for hollow or weak spots indicating termite damage
Accuracy depends on proper use. Excess moisture from leaks can cause false positives, so inspectors correlate readings with other signs before concluding infestation presence.
Infrared and Thermal Imaging Technology
Infrared cameras detect temperature variations behind walls and ceilings caused by termite heat or moisture buildup. Thermal imaging lets inspectors scan large areas without causing damage, highlighting hot or cold spots that suggest termite colonies or water leaks.
This technology is especially useful for detecting hidden infestations in hard-to-reach areas like wall voids, attics, and crawl spaces. It can reduce guesswork and limit unnecessary destructive inspections.
- Use handheld infrared cameras to scan various surfaces
- Look for temperature differences that don’t match ambient conditions
- Focus on spots with higher moisture or termite-generated heat
- Confirm thermal findings by targeted probing or visual checks
Infrared imaging is a supplementary tool; false positives can occur from plumbing leaks or electrical equipment heat.
Professional operators interpret images carefully to distinguish termite activity from other heat sources, improving detection accuracy while protecting the structure.
Detailed Structural Inspection Process
Thorough inspections cover the entire property, including interior and exterior foundations, framing, decks, porches, and attics. Inspectors document every sign, measure moisture, and test suspect wood. They use ladders and crawl boards to access tricky areas.
An effective inspection follows a systematic pattern to avoid missing hidden colonies. Professionals typically start outside at the foundation level, then move indoors. They examine plumbing penetrations, expansion joints, and other points of entry termites exploit.
- Survey foundation walls, slab edges, and soil near structures
- Inspect wooden support beams, joists, and sill plates
- Check for mud tubes along pipe chases and utility penetrations
- Use flashlight, moisture meters, and probing tools during inspection
- Assess areas near water leaks or poor drainage that can facilitate termite growth
Failure to inspect thoroughly can mean missing colonies that will return and cause damage despite treatment. Documentation helps map infestation and monitor treatment progress.
Identification of Termite Species Present
Correct species identification informs treatment decisions because different termites behave and respond to controls in varied ways. Professionals collect specimens from active galleries or swarmers and examine their size, color, and physical traits.
Subterranean termites mainly inhabit soil and require soil treatments, while drywood termites live inside wood and need targeted surface or fumigation treatments. Formosan termites are larger and more aggressive, making early detection critical.
- Collect winged termites or workers during inspection
- Use magnifying lenses or microscopes to check identifying features
- Compare specimens with regional termite species guides
- Adjust treatment plan based on species biology and behavior
Misidentification can lead to ineffective treatments, unnecessary expense, or delayed eradication. Professionals rely on experience and sometimes lab analysis for confirmation.
3. Comparing Termite Treatment Methods: Pros, Cons, Costs, and Use Cases
Termite control methods vary in how they work, how long they take, their costs, and their suitability for different property types and termite species. Chemical soil treatments, baiting systems, fumigation, and heat treatments each have specific pros and cons that make them better or worse options based on infestation severity, home construction, and budget.
Chemical Soil Treatments Explained
Chemical soil treatments create a barrier around and beneath a property using termiticides in liquid form. This barrier either repels or kills termites trying to cross it. The most common chemicals are non-repellent insecticides that termites carry back to the colony, helping control the entire colony over time.
This method can protect wood continually for 5 to 10 years based on the chemical used, soil type, and treatment quality. It requires trenching around the foundation or drilling slab concrete to apply termiticides correctly. Soil treatments work best for subterranean termites, which build tunnels underground, but aren’t effective for drywood termites that live inside wood above ground.
Termite Baits and Colony Elimination
Termite baiting involves placing slow-acting toxic bait stations around the property perimeter. Termites consume the bait and share it with the colony, leading to colony elimination over weeks or months. Baiting is less invasive than soil treatments and offers ongoing monitoring.
Baits are suited for homes where soil treatments are difficult or undesirable, such as landscaped yards or slab foundations, and are useful against subterranean termites. They are not recommended when quick elimination is needed since colony elimination takes longer than chemical barriers.
Fumigation: When and Why It’s Needed
Fumigation involves sealing a structure and filling it with a gas that penetrates wood and kills termites inside entirely. It targets drywood termite infestations that live above ground in wood and can reach areas that soil treatments or baits can’t affect.
This method provides rapid, whole-structure elimination within a couple of days but requires temporary relocation and can be costly. It does not prevent future infestations, so follow-up preventative treatments might be necessary.
Heat and Alternative Treatments Overview
Heat treatment raises the temperature inside wood and wall cavities to at least 120°F, killing termites without chemicals or gas. It is an option to fumigation but is limited by the difficulty of achieving uniform heat throughout a structure. It suits smaller, localized drywood infestations but may not eliminate large or inaccessible colonies completely.
Other alternatives include microwave and electrocution treatments, which offer localized control but are less widespread and may require multiple applications over time. These methods are often used when chemical or fumigation options are unsuitable. The following table compares key aspects of these termite treatment methods to help guide homeowners’ decisions based on their situation:
| Method | Main Use Case | Termite Species Targeted | Typical Timeline | Cost Range (USD) | Advantages | Disadvantages |
|---|---|---|---|---|---|---|
| Chemical Soil Treatments | Prevent or control subterranean termites | Subterranean | Immediate effect; barrier lasts 5-10 years | $500 – $2,500 | Long-lasting protection; effective colony control | Requires trenching/drilling; ineffective against drywood termites |
| Termite Baits | Ongoing monitoring and gradual colony elimination | Subterranean | Weeks to months for colony elimination | $800 – $2,000 (installation + monitoring) | Less invasive; suitable for landscaped/slab homes | Slow action; requires regular monitoring |
| Fumigation | Complete drywood termite eradication | Drywood | 1-3 days treatment plus 1-2 days prep/reentry | $1,200 – $3,500 | Fast, whole-structure kill | Requires vacating home; no lasting barrier; costly |
| Heat Treatment | Localized drywood termite control without chemicals | Drywood | 1 day per treatment | $1,000 – $2,500 | Chemical-free; immediate kill | Challenging to heat entire infested area; possible retreatments |
| Alternative Methods (Microwave, Electrocution) | Spot treatments for drywood termites in limited areas | Drywood | Varies; often multiple sessions | $500 – $1,500 | No chemicals; targeted application | Limited range; multiple treatments needed; not whole-structure |
Cost estimates depend on infestation extent, property size, and local rates. Soil treatments work best for ongoing prevention and control of subterranean species. Baiting allows monitoring and slow colony elimination in places where soil treatment isn’t practical. Fumigation and heat target drywood termites with quick, structure-wide elimination but require more disruption and expense. Alternative spot treatments serve as supplemental tools, not complete solutions.
4. What Homeowners Should Expect: Treatment Process and Timeline
Termite treatment typically spans a few hours to several days depending on the method used and the extent of the infestation. Homeowners should prepare their property before the process, expect specific steps during treatment, and plan for ongoing monitoring. Results evaluation usually starts a few weeks after treatment and continues with periodic inspections.
Pre-Treatment Preparation Checklist
Preparing your home helps professionals apply treatment effectively and ensures safety. It also speeds up the process and minimizes disruptions. Common preparations include clearing areas and protecting household items. Follow these steps to get ready for termite treatment:
- Clear access to treated areas. Move furniture, rugs, or stored items away from baseboards, crawl spaces, and exterior walls where treatment will occur.
- Seal food and water sources. Remove or tightly cover any pet dishes, food containers, and aquariums to avoid contamination.
- Inform household members. Ensure everyone knows the treatment schedule and safety precautions, including temporary restrictions on room use.
- Address ventilation needs. Plan for windows to stay open after application where safe, or prepare fans to reduce lingering fumes if chemical treatments are used.
- Discuss pets and plants. Arrange for pets to be temporarily relocated and protect sensitive plants near treatment zones to prevent exposure.
- Confirm home access. Ensure pest control workers can reach all targeted areas including basements, attics, and exterior soil around the foundation.
These preparation steps allow the treatment to penetrate deeply and reduce chances of re-infestation.
Day of Treatment Procedures
On treatment day, pest controllers perform detailed steps tailored to the chosen method, such as liquid barriers, foam injections, baits, or fumigation. Safety protocols must be followed to protect residents and workers. The main treatment steps generally include:
- Inspection confirmation. Experts reassess termite presence and infestation zones before starting.
- Application of termiticides or bait placement. They treat soil around the foundation, drill into wood to inject chemicals, or install bait stations strategically.
- Sealing access points. Cracks, gaps, or entryways are closed to improve treatment efficacy and block termites’ return paths.
- Ventilation setup. For fumigation, the structure is sealed with tarps and ventilated post-treatment over several hours.
- Cleanup and waste disposal. Excess chemicals and leftover materials are carefully removed following safety guidelines.
- Post-treatment briefing. The professional explains restrictions like re-entry times and precautionary measures for at least 24 to 48 hours.
The entire procedure can take anywhere from 2, 8 hours for localized liquid or bait treatments, or several days for full-structure fumigation requiring sealing and aeration.
Post-Treatment Monitoring and Follow-Up
Monitoring termite activity post-treatment is key to confirming treatment success and catching new infestations early. Pest control companies usually schedule follow-up visits at intervals after the initial work. This ongoing evaluation typically involves:
- Regular inspections. Technicians check bait stations, look for fresh damage, and assess soil and wood conditions around the home.
- Reapplication or adjustment. If evidence of termites remains, additional treatments or extended baiting may be recommended.
- Customer reporting. Homeowners should watch for signs like mud tubes or hollow wood and promptly notify their service provider.
- Documentation. Detailed records of inspection dates, findings, and treatments help track progress and guide future prevention.
Follow-up visits usually occur 3, 6, and 12 months after treatment, then yearly for ongoing protection depending on infestation severity.
Typical Timeline for Results Appearance
Visible signs of termite elimination can take several weeks to become apparent. Initial results often show reduced activity after 2, 4 weeks, with further damage halted over the next few months as workers die off.
Fumigation can kill termites within 24 to 72 hours, but structural repair needs weeks to identify as wood dries out and damage surfaces. Liquid treatments and baits work more slowly by poisoning colonies, with full colony elimination sometimes requiring 3 to 6 months.
Good results include no new damage, absence of mud tubes, no signs of termite wings or discard, and no termite presence during inspections. Homeowners should continue monitoring and maintain barriers or bait stations as recommended to prevent recurrence.
5. Costs, Safety, and Environmental Considerations in Termite Control
Professional termite control costs typically range from $500 to $3,000, depending on the severity of the infestation, the treatment method, and the size of your property. Liquid treatments generally cost less than tent fumigation, which can exceed $2,000 because of the extensive preparation and safety measures involved. Pest control companies usually provide a detailed inspection before quoting a price, so you know exactly what to expect. Factors like the type of termites, property accessibility, and duration of ongoing monitoring also affect the total cost.
Termite treatments use chemicals that require strict safety protocols to protect your family and pets. Professionals apply termiticides with care, avoiding indoor air contamination and often treating soil around your home’s foundation. If tent fumigation is necessary, you will need to vacate your home for at least 24 to 72 hours, and pets must be secured or relocated. After treatment, pest controllers ventilate the home to remove residual chemicals before you return. Following all instructions from your technician minimizes health risks and prevents accidental exposure.
Environmental concerns arise because many termiticides contain chemicals toxic to beneficial insects, aquatic life, and even humans if misused. Proper application aims to localize chemical use, reducing runoff and soil contamination. Your pest control provider should use EPA-registered products and follow label guidelines precisely. Some natural or non-chemical options exist, such as baiting systems that use slow-acting insect growth regulators or physical barriers like stainless steel mesh beneath foundations; these methods limit environmental impact but may require longer treatment times and consistent monitoring.
Eco-friendly alternatives like bait stations use minimal toxicants, targeting only termite colonies and sparing other insects, plants, and animals. While baiting usually costs more upfront and demands regular maintenance, it can be more sustainable over time. Physical barriers installed during construction or renovations prevent termite access without chemicals but are impractical for existing structures. Choosing the right approach depends on balancing environmental goals, budget, and urgency, with pest control professionals offering advice tailored to your situation.
Never try to apply termite treatment chemicals yourself without professional guidance to avoid health risks and ineffective results.
6. How Professionals Ensure Termite Treatment Effectiveness and Prevent Return
After a termite treatment, professionals regularly monitor your property to confirm the treatment’s success and catch any new signs of termite activity early. This monitoring often includes annual inspections and the use of termite bait stations or monitoring systems placed around the home. These devices attract termites, letting the pest control expert check for any remaining or returning colonies. Prompt detection allows for additional targeted treatments before serious damage occurs.
Termite treatment guarantees vary depending on the company and method used. Many professionals offer warranties that last from one to five years, covering re-treatment at no extra charge if termites return during the warranty period. Some warranties require annual inspections and maintenance visits to stay valid. Be sure to read the terms carefully, as warranties typically exclude certain conditions like new infestations from nearby untreated areas or structural changes to your home.
Treatment protection length depends on the method applied and environmental factors such as soil conditions and weather. Liquid termiticides can protect your home for up to five years, while baiting systems might require more frequent servicing but provide long-term control by gradually eliminating colonies. Ongoing maintenance and inspections are key to extending protection and catching potential problems early.
Preventing termites from coming back combines effective treatment with proactive home care. Professionals recommend maintaining a moisture-free environment because termites thrive in damp wood and soil. Removing wood debris, fixing leaks, and keeping gutters clean reduce termite attraction. Also, professional treatments are often paired with physical barriers or soil treatments around the foundation to block reinfestation.
- Annual or semiannual termite inspections following treatment
- Installation and regular servicing of bait stations around the property
- Clear terms specifying warranty length, conditions, and coverage
- Moisture control measures like repairing leaks and improving drainage
- Physical or chemical barriers applied during treatment and checked later
- Prompt retreatment if any termite signs reappear during the warranty
Signs that treatment is working include the absence of active termite tunnels, no new mud tubes on foundation walls, and lack of wood damage found during inspections. Delays in these signs or persistent termite activity usually mean retreatment is needed. Your pest control provider can tell you specifically what to look for and how often to check it yourself between professional visits.
Some situations require customized strategies for the best results. For example, properties near heavily wooded areas with high termite pressure might need more frequent inspections or combined treatment methods. Homes with crawl spaces or slab foundations also have different vulnerability points and may benefit from specialized monitoring systems.
7. How Termite Control Varies by Species, Infestation, and Region
Termite treatment varies significantly depending on the species involved, the severity of the infestation, the type of property, and the local climate. Different termite species require tailored approaches because their behavior, nesting habits, and foraging patterns differ. For example, subterranean termites build extensive underground colonies and often require soil treatments or bait stations around the foundation. Drywood termites, which nest inside wood, call for localized treatments such as fumigation or heat treatments that target the infested wood directly. Knowing the termite species is critical because using the wrong method wastes time and money, and may not eliminate the colony.
Infestation severity also influences treatment choices and outcomes. For light infestations detected early, baiting systems or spot treatments combined with regular monitoring may suffice. In contrast, heavy infestations typically need more complete interventions, such as full-structure fumigation or extensive soil treatments. Severe infestations increase the risk of structural damage, so professionals may recommend immediate, aggressive treatment to prevent costly repairs later. You should expect longer treatment times and higher costs with severe infestations, and multiple follow-up inspections ensure that nests are fully eradicated.
Property type shapes termite control strategies, too. For newer homes with concrete slabs, soil treatment around the foundation can create a chemical barrier to block subterranean termites. Older wooden homes, especially with crawl spaces, might need targeted wood treatments combined with moisture control to reduce termite-friendly environments. Commercial properties with large floor areas may require baiting systems spread more broadly and periodic retreatment. You should inform the pest control provider about the building materials and design, as some treatments might damage sensitive finishes or electronics.
Local climate affects termite activity and treatment timing. In warmer, humid regions, termites are active most of the year, so pest control professionals might recommend year-round monitoring and quicker response to infestations. Cooler or drier regions experience seasonal termite activity, which allows timing treatments during peak foraging periods for better effectiveness. Soil type and moisture levels in different regions also impact how pesticides persist, so professionals tailor chemical applications accordingly. Seasonal timing and regional climate adaptation can reduce treatment frequency and improve long-term protection.
For example, in the southeastern United States, where subterranean termites are common and the climate is warm and wet, soil treatments combined with bait systems are standard. Treatments here must account for heavy rainfall that can wash away chemicals, so retreatment schedules often include reapplication every few years. In contrast, drywood termites found in coastal and southwestern states require invasive treatments like fumigation because soil barriers do not work. These differences mean that using a treatment plan designed for one region often leads to suboptimal results in another.
Professionals first identify the termite species to select appropriate control methods, then assess infestation size and location within the structure. They consider building materials and age, as well as regional climate patterns, to design a treatment plan. Costs reflect these factors; for instance, full-structure fumigation for drywood termites can cost several thousand dollars, while soil treatments for subterranean termites might range in the hundreds or low thousands depending on property size and chemical used. Good results come from thorough inspections, precise treatment application, and post-treatment monitoring tailored to these variables. Skipping steps or using generic treatments often leads to persistent termite problems and recurring damage.
8. Common Homeowner Mistakes During Termite Treatment and How to Avoid Them
Homeowners often unknowingly undermine termite treatment efforts by making avoidable mistakes during and after the process. One common error is disturbing the treated soil or wood too soon, which can break the chemical barrier professionals establish to block termite entry. This disruption allows termites to bypass the treatment, reducing its effectiveness.
Another issue arises when homeowners fail to eliminate moisture sources around the property. Termites thrive in damp environments, so leaving leaks or poor drainage untreated continuously attracts them. Ignoring regular maintenance, like sealing cracks or removing wood-to-soil contact, also creates new entry points, making it harder to keep termites away even after treatment.
Homeowners may also neglect to follow post-treatment instructions, such as avoiding landscaping activities or construction around the treated zones. These activities can disturb or dilute termiticides, leading to treatment failures. Also, some expect immediate results and panic prematurely, which can cause unnecessary retreatments or ineffective DIY fixes.
- Don’t disturb treated areas for at least the timeframe recommended by the pest control professional, usually 30 days.
- Fix leaks and improve drainage to reduce wood moisture around your foundation.
- Remove wood debris, stumps, or firewood piles near the house to eliminate termite food sources.
- Follow all post-treatment care instructions provided, including restrictions on landscaping or digging.
- Schedule yearly inspections to catch any new termite activity before it becomes severe.
- Notify your professional promptly if you see signs of termite damage after treatment.
Professionals addressing treatment failures first assess whether the termite barriers remain intact and if the chemical retreatment zone is still active. They may apply additional termiticides or recommend physical barriers if access points developed. Sometimes, structural repairs are necessary to correct severe damage or reinstate proper moisture control.
Maintaining open communication with your pest control provider and adhering strictly to their aftercare guidelines ensures the highest chance of successful termite eradication and prevents costly retreatments.
Supporting termite control requires a combination of responsible homeowner actions and professional follow-up. Stay proactive by monitoring your property, maintaining a dry environment, and respecting the treatment zone. This cooperation between you and the pest controller keeps safety intact and limits termite damage risks over time.
Step-by-Step Action Plan for Managing Termite Treatment
Use this plan to decide on professional termite control, prepare your home, and track treatment progress to protect your property effectively.
- Before You Start: Schedule a professional termite inspection to identify the species and extent of infestation. Confirm the presence of termites to choose the right treatment.
- Day 1: Discuss treatment options with the pest control expert, including costs, methods, and safety measures. Choose a treatment based on your property specifics and budget.
- Day 2 to Day 5: Prepare your home as instructed by the professionals, clear clutter, move furniture, and ensure access to affected areas. Read and follow all safety guidelines to minimize risk during treatment.
- Treatment Day(s): Allow professionals to apply the selected termite control method. You’ll know it worked when the treated areas are inaccessible and follow-up appointments are set.
- Week 2 to Week 4: Monitor your home for any signs of termite activity as guided by your pest control provider. Absence of new damage or sightings indicates effective treatment.
- 1 to 3 Months After Treatment: Attend the scheduled follow-up inspections to confirm termite elimination and discuss preventive actions. Effective control shows no termite presence and no new damage.
- Ongoing Maintenance: Implement recommended prevention steps, such as moisture control and regular inspections, to reduce the risk of re-infestation over time.
Frequently Asked Questions
How Do Pest Control Companies Handle Termite Colonies Hidden Inside Walls?
They use specialized tools like moisture meters and infrared cameras to detect colonies inside walls. This helps target treatment precisely, minimizing damage and increasing effectiveness compared to surface-only inspections.
Can Pest Control Treatments for Termites Damage Household Pets or Plants?
Most professional termite treatments are designed to be safe for pets and plants when applied correctly. Always inform your pest control provider about pets or sensitive plants to ensure they use the appropriate products and precautions.
Do Pest Controllers Offer Warranties or Guarantees on Termite Treatments?
Many pest control companies provide warranties that cover re-treatment if termites return within a specified period. Confirm the warranty terms and what conditions might void it before treatment begins.
Can Termite Treatments Affect the Structural Integrity of a Home?
Proper termite treatments do not harm a home’s structure; they protect it from damage instead. However, extensive infestations might require repairs, so early treatment prevents further structural issues.
How Quickly Can You Expect to See Termite Activity Stop After Treatment?
Termite activity typically decreases within a few weeks after treatment. Ongoing monitoring confirms effectiveness, and some treatments may continue to work for months to prevent reinfestation.
Are There Termite Signs That Pest Controllers Might Miss During Inspection?
Subtle signs like tiny mud tubes or damaged wood inside furniture can be overlooked. Share any unusual findings with your inspector to improve detection accuracy.
Final Thoughts
Professional pest control eliminates termites through targeted inspections and carefully chosen treatments tailored to your type of infestation and location. You can protect your home best by scheduling a thorough termite inspection with a licensed pest control company as soon as you notice any signs of damage or suspect termites. Acting quickly helps ensure effective treatment and prevents costly damage down the road.




3 Comments