

How to Get Rid of Skin Tags: Safe, Effective Methods and Expert Tips
To get rid of skin tags safely and effectively, you can choose from home remedies, over-the-counter treatments, or professional medical removal. Most procedures take under 30 minutes and address cosmetic concerns or irritation caused by these common, benign growths. Proper identification and care help prevent complications and reduce the chance of recurrence.
This information is for adults with skin tags who want clear, practical advice on removal options and safety. You’ll find expert tips on identifying skin tags, step-by-step home removal methods, what to expect from medical procedures, and when to see a doctor for treatment.
Key Takeaways
- Identify skin tags as small, soft, benign growths that vary from 2mm to 5cm and may be slightly darker than surrounding skin.
- Skin tags commonly develop in adults, especially those with insulin resistance or type 2 diabetes, and may run in families.
- Choose removal methods based on size, location, and preference: home remedies for small tags, OTC for convenience, medical procedures for safety.
- For safe home removal, clean the area, use sterile tools or approved products, and bandage the site for 15 to 30 minutes before washing.
- Medical removal is quick, usually taking 15-30 minutes, and involves freezing or cutting; follow postop care including keeping the wound dry 48 hours.
- Avoid self-removal mistakes like improper hygiene or using unsafe tools, which can cause infection or scarring; seek guidance if unsure.
What Are Skin Tags and How Do I Identify Them Safely?
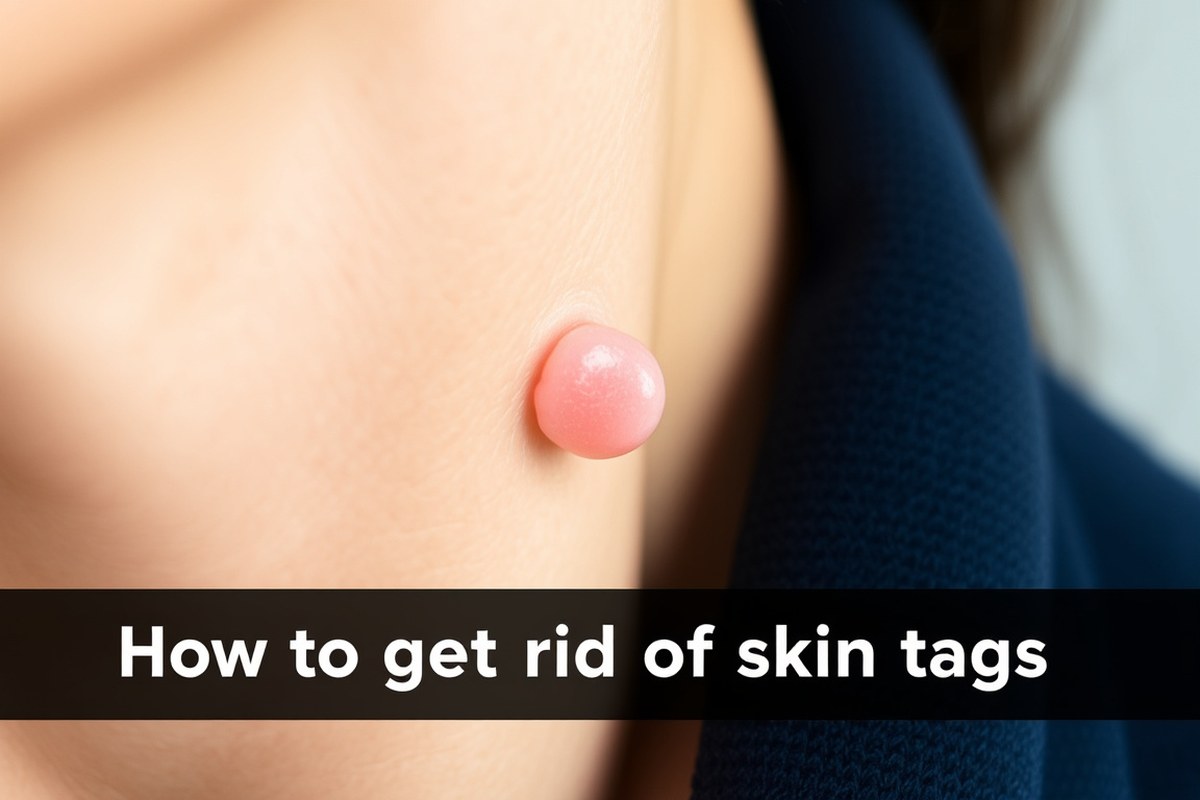
Skin tags are soft, benign growths of skin tissue that typically appear as small, flesh-colored protrusions. They most often develop in areas where your skin naturally folds or experiences friction, such as the neck, armpits, groin, under the breasts, and even on the eyelids. Their size can range from a few millimeters up to half an inch wide, and they usually hang off the skin by a thin stalk called a peduncle. Because they are noncancerous, skin tags pose no health threat but can be bothersome or cosmetically unappealing.
The appearance of skin tags can vary depending on the body area. For instance, those on eyelids tend to be smaller and softer, while tags in armpits or groin may be larger due to more friction and movement. Skin tags may feel smooth or slightly wrinkled and are easy to move or twist when touched. Unlike other skin growths, skin tags usually don’t change color or bleed unless irritated by rubbing or injury. Recognizing these traits helps you differentiate skin tags from look-alike lesions.
Distinguishing skin tags from moles, warts, or other suspicious skin growths is important for safe identification. Moles are typically flat or slightly raised, darker in color (brown or black), and have a uniform shape, whereas skin tags are often lighter and hang off the skin. Warts caused by HPV are rougher and have a grainy surface compared to the smooth texture of skin tags. Seborrheic keratoses, common in older adults, appear as pigmented, waxy, or “stuck-on” patches rather than the soft, pedunculated form of skin tags.
Because some skin cancers can mimic skin tags, especially in unusual shapes or colors, monitoring is important. Look for signs such as irregular borders, rapid growth, color changes, or bleeding. A biopsy from a medical professional may be necessary if a lesion seems atypical or suspicious.
Use this checklist to safely identify a skin tag: it should be soft with a smooth surface; small (usually under 0.5 inches); flesh-colored or slightly darker; attached by a thin stalk; located mostly in skin folds or areas prone to friction; painless and non-bleeding unless irritated. If the growth deviates from these characteristics, such as being flat, hard, or changing color, consult a healthcare provider.
Proper identification matters because accurate recognition allows you to choose safe removal methods or seek medical evaluation if needed. Since skin tags occur in about 60% of American adults and are noncontagious, self-screening helps you monitor for changes without unnecessary alarm. Tracking their size, number, and appearance over time assists in distinguishing harmless skin tags from other conditions that require professional care.
Why Do Skin Tags Form and Who Is at Risk?

Skin tags form when small areas of skin fold or rub against each other, causing a growth of loose collagen and blood vessels enclosed by skin. This friction is a common cause, especially in areas like the neck, underarms, and groin. Genetics also influence your risk; if close family members have skin tags, you are more likely to develop them. Hormonal changes during pregnancy or menopause can trigger new skin tags as hormone fluctuations affect skin and tissue growth.
Having type 2 diabetes or insulin resistance further increases the chance of skin tags. Severe insulin resistance can lead to more skin tags growing, possibly because of its effects on skin cell proliferation and metabolism. This risk also ties closely to obesity since excess weight creates more skin folds, increasing friction and encourages skin tag formation. Weight loss can help reduce this friction and insulin resistance, lowering the likelihood of new tags appearing.
Pregnancy-related hormonal shifts frequently cause new skin tags. In this period, your hormones promote tissue growth, which can manifest as skin tags in friction-prone areas. If you’re pregnant or planning pregnancy, maintaining good hygiene and wearing loose, comfortable clothing may reduce friction and irritation that contribute to skin tag development.
Managing underlying conditions such as diabetes or insulin resistance helps control skin tag formation. Regular exercise and a healthy diet targeting weight loss can reduce obesity-related skin folds and improve insulin sensitivity. For example, losing even 5% to 10% of your body weight might decrease the number of skin folds and friction points.
Reducing skin friction by wearing moisture-wicking, breathable fabrics can minimize the chance of skin tags developing in common areas like the neck and underarms.
Some medications, including illegal steroids, can increase the risk of skin tags by altering hormone levels or immune responses, so discuss any medication concerns with your doctor. Skin tags often remain harmless and can last for years or fall off on their own. Controlling risk factors like insulin resistance and obesity usually helps prevent additional tags from forming.
Comparing Skin Tag Removal Options: Home Remedies, OTC, and Medical Procedures
Removing skin tags can be done through various methods, each with its own benefits and drawbacks depending on factors like location, size, and your tolerance for pain or scarring. Home remedies and over-the-counter (OTC) products may seem convenient and affordable, but medical experts generally do not recommend many of these options due to risks such as infection, scarring, and damage to surrounding skin. Professional removal tends to be quicker, safer, and more reliable, though it comes at a higher cost and requires a visit to a healthcare provider. Here is a comparison of common skin tag removal methods based on effectiveness, cost, pain, healing time, and risks.
| Removal Method | What It Does | Cost | Pain Level | Healing Time | Risks & Considerations |
|---|---|---|---|---|---|
| Home Remedies | Uses natural items like apple cider vinegar or tea tree oil to dry out the tag | Very low (typically under $10) | Minimal to mild irritation | Several days to weeks | May cause skin irritation, infection, scarring; effectiveness is not proven |
| OTC Products | Creams, patches, or freezing kits designed to freeze or dissolve the tag | Low to moderate ($10, $30) | Mild to moderate discomfort | 1 to 3 weeks | Can damage surrounding skin, cause bleeding or infection; often slow and inconsistent results |
| Medical Excision | Precise cutting off of the tag by a dermatologist using sterile tools | About $195 per office visit, including consultation | Local anesthesia minimizes pain during the procedure | 7 to 14 days | Minimal risk when done professionally; possible minor scarring |
| Cryotherapy (Freezing) | Freezing the tag with liquid nitrogen to destroy tissue | Often included in office visit cost ($195) | Brief stinging or burning sensation | 7 to 14 days | Possible blistering, minor discoloration, or scarring |
| Cauterization (Burning) | Burning the skin tag off using heat or electricity | Included in office visit or may have additional charges | Minor pain controlled by anesthesia | 1 to 2 weeks | Small risk of scarring or burns to surrounding skin |
Home treatments are inexpensive and seem attractive for small, non-irritating skin tags. However, they often require repeated applications over weeks and may not fully remove the tag. The risk of infection or skin damage is higher without proper technique and sterile conditions. If the skin tag bleeds, changes size, or persists after home treatment, seek medical advice promptly.
Professional removal through excision, cryotherapy, or cauterization offers the advantage of a single, controlled procedure with a healthcare provider experienced in minimizing pain and complications. Healing generally takes one to two weeks with low risk of adverse effects. The $195 average cost per visit includes consultation and treatment, which can be worthwhile if multiple tags or sensitive areas are involved.
Choosing the safest and most effective option depends on your skin tag’s characteristics and your ability to tolerate minor discomfort and wait for healing. Use home remedies or OTC products cautiously and avoid aggressive attempts like cutting or tying off skin tags yourself. When in doubt or if you have concerns about appearance or symptoms, professional removal is the recommended path.
Step-by-Step Guide for Safe Home Skin Tag Removal
Removing skin tags at home carries risks such as bleeding, infection, and scarring, especially if you cut or pull them off yourself. Tying off a skin tag can work in some cases but requires careful preparation and hygiene. Over-the-counter (OTC) treatments may help, but they need to be used correctly and only on small tags. Never try to cut large skin tags or treat them with sharp instruments at home.
Preparing the Skin and Tools Safely
Cleanliness is critical to prevent infection. Before attempting any removal, wash your hands thoroughly with soap and warm water. Clean the area around the skin tag with an antiseptic solution like rubbing alcohol or iodine. Use new, sterile tools such as dental floss or thread for tying off, and avoid any instruments like scissors or clippers that aren’t designed for surgical use.
Avoid removing skin tags located near sensitive areas such as the eyes, genitals, or on large or fleshy tags. These situations carry higher risks of complications and should be handled by a healthcare professional. Also, do not attempt removal if you have diabetes, poor circulation, or any blood clotting disorders as those increase infection risk and impair healing.
Performing the Tying or Treatment Procedure
Tying off a skin tag works by cutting off its blood supply, causing it to fall off after several days. Use a clean piece of dental floss or thin cotton thread to tightly wrap the base of the skin tag. This method takes patience and care to avoid damaging healthy skin or causing excessive pain.
- Cut a 6, 8 inch piece of dental floss or thin thread and sterilize it by soaking in rubbing alcohol for 5 minutes.
- Wash and dry your hands, then clean the skin tag and surrounding skin with an antiseptic wipe.
- Wrap the floss tightly around the base of the skin tag, as close to the skin as possible, to stop blood flow.
- Tie a secure knot and trim any excess floss so it doesn’t catch on clothing.
- Check the site daily, keeping it clean and dry, and avoid pulling or disturbing the floss.
- The skin tag should shrivel and fall off within 3 to 7 days.
Avoid using scissors or nail clippers to cut off a skin tag. This can cause heavy bleeding because skin tags often have a blood vessel inside. OTC treatments like liquid freeze kits are an option but typically work best on small tags and should be used according to package instructions to limit skin damage.
Post-Procedure Care and Monitoring for Complications
After removal, keep the area clean and dry to avoid infection. Gently wash the site with mild soap and water after the first 48 hours. Apply an antibiotic ointment like bacitracin as directed to help prevent infection and cover with a sterile bandage if needed.
Watch for signs of infection such as redness, swelling, warmth, pus, or increasing pain. Minor bleeding may occur but should stop quickly; heavy or persistent bleeding requires medical attention. Avoid scratching or picking at the site until fully healed to minimize scarring. Healing time usually ranges from one to two weeks depending on the method and skin type.
Medical Skin Tag Removal: What to Expect During and After
Medical removal of skin tags typically involves procedures like freezing with liquid nitrogen, cauterization, or cutting. These methods are done by a dermatologist and have varying pain levels and healing timelines, often resulting in quick recovery with minimal complications.
Cryotherapy and Freezing Explained
A typical method for removing skin tags involves a dermatologist applying liquid nitrogen directly onto the tag. This very cold liquid freezes the tissue, which causes it to dry out and eventually fall off within one to two weeks. Usually, the doctor sprays or applies liquid nitrogen in a controlled way on the skin tag. Many times, the freeze-and-thaw process is repeated three times on each skin tag to make sure it’s fully removed.
This method works well for smaller skin tags and multiple tags because it can be done quickly and efficiently. Liquid nitrogen used by professionals reaches much colder temperatures than over-the-counter freeze treatments, which means home products may not always be effective. You might feel brief stinging or burning during treatment, but the pain is generally mild and short-lived.
Cauterization and Surgical Removal Methods
Cauterization removes skin tags by burning them off using electrolysis, which involves applying heat through a small electric current. This method typically requires local anesthesia, so pain during the procedure is minimal. It prevents bleeding by sealing blood vessels as it works, and it is often chosen for medium to larger skin tags or those in sensitive areas.
Cutting off the skin tag with surgical scissors or a scalpel is another option. This involves numbing the area with a local anesthetic before a careful, quick snip to remove the tag. Sometimes, ligation is used where a surgical thread ties off the blood flow to the skin tag, causing it to fall off over time. Cutting and ligation may cause minor discomfort during and shortly after the procedure but heal well under proper care.
Healing Process and Expected Recovery Times
After any professional removal like cryotherapy, cauterization, or cutting, you can usually expect the treated area to heal within one to two weeks. Cryotherapy sites may develop a blister or scab as the dead tissue sheds, so keep the area clean and avoid picking at scabs to prevent infection. Minor redness or tenderness can occur but typically fades quickly.
Cauterized sites heal somewhat faster due to blood vessel sealing, often experiencing less bleeding and swelling. Surgical cutting wounds may require a few days for initial healing and sometimes a week or more to fully repair depending on tag size and location. Follow your dermatologist’s instructions for wound care, including gentle cleaning and applying antibiotic ointment if advised.
Keep the removal site clean and avoid irritation to reduce the risk of infection and promote faster healing.
Common Mistakes and Risks in Self-Removal and How to Avoid Them
Removing skin tags on your own carries risks if you don’t take proper precautions. Common mistakes include using unclean tools, pulling or cutting skin tags without sterilization, or applying home remedies to areas that are sensitive or prone to infection, such as near the eyes or genitals. These practices can cause excessive bleeding, infection, or scarring.
Signs that a skin tag removal attempt has led to complications include persistent pain, redness, warmth, swelling, pus drainage, or bleeding that doesn’t stop after a few minutes. Mild bleeding can often be controlled by applying direct pressure with a clean cloth for 10 to 15 minutes. Cleaning the area gently with soap and water and applying an antibiotic ointment can help prevent infection. Avoid covering the area with tight dressings that could trap bacteria. Some quick tips to avoid common risks during self-removal include:
- Use sterilized scissors or clippers and clean the skin with rubbing alcohol beforehand.
- Avoid removing skin tags that are large, located near the eyes, genitals, or on the face.
- Do not use harsh chemicals or home remedies like corrosive liquids unless directed by a healthcare provider.
- Be cautious with any bleeding and never attempt to remove multiple skin tags at once if you have bleeding disorders or take blood thinners.
- Stop the removal process immediately if you experience severe pain, heavy bleeding, or swelling.
- Keep the area dry and clean after removal to reduce infection risk.
- Monitor the wound daily for signs of infection over the next week.
Seek medical attention if you notice excessive bleeding that does not slow within 15 minutes, spreading redness or swelling, fever, or persistent pain. Also, see a doctor if the growth changes appearance, recurs quickly, or you’re unsure if it’s a skin tag or a different lesion. A healthcare provider can safely remove skin tags, particularly in sensitive or high-risk areas, and confirm the diagnosis.
How to Prevent Skin Tags and Minimize Recurrence
While you can’t completely stop skin tags from forming, you can lower the chance of getting new ones by managing the causes that lead to their development. Skin tags commonly show up where skin surfaces rub together or against clothing, creating warm and moist areas that favor their growth. Reducing friction and irritation by avoiding tight clothes and jewelry rubbing on your skin can help prevent new skin tags. For instance, choosing loose cotton garments rather than tight synthetic ones can reduce moisture and rubbing in areas with skin folds.
Maintaining a healthy weight plays a significant role in minimizing skin tags. Excess weight increases skin-on-skin contact, especially in areas like the neck, underarms, and groin. By losing weight through balanced diet and regular exercise, you decrease this friction and the risk of developing additional tags. The Centers for Disease Control and Prevention (CDC) advises adults aim for at least 150 minutes of moderate physical activity weekly to support weight management, which may also limit skin tag formation.
Managing underlying health conditions such as diabetes can also impact skin tag development. Diabetes can be associated with abnormal skin growth, including skin tags. Keeping blood sugar levels within target ranges set by your healthcare provider lowers complications and may reduce new skin tag growth. Regular check-ups and following prescribed treatments for conditions like diabetes, hormonal imbalances, or obesity provide another layer of prevention by addressing the root causes that trigger skin tags.
Good hygiene practices help minimize skin irritation and moisture, which are friendly environments for skin tags. Gently cleaning and fully drying areas prone to tags daily reduces bacterial or fungal growth that can worsen skin conditions. For instance, drying folds of skin carefully after bathing lessens moisture and keeps friction low. Using mild powders or barrier creams in high-friction areas may also help protect skin from rubbing.
If you notice a sudden increase in skin tags, consider if recent weight gain or hormonal changes might be contributing factors by discussing this with your doctor. Sudden or unusual growths should be evaluated to rule out other skin conditions or health issues. Always check with a medical professional before attempting to remove large or numerous skin tags yourself, since improper removal can cause bleeding or infection, particularly if tags are vascular or growing rapidly.
When to See a Doctor About Skin Tags and Safety Considerations
Most skin tags are harmless and do not require medical treatment, but certain warning signs mean you should see a doctor for evaluation and removal. Avoid attempting to remove skin tags on sensitive areas like your eyelids at home due to higher risks of complications. Always ensure any product or procedure you choose follows FDA safety guidelines and get professional advice to reduce risks.
Signs of Suspicious or Atypical Growths
Skin tags usually look like small, soft, flesh-colored or slightly brownish bumps that hang off the skin on a narrow stalk. If a growth changes color, size, shape, or texture rapidly, bleeds, oozes, or causes pain, you should not assume it is a skin tag and must see a healthcare professional promptly. A doctor can distinguish benign skin tags from potentially dangerous growths, including skin cancers, by examining the lesion, sometimes performing a biopsy.
Use this decision rule: If the growth is new and grows quickly, if it is irregular with multiple colors, has an uneven border, or if it itches or bleeds, schedule an appointment with a dermatologist within a week. Suspicious features require medical removal and possible pathology to ensure safety.
Special Considerations for Sensitive Body Areas
Removing skin tags on delicate locations like the eyelids, genitals, or inside the nose carries higher risks such as infection, scarring, or injury to important structures. Home removal methods, like cutting or applying over-the-counter chemicals, should never be used in these areas. These places need expert assessment and removal by a trained medical professional who can minimize complications and manage pain safely.
For example, eyelid skin tags should be removed only by a dermatologist or ophthalmologist using sterile tools and sometimes local anesthesia. Attempting self-removal there can lead to serious damage or infection. Remember that not all skin tags on sensitive areas require removal unless they cause discomfort or interfere with function.
Never cut or apply freezing agents to skin growths near your eyes or genitals at home; seek professional care.
Evaluating Product and Procedure Safety
Look for FDA clearance or approval when choosing products for skin tag removal, which indicates the product meets safety and manufacturing standards. Over-the-counter products targeting skin tags often contain ingredients or devices intended for external skin use only and recommend avoiding sensitive areas. Follow all package instructions exactly, and stop use immediately if you experience pain, swelling, or severe irritation.
Doctors typically do in-office removal using methods like snipping, freezing (cryotherapy), or cautery under sterile conditions. These procedures typically cost between $100 and $500 depending on the location and number of tags, but they offer immediate and safer removal with minimal risk of infection. Many dermatologists will also check for other skin concerns during the visit, providing added health benefits.
Always verify the credentials of any practitioner or product, and avoid DIY kits with poor reviews or vague ingredient lists. Medical supervision is the safest route, especially for larger, multiple, or recurring skin tags.
Step-by-Step Action Plan for Safe Skin Tag Removal
Follow these clear steps to identify, remove, and prevent skin tags safely, whether at home or with medical help.
- Before You Start: Confirm the growth is a skin tag by checking for a small, soft, flesh-colored bump that hangs off the skin on common areas like the neck or armpits. Avoid removal if the growth is changing color, bleeding, or painful; see a doctor instead.
- Day 1: Choose your removal method based on size and location: start with gentle home remedies or over-the-counter products for small, accessible skin tags. Successful removal means the tag dries up and falls off within one to two weeks.
- After 1 Week: Monitor removal sites for signs of healing like no redness, swelling, or infection. If irritation or signs of infection appear, stop home treatment and consult a healthcare provider.
- Week 2: Care for the area with clean, dry skin and use gentle moisturizers to aid healing while avoiding scratching or picking at the site. Healthy skin without scabs or scars indicates proper healing.
- Week 3: Review any remaining tags and decide if you want to try another removal session or seek professional removal, especially for large or stubborn tags that didn’t respond to initial treatment.
- Before Medical Removal: Schedule a consultation with a dermatologist if tags are painful, numerous, or in sensitive areas. Expect a brief appointment with local numbing and quick excision or freezing. Success means complete tag removal with minimal scarring and no infection.
- After Medical Procedure: Follow post-care instructions strictly, such as keeping the site clean and avoiding sun exposure. Proper care leads to fast healing without complications.
- Ongoing Prevention: Reduce friction in vulnerable areas by wearing loose clothing and maintaining a healthy weight, which lowers your risk of new skin tags. Check your skin every few months to catch new tags early.
Frequently Asked Questions
What Are Skin Tags a Warning For?
Skin tags are usually harmless and not a warning sign of serious health issues. However, sudden growths or changes should be checked by a doctor to rule out other skin conditions.
Can Skin Tags Be Removed Naturally?
Some people try natural remedies, but these methods lack strong scientific support and can cause skin irritation. Medical removal is safer and more effective.
What Is the Reason for Skin Tags?
Skin tags form due to skin rubbing against skin and may be linked to genetics, obesity, or insulin resistance. They are benign, noncancerous growths.
Will Skin Tags Go Away on Their Own?
Skin tags can fall off naturally if their blood supply is cut off, but most remain until removed. Patience sometimes works but not reliably.
Can I Use Over-The-Counter Products to Remove Skin Tags?
Yes, some OTC products exist but may cause skin damage if misused. It’s best to follow instructions carefully or see a doctor.
Is It Safe to Remove Skin Tags at Home with Scissors?
Cutting skin tags at home risks bleeding, infection, and scarring. Professional removal is safer for most people.
Final Thoughts
Removing skin tags safely requires choosing the right method based on your comfort, size of the skin tag, and potential risks. Avoid cutting or pulling them yourself, as that can cause infection or bleeding. Today, carefully inspect any skin tags you want to remove and consider consulting a healthcare provider before trying home removal, especially if a tag changes in appearance or causes discomfort.


4 Comments