
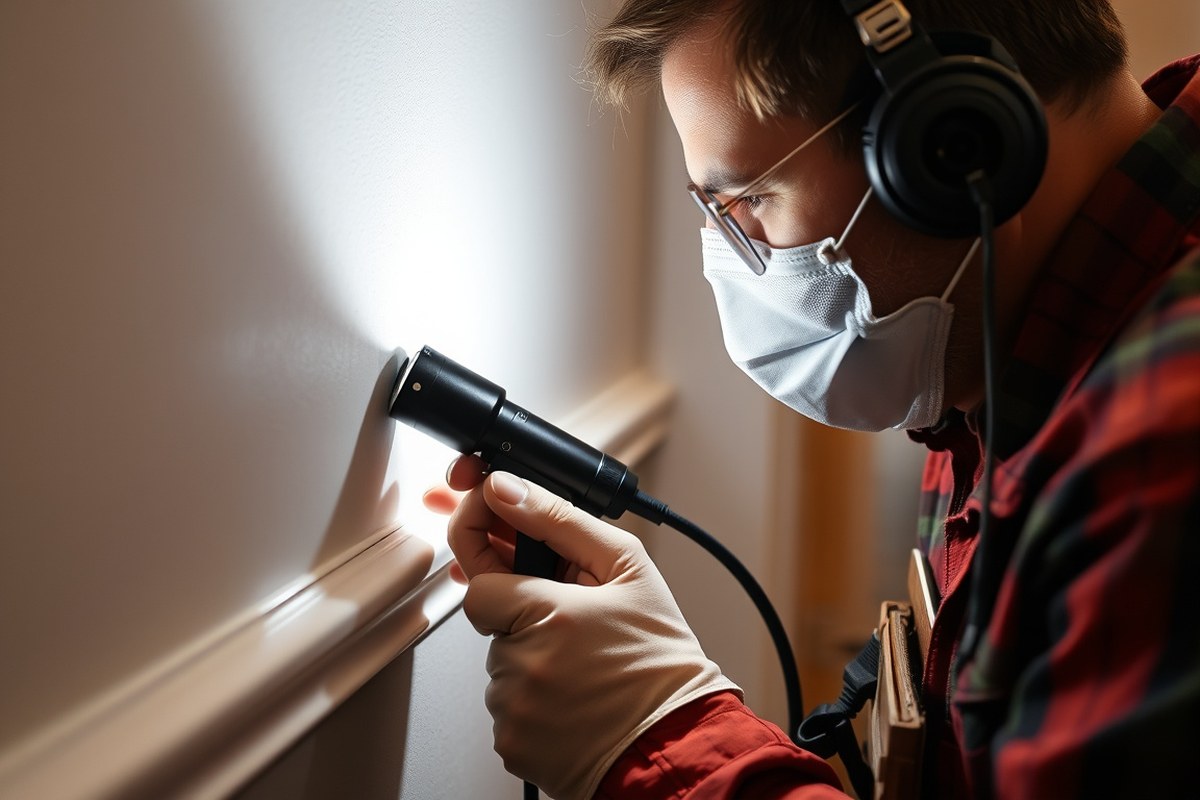
How Does Pest Control Find Ant Nests in Home: 8 Proven Methods That Work
Professional pest control finds ant nests in homes by first identifying the ant species and then locating nests through visual inspections, using baits suited to the species, and employing specialized tools and technology. They check common entry points, foundation areas, and hidden spots indoors where ants prefer to nest. This focused approach allows for targeted treatments that eliminate nests effectively.
This information is for homeowners or renters dealing with ants inside their homes. You’ll learn proven methods pest control experts use to find nests, signs that indicate indoor infestations, how different ant species affect detection, DIY tips, and when calling a professional is the best option.
Key Takeaways
- Pest control experts spend 80% of their ant treatment time locating and eradicating the entire colony for effective results.
- Look for trails, small black ants about 1/8 inch long, and entry points like cracks and wall voids to spot indoor nests.
- Different ant species nest in various indoor locations, affecting detection; species-specific bait is essential for removal success.
- Homeowners can inspect and identify entry points but often mistake surface ants for nests, making professional help advisable.
- Pest technicians use tools like detailed inspections and bait stations, sometimes applying labeled liquid treatments in wall voids.
- Effective ant nest elimination may take several treatments, with professionals offering detailed inspection reports and recommendations.
1. How Pest Control Experts Locate Ant Nests Indoors

Locating ant nests inside a home requires careful inspection and understanding of ant behavior. Pest control experts rely on a combination of visual clues, specialized tools, and knowledge about ant habits to find colonies that are often hidden within walls, under floors, or in less visible areas. Finding and eliminating the queen and colony is important because without disrupting the entire nest, treatments will only provide temporary relief. Here is how pest control professionals typically locate ant nests indoors:
- Inspect known ant traffic paths. Technicians start by observing where ants are most active, following their trails from food sources or water to locate the nest entrance or tunnel.
- Identify entry points and nesting sites. They carefully examine cracks, gaps around pipes, baseboards, and wall voids to find possible entry points and signs of nesting, such as soil deposits or small openings in walls.
- Use bait stations to attract worker ants. Placing baits encourages foraging ants to carry poison back to the colony, which can reveal nest locations as technicians track returning workers.
- Employ specialized detection tools. Devices like moisture meters, borescopes, or acoustic detectors help uncover hidden nests within wall cavities or under flooring where visual inspection is limited.
- Confirm identification of the ant species. Proper species identification guides the choice of bait and treatment, because different ants behave differently and nest in various locations indoors.
- Locate and assess the queen’s chamber. Professionals know eliminating the queen disrupts reproduction, making it essential to find the nest core for effective control.
- Conduct a thorough follow-up inspection. Technicians revisit the treated areas to ensure the colony has been eradicated and no new nests have formed, adjusting treatment plans if necessary.
Finding the ant nest is often the most time-intensive phase of pest control, sometimes making up around 80 percent of the work. Experts rely on their experience and tools to track following ants and detect subtle signs that homeowners might miss. Since queen ants can live for years, targeting the colony directly reduces repeat infestations and lessens the need for multiple treatments. Attempting to handle this without professional knowledge may lead to missed nests or ineffective baiting, prolonging the infestation and increasing costs. Licensed pest control companies provide the expertise, tools, and materials necessary to locate and remove ant nests safely and efficiently.
2. Common Signs and Entry Points Indicating Indoor Ant Nests

Spotting signs of indoor ant nests starts with observing where ants concentrate and tracking their paths. Entry points are often small gaps or cracks around doors, windows and foundations. Recognizing these clues can help you locate nests early and target control efforts effectively.
Visible Ant Trails and Foraging Paths
Ants indoors often travel in visible trails between their nest and food sources. Look for lines of worker ants leading to kitchen counters, pantries, or pet food dishes. These trails can appear as shiny, slightly worn paths along baseboards, countertops, or tile grout.
Following these trails helps pinpoint the nest location. Frequently, trails lead to hidden wall voids, under baseboards, or behind appliances. Ants leave chemical pheromones to guide others, so you may see multiple paths converging on the nest. Check for these signs daily since ant movement increases with food availability and can vary by time of day or season.
Typical Structural Gaps and Cracks Used by Ants
Ants commonly enter through tiny holes or cracks in your home’s exterior. Inspect these areas thoroughly, especially around:
- Window frames and torn or loose screens
- Door thresholds, gaps under doors, and weatherstripping
- Foundation cracks near the ground
- Spaces around plumbing pipes or electrical cables entering walls
- Cracks in siding or brick mortar
Sealing these access points with caulk or foam helps block ants from coming indoors and can disrupt their established trails.
Small entry points often go unnoticed; a flashlight and magnifying glass can help identify them during inspection.
Moisture-Prone Areas Favoring Nest Formation
Ants are drawn to moist environments within homes since these provide water and nesting materials. Common spots to check include:
- Under sinks and around leaking pipes
- Near water heaters and HVAC units
- Basement corners or crawl spaces with poor ventilation
- Plant pots with damp soil inside the house
Damp wood or decaying materials in these areas offer ideal nesting sites for species like carpenter ants. Moisture problems can worsen infestations and make nests harder to detect.
Unusual Indoor Debris or Soil Accumulation
Look for piles of tiny wood shavings, soil grains, or discarded ant wings near baseboards, behind furniture or inside wall voids. Such debris often signals active nest construction or colony expansion. Ants remove waste and discarded materials outside the nest, leaving visible deposits inside.
Soil accumulation indoors is more common when ants transport soil from outdoor nests through cracks or utility holes. Cleaning around these spots right after noticing ants can reduce nesting motivation.
Seasonal Patterns Influencing Nest Location
Ant nest locations often shift with seasons. During warmer months, ants forage widely and may nest outdoors but send workers indoors following food or water. Cooler months may drive colonies to establish nests inside walls or heated areas where conditions are stable.
In spring and early summer, watch for swarmers with wings inside the house. These reproductive ants indicate mature colony growth and help narrow down nesting sites nearby. Seasonal activity patterns affect the best times to inspect for nests, with spring and fall often the most revealing periods.
3. How Different Ant Species Nest Indoors and How It Affects Detection
Different indoor ant species build their nests in distinct ways, which directly influences how pest control professionals find and treat them. Identifying the species is important because each type prefers unique nesting sites that require specific detection methods and control strategies. Pest control experts quickly distinguish ant species by observing their size, color, behavior, and the typical nesting materials they target.
Wood-Nesting Ants: Carpenter Ants
Carpenter ants typically nest in wood, making parts of your home’s structure an ideal place for their colonies. They do not eat wood like termites but hollow it out to create tunnels and galleries, often inside damaged or damp wood. This habit makes locating their nests easier if professionals identify wood damage or sawdust-like frass near baseboards, window frames, or wooden beams.
Pest control specialists inspect wood carefully to find these nests. They also listen for faint rustling sounds in walls or tap on suspect wood to detect hollow spots. Identifying carpenter ants before treatment is important because these ants require different insecticides and control tactics than soil-nesting species. For example, injecting insecticides into soil is ineffective against carpenter ants, whose colonies are inside wood.
Soil and Foundation Nesters
Many ants, such as odorous house ants and pavement ants, prefer nesting in soil around the home’s foundation or under concrete slabs. These nests tend to be harder to locate as they are hidden outdoors or under flooring, but they often send trails indoors in search of food. Professionals look for small piles of dirt or soil that indicate excavation of nests near walls or baseboards.
Detection involves examining these dirt mounds and tracking ant trails to openings leading inside. Pest control experts distinguish species by size and color along these trails, helping decide on control methods that target soil colonies. Unlike carpenter ants, soil nesters may require perimeter treatments that block ants before they enter your home.
Opportunistic and Satellite Colonies
Opportunistic ants, like acrobat ants and pharaoh ants, form satellite colonies inside homes often near water sources or food storage areas. These nests can be diffuse and scattered, making detection challenging. Professionals know these species adapt quickly and relocate nests when disturbed, so they carefully monitor multiple areas within the home.
Identification on site focuses on rapid visual assessment using the ants’ size, body shape, and behavior because treatment varies widely. Tracking worker ants and noting where they consistently forage helps locate satellite nests. Because these ants can appear anywhere, complete inspection of kitchens, bathrooms, and utility rooms is standard practice before treatment.
| Ant Species | Nesting Location | Common Signs | Detection Methods | Control Approach |
|---|---|---|---|---|
| Carpenter Ants | Inside wood structures | Wood damage, sawdust, hollow sounds | Inspect wood, tap test, listen for rustling | Targeted insecticide inside wood |
| Odorous House Ants | Soil near foundation | Dirt piles, ant trails indoors | Trace trails to soil mounds | Perimeter soil treatments |
| Pavement Ants | Under concrete, soil | Small dirt piles, entry through cracks | Examine foundation edges, track ants | Soil and crack treatments |
| Acrobat Ants | Opportunistic inside homes | Multiple indoor nest sites, small size | Monitor food & water sources, follow trails | Complete indoor inspection & treatment |
| Pharaoh Ants | Indoor satellite colonies | Scattered nests, foraging trails | Identify through size/behavior on site | Target all satellite nests to prevent spread |
Recognizing each ant species’ nesting style guides professionals in selecting detection tools and treatment plans that fit the behavior and location of the colony. Quick identification avoids costly or ineffective treatments, such as applying soil pesticides against wood-nesting carpenter ants or missing hidden satellite colonies altogether.
4. DIY Nest Detection: What Homeowners Can Do and Common Mistakes
Yes, you can search for ant nests yourself, but keep in mind these nests are often hidden inside walls or foundations and can be tough to find. Wiping away ant trails can disrupt their activity temporarily, yet it might also make tracking harder. Avoid common mistakes like random spraying and ignoring subtle signs for more effective detection and control.
Using Bait Stations for Nest Identification
Placing bait stations near ant trails and suspected nest sites can reveal nest locations. Ants carry the bait back to the colony, helping you identify where they live as activity around certain stations increases. Baits work best along the basal stem of infested plants, foundation perimeters, and spots where you see frequent ant traffic indoors.
Set bait stations in these areas and check them daily for signs of ant activity. Increased ant numbers at a station often mean the nest is nearby, allowing you to pinpoint the source without opening walls or floors.
Observing Ant Behavior and Movement Patterns
Following ant trails carefully provides clues about nest locations. Look for consistent travel routes coming from cracks, gaps, or hidden spaces around your home’s foundation or interior walls. Pay attention to where ants enter and exit and the direction they head indoors or outdoors.
- Track ant lines during daylight and at night for different activity levels
- Note areas with high ant concentrations or repeated visits
- Mark suspected entry points with a non-toxic marker for monitoring
- Use a flashlight for inspecting dark corners, closets, and behind appliances
- Document movement patterns for several days to spot nest activity
Clear observation helps narrow down the nest location by showing consistently used pathways, avoiding unnecessary damage or mistaken nest guesses.
Common Indoor Areas Overlooked by Homeowners
Many homeowners miss key spots where indoor ant nests hide. Areas around plumbing, inside wall voids near utility lines, behind baseboards, and under floorboards can harbor colonies. Check near windowsills and door frames for ant traffic starting points.
Another frequent oversight is not inspecting areas with moisture, such as around sinks, bathtubs, or leaking pipes. Ants favor humid conditions for nesting, so any damp environment inside your home is a likely candidate to investigate closely.
Mistakes in Disturbing Ant Colonies
Wiping away ant trails with soap and water temporarily confuses ants, but frequent wiping can cause them to redirect their trails, making the nest harder to find. Spraying insecticides randomly often scatters the colony, worsening the infestation by causing ants to split and form satellite nests.
Applying treatments without confirming the nest location wastes time and resources, and repeated DIY attempts may reinforce future problems. Avoid excessive disturbance that disrupts baiting or expert treatment plans by pest professionals.
Limitations of Over-the-Counter Pest Solutions
Store-bought sprays and powders usually provide only short-term relief and fail to reach deep nests inside walls or foundations. They often kill visible ants rather than addressing the queen and broader colony. The effect is temporary and requires repeated applications, which may increase resistance or irritate household members.
- Do not rely solely on sprays to eliminate nests inside walls
- Use baits as a complementary method for deeper control
- Follow product directions precisely to avoid safety risks
- Know when a large or hidden infestation requires professional help
- Beware that excessive chemical use indoors can pose health concerns
Professional pest controllers use targeted treatments that reach nest locations effectively. Use DIY methods as initial measures, but call experts for persistent or widespread infestations to completely stop the problem.
5. Technologies and Tools Pest Control Uses to Locate Hidden Ant Nests
Locating ant nests hidden inside walls or beneath floors often requires tools beyond the naked eye. Pest control professionals use specialized equipment like thermal imaging cameras to detect heat patterns emitted by clustered ants or their nests. These cameras can spot warmer areas inside walls where activity is high, pointing experts to the exact location of the nest without causing unnecessary damage. This technique is especially useful when walls or ceilings are intact and the nest isn’t visible.
Acoustic detection devices also assist in finding nests by picking up the faint sounds ants make when chewing wood or moving through tunnels. These tools amplify subtle noises humans normally can’t hear, helping experts zero in on nests inside structural wood or paneling. Using acoustic detection is effective for carpenter ants that hollow out wooden areas for nesting.
Moisture meters come into play next because ants prefer nesting where conditions are damp but not drenched. Even a minor leak under a sink or behind a wall can create the perfect microenvironment. Measuring moisture levels inside walls or near plumbing helps narrow down possible nesting sites. For example, if moisture readings are high around a bathroom wall, pest control will focus inspection and treatment there. Knowing the moisture condition also guides long-term prevention steps.
Sometimes, pest control technicians employ baiting strategies combined with tracking powders or fluorescent dust. These substances attach to foraging ants and lead back to their nests, making hidden colonies easier to locate. Hearing or seeing the ants follow these trails confirms the nest’s location before treatment. This technique serves both as a diagnostic and control tool but requires patience since ants take time to carry bait materials back to their nest.
Advanced treatments beyond over-the-counter products are essential after nest detection. Professionals have access to products such as slow-acting insect growth regulators and specialized insecticides designed to penetrate walls or wood voids, reaching the colony deep inside. Applying these treatments precisely where the nest is allows quicker eradication while minimizing exposure in living spaces.
Costs for using thermal imaging or acoustic devices vary but typically range from $100 to $300 as part of a complete inspection. Moisture meters add a minimal cost but significantly improve accuracy in identifying vulnerable areas. Treatment costs increase based on the infestation size and complexity of access but generally stay affordable when nests are found promptly.
In homes with high humidity or frequent plumbing issues, regular monitoring using these advanced tools prevents re-infestation. Consistent environmental management makes it harder for ants to establish hidden nests, reducing the need for repeated treatments. Conversely, ignoring moisture problems or delaying inspection risks more extensive damage and more challenging control efforts.
Don’t store firewood or building materials directly against your home; these create humid, protected spots that attract ants and complicate nest detection.
6. Treatments and Timeline for Effective Ant Nest Elimination
Once an ant nest is located, pest control professionals select treatments based on the ant species and nest location. Baits are commonly used for many ant types because they allow workers to carry poison back to the colony. These baits contain slow-acting insecticides that spread throughout the nest, targeting the queen and other ants. However, for carpenter ants, baits are often less effective due to their varied diet. Instead, professionals may use targeted liquid insecticides or dusts applied directly to the nest or entry points.
The elimination process usually takes about one to two weeks after treatment begins. The slow poison in baits ensures the entire colony, including hidden or developing members, consumes the toxicant before dying off. Immediate results are rare because the colony’s health declines gradually. For carpenter ants or large infestations, multiple treatments may be necessary, extending the timeline slightly.
| Ant Species | Preferred Treatment | Typical Elimination Timeline |
|---|---|---|
| Odorous House Ants | Gel or granular bait | 7 to 10 days |
| Pharaoh Ants | Slow-acting bait | 10 to 14 days |
| Carpenter Ants | Liquid insecticide, dust application | 10 to 21 days (may require follow-up) |
| Pavement Ants | Baits or perimeter sprays | 7 to 14 days |
Partial treatment of a nest leads to rapid recolonization. If a bait doesn’t reach the entire colony or if insecticide contact is incomplete, surviving ants can rebuild the nest in weeks, sometimes even days. This happens because some ants, especially queens, remain protected and can continue producing offspring. That’s why thorough treatment targeting the entire nest and follow-up monitoring are important to successful eradication.
For best results, professionals ensure bait placement is where foraging workers can access it during their active times. Treatments near food and water sources improve bait uptake. Timing matters as ants are most active in warm months or times when food is scarce. Multiple visits may occur to replenish bait and confirm elimination, especially for species nesting in hidden or multiple locations.
7. Preventive Measures After Nest Removal to Stop Future Infestations
After removing an ant nest, preventing future infestations means eliminating what attracts ants and blocking their access points. Ants enter homes primarily for food and water, so cleaning up crumbs, spills, and leaks is important. Ants are especially active indoors during warmer months when they search for shelter and nourishment. Taking action early in the season helps reduce reinfestation risk.
Sealing entry points is a concrete step you can do to keep ants out. Check and seal cracks around windows, doors, foundations, plumbing pipes, and vents using silicone caulk or weather stripping. Even small gaps allow ants to enter. Persistent sealing efforts combined with removing attractants form a strong defense. Keep in mind sealing may need touch-ups, especially after extreme weather changes.
- Wipe counters and sweep floors daily to remove food residue.
- Store pantry items in airtight containers to block scent trails.
- Fix leaking pipes and eliminate standing water sources.
- Seal any visible cracks or gaps with caulk or weather stripping.
- Trim trees and shrubs away from siding and windows to reduce ant bridges.
- Maintain regular home inspections for new entry points or signs of ants.
- Use door sweeps and mesh covers on vents and openings.
Professional pest control services often provide ongoing maintenance plans to support your efforts with regular inspections and treatments that keep ants at bay year-round. The cost for DIY sealing and cleaning is generally low, mostly your time and $5 to $20 per tube of caulk. Professional maintenance plans vary but can be worthwhile if infestations are frequent or severe. Successful results mean no visible ants indoors and no fresh entry signs around your home perimeter.
8. When to Call Professionals and Cost Expectations for Nest Location
Calling a professional pest control service is important when ants keep returning despite your efforts, when nests are difficult to locate, or the infestation is spreading quickly. Professionals identify and treat nests directly, which limits ongoing damage and eliminates the colony rather than just individual ants. Untreated nests can lead to structural risks and health concerns, especially if species like carpenter ants or odorous house ants are involved, as they may damage wood or contaminate food areas.
You can decide to contact experts if ant trails persist more than a week after DIY attempts or if you notice multiple active nests. Another sign is when nests are inside wall voids or hard-to-reach spots where bait placement and nest destruction are complicated. Professionals address not just the visible ants but also underlying factors such as moisture and entry points, sealing those to prevent future infestations. The cost of professional ant nest location and treatment varies based on factors like the size of the infestation, ant species, home size, and complexity of access. Here’s a typical cost breakdown:
| Service | Cost Range | Factors Affecting Price |
|---|---|---|
| Initial Inspection and Nest Location | $75 to $200 | Home size, infestation severity, accessibility of nest |
| Ant Nest Treatment | $150 to $350 | Type of ants, treatment method (bait, spray, dust), number of nests |
| Follow-up and Preventive Treatments | $50 to $150 per visit | Frequency required, ongoing monitoring tools used |
The exact cost depends on how thoroughly the pest control company must investigate to find hidden nests and how much sealing or environment modification is necessary to stop re-infestation. Large or multi-level homes often incur higher fees due to extended inspection time, whereas smaller, accessible infestations tend to be less costly.
Failing to treat an ant nest can lead to colony growth inside your walls or under floors, increasing damage risks and making eradication more costly later. Persistent ant problems can attract other pests or create unsanitary conditions, especially when ants contaminate food preparation areas. Paying for a professional early can reduce these risks and often saves money over time through more effective control.
Keep a log of ant activity and prior treatments; this helps professionals understand patterns and pinpoint nests faster during their inspection.
Step-by-Step Action Plan to Find and Eliminate Ant Nests in Your Home
Follow this plan to locate ant nests, treat infestations effectively, and prevent ants from returning. Each step guides you with practical actions and ways to check your progress.
- Before you start: Inspect common entry points like windowsills, door frames, and cracks in walls for ant trails or small soil piles. Spotting these signs helps pinpoint areas to focus on.
- Day 1: Follow ant trails indoors to their source without disturbing them. When clusters of ants or increased activity appear, mark those spots to investigate nests.
- Day 2-3: Set up bait stations with slow-acting ant baits near trails and suspected nests. Check daily to see if ants take the bait, indicating nest locations.
- Week 1: Use a flashlight to look in hidden spaces like baseboards, behind appliances, or inside wall voids. When the colony isn’t visible, try using a moisture meter or hire a professional for advanced detection tools.
- Week 2: Treat identified nests with appropriate insecticides or follow label directions if you’re using DIY solutions. Monitor ant activity, declining numbers show progress.
- After 3 weeks: Clean treated areas thoroughly and seal entry points with caulk or weather stripping. This prevents new nests from forming indoors.
- Ongoing: Maintain cleanliness, remove food sources, and inspect your home regularly to catch early signs of ants before they nest again.
Frequently Asked Questions
How Does Pest Control Find Ant Nests in a Home?
Pest control professionals track ant trails and look for entry points to locate nests, often using bait and specialized tools to pinpoint their location. Identifying the ant species helps determine where nests are most likely found.
What Should You Do If You Find an Ant Nest in Your House?
Avoid disturbing the nest and contact a pest control service to handle removal safely and effectively. Disturbing the nest may cause ants to scatter and worsen the infestation.
How Do Exterminators Get Rid of Ants Inside?
Exterminators use targeted baits suited to the ant species and apply treatments around nests and entry points to eliminate the colony. Using the correct bait ensures the queen and colony are affected, preventing regrowth.
How Many Ants Are Usually in a Nest?
Ant nests can hold from hundreds to thousands of ants depending on the species and nest size. A protected queen allows the colony to grow steadily over time inside walls or wood.
How Long Does It Take for Ants to Go Away After Pest Control?
Ants often disappear within days to a few weeks after treatment if the nest and queen are successfully eliminated. Follow-up treatments may be necessary if ants persist.
Can Seasonal Changes Affect Indoor Ant Nests?
Yes, ants often move indoors during colder months seeking warmth, which can increase indoor ant nest activity. Proper home sealing helps prevent their entry.
Wrapping Up
Finding and eliminating ant nests inside your home requires a careful approach that combines observation, understanding ant behavior, and sometimes professional tools. You can start by inspecting common entry points like window frames and baseboards for signs of ant trails or debris. Taking this step today helps you spot a potential nest early and decide if you need expert help before the problem grows.


One Comment