How to Get Rid of Tree Stumps: 8 Effective Methods and Expert Tips
To get rid of tree stumps effectively, you can use a stump grinder for quick removal, apply chemical solutions to speed up decay, or remove stumps manually with the right tools. Each method has its benefits depending on the stump’s size, age, and your comfort level with labor and equipment. Knowing the safest and most efficient approaches helps prevent trip hazards and clears your yard for better use.
This information is ideal for homeowners and DIY gardeners figuring out how to get rid of tree stumps safely and cost-effectively. You’ll learn eight practical methods, including how to use chemicals like horticultural vinegar or products such as Hi-Yield 32015 Stump Remover, when to opt for natural decomposition, and tips for managing leftover roots and avoiding common removal problems.
Key Takeaways
- Use a stump grinder for stumps under 12 inches in diameter, renting one costs $150, $400 per day, but weigh cost versus hiring a pro.
- Apply 20, 30% horticultural vinegar within 45 minutes of cutting for quick, chemical stump removal, best on stumps cut 18 months or longer.
- For manual removal, reduce the trunk to 4 feet for use, then dig around and cut roots before pulling the stump out.
- Burning stumps may be illegal or unsafe; always check local laws and avoid it near structures or dry areas.
- Speed natural decomposition by drilling 10-inch holes in the stump and applying 0.5 pounds of nitrogen annually to accelerate rot.
- Remove leftover roots carefully and restore soil with organic matter to prepare the area for planting or landscaping.
1. Effective Methods to Get Rid of Tree Stumps Explained
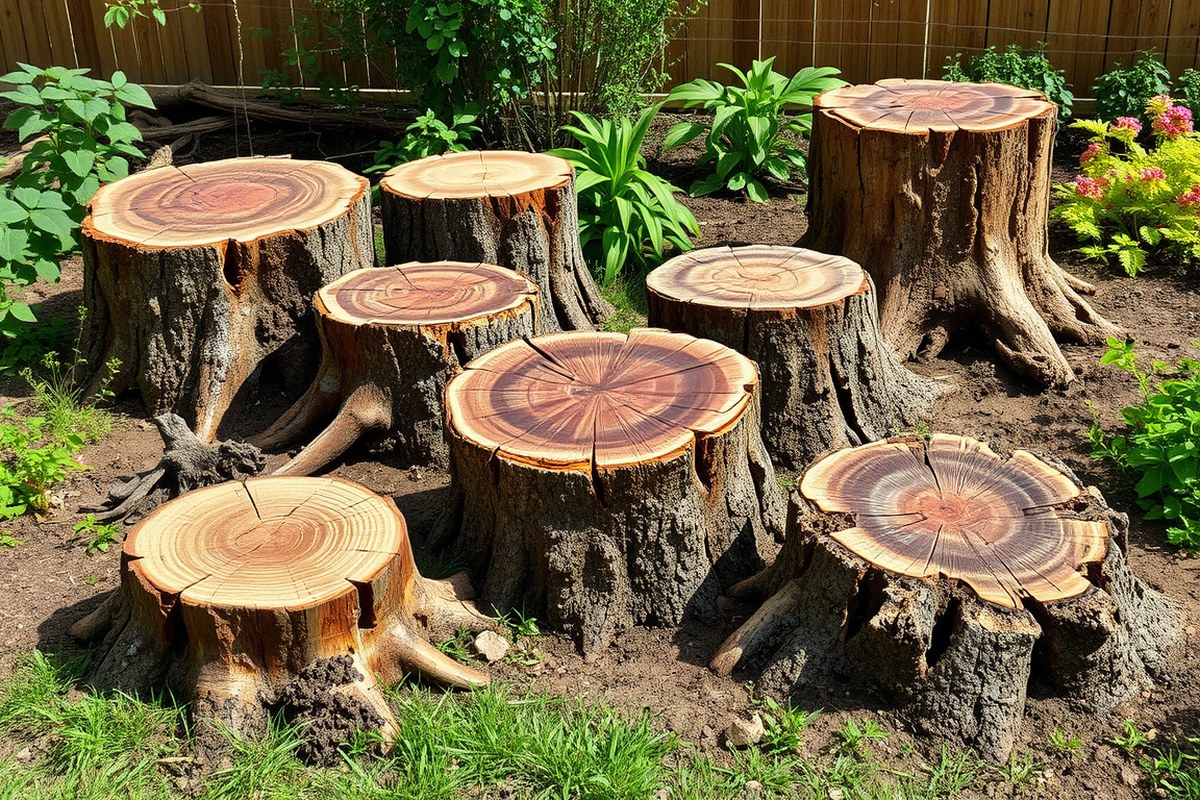
Choosing the right method to get rid of a tree stump depends mainly on the stump’s size, age, and how fast you want results. For small, older stumps that have been dead for about 18 months or more, manual removal or natural decomposition may work well. Manual removal is the fastest physical option but requires lots of effort and is not practical for fresh or large stumps. Chemical treatments offer a moderate-speed alternative, breaking down wood over weeks to months and better suited for medium to large stumps. Grinding and controlled burning deliver faster, often immediate results, but come with higher costs or safety concerns. The table below compares these common stump removal methods by key factors including cost, time frame, and suitability to help you decide:
| Method | Pros | Cons | Time Frame | Cost | Best For |
|---|---|---|---|---|---|
| Manual Removal | Fast for small, aged stumps; inexpensive | Physically demanding; not for fresh or large stumps | Same day to a few hours | Low | Small to medium, older (>1.5 years) stumps |
| Chemical Stump Remover | Speeds decomposition; less manual labor | Requires careful handling; weeks to months | 4 to 12 weeks | Moderate | Medium to large, aged stumps |
| Stump Grinding | Quick removal; immediate results | Costly; noisy and dusty | Same day | $158 to $450 or more | All sizes, especially large |
| Controlled Burning | Complete removal without chemicals | Requires permits; safety risk; not allowed everywhere | Days | Low (fuel cost) | Medium to large stumps where permitted |
| Natural Decomposition | Environmentally friendly; low cost | Very slow; requires patience | Months to years | Low | Small to medium stumps, when time is not an issue |
| Epsom Salt | Inexpensive; easy supplement method | Effectiveness uncertain; slow | Months | Low | Small stumps |
For immediate removal, grinding and controlled burning are your best bets, though grinding tends to be more expensive and controlled burning may require permits. Manual removal makes sense if you want a chemical-free solution and your stump is smaller and seasoned. Chemicals can speed up stump decay when you have the patience to wait a month or more. Natural decomposition methods suit gardeners who prioritize environmental impact and low cost over speed. Supplemental Epsom salt treatments might help small stumps soften but should not replace other methods.
When dealing with large or stubborn stumps, chemical products like Hi-Yield 32015 Stump Remover provide a practical option by breaking down woody tissue for easier extraction. Older stumps, cut at least a year prior, respond better to physical removal or chemicals, whereas fresh stumps often require waiting for seasoning before manual or chemical methods will work effectively.
2. How to Use a Stump Grinder Safely and Effectively

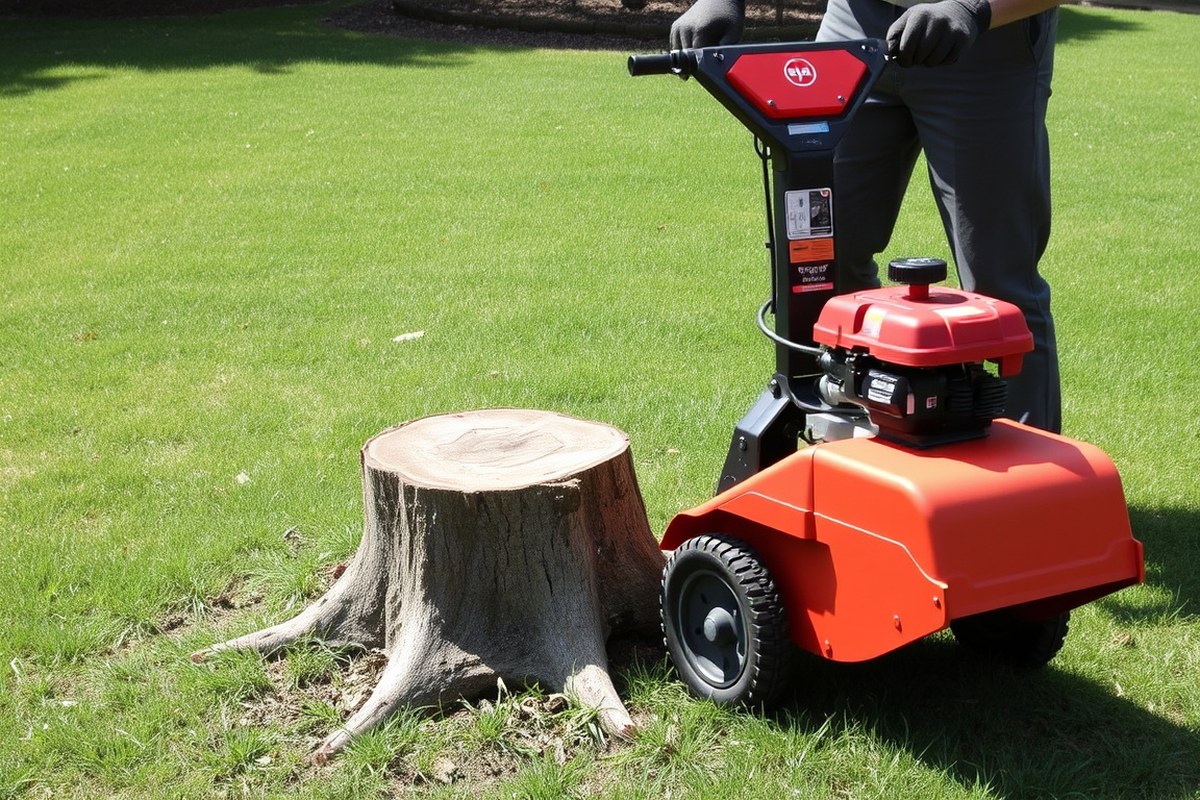
Using a stump grinder is the quickest way to remove tree stumps safely and effectively. Rent a grinder for about $200 to $400 and grind the stump at least 4 inches below ground level to prevent regrowth and prepare the area for landscaping. Wear full safety gear and follow clear steps to avoid injury or property damage.
Preparing the Stump and Work Area
Start by cutting the tree stump as close to the ground as possible to make grinding easier. Saturate the soil around the stump with water to reduce dust and soften the ground, which helps the grinder work efficiently. Clear away rocks, debris, and nearby plants to create a safe, open workspace free of obstacles.
Wear essential safety gear including sturdy gloves, safety glasses, ear protection, long sleeves, and steel-toe boots. Have a vehicle ready to tow the rental grinder and review the machine’s instructions before use.
Operating the Stump Grinder Correctly
Grind the stump in a controlled manner, removing about 4 inches at a time until you reach at least 4 inches below ground level. For general landscaping or turf areas, grinding 8 to 10 inches (20 to 25 cm) below ground is usually enough, but plan for 12 inches (30 cm) or deeper if you intend to replant or cultivate the soil. Follow these steps for effective grinding:
- Position the machine over the stump and lower the grinding wheel to make contact with the wood.
- Move the grinder wheel side to side gradually across the stump’s surface.
- Grind about 4 inches deep, then raise the wheel and reposition to cover the stump’s perimeter.
- Repeat grinding and repositioning until the entire stump is ground to the desired depth below ground level.
- Inspect the stump area carefully to confirm even grinding and no exposed wood above the soil line.
Always turn off the engine and disconnect the power before adjusting or inspecting the grinder to prevent accidents.
Safe Cleanup and Hole Filling After Grinding
Remove leftover wood chips and sawdust from the site. The resulting hole can vary in size and depth, so fill it with quality topsoil or a soil/sand mix to reduce settling. Compact the fill material lightly to avoid future dips in the ground level. Water the area well and replace any turf or plants as needed.
Take time to check for hidden roots that could cause uneven settling or regrowth. If you’re preparing for new landscaping or planting, deeper grinding and thorough soil replacement reduce obstacles for new growth.
3. Applying Chemical Stump Removal: Step-by-Step Guide
Chemical stump removal involves drilling holes into the stump, filling them with a chemical agent, and waiting for the decomposition to accelerate. Proper hole drilling, the right choice of chemical, and a clear understanding of the decomposition timeline are key to success. Avoid errors like using gasoline or shallow holes to prevent ineffective treatment or safety hazards.
Drilling Holes: Size, Depth, and Angle
Begin by using a drill with a 1-inch diameter bit, drilling holes about 8 to 12 inches deep. Space the holes 3 to 4 inches apart in a pattern covering the entire stump surface. Drill vertically into the top of the stump, then more holes into the sides of the stump at a downward angle to maximize chemical absorption.
For older stumps that are harder, drilling may require more effort or a sharper bit. Avoid drilling holes that are too shallow or too narrow; holes less than 1 inch in diameter limit chemical penetration and slow decomposition. The downward angle on side holes helps the chemical soak and prevents runoff, improving effectiveness.
Choosing and Applying the Right Chemical
Chemicals like Bonide Stump-Out Granules or Tordon RTU are commonly used to speed up stump decay without harming nearby plants. These products are typically granular; pour 3 to 4 ounces into each hole. Once filled, add water to the holes to activate the chemicals and aid absorption.
Never use gasoline as a chemical treatment due to fire risk and environmental damage. Some manufacturers allow kerosene or fuel oil for controlled burning only if local laws permit. Follow the product label instructions carefully for safety and best results.
- Clear away debris and dirt from the stump surface to ensure access.
- Using a drill with a 1-inch bit, drill multiple holes 8 to 12 inches deep, spaced 3 to 4 inches apart, on the top surface.
- Drill additional holes along the sides of the stump at a downward angle to improve chemical penetration.
- Pour 3 to 4 ounces of a chemical stump removal granule, such as Bonide Stump-Out, into each hole.
- Fill each hole with water to activate the chemical and aid absorption.
- Follow all label recommendations for the specific product used.
- Keep children and pets away from the treated stump area during the decomposition period.
Monitoring Decay and What to Expect
Chemical treatments usually soften the stump enough for removal within 4 to 6 weeks, much faster than natural decay, which can take six months or longer depending on tree type and size. This method speeds decomposition by roughly 25%, making stump removal less labor-intensive.
Monitor the stump for signs of softness, cracking, or fungal growth to know when it is ready for removal. Avoid rushing the process as incomplete decay can make manual removal difficult and damage tools. In some cases, repeat application may be necessary for very large or dense stumps.
4. Manual Tree Stump Removal: Tools, Techniques, and Tips
Manual tree stump removal involves digging out soil, cutting roots, and levering the stump from the ground. It works well for small to moderate-sized stumps, typically under 18 inches in diameter, where full root excavation is feasible. Using the right tools and a systematic approach will help you remove the stump and most of its roots efficiently and avoid unnecessary strain or damage to your landscape.
Essential Tools for Manual Removal
You’ll need a combination of digging and cutting tools depending on the soil type and stump size. A shovel is indispensable for removing soil around the stump’s base. A pickaxe or mattock is helpful if the soil is compacted or rocky, allowing you to break it up easily. For cutting roots, an axe works well on smaller roots, while a reciprocating saw or dedicated root saw cuts larger, tougher roots more effectively. A pry bar or digging bar helps use the stump free once the roots are severed. Here is a quick reference table for the main tools:
| Tool | Use | Advantage | Disadvantage |
|---|---|---|---|
| Shovel | Digging around stump | Basic, usually available | Time-consuming for dense soil |
| Axe | Chopping smaller roots | Effective and affordable | Requires strength and precision |
| Reciprocating saw | Cutting larger roots | Easier on large roots | More expensive, requires power |
| Pickaxe | Breaking up soil and roots | Great for rocky or tough soil | Labor-intensive |
| Pry bar | Levering stump out | Provides use | Requires physical effort |
Step-by-Step Digging and Root Cutting
Manual removal starts with exposing the roots by digging soil away from the stump’s base. Larger, stubborn roots require cutting before the stump can be uprooted. Follow these steps for effective removal:
- Clear debris and grass from the stump’s base.
- Use the shovel to dig a trench about 12 inches away from the stump, continuing around its circumference.
- Dig down 12 to 18 inches or until roots start appearing.
- Expose and clean roots with the shovel and pickaxe, freeing soil tightly packed around them.
- Cut smaller roots with an axe. For thick roots, use a reciprocating saw or root saw to make precise cuts.
- Repeat exposing and cutting roots as you dig deeper, moving closer to the stump.
- Once most roots are cut, use a pry bar to lever the stump free. Rock it back and forth to loosen it from remaining roots.
- Remove the stump completely, checking for any remaining large roots that may require cutting.
This process usually takes several hours depending on stump size and soil type. Smaller stumps (under 12 inches diameter) can sometimes be removed in less than two hours, while larger ones will require more time and effort.
Disposing of Stump and Root Debris
After removal, you’ll have a pile of wood and root debris to manage. Small pieces can be chipped or shredded for mulch. Larger chunks might need to be hauled away as yard waste or burned if legal and safe in your area.
In some cases, leaving smaller roots buried and covering the area with topsoil and turf can be acceptable for smaller stumps and expedite landscaping restoration. However, for full clearance, remove as much root material as possible to prevent regrowth and underground obstacle problems.
5. Is Burning a Tree Stump Safe and Legal?
Burning a tree stump can be an effective way to remove it faster than natural decomposition, but safety, legality, and environmental concerns must be addressed first. Check local ordinances to determine if stump burning is allowed in your area, as many municipalities require permits or prohibit outdoor burning altogether. Contact the local fire department or city code office to confirm regulations before starting any fire.
Once burning is approved, prepare the site carefully to reduce risks. Clear the area around the stump of any flammable debris, dry leaves, and plants to prevent fire spread. Have water, a fire extinguisher, or a hose ready for emergencies. Burning a stump properly can take up to two weeks of lighting it daily, especially for larger stumps, so plan for ongoing supervision.
- Obtain any required burning permits from local authorities
- Clear vegetation and combustible materials within a 10-foot radius
- Choose a calm day with minimal wind to reduce flying embers
- Light the stump in several spots to encourage even burning
- Monitor the fire continuously and keep water or fire suppression tools nearby
- Burn only dry wood to produce less smoke and improve combustion
- Extinguish the fire completely before leaving the area
Environmental impacts from stump burning include smoke emissions, which can affect air quality and may disturb neighbors. Burning also releases carbon dioxide and unburned particulates that contribute to pollution. Consider weather conditions and local air quality alerts to minimize negative effects. You may also want to protect valuable plants near the stump by setting up barriers or selecting alternative removal methods if burning poses too much risk to the landscape.
Clearing a wide, debris-free zone around the stump helps prevent accidental fires from spreading beyond control.
Costs are generally low since stump burning mainly requires your time and some safety supplies, like a shovel and water source. However, the process demands patience and constant attention to avoid hazards. Good results show the stump reduced to ash or a small pile of charcoal, making it easier to remove remaining debris. Common problems include uncontrolled fire spread, excessive smoke, and incomplete stump burning, which means you may need to repeat the process or complete it with another removal method.
6. Speeding Natural Decomposition and Organic Removal Options
Natural decomposition of a tree stump typically takes several years, often up to 5 years or more, depending on the wood type, climate, and soil conditions. Chemicals can speed this process substantially, reducing it to as little as 4 to 6 weeks with products like Bonide Stump-Out Granules or about 30 days using professional-grade solutions such as Tordon RTU on fresh cuts. However, chemical stump killers may harm beneficial decay organisms in the soil, which makes natural or organic approaches preferable when environmental safety is a priority.
Speeding up natural decomposition involves providing the stump with the right conditions for microbes and fungi to break down the wood more rapidly. One effective approach is to drill several holes into the stump to increase moisture penetration. These holes should be about 1 to 2 inches wide, spaced a few inches apart across the stump’s surface. Keeping the stump moist by watering it regularly encourages microbial activity. This is especially important during dry periods. Adding nitrogen-rich materials like ammonia, blood meal, or a balanced fertilizer around the stump can help. Nitrogen acts as a food source for decay organisms, accelerating the breakdown of the wood fibers.
You can also apply a commercial microbial inoculant designed to promote wood decay. These products introduce specialized fungi and bacteria that decompose tough woody material. Applying the inoculant according to label directions, combined with moisture and nitrogen, can significantly speed stump decay, reducing the timeline from several years to as little as 12 months. This method is safe for soil health and is ideal for gardeners wanting an organic solution without relying on harsh chemicals.
Organic stump removal alternatives include physical methods combined with natural decay. For instance, you can use wood chips or compost to cover a stump after making the moisture holes and applying nitrogen. This not only retains moisture but also adds organic matter that supports microbial growth. Over weeks and months, the stump softens and partially decomposes, making manual removal easier.
Keep in mind that natural and organic methods require patience and ongoing maintenance. Consistent watering and nitrogen application every few weeks will yield the best results. In contrast, chemical methods offer faster outcomes but risk damaging beneficial soil life, which is critical if you plan to plant nearby. Organic options can cost less; basic fertilizers can be purchased for under $20, while microbial inoculants range from $15 to $40 depending on size. The tradeoff is the longer time needed and more frequent care, which fits well if you have no rush to clear the area completely.
7. Managing Leftover Roots and Restoring the Area
After removing the stump, managing leftover roots is essential to prevent future growth and prepare the site for planting or lawn restoration. Roots left in the soil can decay and harbor fungi that spread root diseases, so cutting and removing larger roots reduces these risks. Smaller roots will break down naturally, but clearing debris ensures healthier soil for new growth. How you fill and restore the hole depends on your plans for the area, turfgrass or planting. Avoid using fresh sawdust to fill the hole because it can deplete soil nitrogen and slow plant growth. Instead, use wood chips from older, decomposed material or quality topsoil to encourage healthy regeneration.
- Cut and remove large roots: Use a saw or loppers to cut roots extending 1 to 2 feet from the stump hole. Pull out loosened roots to prevent sprouting and encourage decay.
- Dispose of root debris: Collect and compost or chip the roots. Avoid leaving large root segments or fresh sawdust in planting areas to prevent fungal issues and nitrogen drawdown.
- Rake wood chips into the hole: Use the wood chips from the stump removal process, but only if they’ve aged for 3-4 months. This recycles organic matter and supports soil structure.
- Fill the hole with quality topsoil: Use peat-free, well-draining topsoil to fill any remaining voids. For turfgrass areas, topsoil is preferable to wood chips to create a smooth, stable base for sod or seed.
- Tamp the soil down lightly: Compact the soil with a tamper or foot pressure to reduce settling. Add more soil as needed until the hole is level with surrounding ground.
- Apply mulch layer: Cover the area with 2-3 inches of organic mulch if planting flower beds or shrubs. Mulch conserves moisture and suppresses weeds during root decomposition.
- Prepare for planting or lawn: For planting, loosen nearby soil and add compost to improve fertility. For lawns, wait a few weeks to allow soil to settle before laying sod or seeding.
Wood chips from mature trees can be piled in a sheltered spot to age for several months before using as mulch around garden beds. Fresh sawdust or stump debris should not be used directly to fill holes or as mulch around new plants, as they can inhibit growth. Removing roots fully when possible, filling holes properly with topsoil, and managing organic matter thoughtfully will ensure the restored area supports healthy plants and a level, stable surface.
8. Troubleshooting Common Stump Removal Problems
Stump removal can run into issues like stump regrowth, stuck grinding equipment, or ineffective chemical treatment. One common mistake is rushing to grind a stump right after applying chemicals. Waiting about 30 days allows substances like potassium nitrate to fully penetrate the root network, increasing success before grinding. Grinding too soon might leave tough roots intact and lead to persistent stumps or sprouts. Patience here saves extra work and expense.
Stump regrowth happens when the treatment doesn’t kill the entire root system. Some species, especially invasive ones like Tree of Heaven, resist herbicides and can sprout back. Using strong herbicides such as Tordon RTU Specialty Herbicide can improve results on these tough stumps. Apply them promptly within 45 minutes of cutting to maximize absorption. Multiple treatments sometimes become necessary if sprouts reappear, especially in wetter climates or colder regions where chemical uptake slows down.
Grinding machines may stall or get stuck on very hard or knotted roots. This can happen if the stump is aged and wood has hardened or if there was improper handling of the grinder. Slow your feed rate and work in shallow cuts to reduce strain. Check that blades are sharp and machinery is well-maintained; dull blades increase the chance of grinding becoming stuck. For stubborn stumps, alternating between grinding and reapplying chemical treatments can weaken wood, making mechanical removal easier and less time-consuming.
Chemical treatments sometimes fail due to poor application or unsuitable weather conditions. Rain soon after applying liquid herbicides dilutes and washes chemicals away before roots absorb them. Applying treatments during dry, warm periods increases effectiveness. Typically, temps above 60°F support better absorption, while cold or frozen ground slows chemical activity. Spraying concentrated solutions like Southern Ag 01112 Brush Killer Stump Treatment on multiple stumps improves efficiency, especially on large properties, but follow label directions strictly to avoid environmental harm.
Regional and seasonal factors affect removal success. In northern areas, frozen soil delays chemical uptake and grinding, suggesting spring or early summer as the optimal time. In southern states, the growing season is longer making chemical treatments viable across more months, but heavy summer rains may require repeat applications. Stump removal usually coincides with tree felling but can be planned separately to fit seasonal and weather conditions, reducing risks of regrowth and mechanical failure.
Always wear proper safety gear when handling chemicals or operating a stump grinder, the risks of exposure and injury increase significantly if you rush or skip precautions.
Step-by-Step Action Plan to Get Rid of Tree Stumps
Follow this plan to choose and complete the best tree stump removal method for your property efficiently and safely.
- Before You Start: Assess the stump size, location, and your budget to decide on manual, chemical, grinding, or natural removal. Confirm local regulations, especially for burning.
- Day 1: Gather necessary tools or rent a stump grinder if choosing mechanical removal. Read safety instructions carefully and prepare protective gear.
- Day 2-3: If using chemicals, drill holes in the stump, apply the chemical as directed, and cover it to speed absorption. Expect decomposition within weeks to months.
- Week 1: For stump grinding, operate the machine steadily around the stump base until you reach 4-6 inches below ground level. You’ll see wood chips accumulating as you grind.
- Week 2-4: If opting for manual removal, use an axe, mattock, or shovel to loosen and dig out roots. Check when the stump is loose enough to remove by hand.
- Weeks 4-8: Encourage natural decomposition by piling mulch or compost over the stump and keeping it moist. Confirm progress by the stump softening and shrinking.
- Post-Removal: Remove leftover roots to prevent regrowth and fill the hole with soil. Plant grass or shrubs to restore the area effectively.
- Ongoing: Monitor for regrowth or pest issues. Repeat chemical treatment or dig out stubborn roots if necessary.
Frequently Asked Questions
Can I Use Household Vinegar to Dissolve a Tree Stump?
Household vinegar is too weak to effectively dissolve a tree stump. Using horticultural vinegar with 20, 30% acidity works better for killing stumps without harming nearby plants.
Are There Environmentally Friendly Products to Help Decompose Tree Stumps?
Some organic mulch and natural compost speeds decomposition but expect slow results. Avoid salts, as they harm beneficial decay organisms needed for natural breakdown.
How Long Does It Take for a Chemical Stump Remover to Work?
Chemical stump removers typically need several weeks to months to break down the stump. Patience is key; faster removal methods require more labor or machinery.
Will Freshly Cut Tree Stumps Grow Back If Untreated?
Freshly cut stumps can sprout again unless treated with a systemic herbicide containing glyphosate or triclopyr to stop regrowth. Apply soon after cutting for best results.
Is Renting a Stump Grinder Cost-Effective for Small Stumps?
Renting can be costly, often $200 or more per day, but is efficient for quick removal. Small stumps may be better removed manually if labor is manageable.
Are There Risks Using Chemicals Near Garden Plants?
Chemicals can damage nearby vegetation if not carefully applied. Use targeted application and follow all label instructions to protect your garden.
Before You Go
Choosing the right method to get rid of a tree stump depends on your tools, time, and safety concerns. Start by assessing the stump’s size and your comfort level with equipment like stump grinders or chemicals. Today, you can prepare your site by clearing debris and marking underground utilities to ensure a safer removal process.