

How to Get Rid of Carpenter Bees: A Complete Guide for Fast, Safe Removal
To get rid of carpenter bees quickly and safely, act early by identifying their presence and choosing methods that balance effectiveness with environmental care. Options include natural repellents, traps, targeted pesticides, and mechanical removal like vacuuming. Prevention through wood sealing and painting also plays a key role in controlling infestations over time.
This information suits homeowners, property managers, and DIY enthusiasts aiming to protect wooden structures from carpenter bee damage. You’ll find advice on identifying bees and their nests, using humane treatments, applying pesticides safely, and knowing when professional help is necessary. Practical tips will help you reduce damage and keep carpenter bees away for the long term.
Key Takeaways
- Identify carpenter bees by their size (about 0.75-1 inch) and shiny, black, stripe-free abdomens, unlike bumble bees.
- Expect carpenter bees to be most active in spring and early summer when they begin nesting in wood structures.
- Use natural repellents, traps like carpenter bee boxes, or WD-40 to deter or capture bees without harsh chemicals.
- Apply pesticides carefully to nest entrances, following label directions, and consider professional help for large infestations.
- Locate nests by spotting 4-12 inch long horizontal tunnels parallel to the wood grain, then treat or remove them.
- Prevent infestations by sealing and painting exposed wood surfaces to reduce nesting opportunities for carpenter bees.
How to Identify Carpenter Bees and Their Damage

Carpenter bees look similar in size to bumble bees, measuring about 1 inch long. A key difference is the abdomen: carpenter bees have shiny, mostly black abdomens without the yellow stripes typical of bumble bees. The larger, more strong body may cause confusion, but noting the lack of hair on the abdomen helps distinguish carpenter bees at a glance. These bees prefer untreated or weathered wood for nesting, while bumble bees typically build hives in soil or cavities.
Damage caused by carpenter bees involves boring clean, round tunnels roughly ½ inch in diameter into wooden parts of your home, like eaves, siding, decks, and outdoor furniture. Unlike termites, carpenter bees do not eat wood; instead, they excavate galleries to lay eggs and shelter offspring. A single tunnel usually isn’t a structural concern, but the problem worsens when multiple bees create numerous tunnels or reuse and expand old ones over years. Such repetitive boring can weaken wooden structures significantly and lead to costly repairs.
Carpenter bee tunnels typically extend about 3 to 6 inches deep, sometimes longer if the same nest site is reused or expanded by successive generations. This depth affects control strategies because treatments must reach the full tunnel length to be effective. Surface sprays alone might not penetrate deep enough to kill larvae hidden inside, so knowing tunnel dimensions helps plan treatment timing and methods, such as injection or dust formulations designed for wood use. Use the following checklist to identify carpenter bees and their damage around your property:
- Look for shiny, black abdomens on 1-inch-long bees without yellow stripes
- Check for perfectly round entrance holes about ½ inch wide on wood surfaces
- Inspect untreated or weathered wood on eaves, decks, railings, and fascia boards
- Notice wood surfaces with sawdust or powder near holes, indicating active tunneling
- Observe repeated holes clustered in the same area, which suggest multiple bees or reuse
- Listen for buzzing sounds or spot carpenter bees hovering near wood in spring and summer
Early inspection is important because well-established tunnels can be challenging to treat fully. Monitoring the age and expansion of damage helps decide whether simple surface sealing or more thorough removal is needed. Keeping wood painted or sealed and avoiding exposed bare wood reduces the chance of infestation and visible damage.
When Are Carpenter Bees Active and Most Likely to Infest
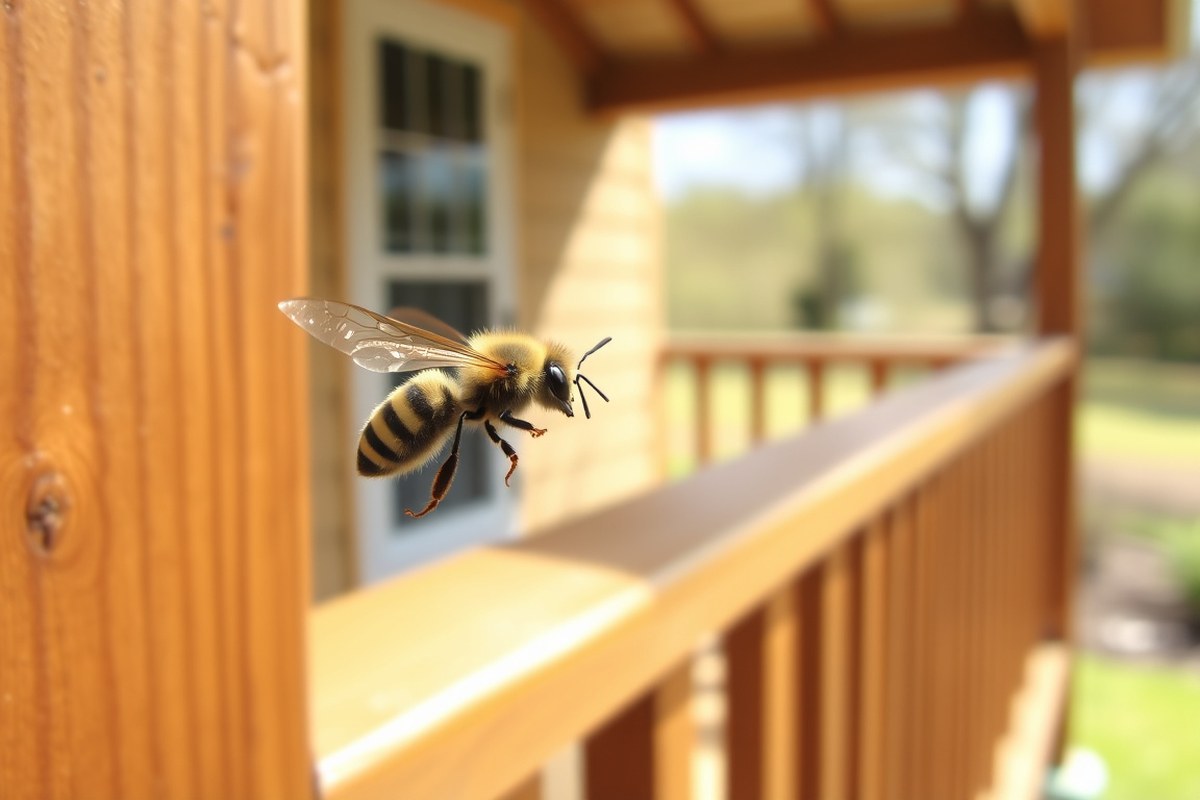
Carpenter bees are most active during the spring and early summer months, typically from March through July in temperate regions like Maryland. This period marks their mating and nesting season when females bore into wood to create tunnels for laying eggs. Early spring is the ideal time to begin control efforts, as applying treatments before or at the start of this active phase prevents new nests from forming and reduces the risk of widespread infestation.
The reproductive cycle of carpenter bees directly influences the timing of control strategies. Female carpenter bees lay eggs inside individual tunnels, and the larvae develop within these cells before emerging as adults the following spring. Because there is usually one generation per year, targeting the bees in early spring before the eggs hatch is important. Attempting control later in the season often misses the window to eliminate the entire brood, making infestations harder to manage.
Climate and regional species play a significant role in carpenter bee activity patterns. In warmer climates, the active season may begin earlier and last longer, while in cooler regions, it shortens accordingly. For example, Eastern carpenter bees, the most common species in the United States, emerge as temperatures consistently rise above 55°F. You can monitor local weather to predict when carpenter bees will start nesting near your property. Adjusting your control timeline to these local conditions improves success rates and prevents unnecessary treatments.
When planning treatment, focus efforts from late winter through early spring, roughly from mid-March to early May, depending on your region’s climate. Inspection during this timeframe helps detect fresh bore holes and active bees before the damage escalates. For busy homeowners or when nests are located in hard-to-reach areas like eaves or overhead beams, hiring a professional pest control service early in the season ensures safe and effective application of control methods, including minimally invasive treatments and proper nest removal.
Environmental factors such as prolonged cold spells or wet weather can delay carpenter bee emergence and activity, pushing treatment windows later into spring. Similarly, drought or very dry conditions might cause bees to seek deeper or less exposed areas to nest, which can affect how and when you inspect and treat wooden structures. Being attentive to these conditions helps avoid mistimed treatments that either fail to control bees or waste resources.
Start monitoring wood structures for small, round holes by early March and schedule treatments shortly after if you notice activity, especially in areas protected from harsh weather where bees are more likely to nest.
Natural and DIY Methods to Repel or Trap Carpenter Bees
Natural repellents, essential oils, and simple DIY traps can help manage carpenter bees by discouraging them from nesting in your wooden structures. Using these methods requires consistent application and setup to keep carpenter bees away without harsh chemicals. While household solutions like WD-40 and vinegar may provide temporary relief, they generally do not offer lasting results.
Using Essential Oils and Natural Sprays
Several essential oils act as natural repellents against carpenter bees. Oils like citronella, eucalyptus, peppermint, and tea tree can disrupt the bees’ ability to detect attractive nesting sites. Using these oils in spray form helps create a protective barrier around wooden surfaces.
To make a natural repellent spray, mix 10 drops of your chosen essential oil with 1 cup of water and 1 tablespoon of dish soap. The soap helps the mixture adhere to wood surfaces. Apply this spray to exposed wood, especially around existing carpenter bee holes, every few days during spring and summer when bees are most active.
Homemade Carpenter Bee Trap Instructions
DIY carpenter bee traps specifically target the bees’ attraction to dark, sheltered spots. One effective trap design uses a wooden box with a small entry hole and a plastic bottle funnel that guides bees inside but prevents escape. Installing traps near nesting areas can reduce bee activity. Follow these steps to build your own carpenter bee trap:
- Cut a wooden box approximately 12 inches long, 6 inches wide, and 6 inches high, leaving one side open.
- Create a 1-inch diameter entry hole on the side opposite the open face.
- Cut the top off a plastic soda bottle to form a funnel, ensuring the neck fits snugly into the entry hole with the narrow end pointing inside.
- Attach the funnel into the hole using tape or staples.
- Make a small perch near the hole with a wooden dowel, about 0.5 inch in diameter.
- Paint the box in dark colors to attract bees.
- Hang or place the trap 5 to 10 feet away from your wooden structures in sunny locations.
- Check and empty the trap every 2 to 3 days during peak activity to prevent bee escapes.
Evaluating Common Household Remedies
WD-40 can temporarily deter carpenter bees by coating the walls of nest holes with a slick barrier. Spray it directly inside the holes during early morning or late evening when bees are less active. However, this method only displaces bees temporarily and won’t stop new bees from returning each season.
Household vinegar lacks documented effectiveness against carpenter bees and is not recommended as a repellent or control method. Noise and vibrations, such as playing loud music or tapping on wood, may temporarily scare away carpenter bees but don’t prevent them from returning or nesting nearby.
Using household remedies occasionally makes sense for spot treatments or small infestations. For long-term management, applying natural oils regularly and setting traps provide better control with fewer risks to your property and beneficial insects.
Chemical Treatments: Pesticides, Their Application, and Safety
When tackling carpenter bees with pesticides, GardenTech® products are among the most effective options available. These insecticides kill carpenter bees on contact and offer up to three months of protection. To apply safely and effectively, spray the pesticide directly into the bee holes and on the nearby wood surfaces. Timing is important: apply pesticide when the female bee is away from the nest to avoid immediate stings and to maximize insecticide contact with the insects inside. Using an aerosol spray can also help control free-flying carpenter bees around wooden structures like gazebos or decks.
Before application, wear protective clothing including long sleeves, gloves, and eye protection to reduce sting risks. Carpenter bees typically are solitary pairs, but their aggressive defensive behavior means you should avoid direct contact during treatment. Avoid spraying on windy days or during rain to prevent drift and contamination. After spraying, monitor the treated area and surrounding zones over several weeks, as surviving bees may appear, and repeat applications may be necessary. While pesticide costs vary, expect to spend between $20 and $50 for a professional-grade product, with potential additional costs if repeated treatment is required.
Deciding whether to kill carpenter bees or encourage relocation depends on your situation. Carpenter bees rarely form large colonies, and some farmers actually cultivate them for their pollination benefits by providing untreated wood blocks and avoiding harmful pesticides. When stings are a concern and you prefer a non-lethal approach, consider non-chemical methods like traps or deterrents instead of pesticides.
Use pesticides only when carpenter bee activity causes damage or when non-chemical controls fail. Overusing pesticides may harm beneficial insects and the environment. After treatment, keep an eye on the area for new tunnel openings or bee appearances. Good results will show no fresh holes and no bee activity after 2 to 3 weeks. Poor outcomes can result from treating at the wrong time, failing to protect yourself properly, or overlooking nearby nesting spots allowing bees to recolonize.
Effective chemical treatment includes choosing a labeled pesticide like those from GardenTech®, applying it directly into nests while the female bee is away, wearing protective gear, and monitoring results carefully. Avoid unnecessary chemical use by weighing the benefits of relocation versus elimination, especially if you want to maintain healthy pollinators nearby.
Locating, Treating, and Removing Carpenter Bee Nests
Find carpenter bee nests by looking for smooth, round holes about 1/2 inch in diameter on unpainted or soft wood surfaces. Active nests show fresh sawdust piles and bee activity, while old nests have no new damage or bees. Treat active nests promptly using appropriate insecticides or dusts to prevent further damage, and remove debris after treatment to discourage reinfestation.
Identifying Active Versus Old Nests
Carpenter bee nests look like perfectly round holes roughly 1/2 inch wide, often found on decks, eaves, wood siding, railings, or sheds made of unpainted or weathered wood. Active nests have fresh sawdust (frass) below the holes and visible bee activity, especially in early spring and late summer. Old nests usually lack fresh sawdust and bee presence but may be entrance points for new carpenter bees to enlarge or reuse.
The tunnels can vary in length but often extend 6 to 12 inches or more inside the wood, with multiple bees sometimes sharing a common entrance leading to separate chambers. This makes it critical to identify all holes and signs of activity to treat thoroughly.
Treating Nests with Sprays or Dust
Effective treatment requires applying an insecticidal dust or spray directly inside the entrance holes and around the affected wood. Treat in early spring as bees emerge or late summer after offspring have matured. Wait until dusk or early morning when bees are less active for safer and more effective application. A basic treatment checklist includes:
- Wear protective clothing, including gloves and eye protection.
- Use an insecticidal dust or spray labeled for carpenter bees, following all label directions.
- Insert a dust applicator or thin nozzle into each nest hole to deposit dust deep inside the tunnels.
- Spray or dust the wood surface surrounding the hole to kill emerging bees and discourage new borings.
- Repeat treatments after one to two weeks to reach bees that were initially protected deeper in tunnels.
- Seal holes 24 to 48 hours after confirming inactivity to prevent re-infestation.
Apply treatment during low bee activity to avoid stings and improve results; avoid treating during heavy rain or wind to prevent wash-off or drift.
Cleaning and Repairing Wood After Removal
After treating nests, remove sawdust piles and any loose wood debris to discourage other insects or carpenter bees from reusing the area. Using a vacuum can efficiently remove sawdust and debris from the ground and crevices.
Fill or seal holes after confirming no bee activity. Use exterior-grade wood filler or caulk, then repaint or seal the surface to protect against moisture and future boring. This maintenance reduces the chance of new nests and slows existing colony expansion over the years. Neglecting to remove debris or seal holes may attract new carpenter bees or other wood-boring insects, leading to repeated infestations and escalating wood damage.
Preventing Carpenter Bee Infestations with Wood Sealing and Painting
Sealing and painting wood can significantly reduce the chances of carpenter bees nesting in your outdoor structures. These bees prefer raw, unfinished, or weathered wood for digging their galleries. Applying a solid, protective coat forms a barrier that discourages them from settling in. For best results, choose high-quality exterior paint or varnish designed for wood surfaces, such as acrylic latex paint or polyurethane varnish, which resist moisture and wear.
Before sealing or painting, make sure the wood is clean and dry. Use a mild detergent and a stiff brush to remove dirt, mildew, or old loose paint. Let the surface dry for at least 24 hours, especially if the weather is humid or rainy. Sanding rough spots can also help finish coats adhere better. After preparation, apply at least two coats of paint or varnish, allowing the recommended drying time between coats. Expect to spend $20 to $50 per gallon of paint or varnish, sufficient to cover 250 to 400 square feet.
Painting alone does not guarantee protection since carpenter bees will attempt to nest in wood with cracked, chipped, or peeling paint. Regular maintenance is important. Inspect painted surfaces yearly, and touch up any damage immediately to prevent exposure of raw wood. Dark paints or stains can sometimes attract bees, as they absorb more heat. Using lighter shades or semi-transparent stains with sealant helps avoid this issue.
Varnishes and polyurethane finishes provide a hard, glossy seal that effectively blocks carpenter bees from tunneling, especially when applied over paint or bare wood. These finishes wear down over time, so reapply every two to three years depending on exposure to sun and rain. Decks and pergolas exposed directly to sunlight and moisture may need more frequent treatment.
For older structures with existing carpenter bee damage, fill holes with wood filler or putty before sealing. This step prevents bees from enlarging old tunnels and nesting nearby. If you find active nests, treat them first before sealing or painting. Waiting until after bee activity subsides in late summer or early fall gives the best timing to apply protective coatings without disturbing the bees.
Keeping wood well-sealed also reduces the need for insecticide treatments and preserves the wood’s appearance and durability. Sealing wood early in the spring, before carpenter bees become active, can stop new infestations. Using exterior-grade sealants combined with light-colored paints or stains offers a practical way to protect your wooden structures while maintaining their natural appeal.
Professional Carpenter Bee Removal: Costs, When to Hire, and Communication
Professional carpenter bee removal typically costs between $88 and $1,500, depending on the severity of the infestation and the services required. Hiring an expert is a good idea once these bees have established nests in your wooden structures, especially if you want a humane removal or don’t have the time and tools to manage the problem yourself. Professionals can offer pest control or relocation services, with the latter being best for homeowners aiming to protect pollinators while safeguarding their property.
Choosing between extermination and relocation depends on your priorities. Pest control companies often use environmentally toxic pesticides. Relocation services, such as those offered by The Other Bee Guy, provide ethical, science-based methods to move bees safely to secure habitats without immediately sealing holes, allowing any exiting bees to leave first. Early professional intervention avoids costly wood repairs and keeps pollinator populations safe. The following table lays out the options, typical costs, and key benefits:
| Service Type | Typical Cost Range | Approach | Best For |
|---|---|---|---|
| Extermination | $88 – $1,000 | Use of pesticides to eliminate carpenter bees | Urgent infestation removal, property damage prevention |
| Relocation | $200 – $1,500 | Humane trapping and removal, bees rehomed | Eco-conscious homeowners, bee preservation |
| Inspection & Monitoring | $100 – $300 | Assessment of infestation and preventive advice | Early detection, ongoing carpenter bee management |
When reaching out to pest control or bee relocation services, clear communication helps ensure good results. Here is a sample script to request professional assistance:
Subject: Carpenter Bee Removal Service Inquiry Message: Hello, I’ve discovered carpenter bees nesting in the wooden areas around my home. I’m interested in having the infestation professionally addressed. Could you provide information on your removal or relocation services, costs, and approach? I prefer methods that consider environmental safety and the humane treatment of bees if available. Also, please advise on the typical timeline and any preparations I should make before your visit. Thank you.
Use this template as a starting point and adjust based on your priorities, property type, and schedule. Ask the company about follow-up services and guarantees, especially regarding sealing holes and monitoring for new activity. Remember that not sealing the holes immediately after removal can help ensure all the bees have left the site completely.
Long-Term Monitoring, Prevention, and Common Treatment Mistakes
Preventing carpenter bee re-infestation requires ongoing effort through regular inspections and maintenance. You must watch for fresh signs of activity and respond quickly when you find them. Avoiding common mistakes improves your long-term success at controlling these persistent pests.
Regular Inspection Schedules
Plan to inspect wooden structures in early spring and late summer when carpenter bees are most active. Check exposed wooden beams, eaves, decks, and porches for freshly drilled holes roughly ½ inch in diameter. Look for sawdust piles beneath these holes, a key sign of new burrowing. Keep a log of inspection dates and findings to track trends over time.
Besides visual checks, lightly tapping wooden surfaces can reveal hollow spots indicating internal tunnels. Use a flashlight to inspect dark or shaded areas thoroughly. Spotting active bees or fresh holes means you should treat the area promptly to prevent further damage.
Recognizing Effective Treatment Results
Successful carpenter bee control shows a decline in fresh holes and sawdust near previously active sites within weeks. Over two to three months, treated locations generally see no new burrows. Dead adult bees near old nests may also signal effective treatment. However, occasional sightings of lone bees do not always mean a failure, as a few stragglers can appear near treated wood.
Document your findings after treatment by noting hole condition and any bee activity. Appearance of new holes or expansion of old ones requires an immediate reassessment of your treatment strategy. Taking action promptly prevents further structural damage.
Common Errors and How to Fix Them
Many homeowners fail by missing early signs or treating only visible holes without addressing nearby nesting sites. Incomplete sealing or untreated adjacent wood may lead to rapid re-infestation. Using ineffective or incorrectly applied pesticides also reduces results. Avoid spraying on hot days above 85°F, which can cause evaporation and less penetration. Fix these issues by following a thorough treatment checklist:
- Inspect all wooden areas, including hidden spots
- Treat all drilled holes and any newly found ones
- Apply treatment during cool mornings or evenings
- Seal treated holes with wood filler or caulk
- Repaint or reseal wood surfaces annually
- Remove damaged or rotted wood promptly
- Use traps or physical barriers to catch or deter bees
Ignoring ongoing maintenance is a common mistake. Maintaining painted or sealed wood keeps carpenter bees from choosing your property as their burrowing site. A professional inspection every few years can catch early problems you might miss.
Never treat carpenter bee holes during peak bee activity to avoid harming pollinators and reducing treatment effectiveness.
Step-by-Step Action Plan to Get Rid of Carpenter Bees
Follow these steps to identify carpenter bees, treat active nests, and prevent future damage effectively and safely.
- Before you start: Inspect your wooden structures during midday to identify carpenter bees and their round entrance holes about 3/4 inch in diameter. Confirm activity by spotting bees entering or exiting holes.
- Day 1: Apply natural repellents like citrus oil or use bee traps near active nests to reduce bee presence. Check for decreased bee visits within 24, 48 hours.
- Day 2 or 3: Use a dust or aerosol pesticide labeled for carpenter bees directly in the nest holes at dusk when bees are less active. A visible reduction in bee activity over the next few days indicates effectiveness.
- Day 7: After treatment, seal or plug the nest holes with wood putty or caulking to block re-entry once you see no more bees leaving the holes.
- Week 2: Paint or seal exposed wood surfaces to prevent future infestations; fresh paint or wood sealant also allows you to spot new holes early.
- Month 1: Monitor treated areas regularly for new holes or bee activity, especially in spring when carpenter bees return.
- Ongoing: If infestations persist or nests are large, contact a licensed pest professional to avoid damage and ensure safe removal.
Frequently Asked Questions
What Does WD-40 Do to Carpenter Bees?
WD-40 can kill carpenter bees quickly when sprayed directly on them, acting as a fast insecticide. It’s a handy short-term solution but doesn’t prevent reinfestation or address nests inside wood.
Why Shouldn’t You Kill Carpenter Bees?
Avoid killing carpenter bees because they pollinate plants and usually don’t cause significant structural harm. Humane removal or deterrents protect beneficial insects and help maintain the local ecosystem balance.
What Smell Do Carpenter Bees Hate?
Carpenter bees hate the smell of citrus, which can repel them from wooden structures. Using citrus-based sprays or hanging citrus peels near nests may help discourage them from nesting nearby.
Do Carpenter Bees Ever Go Away?
Carpenter bees don’t go away on their own and often return if nests aren’t removed or treated. Regular maintenance and early treatment are key to preventing long-term infestations.
Can I Use a Vacuum to Get Rid of Carpenter Bees?
Yes, you can use a vacuum to suck up carpenter bees without harming them. This method works best during active periods but doesn’t eliminate nests or prevent future visits.
Are Fake Wasp Nests Effective for Carpenter Bee Control?
Fake wasp nests can deter carpenter bees because they avoid wasps. Hanging them on porches or eaves may reduce nesting but works best combined with other prevention methods.
The Bottom Line
Getting rid of carpenter bees requires a combination of identification, targeted treatment, and prevention to protect your wooden structures effectively. Start by inspecting your property for fresh bee holes and signs of damage to catch an infestation early. Today, consider sealing bare wood surfaces or applying a bee-repellent paint to make your home less attractive to these pests.




One Comment