What to Do Before Pest Control Comes: A Complete Guide for Effective Preparation
Preparing your home properly before pest control comes ensures the treatment works effectively and reduces health risks. Clear clutter, cover or store food, and move furniture away from walls so technicians can treat all areas thoroughly. You should also notify your pest control provider about children, pets, or special health concerns to adjust the plan accordingly.
This guidance suits homeowners and renters facing pest control visits for ants, bed bugs, rodents, or other common pests. It covers specific steps for protecting belongings, when to vacate your home, seasonal adjustments, and common preparation mistakes to avoid. Proper preparation also helps control costs and supports safe, lasting pest management.
Key Takeaways
- Clear clutter and move furniture away from walls to expose pest hiding spots and improve treatment effectiveness.
- Store all food in sealed containers or remove it from the treatment area to prevent contamination.
- Relocate pets, fish tanks, and plants outside the treatment zone to avoid harmful chemical exposure.
- Vacate your home for the recommended period, often 2 to 6 hours, to ensure safety during and after treatment.
- Notify pest control professionals about allergies, asthma, or chemical sensitivities before treatment begins.
- Adjust preparation steps by season and pest type, such as sealing cracks in winter or removing debris in summer.
How to Prepare Your Home for Pest Control Treatment
Start preparing your home at least one week before the pest control appointment to ensure the treatment reaches all critical areas. Early preparation lets you clear clutter, clean affected spots, and arrange your schedule to avoid interfering with the service. Detailed prep improves pest control effectiveness and reduces the need for repeat treatments.
Begin by inspecting your home for signs of pests and areas they frequent. Focus on kitchens, bathrooms, basements, and entry points like doors and windows. Clean these spaces thoroughly, including vacuuming floors, wiping counters, and removing food residues. This step reduces food sources pests target and helps the treatment penetrate hiding spots better.
About three days before the appointment, start putting away or sealing all food items in airtight containers or inside the refrigerator. Leave no open food or pet dishes out overnight, as these attract pests and interfere with chemical treatments. Cleaning trash bins and securing garbage outdoors also prevents re-infestation. On the day before treatment, follow a checklist to streamline preparation:
- Vacuum and mop floors, especially in corners and under appliances.
- Clear countertops, behind appliances, and inside cabinets to give technicians access.
- Remove or cover pet bedding and relocate pets to a safe area.
- Turn off air conditioning or heating systems to avoid spreading chemicals.
- Arrange temporary removal of children, elderly, or immune-compromised individuals if advised.
- Own or rent a storage bin for small personal items that could be exposed.
On the treatment day, avoid cleaning after the service because residue sprays need time to work. Technicians often require access to water and electricity, so ensure these utilities are on and any locked doors are accessible. Plan to vacate the premises for the time recommended, usually a few hours, to avoid exposure and let chemicals dry thoroughly.
Thorough cleaning beforehand doesn’t mean using strong chemical cleaners, which can repel pests and reduce treatment effectiveness. Stick to soap and water or gentle cleaners. Cost-wise, basic cleaning supplies and storage containers often suffice. Failing to prep leads to blocked access for technicians, pests finding untreated spots, and wasted service fees.
Specific Preparation Steps for Different Common Pests

Preparation steps for professional pest control vary significantly depending on the type of pest you’re dealing with. Each pest requires specific actions to improve treatment effectiveness, such as clearing food debris for ants or sealing entry points for rodents. You can take some initial control measures yourself, but these should complement the professional treatment rather than replace it.
Ants: Food and Barrier Prep
Ant control is largely about removing food sources and creating barriers that prevent ants from entering treated areas. Clear counters, tables, and floors of crumbs, sticky residues, and standing water before the technician arrives. Store all food items, including pet food, in sealed containers to deny ants any access. Washing surfaces with soap and water can remove scent trails ants follow, making treatment more effective.
Vacuuming ant trails before treatment can reduce ant numbers temporarily but won’t eliminate colonies or prevent re-infestation. Avoid using store-bought sprays right before the visit, as some may repel ants and interfere with the professionals’ baits or treatments.
Termites: Access and Moisture Control
Termite treatment focuses on allowing professionals access to infested wood and controlling moisture levels that encourage termite activity. Remove drapes or furniture blocking access to baseboards and walls where signs of termites appear. Clear clutter near the foundation outside so the technician can inspect and treat those areas effectively.
Fix leaks in irrigation, faucets, and gutters before treatment to reduce moisture. High moisture attracts termites and can reduce the effectiveness of chemical barriers. Do not apply any termite pesticides yourself, as improper application can invalidate warranties and complicate professional work.
Bed Bugs: Decluttering and Linen Handling
Bed bug preparation involves reducing hiding spots and ensuring bedding can be treated. Remove all clutter from bedrooms and other sleeping areas to give the technician access to corners, furniture joints, and baseboards. Wash all bedding, linens, curtains, and clothing in hot water (at least 120°F) and dry on the highest heat setting to kill any bed bugs before treatment.
Place cleaned items in sealed plastic bags until after treatment to prevent re-infestation. Vacuum beds, mattresses, and furniture well, disposing of the vacuum bag immediately in a sealed container outside. Avoid self-treating with sprays or powders, since these can spread bed bugs to other areas and mask infestation signs.
Rodents: Sealing Entry Points and Traps
Effective rodent control relies on sealing entry points and setting traps prior to treatment. Inspect your home for gaps larger than a quarter inch around doors, windows, pipes, and vents. Seal holes with steel wool and caulk, or use metal flashing for larger gaps, since rodents can gnaw through softer materials. Clear away any debris near foundation walls and keep the yard trimmed to reduce rodent cover.
Set snap or electronic traps along walls away from children and pets, baited with peanut butter or dried fruit to catch rodents before the professional arrives. Never use poison baits yourself in an enclosed home without professional guidance to avoid risks to family members or pets and unintentional spreading of rodents in walls.
Cockroaches: Kitchen Cleaning and Hiding Spots
Cockroach preparation involves deep kitchen cleaning and removing hiding spots. Clean under and behind appliances, inside cabinets, and along baseboards to clear crumbs, grease, and moisture from cockroach habitats. Empty trash regularly and wipe down garbage cans with disinfectant.
Reduce clutter like cardboard or paper piles that provide cockroaches cover. Seal cracks in walls, around sinks, and near plumbing penetrations. Avoid applying insecticides yourself, especially sprays, because they can disperse cockroaches making the infestation harder to control.
The table below summarizes the specific action items to prepare for treatment of common pests. Following the correct steps improves insecticide or bait effectiveness and speeds up pest elimination.
| Pest Type | Primary Prep Tasks | DIY Measures Before Arrival | Common Mistakes to Avoid |
|---|---|---|---|
| Ants | Clean food debris, store food sealed, wash trails | Vacuum trails; avoid sprays before treatment | Using repellents that disrupt baiting; leaving food out |
| Termites | Clear access, fix leaks, reduce moisture | Remove furniture blocking walls | DIY pesticides; ignoring water issues |
| Bed Bugs | Declutter, wash and bag linens, vacuum | Vacuum thoroughly; avoid sprays | Using insecticides that spread bugs; not bagging cleaned linens |
| Rodents | Seal holes, set traps, clear debris | Place traps with bait; patch gaps with steel wool | Using poison baits alone; leaving gaps unsealed |
| Cockroaches | Deep kitchen cleaning, remove clutter, seal cracks | Clean under appliances; discard trash frequently | Spraying that scatters cockroaches; leaving food sources |
DIY actions help reduce pest populations and improve treatment reach but do not replace professional pest control. Professionals use products and techniques that homeowners cannot access or apply safely.
Do not apply any insecticides or rodenticides yourself right before professional treatment, as this can interfere with their work or create safety hazards.
How to Protect Food, Pets, Plants, and Valuables Before Treatment
Before pest control treatment, securing food, dishes, pets, and plants is necessary to prevent contamination and avoid health risks. Remove or tightly seal all food items and dishes. Pets should be moved out of treated areas, and indoor plants need special care to protect them from exposure to chemicals.
Securing and Storing Food and Dishes
All food items need to be stored in airtight containers or removed from the treatment area. This includes dry goods, canned foods, pet food, and beverages. Foods left exposed during treatment risk absorbing chemicals or being contaminated by dust and spray. Move food to a closed pantry, refrigerator, or tightly seal it in heavy-duty plastic bags or containers. Dishes, utensils, and food preparation surfaces should be washed and covered with plastic wrap or stored inside cabinets to prevent contact with pesticides. Avoid relying on loosely fitting lids or paper covers, as these do not provide adequate protection.
This process usually takes about 15 to 30 minutes, depending on the kitchen size and food volume. Timely preparation is important; finish food storage at least one hour before the pest control technician arrives to allow you time to double-check all areas. Inadvertently leaving food out can lead to contamination and requires additional cleaning or disposal after treatment.
Relocating and Protecting Pets
Pets should be removed from the home or confined to a room not being treated for the entire duration of the pest control process. Exposure to pest control chemicals can cause respiratory and skin irritation or worse, especially for small animals and bird species. When removal of pets is not an option, ask the pest control professional to identify safe zones and closely supervise your pet while inside. Make sure pet bedding, food, and water bowls are taken out or covered securely with plastic wrap or sealed containers.
Plan pet relocation ahead of time. Bring outdoor pets indoors temporarily or place them at a friend’s or boarding facility. For indoor pets, a carrier or separate room with closed doors and windows will limit exposure. The time pets must stay away often ranges from 4 to 24 hours after treatment, depending on the product used. Your pest control provider can give a specific timeline. Never let pets roam freely during or immediately after treatment.
Handling Sensitive Plants and Household Items
Indoor plants can absorb pesticides through their leaves or soil, which may harm or kill them. Move all sensitive plants outside or to an untreated area in the home before treatment begins. When moving plants outside is not an option, group them together in a protected location away from spray points. Cover plants with a breathable cloth or plastic sheet but avoid direct contact with the foliage to reduce risk. Water plants thoroughly a day before treatment because moist soil slows chemical absorption.
Valuables such as electronics, antiques, and textiles should be relocated from treatment rooms to prevent damage from sprays or dust. When moving these items is difficult due to size or fragility, cover them with plastic sheeting sealed with tape. Confirm the pest control specialist is aware of any valuable or sensitive household goods so they can adjust the treatment accordingly. This extra step helps avoid costly damage or malfunction of your possessions.
When and How Long Should I Vacate My Home During Pest Control?
You typically need to leave your home during pest control treatment, especially if the service involves chemical sprays or fumigation. The length of time you must vacate depends on the type of treatment being applied. For standard insecticide sprays, staying away for 2 to 4 hours is common. For fumigation or more intensive treatments, you may need to be out for 24 to 48 hours to avoid inhaling toxic fumes. Leaving ensures your safety by preventing exposure to harmful chemicals.
After the treatment, reentry times vary by product and pest. Most spray treatments allow reentry after 2 to 4 hours once the drying or airing out process is complete. In cases of fumigation, professionals typically advise waiting a full day after the tent or treatment setup is removed. Your pest control technician should provide detailed instructions for your specific treatment.
Planning your vacate time starts with confirming the treatment method with the company. When sprays are used, plan to leave before the appointment and stay away until the treated surfaces have dried, which usually takes a few hours. For fumigation, arrange to be out the entire day of treatment plus the day after. Make sure to open windows and run fans if advised, as this helps clear any residual odors or chemicals.
Costs or inconvenience add up when you must stay elsewhere, especially for 24 hours or more. Consider booking a nearby hotel, staying with friends, or taking a day off work. Some treatments require you to remove pets and plants, which adds to the preparation effort. Ask your pest control provider how long you’ll need to be out to plan accordingly.
Resuming normal activities should come only after you confirm the reentry window given by your technician. Avoid touching treated surfaces or vacuuming immediately after treatment unless they specify it is safe. A common mistake is returning too soon, which risks exposure and can reduce the treatment’s effectiveness because the chemicals haven’t had enough time to work thoroughly.
Respiratory issues or sensitive family members may require longer vacate times. Always communicate any health concerns beforehand so the pest control service can adjust their plan or advise you on extra precautions. In some cases, they may recommend removing people for a day longer than usual to prevent irritation or allergic reactions.
Furniture, Personal Belongings, and Clutter: What to Move and Where
You need to move certain furniture and belongings to allow the pest control technician full access to walls, baseboards, and floor spaces where pests hide or travel. Clearing space helps the treatment reach all necessary areas and protects your items from chemicals or damage. Focus on furniture near pest hotspots, below windows, along baseboards, and in corners of rooms where treatment will be applied.
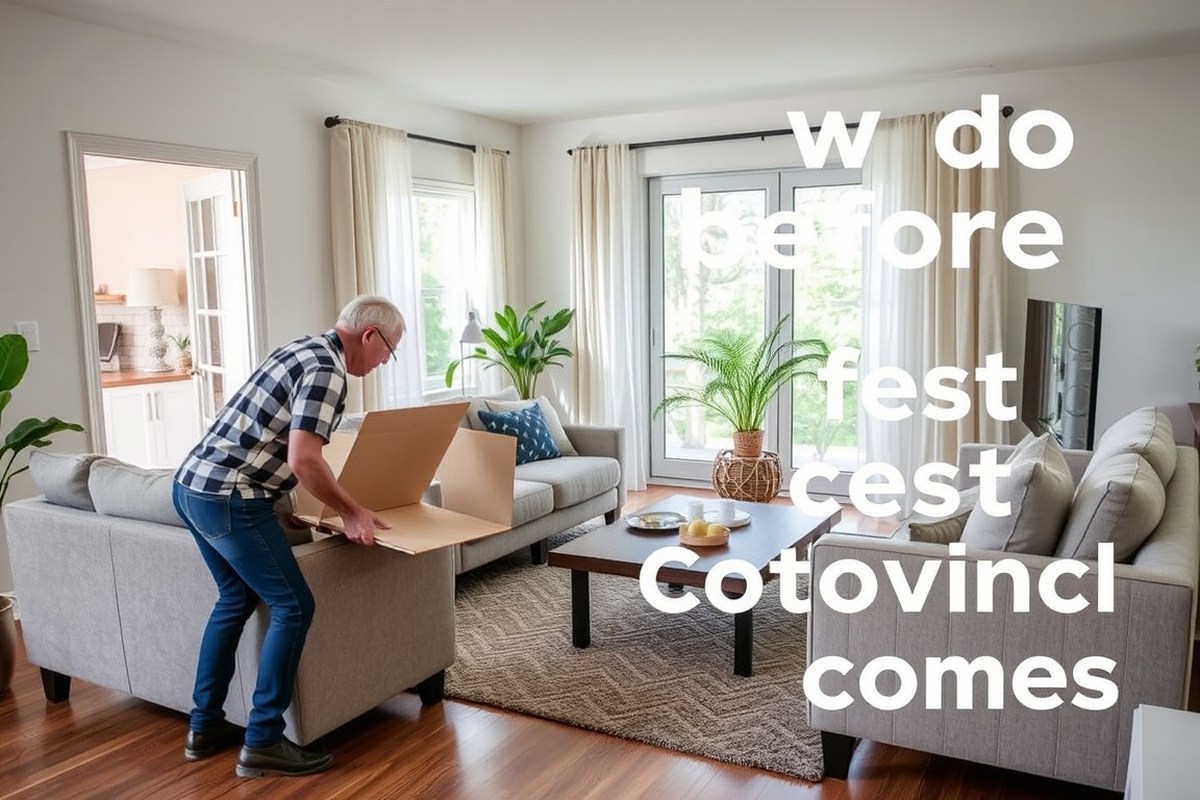
Start with large pieces like sofas, beds, dressers, and chairs that sit against walls. Pull those at least 12 inches away from walls and baseboards so technicians can thoroughly spray or treat the perimeter. Items such as bookshelves, storage bins, and armoires should also be moved away from walls if possible. This prevents pests from using those as bridges and ensures better coverage of treatments.
Small personal belongings, especially anything that might be sensitive to chemicals, need to be relocated. Place clothing, shoes, toys, and pet supplies in sealed plastic containers or bags and move them out of the treatment areas. Electrical devices should be unplugged and moved if on floors around baseboards, since sprays might be used nearby. Kitchen items, especially those on the floor or counters in affected rooms, must be removed or covered thoroughly.
- Move furniture at least 12 inches from walls and baseboards
- Remove or cover small personal items near treatment zones
- Use plastic bins or bags to store belongings during treatment
- Unplug and relocate electrical devices near baseboards
- Clear clutter like stacks of boxes, laundry piles, and loose papers off the floor
- Relocate pet dishes, beds, and toys to untreated rooms
- Remove floor rugs or mats when pest control involves spraying floors
This preparation typically takes 30 to 60 minutes depending on the size of the space and amount of furniture. Some treatments require more extensive clearing, especially if pests are widespread. Take photos of arranged rooms before you move items to help reset your space later.
Improper furniture movement can block access to critical pest areas and reduce treatment effectiveness. Also avoid covering areas with plastic sheets that trap moisture or exclude treatment. If you cannot move heavy or built-in furniture, inform your pest control technician ahead of time to discuss alternatives.
Keep moved items off the floor by placing them on plastic sheets or tables to avoid chemical residues and to make cleanup easier after treatment.
Common Home Preparation Mistakes and How to Avoid Them
Skipping or rushing preparation before a pest control treatment often reduces its effectiveness and can even cause safety issues. Treatments may not reach all pest hiding spots if clutter or furniture blocks access. Pests hiding under debris or behind items easily escape and reinfest after the treatment. You need to clear floors and countertops around the treatment zones at least a day before the appointment. That usually means moving furniture a few inches away from walls and vacuuming floors thoroughly to remove crumbs, dust, and pest eggs.
One common preparation mistake is not sealing or removing pet food and water bowls. Pest control chemicals can contaminate pet dishes, so you should store all pet food in sealed containers and remove water bowls during treatment. Failure to do this often forces pest control professionals to postpone application or leaves pets at risk. Cleaning pet feeding areas after the treatment also helps eliminate residue or lingering odors that might attract pests back.
Another error is neglecting to inform the pest control company about sensitive areas or special conditions in your home, such as asthma triggers, allergies, or aquariums. This can result in treatments using chemicals unsuitable for your household, increasing health risks or causing damage. Always disclose any health concerns or vulnerable occupants so the technician can choose safer options or apply treatments differently to reduce exposure.
Homeowners sometimes underestimate the need to vacate the premises for the required time following treatment or fail to plan where to stay. Not vacating as directed can lead to inhaling chemicals or accidental contact with treated surfaces. You should confirm with your provider the exact length of time to stay out, often from 2 to 24 hours depending on the treatment type. Arrange overnight stays with neighbors, family, or hotels if needed.
Failing to cover or remove food items in kitchens and pantries is a frequent oversight. Pests hide in food packaging, and chemicals can contaminate exposed items. You should remove all exposed food or seal them tightly in containers or plastic wrap. This simple step prevents contamination and preserves food safety. After treatment, clean counters and cupboards carefully before returning food to storage.
Lastly, ignoring instructions about running ventilation, such as fans or air conditioning, can interfere with chemical effectiveness. Some treatments require a closed environment for a period after application to concentrate the pesticide. Check your provider’s guidelines and turn off ventilation systems during and shortly after treatment, usually for 1 to 2 hours. This avoids dissipating chemicals prematurely and maximizes pest control results.
Adjusting Preparation by Season and Location for Best Results
Weather and regional factors influence how you should prepare your home for pest control treatment. Seasonal changes like temperature and moisture affect pest behavior and chemical effectiveness, so your prep steps must adjust accordingly. Geographic location and whether you live in an urban or rural area also change which pests are common and how you manage your yard and home environment before treatment.
Winter vs Summer Prep Considerations
Winter usually limits pest activity, especially for insects like ants and cockroaches, which tend to shelter inside. During cold months, focus on clearing clutter inside the home where pests can hide and keeping areas dry to avoid creating inviting environments. In some cases, pest control companies might adjust or reduce treatments for certain pests in winter due to lower pest activity, so confirm this beforehand to schedule your prep correctly.
Summer increases pest presence, especially mosquitoes, ticks, and spiders. You’ll need to do thorough lawn maintenance: mow the grass, trim shrubs, and remove standing water sources where insects breed. Also, clear debris and wood piles near the house; these provide shade and moisture that attract pests. Summer treatment generally requires more extensive prep outdoors and often strict indoor cleaning to expose hiding pests and eggs for effective results.
Humidity and Moisture Management
High humidity and moisture create ideal conditions for many pests like termites, silverfish, and molds that can lead to pest infestations. Before a treatment, check for leaks under sinks, around water heaters, and in basements or crawl spaces and fix them promptly. Drying out these areas reduces pest harborage and improves pesticide performance, which often breaks down faster in wet conditions.
In drier climates, moisture problems are usually less frequent but puddles near drip irrigation or clogged gutters still need attention. You should clear gutters, remove standing water, and improve drainage flowing away from the foundation to prevent attracting pests like mosquitoes or rodents. Keeping humidity under 50% indoors by using dehumidifiers or ventilation can make a notable difference in pest pressure and treatment success.
Urban Versus Rural Home Adjustments
Urban homes face different pest challenges like cockroaches, rodents, and flies that thrive in close quarters with neighbors and complex plumbing systems. Preparing for pest control in cities means sealing cracks in walls and around pipes meticulously since these are common entry points. You also have to manage trash effectively, keeping bins covered and away from the home to reduce pest attraction.
Rural properties often deal with agricultural pests, wildlife like rodents and snakes, and outdoor pests invading indoors. Preparation requires more focus on managing vegetation around the home, mowing fields or tall grass, removing brush piles, and possibly fencing off areas with frequent wildlife activity. In rural settings, communicating with your pest control provider about wildlife risks helps determine whether extra exclusion work or barriers might be necessary before treatment.
Communicating Special Home Situations and Health Concerns to Professionals
You should clearly inform your pest control provider about any allergies, sensitive health conditions, or home automation systems well before the treatment day. Doing so helps the technician tailor their approach safely and avoid triggering alarms or health issues during the visit.
Notifying About Allergies and Sensitivities
Start by listing any household allergies or health sensitivities that might interact with pest control chemicals or methods. Share details like whether anyone in the home is allergic to pesticides, has asthma, requires low-toxicity treatments, or if there are small children or elderly residents with compromised immune systems. You can tell the provider directly when booking or at least a few days ahead, either by phone or email. For example, say: “I want to let you know that I or someone in my home is allergic to pyrethrin-based products. Can you confirm if your treatment plan avoids these, or suggest alternatives?” This lets them adjust or recommend safer options.
Providing this data in writing ensures there’s a reference record. Healthcare concerns shape what chemicals can be used and how thoroughly the technician ventilates and cleans afterward. Without this notice, you risk exposing vulnerable family members or pets to harmful substances or triggering health emergencies during or after treatment.
Instructions for Medications and Household Automation
If you have medication storage areas, tell the pest control provider to avoid treating those spots or ask how to protect those areas during application. Mention any home automation details such as smart thermostats, security cameras, or lighting systems that might be affected by technicians opening doors, moving objects, or using aerosol sprays. For example, say: “My home has a Nest thermostat, and a Ring security system. Please inform your team not to disable or disturb these devices unless necessary, and let me know if precautions are needed on my end.”
Alarm systems often require temporary deactivation to prevent false alarms triggered by movement or door openings during treatment. Confirm with your provider if they will handle this or if you need to turn off alarms in advance. Some companies include this service, while others ask homeowners to handle it. Clear communication avoids emergency calls or disrupted treatment schedules.
Always double-check if your pest control company requires advance notice to deactivate alarms, you might need to do this yourself to prevent emergency dispatches.
Confirming Special Requests Before Treatment Day
Follow up a day or two before the appointment with a call or message to reiterate any special health issues, automation setups, or allergy warnings. Use a clear script like: “I’m calling to confirm my pest control appointment on [date]. Please remember that I notified you about allergies to [specific chemicals] and that my home automation includes [list systems]. Let me know if you need me to do anything before the technician arrives.”
This confirmation reduces miscommunication and gives the provider a chance to clarify any unresolved safety instructions. Doing this check also reassures you that your concerns haven’t been overlooked. Neglecting this step could result in the technician applying products that risk your household’s health or cause unexpected alarm triggers, which could delay or cancel treatment.
Post-Treatment Aftercare and How to Check If the Treatment Worked
After the pest control treatment, thorough cleaning and proper ventilation help remove residual chemicals and reduce odors, improving indoor air quality safely. Open windows and use fans to ventilate the treated areas for at least two to four hours, or as instructed by the pest control professional. Wait before cleaning surfaces that received the treatment, typically 24 to 48 hours, to allow the pesticides to work effectively.
Check the success of the treatment by inspecting usual pest hideouts and activity areas for dead insects, reduced sightings, or lack of fresh damage. This evaluation typically starts a few days after the treatment and continues over two to four weeks, depending on the pest type. Keep a log of any new pest activity to inform follow-up treatments if necessary.
Follow-up steps often include a second visit from your pest control provider, especially for infestations of bedbugs, termites, or persistent rodents. These additional treatments target any surviving pests and prevent reinfestation. Schedule these visits as recommended, usually within two to three weeks after the initial service.
- Ventilate for 2 to 4 hours by opening windows and running fans after treatment
- Delay deep cleaning of treated areas for 24 to 48 hours to preserve pesticide effectiveness
- Inspect common pest locations daily for 2 to 4 weeks to monitor pest activity
- Record pest sightings, damage signs, or unusual droppings during the evaluation period
- Plan follow-up treatments with your pest service provider as advised
- Keep children and pets away from treated areas until safe per product instructions
Cleaning products containing bleach or ammonia can neutralize pesticides prematurely, so avoid these during the wait period unless the professional advises otherwise. Use mild soaps and water for superficial cleaning if necessary. If pests persist after follow-up treatments, consider additional inspection for hidden sources, structural repairs, or integrated pest management approaches.
Safety Risks and Cost Considerations for Pre-Treatment Preparation
Failing to prepare properly before pest control treatment raises the risk of pesticide exposure to vulnerable groups such as children, elderly residents, and pets. Pets exposed to pesticides can suffer from symptoms ranging from mild irritation to serious poisoning, including vomiting, difficulty breathing, seizures, or neurological damage. This happens most often when animals come into direct contact with treated surfaces or ingest chemicals by licking their fur or contaminated toys. To avoid these risks, you need to remove pets from the treated areas and, if possible, keep them outside the home during the application and until it is safe to re-enter, usually 2 to 4 hours afterward depending on the product used.
The elderly and children require extra caution because they are more susceptible to pesticide effects due to weaker immune systems and slower toxin processing. Avoid exposure by ensuring they leave the home during treatment or stay away from treated rooms until dry and ventilated. Cover or remove items they frequently touch, such as toys, bedding, and mobility aids. Use of gloves or damp cloths for cleaning after treatment can further reduce accidental contact risks. In all cases, communicate any special health issues or sensitivities to your pest control professional beforehand.
Preparing your home for pest control usually carries little to no direct cost beyond your time. Most pre-treatment tasks involve moving furniture, cleaning floors, and securing food or pet items, which do not require purchasing materials. Arranging temporary boarding or daycare for pets during treatment involves separate costs that vary by location. Occasionally, pest control companies may charge a prep fee if extensive clearing or specialized work is needed, typically around $50 to $150 depending on the scope. Clarify this with your provider before scheduling to avoid surprises.
Preparation directly affects the treatment’s effectiveness and safety. Removing clutter and vacuuming floors reduces dust and debris that can block pesticide application, improving coverage and reducing chemical use. Securing food prevents contamination and pest attraction afterward. Ventilating the space after treatment helps remove lingering pesticide odor and residues. Neglecting these steps can cause poor results, necessitate repeat treatments, or trigger accidental exposures that could require medical attention. Following clear safety rules minimizes these risks.
Specific safety steps include relocating pets and their bedding offsite, having children stay with friends or relatives during spraying, and covering aquariums with plastic wrap or moving them from treated rooms. When moving vulnerable individuals is not possible, speak with your pest control company about less invasive treatment options or targeted applications. Always check product labels for ventilation recommendations and waiting times before re-entry. In case of accidental exposure, immediately rinse the affected area with water and contact poison control or a healthcare provider for advice tailored to the chemical involved.
Your Step-by-Step Action Plan Before Pest Control Treatment
Prepare your home carefully before pest control to ensure the treatment reaches all pest areas and keeps your family safe. Follow this timeline to organize tasks and check results efficiently.
- One week before treatment: Clear clutter and move furniture away from walls by at least 12 inches. This opens access to pest hiding spots and allows technicians to apply treatments thoroughly. Confirm the space is accessible by walking around and noting any blocked areas.
- Three days before treatment: Secure all food in sealed containers or remove it from treatment areas. Wrap pet food tightly and set aside plants outdoors or in untreated rooms. This prevents contamination and protects sensitive items. Double-check cupboards, pantry shelves, and pet feeding stations.
- Two days before treatment: Inform your pest control professional about any health issues, respiratory conditions, or special home features, such as aquariums or non-removable valuables. Communicate allergies or chemical sensitivities so they can select safer products. Confirm these details with the provider in writing or email.
- Day before treatment: Plan to vacate your home according to the product instructions, generally 4 to 6 hours after spraying, but longer if fumigation is used. Arrange accommodations or temporary lodging. Pack essentials separately and switch off HVAC systems to avoid spreading pesticides indoors.
- Day of treatment: Ensure all pets, including indoor cats and birds, and plants are out of the home. Close windows and doors securely. After treatment, follow the pest control provider’s guidelines for ventilation timing and re-entry. Use a checklist to confirm each step is completed.
- One to two days after treatment: Avoid cleaning or wiping treated surfaces to allow pesticides to take full effect. Monitor treated areas for pest activity. Note any dead or wandering pests as an indicator the treatment is working.
- One week after treatment: Inspect visible pest activity and consult your pest control technician about follow-up visits if pests persist. Keep food and pets away from treated zones until professionals approve safety. Use sticky traps or visual inspection to measure results objectively.
Frequently Asked Questions
How Early Should I Schedule Pest Control Before an Infestation Gets Worse?
Schedule pest control as soon as you notice signs of infestation to prevent spread and damage. Early treatment limits the pests’ ability to multiply and reduces the need for repeated visits or stronger chemicals.
Can I Stay in My Home During Pest Control Treatment If I’m Not Allergic?
Staying during treatment depends on the chemicals used; ask your technician during booking. Some treatments release fumes that require vacating; others are safe if you keep windows open. Always prioritize your health as symptom sensitivity varies.
Should I Cover Aquariums or Fish Tanks Before Treatment?
Covering aquariums is recommended to protect fish from pesticide fumes or residues. Use a plastic sheet or lid without sealing it airtight, so fish still get oxygen but avoid contamination from sprays or dust.
Do I Need to Unplug Electronic Devices Before Pest Control?
Unplugging electronics is advisable to avoid potential damage and allow thorough treatment in cracks and crevices. Pests often hide around wires and behind devices, so unplugging helps technicians access all areas safely.
Can I Plan a Pest Control Service If I’m Pregnant or Have Infants?
Inform the pest control company about pregnancy or infants so they can use child-safe products or recommend scheduling when no one is home. Some chemicals affect sensitive groups more, so professional advice helps reduce health risks.
What Ventilation Should I Do After the Pest Control Service?
Ventilate by opening windows and doors for at least two to four hours after treatment to disperse chemicals and reduce inhalation risks. Proper airflow speeds up drying times and ensures your home is safe before reoccupying.
Key Points to Remember
Preparing your home thoroughly helps maximize the effectiveness of pest control treatment and keeps your family safe. Today, start by clearing at least 12 to 18 inches of space around baseboards and moving furniture away from walls; this gives the technician proper access to treat hidden pest areas. Taking this step early lets you handle other tasks like securing food and informing the professional about health concerns without rushing before the appointment.