How to Get Rid of Oil Stains: 8 Proven Methods That Actually Work
To get rid of oil stains, act quickly by blotting the area and applying a drop of dish soap directly to the stain before washing. Fresh stains respond best to immediate treatment, while older or set-in stains might need stronger commercial removers or specific methods based on fabric type. Avoid common mistakes like using household oils or harsh chemicals that can worsen the stain or damage fabrics.
This article helps homeowners, renters, and anyone dealing with oil stains, from fresh kitchen spills to stubborn set-in marks, understand which methods and products really work. You’ll also learn how to choose the right treatment by fabric, handle delicate materials, deal with persistent stains, and prevent future messes effectively.
Key Takeaways
- Blot fresh oil stains immediately, then apply baking soda or cornstarch and let sit 30 minutes to overnight to absorb oil.
- For old stains, pre-soak fabric in warm water with detergent or a pre-stain remover for at least 30 minutes before washing.
- Choose treatments carefully: baking soda suits cotton and synthetics; use gentle soaking times for wool or silk to avoid damage.
- Household powders like baking soda or salt often work well, but commercial stain removers provide stronger action for set-in stains.
- Avoid rubbing stains harshly or using oil-based sprays, which can embed oil deeper and make stains permanent.
- For dry-clean-only and delicate fabrics, avoid water and DIY treatments; opt for professional dry cleaning to protect fibers.
1. Best Way to Remove Fresh Oil Stains Quickly
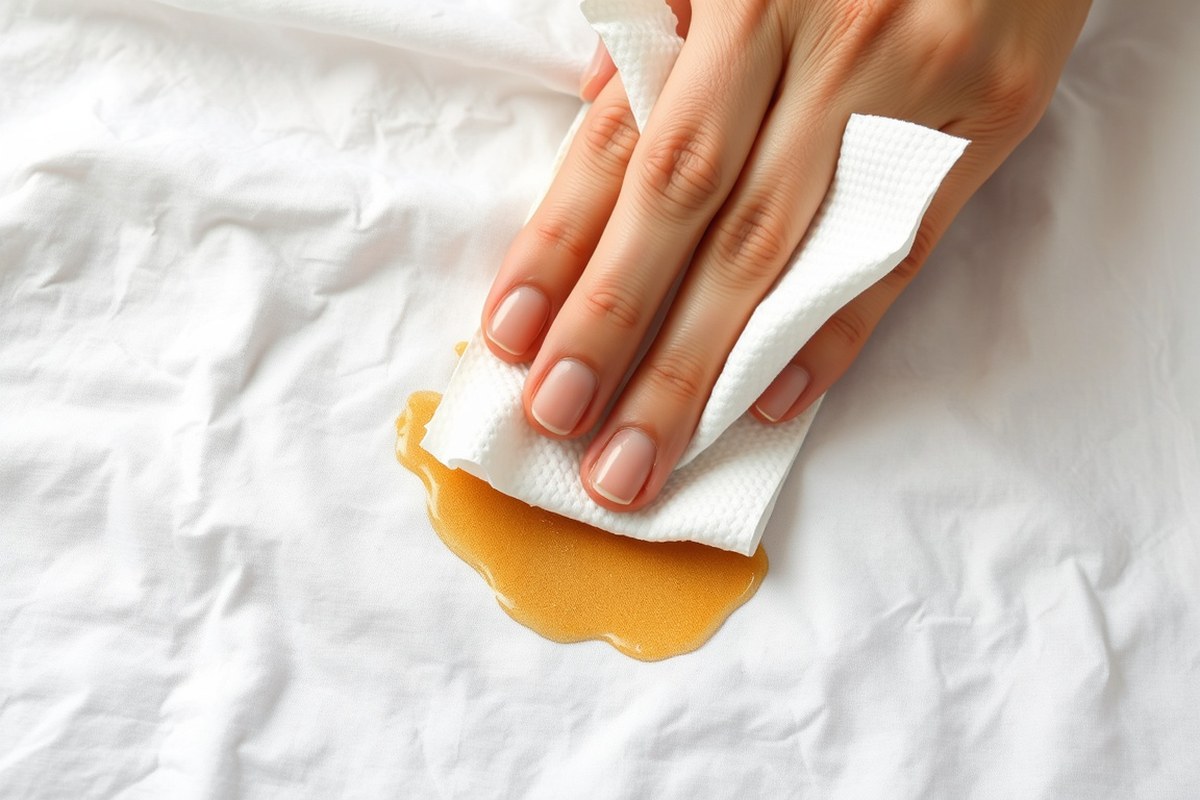
Removing fresh oil stains quickly increases your chances of restoring your clothes without permanent marks. Acting fast prevents the oil from soaking deeper into the fabric, making it easier to lift the stain. To treat the stain effectively, avoid rubbing since it can push oil further into the fibers. Instead, blot the stain to absorb excess oil without spreading it.
Household products like dishwashing liquid and baking soda are usually effective. Dishwashing liquid cuts through grease, while baking soda helps absorb residual oil. Cold water rinses work well initially, but warm or hot water suits oily butters or animal fats, depending on the fabric care instructions. Below is a clear step-by-step process to handle fresh oil stains on most washable fabrics, including tips for different types of oil and fabric thickness.
- Blot the fresh stain gently with a paper towel or clean cloth. Avoid rubbing to prevent pushing oil deeper into the fabric. Blotting removes as much oil as possible right away.
- Sprinkle baking soda, cornstarch, or talcum powder over the stain. Let it sit for 10 to 15 minutes to absorb remaining oil, then gently brush off the powder.
For fresh cooking oil stains like olive or vegetable oil, baking soda works well here. - Apply a small amount of liquid dish soap directly onto the stain. Work it gently into the fabric fibers with your fingers or a soft toothbrush.
Dish soap designed to cut grease works best; it is inexpensive (around $0.05 to $0.10 per use) and safe for most fabrics. - Rinse the stained area with warm water. Check the fabric care label to determine the safest water temperature. For buttery or animal fat stains, warm water helps dissolve residual oil better.
- Repeat the dish soap application and rinsing if the stain persists. Fresh stains often come out with one or two treatments. Persistent spots may require multiple rounds.
- Wash the clothing item according to the care label instructions. Use the hottest water the fabric allows to help remove any remaining oil.
Do not put the garment into the dryer until the stain is fully gone, since heat can set the oil permanently. - Check the fabric after washing before drying. If oil spots remain, treat and wash again rather than drying.
Drying while stained causes the oil to bond more firmly with fabric fibers, making removal harder.
2. Effective Methods for Removing Old or Set-In Oil Stains
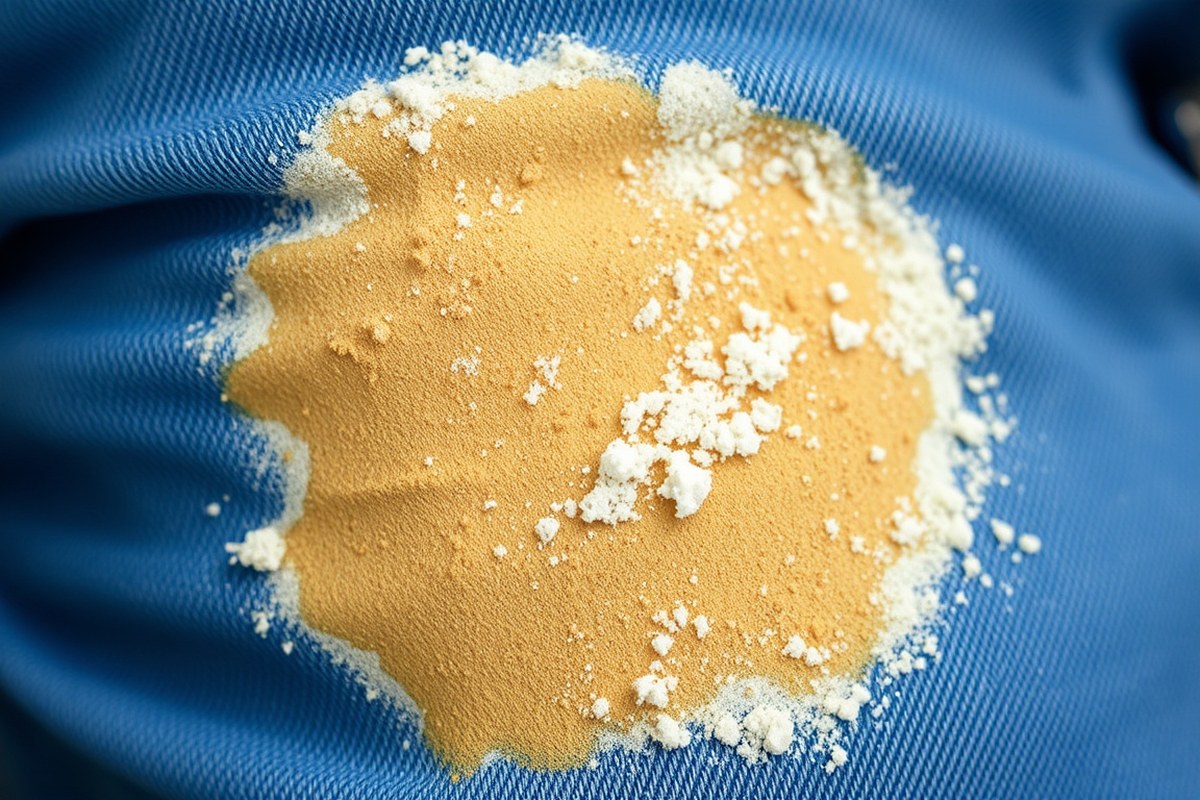
Old or set-in oil stains need more attention and time than fresh spills. Using absorbent powders combined with dish soap or enzyme detergents, along with longer soaking periods, increases your chances of completely removing the stain. Repeating these steps often helps, but professional cleaning might be necessary for very stubborn stains.
Applying Absorbent Powders Like Baking Soda or Cornstarch
Baking soda and cornstarch work by absorbing oil from fabric fibers, making them essential for old, set-in stains. Letting these powders sit for a longer time, up to 24 hours, is critical to pull out as much oil as possible.
To tackle the stain effectively, sprinkle a generous amount of baking soda or cornstarch over the affected area. The powder will soak up loosened oil and reduce the stain’s visibility before washing. This step is especially useful when combined with dish soap treatments.
- Blot any excess oil gently with a clean towel without rubbing it deeper into the fabric.
- Cover the entire oil stain with a generous layer of baking soda or cornstarch.
- Let the powder sit on the stain for at least 30 minutes, preferably several hours or overnight for better absorption.
- Brush off the powder gently before proceeding to the next treatment step.
- Repeat the powder application if the stain still feels greasy or visible.
Tip: Baking soda alone often won’t remove old stains but boosts oil absorption when paired with degreasing agents like dish soap.
Using Dish Soap and Enzyme Detergents for Deep Cleaning
Dish soap acts as a powerful degreaser and is effective on cotton, synthetic, and many other fabrics. Enzyme detergents also break down grease molecules, making them good choices for set-in oil stains. Combining dish soap with baking soda increases the cleaning power.
Apply liquid dish soap directly to the stain and rub it gently into the fabric. Let it sit for 10 to 30 minutes to loosen the oil. For tougher stains, mix dish soap with baking soda to form a paste and leave it on for up to an hour or overnight.
- Apply a few drops of dish soap directly onto the stain, ensuring full coverage.
- Rub the soap gently into the fabric with your fingers or a soft brush.
- Let the soap sit for 10 to 30 minutes, extending the time up to an hour or overnight if the stain is stubborn.
- Optionally, mix two parts dish soap with one part baking soda to create a paste for added cleaning power.
- After the soak time, rinse or wash the fabric according to its care label.
Warning: Always test dish soap or enzyme detergent on a hidden fabric area first to prevent color fading or damage.
Repeating Treatment and When to Consider Professional Help
One round of treatment may not fully remove an old oil stain. Repetition of the soaking, applying powders, and washing steps can improve results. After washing, inspect the garment before drying because heat can set the stain permanently.
If repeated home treatments fail, professional cleaning services offer advanced options, especially for delicate or leather fabrics. These services often use stronger chemicals and specialized techniques to restore the item.
- Check the stained area after washing but before drying to avoid setting the stain with heat.
- Repeat absorbent powder and dish soap treatments if the stain remains visible or greasy.
- Allow the stained area to air dry after each treatment to monitor progress.
- Consider professional dry cleaning or leather cleaning if home methods do not remove the stain.
Tip: Avoid putting stained clothes in the dryer until the oil stain is fully removed to prevent permanent setting.
3. Choosing the Right Treatment by Fabric Type and Stain Age
Choosing the right treatment for oil stains depends on your fabric type and how long the stain has set. Delicate fabrics and dry-clean-only garments need gentler care or professional cleaning to avoid damage. Washing temperatures also vary by fabric to protect colors and texture while helping remove oil.
Safe Treatments for Delicate and Dry-Clean-Only Fabrics
Delicate materials like silk, satin, and wool require mild treatments to prevent fiber damage. Use vinegar diluted with water as a gentle alternative to harsher solvents; apply it sparingly on the stain before rinsing carefully. Avoid rubbing or scrubbing these fabrics which can ruin the weave and finish.
Dry-clean-only items such as most suits, fine wool, and some silks require solvent-based cleaning methods found in professional services. Home washing machines and common detergents cannot replicate these solvents, risking permanent damage or set stains. When in doubt, seek professional help early rather than treating at home and worsening the stain.
Recommended Washing Temperatures by Fabric
Wash sturdy fabrics like cotton and most synthetics at 40°C to 60°C for effective oil stain removal without harming the fibers. Delicate fabrics and wool or silk should be washed in cold water to protect their shape and color. Too much heat can set oil stains or shrink delicate garments.
| Fabric Type | Recommended Washing Temperature | Notes |
|---|---|---|
| Cotton and Synthetics | 40°C – 60°C | Effective for oil stain removal and safe for most styles |
| Silk and Wool | Cold water | Prevents shrinkage and damage to delicate fibers |
| Dry-Clean-Only Fabrics | Not recommended for home washing | Requires professional solvent cleaning |
Choosing the right water temperature helps avoid setting oil stains and protects the fabric’s integrity. Delicate fabrics handled in cold water paired with gentle treatments show better results without damage.
How Stain Age Influences Treatment Options
Fresh oil stains respond best to quick action with absorbents like baby powder or cornstarch applied to soak up oil before washing. The faster you treat the stain, the less likely it will set and become permanent.
Older or set-in stains require longer soaking times, usually at least 30 minutes, to loosen oil before washing. For delicate fabrics, reduce soaking time to avoid fiber weakening. Inspect the fabric after drying because oil stains can be hard to detect when wet, and additional treatments may be needed if the stain persists.
Professionals recommend treating fresh stains promptly and checking garments carefully after washing. If home treatments fail after a few tries, professional cleaning may be necessary to prevent permanent oil marks, especially on delicate or expensive clothing.
4. Comparing Household and Commercial Oil Stain Removers
Selecting the right oil stain remover involves balancing effectiveness, safety, convenience, and cost. Household items like dish soap and baking soda are readily available, affordable, and safe for most fabrics. Commercial stain removers offer targeted formulations designed to tackle tough, set-in oil stains but often come at a higher price and may require careful testing on delicate fabrics. It’s important to test all products on a hidden seam before full application to avoid damage.
| Remedy | Pros | Cons | Best Uses | Safety Notes |
|---|---|---|---|---|
| Dawn Dish Soap | Specifically designed to cut grease; effective on both cooking and motor oil; inexpensive | May require repeat applications for set-in stains; not formulated specifically for fabric | Fresh and moderately set-in cooking and motor oil stains on washable fabrics | Safe on most fabrics; test on hidden area first |
| Baking Soda + Dish Soap Mix | Absorbs oil before scrubbing; improve stain lifting; household staple; affordable | May temporarily spread stain if brushed too soon; needs patience for fizzing with vinegar | Fresh oil stains where absorbing initial oil is critical; gentle scrubbing for washable fabrics | Non-toxic; safe on most fabrics; avoid over-saturation |
| White Vinegar (with Baking Soda) | Fizzy reaction helps lift stains; good for residue removal | Not effective on oil alone; oil is hydrophobic; may not fully remove oil stain alone | Stains needing residue cleanup or combined treatments with baking soda | Non-toxic; dilute with water; test on fabric |
| Murphy Oil Soap | Highly effective on oil stains; designed for cleaning oil-based residues | More expensive; may require rinsing; not always available in grocery stores | Tough cooking or motor oil stains; set-in stains on durable fabrics | Safe on wood and many fabrics, but test first; follow product instructions |
| Commercial Stain Removers (e.g., Goo Gone, OxiClean) | Formulated for set-in grease; can handle stubborn stains; fast acting | Higher cost; may contain chemicals; not all are safe for delicates | Set-in cooking and motor oil stains; heavy grease buildup | Follow label directions; test on hidden fabric; avoid on delicate or dry-clean-only items |
Dawn dish soap works well on both cooking and motor oil because of its grease-cutting ingredients. Baking soda alone absorbs oil effectively, and mixing it with dish soap doubles the cleaning power by loosening the stain’s grip on fabric fibers. Vinegar adds a fizzing action when combined with baking soda but doesn’t dissolve oil directly since oil resists mixing with water and acids. Commercial stain removers are better suited when stains have set in and household remedies fall short. They contain enzymatic or oxygen-based agents that can break down oil molecules more deeply.
5. Common Mistakes That Make Oil Stains Permanent and How to Fix Them
Avoid rubbing oil stains aggressively because it causes the stain to spread and pushes the oil deeper into the fabric fibers, making removal harder. Instead, gently blot the stain with a clean cloth or paper towel to absorb excess oil before treatment. Using cold water alone on grease stains is usually ineffective; washing with warm or hot water better breaks down the oil. However, hot water can damage delicate fabrics, so always check care labels and opt for warm water or specific stain removers for those materials.
One of the biggest errors is drying clothes before the oil stain is fully removed. Heat from a dryer permanently sets the stain, making it nearly impossible to remove later. Always check the stained area after washing and before drying by holding it up to light or touching it to detect any residue. When the stain persists, retreat and wash again without using the dryer.
When mistakes happen, such as spreading the stain or fixing it into the fabric by drying, don’t panic. You can often fix damage by re-treating the stain with an oil-dissolving detergent or homemade solutions like a vinegar and water mix (one part vinegar to two parts water), then soaking the garment for 30 minutes in warm water. Repeated soaking and washing with hot water can help lift the oil out even after it has set, but avoid tumble drying until fully clean.
- Gently blot fresh oil stains, don’t rub.
- Use warm or hot water unless fabric care labels state otherwise.
- Soak treated stains in warm water for at least 30 minutes before washing.
- Check stains after washing before using the dryer.
- When the stain remains, repeat treatment and wash again before drying.
- Use commercial grease stain removers or a white chalk rubbing for stubborn stains.
- Avoid hot water on delicate fabrics, opting instead for mild stain removers and warm water.
Never dry a garment with an oil stain until you’re sure the stain is completely gone, because once heat sets it, removal becomes unlikely.
Dealing with oil stains requires patience and care to avoid turning a cleanable spot into a permanent mark. Follow the fabric care instructions strictly and treat the stain as soon as possible. For delicate or dry-clean-only fabrics, consider professional help to avoid damage. Repetition and gentle treatments usually yield the best results, but skip the dryer until your efforts have fully worked.
6. How to Handle Oil Stains on Dry-Clean-Only and Delicate Fabrics
Removing oil stains from dry-clean-only and delicate fabrics requires a cautious approach to avoid damage. You can try mild home treatments like a diluted vinegar solution on silk or wool, but avoid scrubbing or harsh products. When stains persist or the fabric is highly sensitive, professional dry cleaning is the safest choice.
Assessing Fabric Labels and Stain Severity
Start by carefully checking the garment’s care label. Items marked dry-clean-only or made from delicate fibers such as silk, wool, chiffon, or satin need special handling. These fabrics can be damaged by water, strong detergents, or agitation. Next, evaluate the oil stain’s size and age. Fresh small stains might respond to gentle home remedies, while large or set-in stains usually demand professional attention to avoid fabric harm.
For example, older or deeply embedded stains often require solvents or heat treatments that are best done by experienced cleaners. Avoid experimenting on valuable pieces to prevent changes in fabric texture or color, especially with silk and wool, which can lose softness or develop water spots.
Gentle Pretreatment Options for Delicate Materials
For delicate fabrics you want to spot-treat at home, try a vinegar-based cleaner made by mixing one part white vinegar with two parts cool water. Apply it sparingly using a soft cloth or cotton swab, dabbing gently without rubbing. This helps break down the oil while minimizing damage to fibers. Limit this treatment to small stain areas, and always test first on an inconspicuous spot to check for colorfastness.
Never use strong stain removers, bleach, or vigorous scrubbing on delicate fabrics. Cold water is best since hot water can set stains and weaken fibers. After applying the vinegar solution, allow the fabric to air dry away from direct sunlight or heat. If the stain shows no improvement after a few gentle attempts, avoid further home treatment to prevent fabric deterioration.
When to Consult a Professional Cleaner
Professional dry cleaners use specialized solvents and techniques designed for delicate and dry-clean-only fabrics. They can safely remove oil stains without risking shrinkage, color loss, or texture changes. Seek their services especially when dealing with valuable items or persistent stains that resist gentle home remedies. Silk garments, in particular, benefit from expert care because of their sensitivity.
Dry cleaning costs vary widely depending on the fabric and stain, commonly ranging from $5 to $20 per item. Investing in professional cleaning can save costly garment repairs or replacements caused by improper home treatments. When in doubt about your ability to safely remove oil stains, or if the fabric is labeled dry-clean-only, take the garment to a reputable cleaner promptly.
7. What to Do When Oil Stains Remain After Multiple Washes
Repeated treatments often prove necessary for stubborn oil stains. You can try cleaning the stain two or three times before expecting it to fade significantly. Use the same method as the first treatment: apply a good-quality degreasing detergent or stain remover, let it sit for 5 to 10 minutes, then wash using the warmest water safe for the fabric. Avoid overheating or drying the item after the first wash if the stain remains, as dryer heat can permanently set the oil.
Do not iron over oil stains because heat from the iron can cause the oil to bond more tightly with the fabric fibers, making removal harder or even impossible later. Instead, air dry the fabric or use a low-heat setting away from the stained area if necessary. Always check the stain after washing and before drying to catch any remaining oil residue. When oil residue remains after washing, try these tips to break it down further and prevent permanent damage:
- Apply a liquid dish soap known for cutting grease directly onto the stain and let it sit for 10 to 15 minutes.
- Gently rub the fabric together or use a soft-bristled brush to work the soap into the stain.
- Add a tablespoon of baking soda to your wash load to help absorb leftover oil and boost cleaning power.
- Use warm water appropriate for the fabric type to help dissolve oils more effectively.
- Avoid repeated exposure to high heat, especially from dryers or irons, until the stain is fully gone.
- Consider a specialized commercial stain remover formulated for grease if household products don’t work.
- For delicate fabrics, use a mild detergent and handle gently to prevent damage during repeated treatments.
Stubborn stains that linger after multiple washes indicate the oil has partially set but usually do not mean permanent damage if treated carefully. Repeated applications with the right products and avoiding heat can usually lift the stain without harming the fabric. Noticing any fabric degradation or fading after treatments suggests it may be time to consult a professional cleaner for delicate or valuable items.
8. Preventing Oil Stains and Best Practices During Removal
Preventing oil stains before they happen saves time and keeps your clothes looking fresh longer. When cooking or handling oils, wear an apron or old clothing that you don’t mind getting stained. Use splatter guards on pans and wipe spatters immediately with paper towels to limit spread. For greasy work like auto maintenance or grilling, choose durable work clothes and keep stain remover wipes on hand for quick treatment.
Pretreating oil stains is important whenever you notice one, even if you plan to wash the item soon. Applying a pre-stain remover or liquid laundry detergent directly onto the stain breaks down the oils better than relying solely on detergent in the wash. Products with enzymes designed to dissolve fats, such as BioPure Laundry Sheets or Charlie’s Soap Laundry Liquid Detergent, work well on common cooking oils like olive oil and butter. Gently rubbing the product into the stain and letting it sit for 5 to 15 minutes before laundering improves results.
Choosing the right drying method after washing stained clothes helps prevent permanent marks. Avoid tumble drying until the oil stain is completely removed, as heat can set the stain permanently. Instead, air dry the garment and check if the stain remains. Should it persist, repeat the pretreatment and wash cycle before using the dryer. Air drying takes longer but protects your clothing from lasting damage.
- Wear protective clothing or aprons when handling oils or cooking
- Use splatter guards or lids on pans to reduce oil spray
- Wipe fresh oil spills from fabric immediately with a paper towel
- Apply pre-stain treatment or detergent directly on oil stains before washing
- Let pre-treatment sit 5, 15 minutes before laundering
- Air dry clothes with recent oil stains to prevent setting
- Repeat pretreatment and washing if the stain persists before drying
Never put an oil-stained garment in the dryer before the stain is fully removed, or the heat can bake the stain in permanently.
Taking these protective steps reduces the chances of struggling with stubborn grease stains later. Even a small delay in treating a stain or skipping pretreatment can turn a fixable spot into a permanent blemish. Keeping stain remover handy and minding drying methods gives you the best shot at keeping your laundry free of oily marks.
Step-by-Step Action Plan for Removing Oil Stains
Follow these clear steps to tackle oil stains on your clothes quickly and effectively, whether the stains are fresh or old. Use the right methods for your fabric, avoid common mistakes, and save your garments confidently.
- Immediately after the spill: Blot excess oil gently with a clean cloth or paper towel without rubbing. This stops the stain from spreading and eases removal.
- Within the first hour: Sprinkle an absorbent powder like baking soda or cornstarch on the stain, let it sit 15, 30 minutes, then brush off. The powder should appear powdery, not greasy, confirming oil lift.
- Before washing: Apply a liquid dish detergent directly to the stain and gently work it in. Dish detergents cut oil effectively on most machine-washable fabrics. Wait 5, 10 minutes for treatment but don’t let detergent dry.
- Washing day: Wash the garment in the warmest water safe for the fabric using your regular laundry detergent. Check the care label to avoid damage. The stain should look significantly lighter or gone after washing.
- When the stain remains after washing: Avoid drying the garment. Repeat the detergent pretreatment and wash again. Air dry to confirm the stain is gone because heat can set oil stains permanently.
- For old or set-in stains: Use a stain remover that specifies effectiveness on oil stains, or apply a paste of powdered laundry detergent and water. Let it sit 30 minutes before washing. Stains will fade but may need a couple of treatments.
- With delicate or dry-clean-only fabrics: Dab with a small amount of mild detergent solution or spotting solvent recommended on the label. Test in a hidden area first. When uncertain, take the item to a professional cleaner promptly.
- Prevent future stains: Treat spills quickly using the same blot-and-absorb approach. Avoid rubbing and dry stains only after confirming oil is removed. Store oil-prone clothes away during cooking or oily tasks to minimize risk.
Frequently Asked Questions
Does Oil Stain Permanently?
Oil stains are not always permanent but become harder to remove the longer they sit. Treating the stain quickly prevents it from bonding permanently to fabric fibers.
Will Dawn Get Oil Out of Clothes?
Dawn dish soap can effectively remove oil stains because it breaks down grease. It’s best to apply it directly to the stain before washing.
How to Remove Heavy Oil Stains?
Heavy oil stains require repeated treatments using strong detergents or commercial stain removers. You may need to soak the fabric before washing.
Do Oil Stains Eventually Come Out of Clothes?
Oil stains don’t always come out on their own and may set permanently if left untreated. Immediate care improves removal chances.
Can You Use Baking Soda for Oil Stains?
Baking soda helps by absorbing fresh oil but is less effective on set-in stains. Use it quickly after the spill.
Is It Okay to Put Oily Clothes in the Dryer?
Avoid drying oily clothes before removing stains because heat can set oil permanently into the fabric.
Wrapping Up
Act quickly to treat oil stains right after they happen, and choose your cleaning method based on the fabric type and age of the stain. Trying a spot test with a household stain remover or gentle detergent can help you find the safest option before committing to a full treatment. Today, set aside a small stain removal kit with basic supplies like dish soap, baking soda, and a soft brush to tackle stains efficiently whenever they occur.